manuals.online logo
Brands
  1. Home
  2. •
  3. Brands
  4. •
  5. Juniper
  6. •
  7. Network Hardware
  8. •
  9. Juniper SSR1400 User manual

Juniper SSR1400 User manual

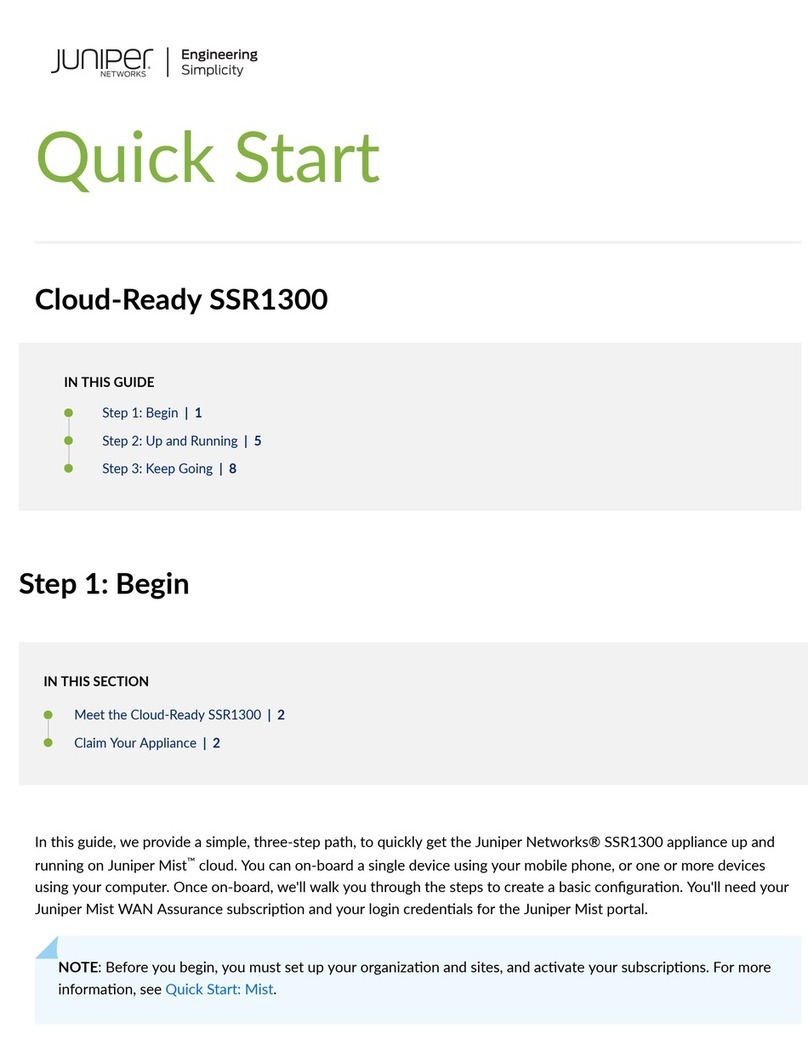
Quick Start
Cloud-Ready SSR1400
IN THIS GUIDE
Step 1: Begin | 1
Step 2: Up and Running | 4
Step 3: Keep Going | 13
Step 1: Begin
IN THIS SECTION
Meet the Cloud-Ready SSR1400 | 2
Claim Your Appliance | 2
In this guide, we provide a simple, three-step path, to quickly get the Juniper Networks® SSR1400 appliance up and
running on Juniper Mist™ cloud. You can on-board a single device using your mobile phone, or one or more devices
using your computer. Once on-board, we'll walk you through the steps to create a basic conguraon. You'll need your
Juniper Mist WAN Assurance subscripon and your login credenals for the Juniper Mist portal.
NOTE: Before you begin, you must set up your organizaon and sites, and acvate your subscripons. For more
informaon, see Quick Start: Mist.
Meet the Cloud-Ready SSR1400
The SSR1400 is a 1 U xed conguraon appliance that's ideal for large data center or campus deployments. Powered
by the Juniper® Session Smart Router (SSR) soware, the SSR1400 provides secure and resilient WAN connecvity.
The SSR1400 has four 1 GbE ports, four 1/10/25 GbE SFP28 ports, four 10 GbE SFP+ ports, a management port (for
Mist operaons), 256 GB of memory, and a 512 GB enterprise-grade solid-state drive (SSD) for storage.
Claim Your Appliance
IN THIS SECTION
Mist AI App QR Scan | 2
Enter the Mist Claim Code | 3
The SSR1400 comes ready to manage using the Juniper Mist™ Cloud portal.
To add the SSR1400 to your organizaon's WAN Edge inventory, you must enter the SSR1400 claim informaon into
Mist. The claim code label (QR code scker) on the front panel has the claim informaon.
To enter the claim informaon, do one of the following:
• Scan the QR code with the Mist AI mobile applicaon. See "Mist AI App QR Scan" on page 2.
• Manually enter the claim code in Mist. The claim code is the number above the QR code. For example: In this picture,
the claim code is KF9HC588GPSFRCZ. See "Enter the Mist Claim Code" on page 3.
Mist AI App QR Scan
You can download the Mist AI App from the Mac App Store or from Google Play Store.
2
1. Open the Mist AI app and log in using your account credenals. If you do not have an account, see Create a Mist
Account and Organizaon.
2. Select your organizaon.
3. Tap Claim Devices to Org.
4. Scan the QR code. The app automacally claims the device and adds it into your organizaon's inventory.
5. On the Organizaon screen, tap Device Inventory → Routers → Unassigned.
Review the MAC address.
Onboarding Complete!
Fantasc, the SSR1400 is in your inventory! To provision the SSR1400, see "Step 2: Up and Running" on page 4.
Enter the Mist Claim Code
Claiming mulple devices—When you purchase mulple devices, we provide you with an acvaon code along with
your PO informaon. Make a note of this code.
Claiming a single device—Locate the QR code on your device and make a note of the alphanumeric claim code directly
above it.
1. Open the Juniper Mist™ Cloud portal and log in to your account. If you do not have an account, see Create a Mist
Account and Organizaon.
2. Select Organizaon > Inventory from the menu on the le, then select the WAN Edges tab at the top.
3. Click Claim WAN Edges in the upper right poron of the inventory screen.
4. Enter the SSR1400 Acvaon code or claim code and click Add.
3
5. Clear the Assign claimed WAN Edges to site check box to place the SSR1400 in the inventory. The SSR1400 is
assigned to a site later, see "Assign the SSR1400 to a Site" on page 11.
6. Click the Claim buon to claim the SSR1400 into your inventory.
Video: Add the Claim Informaon in Mist
Onboarding Complete!
Fantasc, the SSR1400 is in your inventory! To provision the SSR1400, see "Step 2: Up and Running" on page 4.
Step 2: Up and Running
SUMMARY
The SSR1400 is onboarded to the Juniper Mist™ Cloud. To
provision the SSR1400 with ZTP, log in to your Mist portal
and begin the WAN conguraon.
IN THIS SECTION
Add the Network | 5
Add Applicaons | 6
Create a WAN Edge Template | 6
Assign the Template to a Site | 11
4
Assign the SSR1400 to a Site | 11
Install the SSR1400 in a Rack | 11
Connect Your SSR1400 to the Mist Cloud | 12
Add the Network
To begin your WAN design, idenfy the network to be used for accessing applicaons over a LAN network segment.
1. Select Organizaon > Networks from the menu on the le.
2. Click Add Networks in the upper-right corner of the Networks page.
Video: Access the Add Networks Page
3. Enter a name for the network.
4. Enter the network subnet. For example, 192.168.1.0/24.
5. Click Add.
Excellent! This network is now dened for use across the enre organizaon, including the template that you will apply
to your SSR1400.
5
Add Applicaons
Dene the applicaons for the WAN to deliver, starng with the Internet.
1. Select Organizaon > Applicaons from the menu on the le.
2. Click Add Applicaons in the upper-right corner of the Applicaons page.
Video: Access the Add Applicaons Page
3. Enter the name of the applicaon. For example, Internet.
4. Enter 0.0.0.0/0, or all IPv4 address space in the IP Addresses eld.
5. Click Add.
Nice! Your organizaon is now set up to provide access to the Internet.
Create a WAN Edge Template
IN THIS SECTION
Create a Template | 7
Congure the WAN Port | 7
Congure the LAN Port | 8
Congure Trac Steering Policy | 10
6
Congure the Applicaon Policy | 10
Excellent! Now you have the SSR1400 waing to be claimed, a network for your LAN, and an applicaon. Next, you
need to create a WAN Edge template that es them all together! Templates are reusable and keep the conguraon
consistent for every SSR1400 you deploy.
Create a Template
To create a Template:
1. Select Organizaon > WAN Edge Templates from the menu on the le.
2. Click Create Template in the upper-right corner of the WAN Edge Templates page.
3. Enter a name for the template.
4. Click Create.
5. Enter the NTP and DNS informaon for the WAN edge device as per your network requirements.
Video: Create the Template
Congure the WAN Port
The rst thing to do in your template is to specify which port to use for the WAN.
1. Scroll to the WAN secon of the template, and click Add WAN.
2. Enter the name for the WAN port. For example, wan1.
Video: Add WAN Conguraon
3. Enter the interface as xe-0/0/0 to designate it as a WAN port.
7
4. Click Add.
Congure the LAN Port
Next, associate your LAN network segment with the appropriate port on the SSR1400.
1. Scroll to the LAN secon of the template, and click Add LAN.
Video: Add LAN Conguraon
2. From the Network dropdown menu, select your network segment to associate it with the LAN port.
3. Enter the interface for the LAN port, for example, xe-0/0/3.
4. Enter 192.168.1.1 as the IP Address that needs to be assigned to the WAN edge device .1 for use as the gateway
in the network.
5. Enter /24 as the Prex Length.
8
6. Select Server under DHCP to provide DHCP services to endpoints on this network.
7. Give your DHCP server an address pool starng with 192.168.1.100 and ending with 192.168.1.200.
8. Enter 192.168.1.1 as the gateway to be assigned to DHCP clients.
9. Finally, enter the IP addresses for the DNS Servers to be assigned to clients on the network. For example, 8.8.8.8,
8.8.4.4.
10. Click Add.
Your template has the WAN and LAN informaon. Now, you need to tell the SSR1400 how to use the informaon to
connect users to applicaons. This is done using trac steering and applicaon policies.
9
Congure Trac Steering Policy
To congure Trac Steering policy:
1. Scroll to the Trac Steering secon of the template, and click Add Trac Steering.
Video: Add Trac Steering Policy
2. Enter a name for the steering policy, for example, local-breakout.
3. Click Add Paths to give your steering policy a path to send trac.
4. Select WAN as the path type, and select your WAN interface. For applicaons that use the policy, this indicates you
want the trac to be sent directly out of the local WAN interface.
5. Click the ✓ buon in the upper right corner of the Add Path panel, and then click Add at the boom of the Add
Trac Steering side panel.
Congure the Applicaon Policy
To congure Applicaon policy:
1. Scroll to the Applicaon Policies secon of the template, and click Add Applicaon Policy.
Video: Add Applicaon Policy
2. Enter a string in the Name column, and click the check mark to the right of your entry.
3. Select your LAN network from the Network column drop-down list. Select Allow from the Acon column drop-down
list.
4. Select your applicaon from the Applicaons column drop-down list. For example, applicaon Internet that you
created in "Add Applicaons" on page 6.
5. Select your local breakout steering policy from the Trac Steering column drop-down list.
Video: Congure the Applicaon Policy
Almost there! You now have a working WAN Edge template that you can apply to many sites and appliances across your
organizaon.
10
Assign the Template to a Site
Now that you have set up the template, you need to save and assign it to the site where your WAN edge device will be
deployed.
1. Scroll to the top of the page and click Save.
2. Click the Assign to Site buon, and select the site to which you want to apply the template conguraon.
Great work! All that remains is to associate the SSR1400 with a site.
Assign the SSR1400 to a Site
Aer the SSR1400 is onboarded to the Mist cloud, you'll need to assign it to a site so you can begin to manage the
conguraon and gather data in Mist cloud.
1. Select Organizaon > Inventory. The status of the SSR1400 is shown as Unassigned.
2. Select the SSR1400 and from the More drop-down list, select Assign to Site.
3. Select the site from the Site list.
NOTE: Under Manage Conguraon, do not check the Manage Conguraon with Mist checkbox for the
SSR1400 if it is using Session Smart Router soware version 5.4.4. This allows the SSR1400 to reach out to
the conductor IP address specied when the site was created to receive conguraon informaon.
If you are onboarding a Mist-managed appliance using Session Smart Router soware version 6.0, select
Manage Conguraon with Mist. If you do not select Manage Conguraon with Mist, the SSR1400 will not
be managed by Mist.
4. Click Assign to Site.
Video: Assign the SSR1400 to a Site
The site assignment takes a few minutes. Aer the site is fully onboarded, use the Mist WAN Edge - Device View to
access the SSR1400, and the Insights view to view events and acvity.
Install the SSR1400 in a Rack
Install the SSR1400 in a rack and connect it to power. For instrucons see the hardware guide on the Juniper Mist
Supported Hardware page.
11
Connect Your SSR1400 to the Mist Cloud
Your SSR1400, uses port labelled MGMT (mgmt-0/0/0) as the default port to contact Mist for zero-touch provisioning
(ZTP). It uses port 0/3 (xe-0/0/3) to connect to the LAN.
1. Connect the MGMT port to an Ethernet link that can assign a DHCP address to the SSR1400 and provide
connecvity to the Internet and Mist.
NOTE: For management, you can connect the SSR1400 to Mist using the MGMT port. You can also connect
to Mist from one of the WAN ports only when the MGMT port is disconnected, or does not have a valid
DHCP leased address and default route.
Do not change the Mist management port once your appliance is powered on and connected to the Mist
Cloud instance.
2. Connect port 0/3 to your LAN devices, such as
• Mist-managed Juniper EX switches
• Mist APs
• User devices
3. Power on the SSR1400.
Great job! Your SSR1400 is now connected to the Mist cloud! In just a few minutes, Mist will send the template-driven
conguraon down to your device. Once the conguraon has been applied, it will begin forwarding sessions from LAN
to WAN as described by your policy.
Go to the WAN Edges menu on the Mist sidebar, select your device, and watch events as the device completes ZTP.
As your client devices connected to the LAN are assigned addresses from the WAN Edge DHCP server and begin
sending sessions, telemetry will populate the insights page, and Marvis will start analyzing it on your behalf.
12
Step 3: Keep Going
SUMMARY
Congratulaons! Now that you've done the inial
conguraon, your SSR1400 is ready to use. Here are some
things you can do next:
IN THIS SECTION
What's Next? | 13
General Informaon | 13
Learn with Videos | 14
What's Next?
If you want to Then
Understand the various conguraons available on the
SSR1400
See Conguraon Management on the SSR
Congure essenal user access and authencaon features See Access Management
Upgrade the soware See Upgrading the SSR Networking Plaorm
General Informaon
If you want to Then
See all documentaon available for the SSR1400 See the SSR1400 Documentaon in the Juniper Networks
TechLibrary
See all documentaon available for SSR soware Visit Session Smart Router (formerly 128T)
Stay up-to-date with new and changed features and known and
resolved issues
See the SSR Release Notes
13
Learn with Videos
Here are some great video and training resources that will help you expand your knowledge of SSR Soware.
If you want to Then
Get short and concise ps and instrucons that provide quick
answers, clarity, and insight into specic features and funcons
of Juniper technologies
See Learning with Videos on Juniper Networks main YouTube
page
View a list of the many free technical trainings we oer at
Juniper
Visit the Geng Started page on the Juniper Learning Portal
Juniper Networks, the Juniper Networks logo, Juniper, and Junos are registered trademarks of Juniper Networks, Inc. in the
United States and other countries. All other trademarks, service marks, registered marks, or registered service marks are the
property of their respecve owners. Juniper Networks assumes no responsibility for any inaccuracies in this document.
Juniper Networks reserves the right to change, modify, transfer, or otherwise revise this publicaon without noce.
Copyright © 2023 Juniper Networks, Inc. All rights reserved.
14

Other manuals for SSR1400

2

This manual suits for next models

1

Other Juniper Network Hardware manuals

Juniper JRR200 Installation instructions

Juniper

Juniper JRR200 Installation instructions

Juniper PTX10004 Installation instructions

Juniper

Juniper PTX10004 Installation instructions

Juniper SRX5400 Service manual

Juniper

Juniper SRX5400 Service manual

Juniper NFX250 User manual

Juniper

Juniper NFX250 User manual

Juniper Junos OS User manual

Juniper

Juniper Junos OS User manual

Juniper NFX150 User manual

Juniper

Juniper NFX150 User manual

Juniper MX240 User manual

Juniper

Juniper MX240 User manual

Juniper SRX300 Series User manual

Juniper

Juniper SRX300 Series User manual

Juniper Day One+ QFX5700 User manual

Juniper

Juniper Day One+ QFX5700 User manual

Juniper JSA7500 User manual

Juniper

Juniper JSA7500 User manual

Juniper Day One+ User manual

Juniper

Juniper Day One+ User manual

Juniper 16-PORT GIGABIT ETHERNET XPIMS User manual

Juniper

Juniper 16-PORT GIGABIT ETHERNET XPIMS User manual

Juniper Junos Space JA1500 User manual

Juniper

Juniper Junos Space JA1500 User manual

Juniper SRX320 Manual

Juniper

Juniper SRX320 Manual

Juniper ACX7100-32C User manual

Juniper

Juniper ACX7100-32C User manual
Juniper MX150 User manual

Juniper

Juniper MX150 User manual

Juniper WX 15 User manual

Juniper

Juniper WX 15 User manual

Juniper Junos Space JA2500 Installation instructions

Juniper

Juniper Junos Space JA2500 Installation instructions

Juniper SRX300 Series User manual

Juniper

Juniper SRX300 Series User manual

Juniper MX150 Installation instructions

Juniper

Juniper MX150 Installation instructions

Juniper WX 3400 User manual

Juniper

Juniper WX 3400 User manual

Juniper Junos Space JA2500 User manual
Juniper

Juniper Junos Space JA2500 User manual

Juniper SSG5 Manual

Juniper

Juniper SSG5 Manual

Juniper SRX300 Series Installation instructions

Juniper

Juniper SRX300 Series Installation instructions

Popular Network Hardware manuals by other brands

Jaton AM4100P Quick installation guide

Jaton

Jaton AM4100P Quick installation guide

Atmel ATAVRAUTO100 user guide

Atmel

Atmel ATAVRAUTO100 user guide

MANNL ELEKTRONIK WIFI232-S user manual

MANNL ELEKTRONIK

MANNL ELEKTRONIK WIFI232-S user manual

LX Polaris quick start guide

LX

LX Polaris quick start guide

Linksys EFG80 - EtherFast Instant GigaDrive NAS... Specifications

Linksys

Linksys EFG80 - EtherFast Instant GigaDrive NAS... Specifications

Ubiquiti UF-AE quick start guide

Ubiquiti

Ubiquiti UF-AE quick start guide

Positron G1002-M+ Self-installation guide

Positron

Positron G1002-M+ Self-installation guide

Gigamon GigaVUE-HC3 Hardware installation guide

Gigamon

Gigamon GigaVUE-HC3 Hardware installation guide

Omron V330-F Series quick start guide

Omron

Omron V330-F Series quick start guide

ExtraHop Trace Admin UI Guide

ExtraHop

ExtraHop Trace Admin UI Guide

FieldServer FS-8700-22 X30 Driver manual

FieldServer

FieldServer FS-8700-22 X30 Driver manual

Force 10 Adit 3104 IP Reference manual

Force 10

Force 10 Adit 3104 IP Reference manual

Hihome WPP-10S1 quick start

Hihome

Hihome WPP-10S1 quick start

CoreTigo TigoBridge A1 user manual

CoreTigo

CoreTigo TigoBridge A1 user manual

Allnet ALL-MC116SV-VDSL2 user manual

Allnet

Allnet ALL-MC116SV-VDSL2 user manual

Draytek Vigor2927 Series quick start guide

Draytek

Draytek Vigor2927 Series quick start guide

Ceragon Fibe-Air IP-10G installation guide

Ceragon

Ceragon Fibe-Air IP-10G installation guide

National Instruments NI WAP-3701 user manual

National Instruments

National Instruments NI WAP-3701 user manual

manuals.online logo
manuals.online logoBrands
  • About & Mission
  • Contact us
  • Privacy Policy
  • Terms and Conditions

Copyright 2025 Manuals.Online. All Rights Reserved.