Jura E8 User manual

E (NAA)
Instructions for Use
For your safety: read and understand manual before use.

Table of contents
Your E
IMPORTANT SAFEGUARDS ����������������������������������������������������������������������������������������4
Control elements ����������������������������������������������������������������������������������������������������8
Preparing and using for the first time �����������������������������������������������������������������������10
Setting up the machine �������������������������������������������������������������������������������������������10
Filling the bean container �����������������������������������������������������������������������������������������10
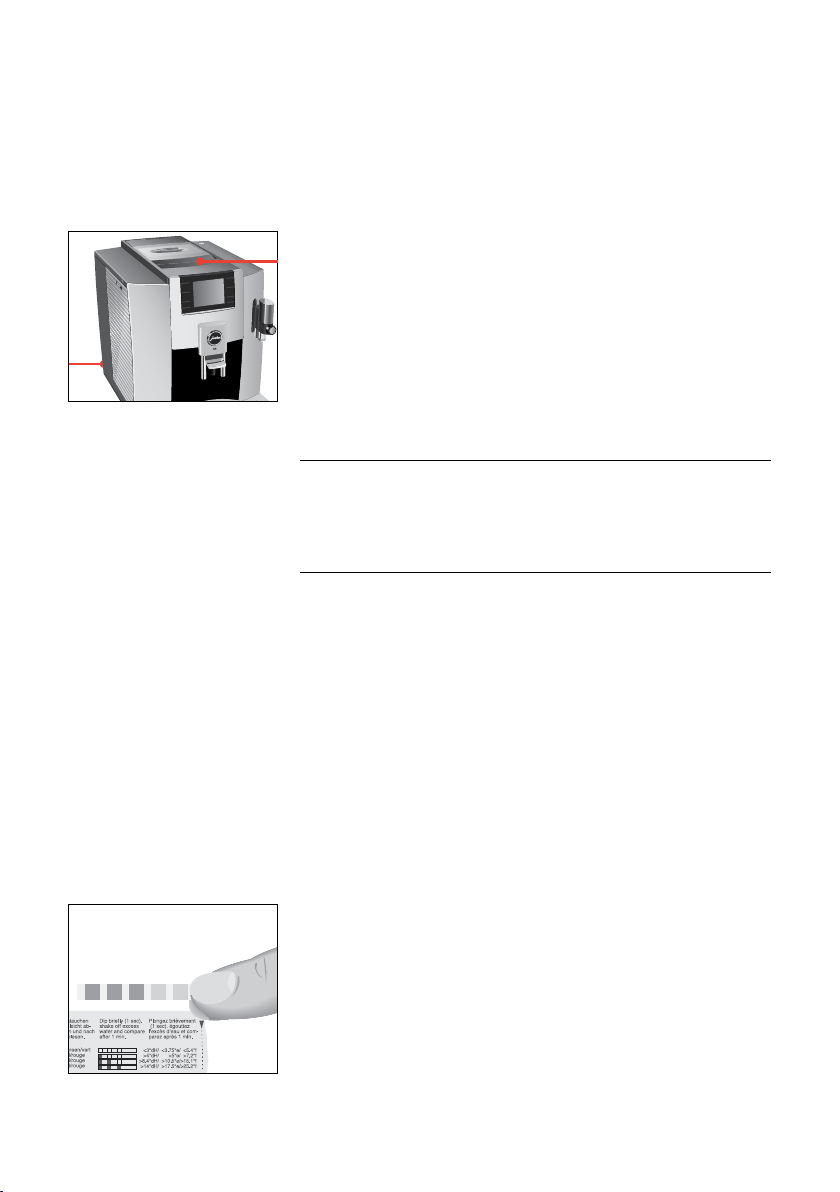
Determining the water hardness ��������������������������������������������������������������������������������10
First-time use �������������������������������������������������������������������������������������������������������� 11
Managing your E8 – the JURA Cockpit ������������������������������������������������������������������������13
Connecting milk �����������������������������������������������������������������������������������������������������13
Connecting the Cool Control milk cooler (wirelessly) ������������������������������������������������������13
Connecting the machine to the WiFi network ���������������������������������������������������������������14
Preparation ����������������������������������������������������������������������������������������������������������15
Preparation with preselection (Specialty Selection) ��������������������������������������������������������16
Espresso and coffee ������������������������������������������������������������������������������������������������16
Latte macchiato, cappuccino and other specialty coffees with milk ������������������������������������16
Caffè Barista and Americano ������������������������������������������������������������������������������������17
Espresso doppio �����������������������������������������������������������������������������������������������������17
Ground coffee ��������������������������������������������������������������������������������������������������������17
Hot water �������������������������������������������������������������������������������������������������������������18
Adjusting the grinder ����������������������������������������������������������������������������������������������18
Adjusting the product settings ����������������������������������������������������������������������������������19
Daily operation ���������������������������������������������������������������������������������������������������� 20
Switching the machine on and off �����������������������������������������������������������������������������20
Filling the water tank ����������������������������������������������������������������������������������������������20
Maintenance actions ����������������������������������������������������������������������������������������������20
Machine settings �������������������������������������������������������������������������������������������������� 22
Maintenance �������������������������������������������������������������������������������������������������������� 23
Rinsing the machine ���������������������������������������������������������������������������������������������� 23
Rinsing the milk system ������������������������������������������������������������������������������������������24
Cleaning the milk system ����������������������������������������������������������������������������������������24
Dismantling and rinsing the fine foam frother ������������������������������������������������������������� 25
Inserting/changing the filter ������������������������������������������������������������������������������������� 26
Cleaning the machine �������������������������������������������������������������������������������������������� 27

Table of contents
Descaling the machine ������������������������������������������������������������������������������������������28
Descaling the water tank �����������������������������������������������������������������������������������������30
Cleaning the bean container ������������������������������������������������������������������������������������ 30
Display messages ��������������������������������������������������������������������������������������������������31
Troubleshooting ��������������������������������������������������������������������������������������������������� 32
Transport and environmentally friendly disposal �������������������������������������������������������� 33
Transport/ Emptying the system ������������������������������������������������������������������������������ 33
Disposal �������������������������������������������������������������������������������������������������������������� 33
Technical data �����������������������������������������������������������������������������������������������������34
Index ����������������������������������������������������������������������������������������������������������������� 35
JURA contact details/ Legal information �����������������������������������������������������������������40

IMPORTANT SAFEGUARDS
Failure to observe the instructions for use may result in serious
injuries or damage to property. Safety information is therefore
indicated as follows:
JThis is the safety alert symbol� lt is used to
alert you to potential personal injury hazards�
Obey all safety messages that follow this
symbol to avoid possible injury or death�
DANGER indicates a hazardous situation which,
if not avoided, will result in death or serious
injury�
WARNING indicates a hazardous situation
which, if not avoided, could result in death or
serious injury�
JCAUTION CAUTION, used with the safety alert symbol,
indicates a hazardous situation which, if not
avoided, could result in minor or moderate
injury�
NOTICE NOTICE is used to address practices not related
to personal injury�
When using electrical appliances, basic safety precautions shall
always be followed, to reduce the risk of fire, electric shock, and/or
injury to persons, including the following:
ZRead all instructions.
ZDo not touch hot surfaces. Use handles or knobs.
ZTo protect against fire, electric shock and injury to persons, do
not immerse power cord, plugs, or body of machine in water
or other liquid.
ZClose supervision is necessary when any appliance is used by
or near children.
ZUnplug from outlet when not in use and before cleaning.
Allow to cool before putting on or taking off parts, and before
cleaning the appliance.
ZDo not operate any appliance with a damaged cord or plug or
after the appliance malfunctions, or has been damaged in any
manner. Return appliance to the nearest authorized service
facility for examination, repair or adjustment.
ZThe use of an accessory attachment not recommended by the
Comply with the
instructions for use
J DANGER
J WARNING
Follow the basic safety
precautions

IMPORTANT SAFEGUARDS
SAVE THESE INSTRUCTIONS. Pass them on to any subsequent user.
The appliance is designed and intended for household use only. It
shall only be used for coffee preparation and to heat milk and water,
according to these instructions. Use for any other purpose will be
deemed improper. JURA Elektroapparate AG cannot accept any
responsibility for the consequences of improper use.
People, including children, who
Zdo not have the physical, sensory or mental capabilities to use
the appliance safely or
Zare inexperienced or lack knowledge in how to use the
appliance safely
must be supervised by a responsible person when using it, or must
be instructed in how to use it correctly.
ZA short power-supply cord is to be provided to reduce risks
resulting from becoming entangled in or tripping over a
longer cord.
ZThe cord shall be arranged so that it will not drape over the
counter top or table top where it can be pulled on by children
or tripped over.
ZThis appliance has a 3-pin grounded plug.
ZDo not modify the plug in any way.
Intended use
Special power cord set
instructions
appliance manufacturer may result in fire, electric shock, or
injury to persons.
ZDo not use outdoors.
ZDo not let the cord hang over the edge of a table or counter,
or touch hot surfaces.
ZDo not place on or near a hot gas or electric burner, or in a
heated oven.
ZTo disconnect, turn any control to ‘OFF’ then remove plug
from wall outlet.
ZDo not use appliance for other than intended use.
ZUse extreme caution when dispensing hot steam, hot water
or hot coffee.

IMPORTANT SAFEGUARDS
Extension cords are available an may be used if care is exercised in
their use.
If the user chooses to use an extension cord,
Zthe marked electrical rating of the extension cord should be
at least as great as the electrical rating of the appliance, and
Zif the appliance is of the grounded type, the extension cord
should be a grounding type 3-wire cord, and
Zthe longer cord should be arranged so that it will not drape
over the counter top or tabletop where it can be pulled on by
children or tripped over.
To reduce the risk of fire or electric shock, DO NOT remove any
service covers. DO NOT modify the appliance in any way that is not
described in these instructions. NO user serviceable parts included.
Repair MUST be done by authorized personnel only.
In the event of signs of damage, for example if there is a smell of
burning, unplug the machine immediately from outlet and contact
JURA customer service.
This appliance is for household use. Any servicing other than
cleaning and user maintenance shall be performed by an authorized
service representative:
ZDo not immerse base in water or try to disassemble.
ZDo not put the appliance or any individual parts in the
dishwasher.
ZCheck voltage to be sure that the voltage indicated on the
name plate complies with your voltage. The name plate is
located on the underside of the appliance.
ZNever use warm or hot water to fill the water container. Use
cold water only.
ZKeep your hands and the cord away from hot parts of the
appliance during operation.
There is a risk of scalds or burns on the spouts and the cappuccino
frother / nozzle.
ZKeep children away.
ZDo not touch any hot parts. Use the handles or knobs
provided.
ZEnsure that the cappuccino frother / nozzle is correctly fitted
and clean. If incorrectly fitted or if they become blocked, the
cappuccino frother or its parts might come off.
J WARNING
JCAUTION

IMPORTANT SAFEGUARDS
ZNever clean with scouring powders or hard implements.
ZEnsure that the ventilation slots are not covered.
ZNever pull out the drip tray during the brewing process. Only
pull the drip tray when the display instructs you or when the
appliance is ready for use.
ZNever fill instant coffee, chocolate mix etc. into the bean
container or ground coffee funnel (filler funnel for ground
coffee). It will damage the functioning of the brewing
chamber.
ZNever fill sugar coated coffee beans into the bean container.
In case of doubt, call your dealer.
ZNever fill anything other than coffee beans into the bean
container (no chocolate, no rice, no nuts, no spices, nothing
other than roasted coffee beans).
ZNever fill frozen beans into the bean container. If you store
beans in the freezer, let them thaw 3 to 4 hours before filling
them into the bean container.
ZNever fill anything but fresh, cold and clean water into the
water tank, except when decalcifying.
ZNever use mineral or carbonated water. You can use tap water,
bottled water, spring water and reverse osmosis water.
ZNever do anything with the machine which is not described in
these instructions. In case of doubt, call your dealer.
NOTICE
NEVER DO
(or you will void your
warranty protection):

Control elements
Control elements
max.
2X
J HOT
J HOT
J HOT

Control elements
On/Off button Q
Multi-function buttons (button function
depends on what is shown in the display)
Display
Milk system with fine foam frother
Height-adjustable coffee spout
Hot-water nozzle
Coffee grounds container
Cup platform
Drip tray
Power cord (permanently connected or
plug-in)(back of the machine)
Water tank
Water tank cover
Bean container with aroma preservation
cover
Service socket for optionally available
JURA WiFi Connect
Filler funnel for ground coffee
Filler funnel cover
Grinder adjustment switch
Container for milk system cleaning
Measuring spoon for ground coffee
6

Preparing and using for the first time
When setting up your E8, please note the following:
UChoose a spot for your E8 which protects the machine against
overheating� Ensure that the ventilation slots are not covered�
UPlace the E8 on a horizontal surface that is not sensitive to
water�
Coffee beans which have been treated with additives (e�g� sugar),
ground coffee or freeze-dried coffee will damage the grinder�
TOnly use roasted, untreated coffee beans to fill the bean
container�
TRemove the aroma preservation cover�
TRemove any dirt or foreign objects from inside the bean
container�
TFill the bean container with coffee beans and close the aroma
preservation cover�
When you use the machine for the first time, you must set the water
hardness� If you do not know the hardness of your water, you can
find this out first� Use the Aquadur® test strips supplied with the
machine�
THold the test strip under flowing water for one second� Shake
off the water�
TWait for about 1minute�
TYou will then be able to read the degree of water hardness from
the discoloration of the Aquadur® test strip and the
description on the packaging�
Setting up the machine
Filling the bean container
NOTICE
Determining the water
hardness

Preparing and using for the first time
Level Display German
Degree (°dH)
Degrees of general
hardness (°dGH)
Parts per
million (ppm)
Indicator Strip number
of ‘reddish’fields
Not active – – – –
Very soft water <3 <3 < 53�4 None
Soft water > 4 > 4 > 71 1
Hard water > 8�4 > 8�4 > 150 2
Very hard water > 14 > 14 > 250 3
If the machine is operated with a defective power cord, there is a
danger of potentially fatal electric shock�
TNever use a machine which is damaged�
TNever use a machine which has a defective power cord�
Milk, sparkling mineral water or other liquids can damage the
water tank or the machine�
TOnly fill the water tank with fresh, cold water�
EThe water volume is given as standard in ‘oz’� You can
change this setting to ‘ml’ in programming mode (see
Chapter 6 ‘Permanent settings in programming mode’)�
Precondition:The bean container has been filled�
TFor machines with a plug-in power cord: Connect the power
cord to the machine�
TInsert the power plug into a power socket�
TPress the On/Off button Qto switch the E8 on�
‘Choose language’
TPress the 0or 9button until the desired language is displayed,
e�g� ‘English’�
TPress the ‘Save’ button�
‘Saved’ appears briefly on the display�
‘Water hardness’
EIf you do not know the hardness of your water, you must
find this out first (see chapter 3 ‘Preparing and using for the
first time – Determining the water hardness’)�
First-time use
J WARNING
NOTICE

Preparing and using for the first time
TPress the 0or 9button to change the setting for the water
hardness�
TPress the ‘Save’ button�
‘Saved’
‘Filter operation’ / ‘Insert filter’
TRemove the water tank and rinse it with cold water�
TFit the filter cartridge extension supplied on top of the CLEARYL
Smart filter cartridge�
TInsert the filter cartridge with its extension into the water tank�
TTurn the filter cartridge clockwise until it audibly clicks into
place�
TFill the water tank with fresh, cold water and reinsert the tank�
EThe machine automatically detects that you have just
inserted the filter cartridge�
‘Saved’
‘Filter is being rinsed’
‘System is filling’
‘Empty drip tray’
TEmpty the drip tray and coffee grounds container and put them
back into the machine�
TPlace one receptacle under the coffee spout and another under
the fine foam frother�
‘Rinse the coffee system’
‘Rinse the milk system’
‘Connect accessory’
TTouch ‘Connect’ to connect your E8 to your network�
TIf necessary, scan the QR code with your mobile device to down-
load the JURA app (J�O�E�®)�
TTouch ‘Connect’�
The start screen is displayed� Your E8 is ready for use�
E8
E8

Preparing and using for the first time
You can manage your E8 with the JURA Cockpit. Press
the fbutton to enter the JURA Cockpit�
Symbol Meaning
c‘Maintenance status’ section
f‘Machine setting’ section
h‘Smart mode’ active
4(white) Your E8 is connected with the network via JURA
WiFi Connect�
4(red) No connection to the WiFi network
$Filter mode
Your E8 creates fine, creamy, feather-light milk foam with a perfect
consistency� The most important requirement for frothing milk is
a milk temperature of 39–46 °F (4–8 °C)� We would therefore
recommend using a milk cooler or a milk container�
TRemove the protective cover from the fine foam frother�
TConnect the milk pipe to the fine foam frother�
EYour E8 is equipped with the HP milk system�
TConnect the other end of the milk pipe to a milk container or a
milk cooler�
Your E8 can be connected with your Cool Control milk cooler�
EThe WiFi Connect can be protected against unauthorised
access using a PIN� Activate the PIN function via the JURA
app� You will find more information at jura.com/wifi�
Precondition: The JURA WiFi Connect is inserted into the service
socket of your E8�
T Press the fbutton�
T Press the ^button�
T Press the ‘Connections’ button�
T Press the ‘Connect accessory’ button�
T Press the ‘Connect’ button�
T Now follow the instructions on the display�
Managing your E – the
JURA Cockpit
c
4
Connecting milk
E8
E8
Connecting the Cool Control
milk cooler (wirelessly)

Preparing and using for the first time
Your E8 can be connected with your JURA app (J�O�E�®)�
EThe WiFi Connect can be protected against unauthorised
access using a PIN� Activate the PIN function via the JURA
app� You will find more information at jura.com/wifi�
Precondition: J�O�E�® is installed on your mobile end device and
you have logged into your home network� The JURA WiFi Connect
is inserted into the service socket of your E8�
T Press the fbutton�
TPress the ^button�
TPress the ‘Connections’ button�
T Press the ‘Wi-Fi connection’ button�
TPress the ‘Connect’ button�
T Now follow the instructions on the display�
Connecting the machine to
the WiFi network

Preparation
Preparation
Hot coffee, hot steam and hot water can cause scalding� Scalding
is a serious burn�
TUse extreme care when handling hot liquid or steam�
TAllow liquid to cool down before drinking�
TIn the event of scalding, rinse affected area with cold water and
seek medical attention�
TKeep children AWAY�
Basic information about preparing drinks:
Aim What to do
Change the coffee strength of
a single product
Press the 9or 0button during
grinding
Change the amount for a
single product
Press the 9or 0button during
preparation
EThe longer you press the 9and 0buttons, the faster your
setting changes�
Aim What to do
Permanently save the
amount for a single product
Press ‘Save’ straight after
preparation
Change the amount, coffee
strength and temperature
for any given product
Press the button for a product
for two seconds and configure
the settings
Display more products Press the ^button to display the
next product page
Prepare two specialty coffees Press the preparation button
twice within two seconds
Stop preparation Press the ‘Cancel’ button
EThe water volume is given as standard in ‘oz’� You can change
this setting to ‘ml’ in programming mode (see Chapter 4
‘Permanent settings in programming mode – Unit for
amount of water’)�
Coffee tastes best served hot� A cold porcelain cup cools the
beverage – and impairs the taste� We therefore recommend
J WARNING

Preparation
prewarming the cups� You can purchase a JURA Cup Warmer
from your specialized dealer�
Press the fbutton for two seconds to initiate Specialty Selection:
Specialty Selection Meaning
‘Extra Shot’ s
(cappuccino, flat white,
latte macchiato)
The product is prepared with two
brewing operations, each with half the
amount of water – for a specialty
coffee with a particularly intense taste�
‘Ground coffee’ £The product is prepared with ground
coffee�
EIf you press your preselection briefly, the next product will
be prepared according to your preselection�
EIf you press and hold your preselection (for two seconds), the
preselection will be active until you switch off your E8�
Example:Coffee
TPlace a cup under the coffee spout�
TPress the ‘Coffee’ button�
The preset amount of water for coffee flows into the cup�
Your E8 prepares the following specialty coffees with milk at the
touch of a button:
UCortado
ULatte macchiato
UMacchiato
UFlat White
UCappuccino
Example:Latte macchiato
Precondition:Milk is connected to the fine foam frother�
Preparation with
preselection (Specialty
Selection)
Espresso and coffee
E8
E8
Latte macchiato, cappuccino
and other specialty coffees
with milk

Preparation
TPlace a glass under the fine foam frother�
TPress the ‘Latte Macchiato’ button�
The preset amount of milk foam flows into the glass�
EThere is a short interval while the hot milk separates from
the milk foam� This allows the typical layers of a latte
macchiato to form�
The preset amount of water for espresso flows into the glass�
To ensure that the fine foam frother always works properly, you must
clean it daily when you have been preparing milk (see chapter 7
‘Maintenance – Cleaning the milk system’)�
For the ‘Caffè Barista’ and ‘Americano’, the E8 blends the coffee with
hot water using a special preparation method� This results in a
full-bodied specialty coffee which is particularly easy to digest� You
can change the amount of this additional water (see chapter 4
‘Preparation – Adjusting the product settings’)�
‘Doppio’ is Italian for ‘double’� When you select Espresso doppio,
two espressi are prepared one after the other� The result is an extra
full-bodied and aromatic specialty coffee�
You can choose to use a second coffee variety, for example
decaffeinated coffee, with the filter funnel for ground coffee�
Basic information about ground coffee:
UNever add more than two level measuring spoons of ground
coffee�
UUse ground coffee which is not ground too finely� Very fine
coffee can block up the system so that the coffee only comes
out in drips�
UIf you did not fill the machine with a sufficient amount of
ground coffee, ‘Not enough ground coffee’ is displayed and the
E8 stops the operation�
UThe desired specialty coffee must be prepared within
approximately one minute after filling with the ground coffee�
Otherwise the E8 stops the operation and is once more ready
for use�
UAll specialty coffees with ground coffee are always prepared
following the same model�
E8
E8
Caffè Barista and Americano
Espresso doppio
Ground coffee

Preparation
Example:Proceed as follows to prepare one espresso using ground
coffee�
TPlace an espresso cup under the coffee spout�
TPress the fbutton for two seconds to initiate Specialty
Selection�
TPress the ‘Ground coffee’ £button�
TPress the ‘Espresso’ button�
‘Ground coffee’ / ‘Please add ground coffee’
TOpen the powder chute cover�
TPlace one level measuring spoon of ground coffee into the filler
funnel�
TClose the cover of the filler funnel�
TPress the ‘Next’ button�
The preset amount of water for espresso flows into the cup�
There is a danger of scalding from hot water splashes�
TAvoid direct contact with the skin�
TPlace a cup under the hot-water spout�
TPress the ‘Hot water’ button�
The preset amount of water flows into the cup�
You can adjust the grinder to suit the degree of roast of your coffee�
If you adjust the consistency of grind when the grinder is not
operating, the grinder adjustment switch could be damaged�
TOnly adjust the consistency of grind when the grinder is in
motion�
The consistency of grind is correct if the coffee flows regularly from
the coffee spout� In addition a fine, thick crema forms�
Example: Proceed as follows to change the consistency of grind
during the preparation of an espresso�
TPlace a cup under the coffee spout�
max.
2X
Hot water
JCAUTION
E8
E8
Adjusting the grinder
NOTICE

Preparation
TOpen the cover of the filler funnel for ground coffee�
TPress the ‘Espresso’ button to start preparation�
TTurn the grinder adjustment switch to the desired position
while the grinder is in motion�
The preset amount of water flows into the cup�
TClose the filler funnel cover�
Press the button of a product on the start screen for about two
seconds to view the list of settings (‘Product settings’)�
Permanent settings in programming mode always follow the same
model�
Example:Proceed as follows to change the coffee strength for one
coffee�
TPress the ‘Coffee’ button for about two seconds.
TPress the ‘Product settings’ button�
‘Coffee strength’ öää
TPress the buttons on the left and right of öää to change the
product settings ‘Amount’ and ‘Temperature’�
TPress the 0or 9button to change the setting�
TPress the ‘Save’ button�
TPress the Rbutton to return to the start screen�
max.
2X
Adjusting the product
settings

Daily operation
Daily operation
TPlace one receptacle under the coffee spout and another under
the fine foam frother�
TPress the On/Off button Q�
EWhen the machine is switched off, the system is only rinsed
if a specialty coffee has been prepared�
EIf milk has been prepared before switching off, you will be
prompted to perform milk system cleaning (‘Clean the milk
system’)� After 30 seconds the switch-off process continues
automatically�
The spouts are rinsed�
Your E8 is switched on or off�
Daily maintenance of the machine and hygiene when handling milk,
coffee and water are key to a perfect coffee result in the cup every
time� You should therefore change the water daily.
Milk, sparkling mineral water or other liquids can damage the
water tank or the machine�
TOnly fill the water tank with fresh, cold water�
TOpen the water tank cover�
TRemove the water tank and rinse it with cold water�
TFill the water tank with fresh, cold water and reinsert the tank�
TClose the water tank cover�
Optimal coffee quality depends on many factors� One important
prerequisite is regular maintenance of your E8� Carry out the
following steps:
Maintenance action Daily If necessary Note
Empty the drip tray and
coffee grounds container and
rinse with warm water
(The insert for the drip tray,
including the drip tray itself,
and the coffee grounds
container are dishwasher-safe)
x Always empty the coffee grounds
container when the machine is switched
on� This is the only way of resetting the
coffee grounds counter�
Switching the machine on
and off
E8
E8
Filling the water tank
NOTICE
Maintenance actions
Other manuals for E8
6
This manual suits for next models
3
Table of contents
Other Jura Coffee Maker manuals

Jura
Jura E6 User manual

Jura
Jura A1 User manual

Jura
Jura A9 User manual

Jura
Jura A7 User manual

Jura
Jura IMPRESSA Z5 User manual

Jura
Jura IMPRESSA F505 User manual

Jura
Jura SUBITO User manual

Jura
Jura D4 User manual

Jura
Jura IMPRESSA J9.4 One Touch TFT User manual

Jura
Jura IMPRESSA J9.3 One Touch TFT User manual