2
Your IMPRESSA X9 Win
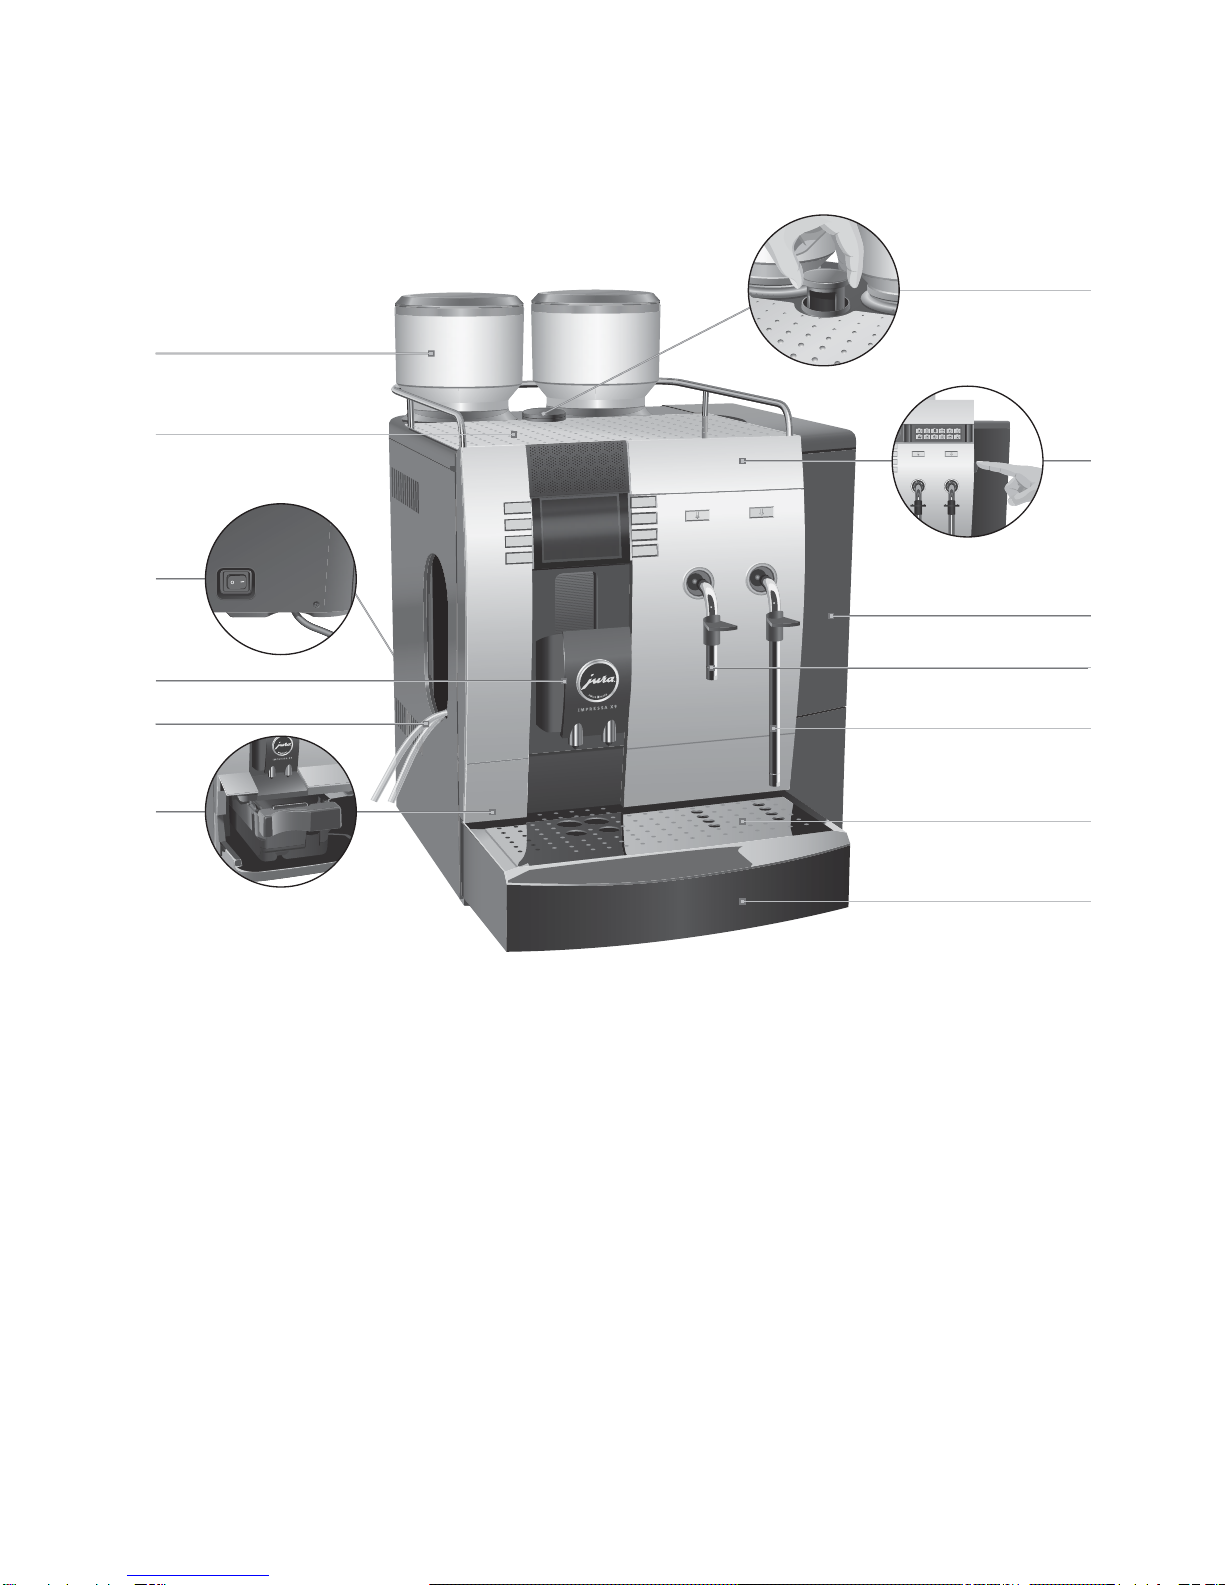
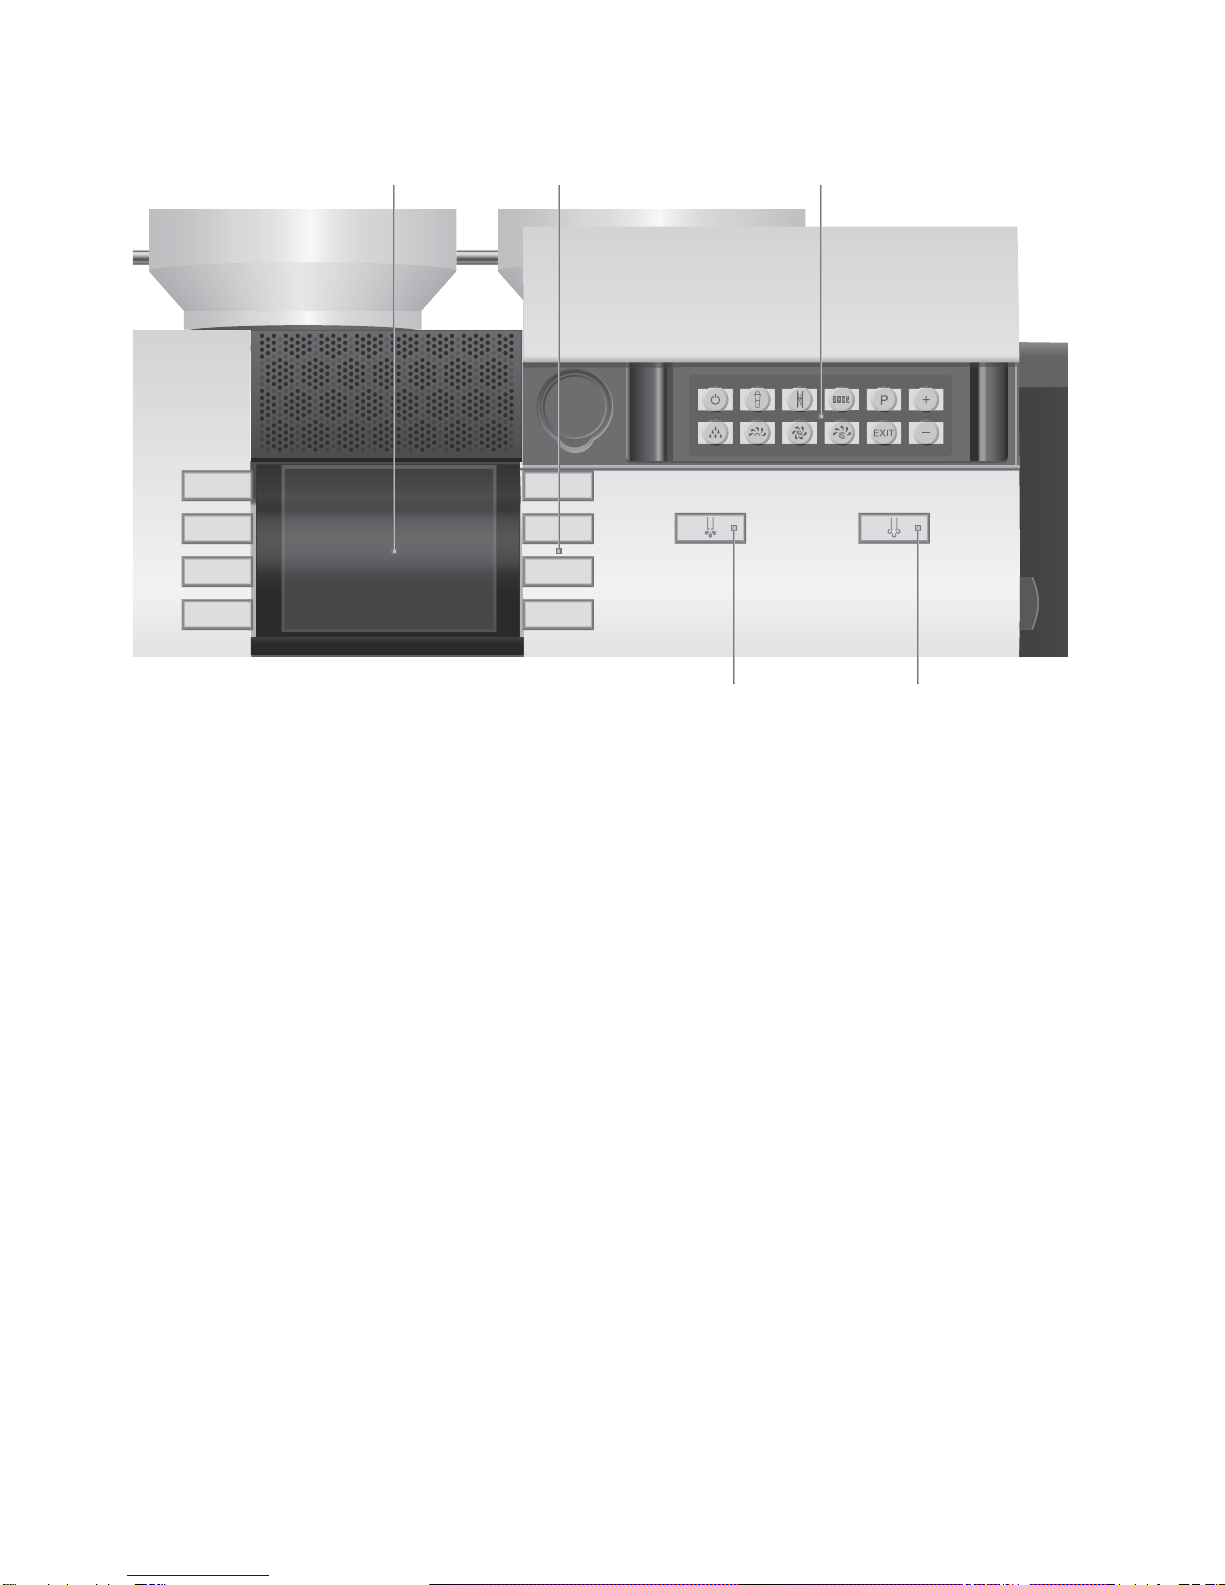
Control elements 4
Proper use 6
For your safety 6
The IMPRESSA X9 Win Manual 9
Symbol description......................................................................................................................................10
Welcome to the world of JURA! 11
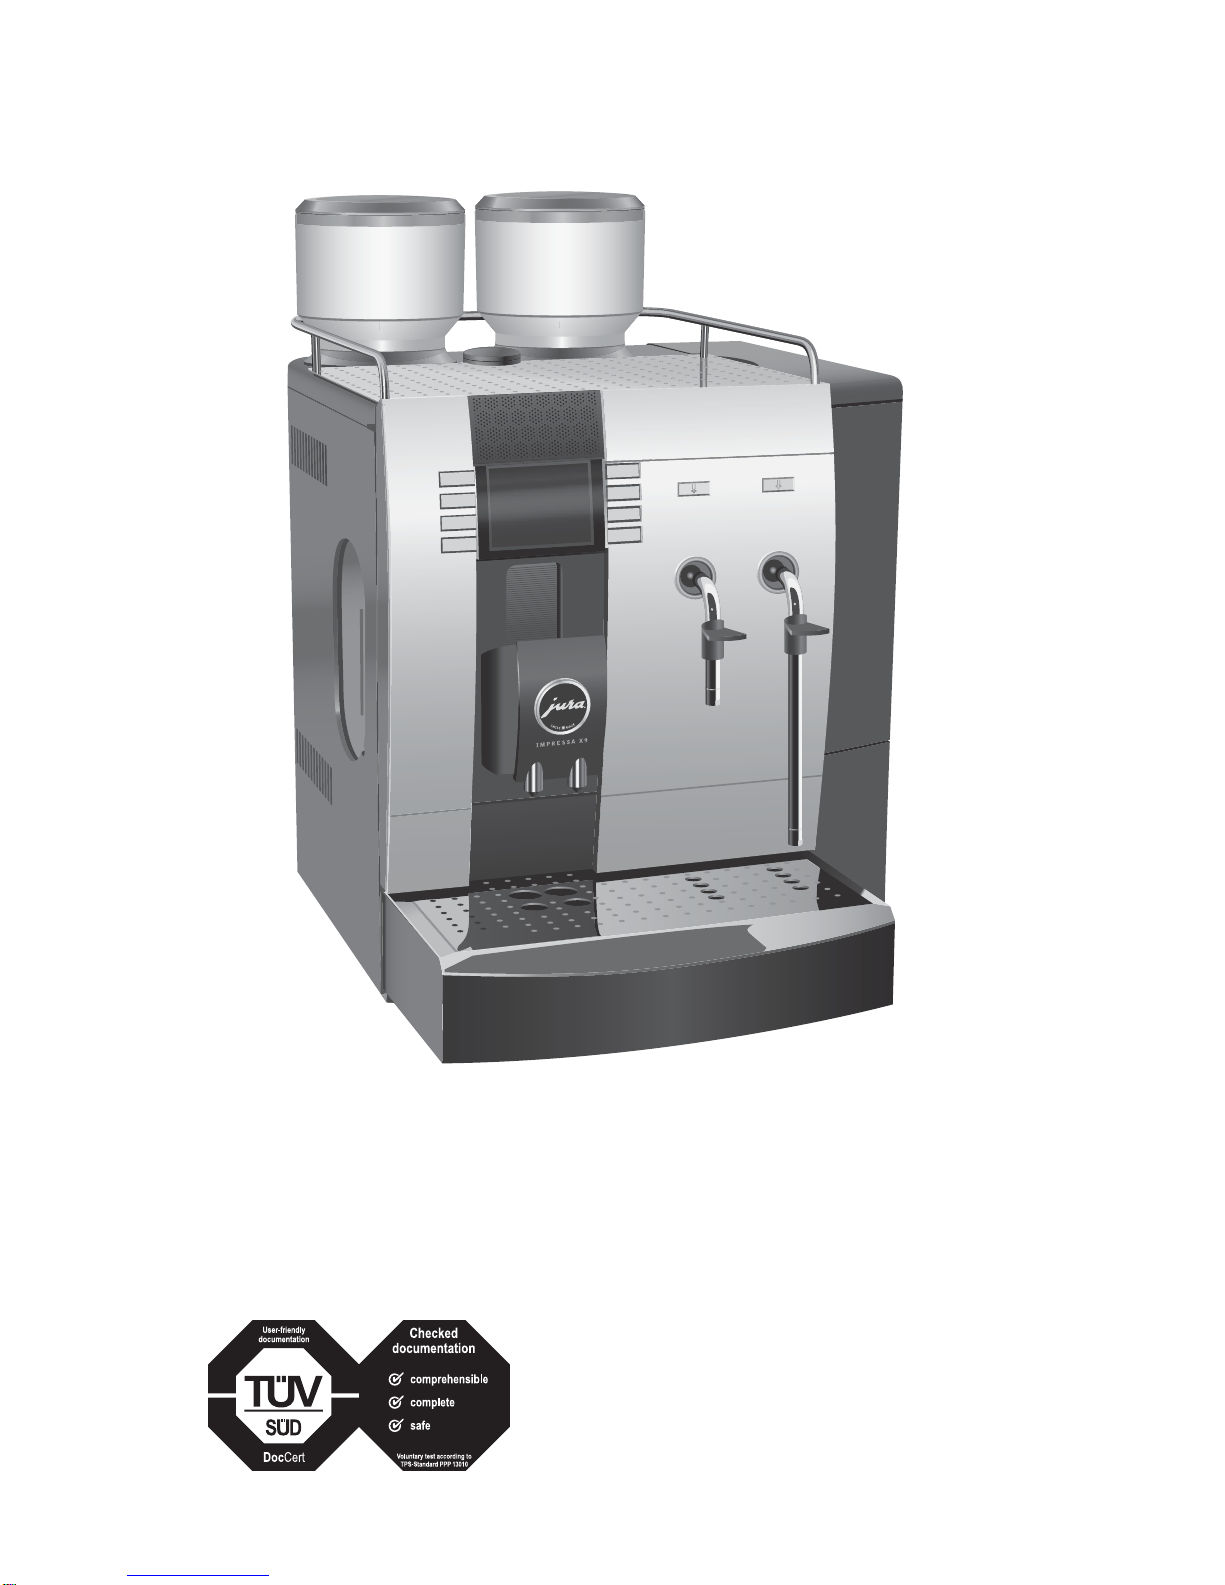
1 IMPRESSA X9 Win 12
A stylish performance.................................................................................................................................12
JURA on the Internet....................................................................................................................................13
2 Preparing and using for the first time 14
Supplied as standard...................................................................................................................................14
Standard products.......................................................................................................................................14
Setting up......................................................................................................................................................15
Filling the water tank...................................................................................................................................15
Filling the bean container...........................................................................................................................16
First-time use................................................................................................................................................16
Inserting and activating the filter cartridge............................................................................................18
Determining and adjusting the degree of water hardness..................................................................18
Adjusting the grinder..................................................................................................................................19
Switching on................................................................................................................................................20
Switching off (standby)...............................................................................................................................21
3 Familiarising yourself with the control options 22
Preparation at the touch of a button.......................................................................................................22
Permanent settings in programming mode..........................................................................................23
Viewing information and maintenance status......................................................................................24
Resetting the counter.................................................................................................................................25
4 Preparation at the touch of a button 26
Barista Tips ..................................................................................................................................................26
Espresso........................................................................................................................................................27
Coffee............................................................................................................................................................28
Cappuccino, milky coffee and latte macchiato......................................................................................28
Hot milk........................................................................................................................................................29
Hot water......................................................................................................................................................29
Steam............................................................................................................................................................30
5 Permanent settings in programming mode 31
Product settings...........................................................................................................................................31
Table of contents