K-Mate BTH180P User manual

BTH80P
True Wireless Bluetooth Headset
User’s manual

Contents
Brief introduction…………...…………………………..…... 1
Before use……………………………………………………. 1
1. Overview…………………………………………………...……1
2. Charging for headset..……………………………………………2
2. Charging for charging case..…………………………………2
Getting started……..…………………………………………3
1. Wearing headset.............................................................3
2. Mono & Twin Modes.............................................................5
3. Earbuds pairing/connecting........................................................6
4. Function operation.........................................................8
7. Battery display........................................................................ ......8
8. Meaning of indicator light………………………………….....9
9. Factory Reset……………………………………………..…..….9
Care and maintenance……………………………..……….10
FAQs……………………………………...…………………..11
Specification……………………………...………………..…11

Welcome to use this True Wireless Bluetooth headset, BTH180P, Please read
this user’s manual carefully before use.
Brief introduction
BTH180P is a true wireless Bluetooth headset. The earphones on the left and
right sides adopt a separate design, which can be used in different occasions
according to personal usage habits. There is no need to connect the earphone
cable between the two earphones. It can be used with a single earphone or
can realize stereo effect through Bluetooth connection. The headset is
equipped with a dedicated charging box, which is convenient to carry and
charge the headset, and the charging box itself supports wireless charging.
You can use your wireless charger to charge the charging box.
Before use
1. Overview

2. Charging for earbuds
When the headset is low on power, it emits the red light flashing slowly 4
times every 14s. Please recharge the battery of the headset.
The way of charging for the earbuds as following:
1. Put the earbuds into the charging case to ensure that the charging pins
connect well, and start charging when you see the red indicator light of
the earbuds on. (If the cover of the charging box is closed, the charging
will be disconnected when opened, you need to take out the earphones
and put them back in order to continue charging)
Red light on: Charging
Red light off: Finished charging
2. Charging should be completed in roughly 2 hours.
1
MFB touch-button
6
Type-C charging jack
2
LED indicator (Red and
blue)
7
Wireless charge induction
area
3
Microphone
8
Earhook
4
Top case
9
Charging pins
5
Charging indicator light

Remarks:
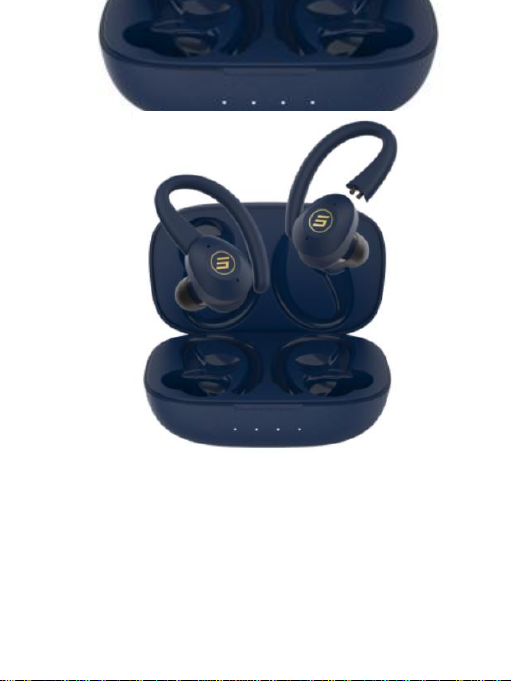
Please place the L and R earphones in the correct charging compartment
according to the L and R marks on the charging box to charge them.
3. Charging for charging case
When any of the following situations occurs, it indicates that the charging
case will be low power. You need to charge the charging case:
1) When the indicator of the charging case has only one white light on, it
means the battery of the charging case is low.
2) When the indicator light of the charging case doesn’t turn on and the
earphone cannot be charged, it means that the battery of the charging case
has been used up
The charging case supports USB cable charging and wireless charging. The
way of charging for the charging case as following:
Using USB cable
1) Plug the Micro USB charging cable into the case’s charging jack.
2) Plug the USB cable into a USB port of PC or a 5Volt USB charge.
Wireless charging
1) Connect the wireless charger to the power cable. (some wireless
chargers with built-in batteries may not need to be connected to the power
cable)
2) Place the charging case in the charging area marked on the wireless
charger and make sure it is placed in the center of the charging area for
maximum efficiency.
Charging box battery indicator flashes = charging
White LED off = Finished charging
3) Charging should be completed in roughly 2.5 hours.When using wireless
charging , the charging time will be slightly longer.
4) If the earbuds are in the charging case, it can charge the earbuds while
charging the charging case.

Type-C charging Wireless charging
Remarks:
The indicator light of the charging box is off when the earphone in the
idle state(not in charged).
Open the cover of the charging box, the 4 white indicator lights of the
charging box will light up in sequence, and the indicator lights will go
out after about 5s.
Indicates that the current charging box power level from low to high is
one, two, three, and four white lights flashing.
If you do not use the earbuds and charging case for a long time, it is
recommended to charge the earbuds and charging case for at least 3
months to avoid the battery exhaustion and enter the sleep mode.
Notes:
Batteries (battery pack or batteries installed) shall not be exposed to
excessive heat place, such as sunshine, fire.
The battery is recyclable.

Getting started
1. Wearing headset with earhook
a. Choose the right earphone to match the ear
b. Align the earphone with the ear and insert the ear tip into the ear hole
C.Rotate the earphone to a comfortable position
2. Without earhook
a. Choose the right earphone to match the ear
b. Align the earphone with the ear and insert the ear tip into the ear hole
C.Rotate the earphone to a comfortable position

3.Mono mode
Each earbuds can be connected singly to the cellphone.
1. Power on
1)In the charging state, open the charging box top case or take the earphone
out of the charging box, and the earphone will automatically turn on.
2)If the earbuds are power off, you should press touch-button for about 3s
until blue LED flashes as the same time the earbuds emits “Power on”. Then
release. This is now in the “Power on”state.
2.Pairing
1) When we open the charging case, it will be power on and turn into
pairing mode. Then it will connect back to the phone you paired with
before.When the earbuds and the cellphone fails to connect back, the
earbuds will automatically enter the pairing state.
2) If the earbuds are power off, you should press touch-button for about 5s
and release it when the red LED and blue LED flash quickly and alternately.
You will hear “Pairing”. The earbuds are in “Pairing”mode
3.Connecting
When the headset is in pairing mode, search for the corresponding Bluetooth
phone name from the Bluetooth list of the phone and click Connect (some
phones do not have a connection pop-up window). After the pairing and
connection are successful, both ears will simultaneously display
"Connected".

4.Power off
1)Auto power off once put into charging case
2)Press touch-button about 5s and release it till red LED is on,and earbuds
prompt “Power off”.
Remark:
When the earbuds are idle and not connected to the Bluetooth device,
they will automatically enter the pairing mode after 10 seconds.
The pairing mode will last for 5 minutes. If it is not paired with any
mobile phone after 5 minutes, the earbuds will shut down automatically.
5. Twin mode
(Binaural mode: connect left and right earphones to enjoy stereo sound)
1. Connection method: Operate any earphone to enter the pairing mode and
pair with the mobile phone, then turn on the other earphone or take it out of
the charging box. If you click “pair”, the secondary earbud will also be
paired with the phone., the two earphones can be automatically connected.
2. Role switching: If the headset is successfully paired with the mobile
phone, the role switching function can be performed. In the following cases,
the accessory ear can automatically switch and connect to the mobile phone
so that you can continue to use the headset:
1) When the main earphone is automatically turned off during low power
during use, the auxiliary earphone can be automatically connected to the
phone.
2) When the main earphone is put into the charging box for charging, the
auxiliary earphone can be automatically connected to the mobile phone.

6.Pair and connect the left and right earphones (when the two
earphones cannot be connected automatically)
1. Put the left and right earphones into pairing state respectively (red and
blue lights flash alternately).
2. When the headset is in the pairing state, press the touch button in 5
consecutive taps, and see that the red light turns to red and blue lights
alternately and slowly flashing after 1 second, which means the headset has
entered TWS pairing mode.
3. After the two earphones enter TWS pairing mode (red and blue lights
alternately flash slowly), the earphones will automatically match and
connect successfully.
Remark:
1. The left and right earphones have been matched and connected before
leaving the factory. Normally, you only need to take the left and right
earphones out of the charging box to automatically power on and connect.
2. If two earphones cannot be automatically connected after being taken
out of the charging box at the same time, you can press this operation to
re-establish the connection between the left and right earphones.
6.Function operation
1. music
Function
Status of
earbuds
L
R
Prompt
tone
Play
Playing
music
Double-click
touch-button
Double-click
touch-button
N/A
Pause
Playing
music
Double-click
touch-button
Double-click
touch-button
N/A
Previous
song
Playing
music
Press Left touch -
button about 2s
N/A
Dang
Next song
Playing
music
N/A
Press Right touch -
button about 2s
Dang
Deep base
Playing
music
N/A
triple-click Right
touch-button
Deep
base

Balance
Playing
music
N/A
triple--click Right
touch-button
Balance
3. Connected mobile phone operation
Function
Status of
earbuds
L
R
Prompt tone
Voice
dialing
Connected
with phone
Press and
hold the
touch
bottom 4s
N/A
Voice dial
Turn on
ambient
sound
Connected
with phone
N/A
Press and
hold the
touch
bottom 4s
Audio pass
through on
2.Calling
Function
Status of
earbuds
L
R
Prompt tone
Cancel
calling
Calling
Once-click
touch-button
Once-click
touch-button
Dang
Answering
Incoming
call ringing
Once-click
touch-button
Once-click
touch-button
Dang
Reject
Incoming
call ringing
Double-click
touch-button
Double-click
touch-button
Dang
End calling
During a call
Double-click
touch-button
Double-click
touch-button
After dang Falling
tone
Voice
switch to
phone
During a call
Press touch -
button about 2s
Press touch -
button about 2s
Falling tone
Voice
switch to
earbuds
During a call
Press touch -
button about 2s
Press touch -
button about 2s
Rising tone

Turn off
ambient
sound
Connected
with phone
N/A
Press and
hold the
touch
bottom 4s
Audio pass
through off
Game
mode
Connected
with phone
triple--click
touch-button
N/A
Enter gaming
mode
Exit
Game
mode
Connected
with phone
triple--click
touch-button
N/A
exit gaming
mode
Volume
up
During a call
N/A
Short
press
touch-butt
on
There is no
prompt sound
during
operation, and
the maximum
volume
prompts
Maximum
Volume
down
During a call
Short press
touch-button
N/A
There is no
prompt sound
during
operation, and
the maximum
volume
prompts
Minimum
Remark:
In the call mode, the left and right earphones have a call sound and can
operate the call, but only the microphone of the main earphone can
record the sound.
7.Battery display

When the earbuds are connected to an IOS device or some of the Android
device, it will display the battery of earbuds on the device. When the
earbuds is low on power ,the battery indicator will turn red and show a
depleted battery icon. For different phones, there may be different ways to
display the battery life on the phone. The following is a screenshot of the
battery life on the iOS phone.
Full charge Low battery
8. Meaning of indicator light
indicator light
State
Earbuds
Red and blue LED flash
quickly alternately
Pairing mode with phone
Red and blue LED flash
slowly alternately
TWS pairing mode
Blue LED flashes every 5
seconds
Unconnected
Blue LED flashes twice every
10 seconds
Connected
Red LED flashes four times
every 14 second
Low battery
Charging
case
No indicator light will light up
in the charging case without
charging or putting the
earbuds into the case
Idle state
The number of white LED
Charging the earbuds

represents the current battery
power of the charging case.
According to the power level
from low to high, there are 1,
2, 3 and 4 white LED on.After
flashing, it lights for about 5s
and then goes out
During the charging process,
the number of white lights on
the charging box represents
the current battery power of
the charging box. According to
the power level from low to
high, the white lights flash 1,
2, 3, 4
Charging
The white light of the charging
box goes out after charging is
completed
Finish charging
9. Factory Reset
Put the earphone into the charging box, press and hold the left and right ears
for 10 seconds at the same time. Red and blue LED are on for 1 second at
the same time
Press touch - button about 10 s
Remarks:
After factory reset, the paired list of earbuds and mobile phone will be
deleted. But the paired list of primary earbud and secondary earbud will
not be deleted. The earbuds will no longer automatically connect back to
the phone after they are turned on, but the primary and secondary earbud
will still automatically connect back to each other.
After factory reset, when the earbuds take out of the charging case, it
will automatically enter the pairing mode with the phone (red and blue

lights alternately flash quickly), and you need to click on the phone to
repair.
Care and maintenance
Read the following recommendations carefully before using BTH180P.
Following these you will be able to enjoy this product for many years.
Keep it dry and don’t put it in the damp place to avoid the product’s
internal circuit being affected. Don’t wear the headset when in strong
exercise to avoid sweat enter.
Clean the earbuds before putting it into the charging case to prevent
sweat from corroding the product.
Keep the product away from direct sunlight or hot places. High
temperatures will shorten the life of electronic devices, destroy the
battery or distort certain plastic parts.
Don’t expose the product to cold areas. It may damage the internal circuit
board.
Don’t try to disassemble the product as it may get damaged if you are not
professional.
Don’t let it fall down onto the floor or other hard surfaces. The internal
circuit might get damaged.
Don’t use intensive chemical products or detergent to clean the product.
Don’t scratch the surface with sharp things.
In case the product doesn’t function properly, send it to the store you bought
it. The staff will help you to solve the problem
FAQs
1. What does it mean when red LED flashes slowly four times a minute?
Battery is low power, need to be recharged.
2. Why is the red LED off when charging?
a) The charging case may not have enough power to charge the headset.
Please charge the charging case.
b) Make sure the metal contacts of the earbud and charging case are free of
obstacles.
a) The battery may dry up. Please charge the battery for 30 minutes, and
then the red LED will be on.
3. Why can’t I hear the sound on the headset?
a) Make sure the volume is not too low or muted;

b) Make sure the headset connects with the mobile phone correctly;
c) Make sure the distance between the headset and the cell phone is in the
available Bluetooth range.
4. Why can’t I hear the sound clearly on the headset?
a) Make sure the mobile phone is in the strong signal area;
b) Make sure the headset is in the available range. and no other block。
5. Why the pause/play, last/next song not function when playing music?
Make sure your Bluetooth device supports AVRCP (Audio/Video Remote
Control profile)
Specifications
Bluetooth version
Bluetooth V5.0
Bluetooth profiles
HFP, HSP,A2DP and AVRCP
Operating distance
10 meters
Working time(one
earbud)
Up to 4.5 hours(maximum volume)
Up to 6 hours (50% volume)
Working time(two
earbuds)
Up to 4.5 hours (maximum volume)
Up to 6 hours (50% volume)
Charging time for
earbud
About 2 hours
Charging time for case
About 2.5 hours
cycle count of the
charging case to charge
the earbuds
3.5 times
Charging input for case
USB charging: DC5.0V 500mA
Weight
One earbud:9.0g
Charging case:66.8g
Measure
Earbud with ear hook:
32.8 x 49.3 x 26.0 mm
Earbud 21.8 x 25.0 x 26.0 mm
Charge case 87.0 x 57.4 x 34.8 mm

NOTE: This equipment has been tested and found to comply with the
limits for a
Class B digital device, pursuant to part 15 of the FCC Rules. These
limits are
designed to provide reasonable protection against harmful interference
in a
residential installation. This equipment generates uses and can radiate
radio
frequency energy and, if not installed and used in accordance with the
instructions,
may cause harmful interference to radio communications. However,
there is no
guarantee that interference will not occur in a particular installation. If
this
equipment does cause harmful interference to radio or television
reception, which
can be determined by turning the equipment off and on, the user is
encouraged to
try to correct the interference by one or more of the following measures:
- Reorient or relocate the receiving antenna.
- Increase the separation between the equipment and receiver.
-Connect the equipment into an outlet on a circuit different from that to
which the
receiver is connected.
-Consult the dealer or an experienced radio/TV technician for help
Changes or modifications not expressly approved by the party
responsible for compliance could
void the user's authority to operate the equipment.
This device complies with Part 15 of the FCC Rules. Operation is
subject to the following two conditions:
(1) this device may not cause harmful interference, and
(2) this device must accept any interference received, including
interference that may cause
undesired operation.
Table of contents
Other K-Mate Headset manuals

K-Mate
K-Mate BTE010 User manual

K-Mate
K-Mate BTH069 User manual

K-Mate
K-Mate BTH015 User manual

K-Mate
K-Mate BTH108R User manual

K-Mate
K-Mate BTH018 User manual

K-Mate
K-Mate BTH109R User manual

K-Mate
K-Mate LBT-HP05 User manual

K-Mate
K-Mate BTH132 User manual

K-Mate
K-Mate BTH026N User manual

K-Mate
K-Mate BTE004 User manual

K-Mate
K-Mate BTH109A User manual

K-Mate
K-Mate BTH010 User manual

K-Mate
K-Mate BTH108Q User manual

K-Mate
K-Mate BTH090 User manual

K-Mate
K-Mate BTE002 User manual

K-Mate
K-Mate BTH023 User manual

K-Mate
K-Mate BTH171Q User manual

K-Mate
K-Mate BTH008 User manual

K-Mate
K-Mate BH5300 User manual

K-Mate
K-Mate BTH002NI User manual