König Electronic HAV-MCS30 User manual

HAV-MCS30
2
AUDIO SET
14
AUDIO-SET
27
SYSTÈME AUDIO
40
AUDIOSET
52
IMPIANTO AUDIO
65
EQUIPO DE SONIDO
78
AUDIÓ SZETT
91
AUDIOSETTI
103
AUDIO SET
115
ZVUKOVÁ SOUPRAVA
128
SISTEM AUDIO

2
ENGLISH
Main Unit
1. iPod® Socket
2. Remote sensor
3. Front Lens
4. SD/MMC Card slot
5. STANDBY Button
6. PROG/CLK ADJ Button
7. TUNER/BAND Button
8. iPod® Button
9. CD/USB/SD Button
10. OPEN/CLOSE Button
11. AUX IN Socket
12. Earphone Socket
13. Display
14. PLAY/PAUSE/PRESET- Button
15. STOP/PRESET+ Button
16. USB Port
17. PLAY MODE/ST/MO Button
18. VOLUME Buttons
19. EQ Button
20. //TUNING and
// TUNING Buttons
21. CD Door
22. STANDBY Indicator
23. FM Wire Antenna
24. Video out Socket
25. Audio out Sockets
26. Subwoofer Output Socket
27. Right Speaker Terminal
28. Left Speaker Terminal
29. AC Power Cord
Y. RESET Switch

3
Remote Control
30. ◙Button
31. iPod® Button
32. STOP/PS+ Button
33. PLAY MODE/ST/MO Button
34. SLEEP/12/24HR Button
35. /TUNING- and /TUNING + Buttons
36. ID3 Button
37. TIMER Button
38. PROG/CLK ADJ Button
39. OPEN/CLOSE Button
40. MODE/REMAIN Button
41. FOLDER+ Button
42. Infrared Transmitter
43. AUX Button
44. MUTE Button
45. TUNER/BAND Button
46. CD/SD/USB Button
47. / PS- Button
48. VOL +/- Button
49. The numerical button 0 - 9 can also be used for the following purpose:
- “2” button with roll up, “8” button with roll down
- “4” button with ΩRepeat, “5” button with ENTER, “6” button with MENU
50. EQ Button
51. FOLDER - Button
SETTING UP AND CONNECTING
Replacing battery for the Remote Control
The remote control battery is already installed at the factory.
If the remote control stops operating, replace the battery
with a new one.
1. Squeeze the notched tab A while pulling the battery door
latch B out to take the battery holder out.
2. Insert a “CR2025” 3V lithium battery. Make sure the
polarity (the + and – side of the battery) is correct.
3. Replace the battery holder back in the remote control.

4
Speaker connection
1. To insert the speaker cable, push down the terminal lever of the
RIGHT Speaker Terminal (27) and LEFT Speaker Terminal (28).
2. Please ensure the cables are connected into the speaker terminal
with the correct polarities. Connect the left speaker to terminals L
and the right speaker to terminal R.
Headphone connection
You can use headphones (not included) to listen in privacy. Insert
the headphones 3.5mm plug into the phones socket (12). Use
corresponding adaptors (specialist shops) if you have different plugs.
The speakers will cut off automatically when the headphones are
being used.
Subwoofer connection
An external subwoofer speaker can be connected to the socket marked “Subwoofer” (26) on
the rear of the main unit.
VIDEO OUTPUT connection
The video output from certain iPod® s can be send to a TV using the
VIDEO OUT socket (24). The accompanying audio signal can be send
using the AUDIO OUT sockets (25).
A standard AV lead with yellow, red and white coloured plugs (not
supplied) can be used for this purpose. Please note that the sockets on
your TV must be configured to accept input rather than output signals to
enable this feature to work correctly.
AUX connection
1) Connect a 3.5mm stereo jack lead to the AUX IN socket (11) and the other end to your
preferred device.
2) Press the AUX button on the remote control (43) “AUX” will show in the display.
3) Select the play function on the auxiliary device and the sound output can then be heard from
the Micro
Main connection
1. Unwind the AC Power Cord (29) completely.
2. Insert the plug into any convenient AC outlet.
3. As soon as the unit has been connected with the main voltage, parts of the unit are in
operation due to the standby function. Turn off the unit completely before pulling the main
plug out of the AC outlet.
Red
Red
Black

5
CLOCK AND TIMER
When used for the first time, or if the main plug has been disconnected
for some time, the display will flash „AM 12:00“
1. In standby mode, press the PROG/CLK ADJ button (6/38), the hour
digits will flash in the display.
2. Press SLEEP/12/24HR (34) button to change between 12hour or
24hour time format.
3. Press //TUNING or //TUNING (20, 35) button
repeatedly to set the correct hour.
4. Press the PROG / CLK ADJ (6, 38) button again, then press
//TUNING or //TUNING (20, 35) button repeatedly
to set the correct minute.
5. Press PROG / CLK ADJ (6, 38) button again to complete setting the current time.
TIMER ON and OFF setting (Automatically turn on and off the unit)
1. In standby mode, press the MODE/REMAIN (40) button. “TMR-ON”
indicates and “O” flashes in the display. Press the PROG / CLK ADJ
(6, 38) button and the hour digit will flash.
2. Press the //TUNING or //TUNING (20, 35)
buttons repeatedly to set the desired hour.
For example “ 2:00” .
3. Press the PROG / CLK ADJ (6, 38) button and the minute digit will
flash.
4. Press the //TUNING or / /TUNING (20, 35)
buttons repeatedly set to the desired minute.
For example “2.08”
5. Press the PROG / CLK ADJ (6, 38) button again to confirm the
setting.
6. Press the MODE/REMAIN (40) button again.TMR-OFF shows in the
display. Press the PROG / CLK ADJ (6, 38) button and the hour digit
will flash.
7. Press the //TUNING or //TUNING (20, 35)
buttons repeatedly to set the desired hour.
For example “ 4:00”.
8. Press the PROG / CLK ADJ (6, 38) button again and the minutes
digit will flash.
9. Press the //TUNING or //TUNING (20, 35)
buttons repeatedly to set the desired minute. For example “4.08” .
10. Press the PROG / CLK ADJ (6, 38) button again to confirm the
setting.
11. Press the MODE/REMAIN (40) button to return to the current time.
12. Press the TIMER (37) button until “0” indicates in the display.The unit
will automatically turn on and off at the set time.
13. To turn of the timer function press the TIMER (37) button. The “0” will disappear from the
display and the timer function is turned off.

6
Note:
- Please ensure the correct time is set before setting the Timer on/off function.
- The On/Off timer can only operate if the unit is switched to standby mode when not in use. In
timer mode, the unit will switch on in the last mode that was in use.
If you wish to wake to music from your iPod® ensure that the iPod® is connected.
If you wish to wake to music from a CD, ensure that a CD is loaded.
If you wish to wake to radio, ensure that a radio station is tuned.
If you wish to wake to music from USB or SD/MMC, please ensure that a USB device or SD/
MMC card is inserted.
SLEEP setting (Automatically turn off)
The unit can be programmed to switch off after a set time, for example
if you wish to go to sleep while listening.
The Sleep time can be set at 10, 20, 30, 40, 50, 60, 70, 80 or 90 minutes.
Press the SLEEP/12/24HR button repeatedly until the desired sleep time
is shown in the display.
The unit will automatically switch off after the selected time.
Note: If the CD playing time is shorter than your selected sleep time, the music will stop at the
end of disc.
BASIC OPERATION
Turn on the unit
Press the STANDBY (5, 30) button to turn on or turn off the unit.
Operating mode selection
Press the TUNER/BAND (7, 45) button, (8, 31) button, CD/USB/SD (9, 46) button or AUX (43)
button to select the different operating modes.
PLAY / PAUSE / PRESET- (14, 47) button:
Press this button to begin playback or pause a CD. In Tuner mode, press this button to skip to
a previous preset radio station.
STOP / PRESET+ (15, 32) button:
Press this button to stop the playback of a CD. In Tuner mode, press this
button to skip to the next preset radio station.
VOLUME (18, 48) button:
Press repeatedly to adjust sound level output from 00 (minimum) to 40
(maximum).
MUTE (44) button:
Press this button to mute the sound output from the unit „VOL-OFF“ will
show in the display. To restore sound output, press the button again
„VOL-ON“ will show in the display.
EQ (19, 50) button:
Press this button to select one of the 5 preset sound equalizer settings.
These are FLAT, ROCK, JAZZ, POP and CLASSIC.
TUNER OPERATION
Manual operation
1. Press the STANDBY (5, 30) button to turn on the unit
2. Press TUNER/BAND button repeatedly to select MW or FM.
3. Press //TUNING or //TUNING (20, 35) buttons to manually tune up or
down the current waveband in 0.05MHz increasements.

7
Automatic search operation
1. Press and hold the //TUNING or //TUNING (20, 35) buttons to
automatically search for the next or previous radio station with a strong signal. Stations with
a weak signal can be tuned manually.
2. Press and hold //TUNING or //TUNING (20, 35) button approx 1 second,
to start the station search again.
Note: During the search operation the sound level will be muted automatically.
Preset memory
This unit is able to store 24 FM and 16 MW radio stations in the preset
memory.
1. In TUNER mode, select FM or MW waveband.
2. Tune to a radio station either manually or by automatic search.
3. Press the PROG / CLK ADJ (6, 38) button, “PROGRAM” shows in
the Display, and “- -“will flash, to indicate that a radio station can be
preset.
4. Press the PRESET – (14, 47) or PRESET+ (15, 32) button repeatedly
until the desired memory position number appears in the Display.
5. Press the PROG / CLK ADJ (6, 38) button again to save the programmed station.
6. In order to store the remaining stations, repeat steps 2 - 5 accordingly.
ST/MO button (17, 33)
Press this button repeatedly to switch between stereo and mono reception.
• When the unit is tuned into a stereo broadcast with a good signal, „ST“ will show in the
display.
• If a stereo broadcast is received, but with interference, it is recommended to switch to mono
mode.
Selecting the tuner preset station memories
Press the PRESET – (14, 47) or PRESET+ (15, 32) buttons to select preset stations that are
stored in the memory.
Note: To access preset stations 1-9, you must press “0” first.
Reception tips
FM: Extend the FM Wire Antenna (23) completely for best reception. If a
stereo broadcast received, “ST” will indicate in the Display.
MW: This unit is equipped with a built-in directional ferrite antenna, move
and rotate the unit for best reception.
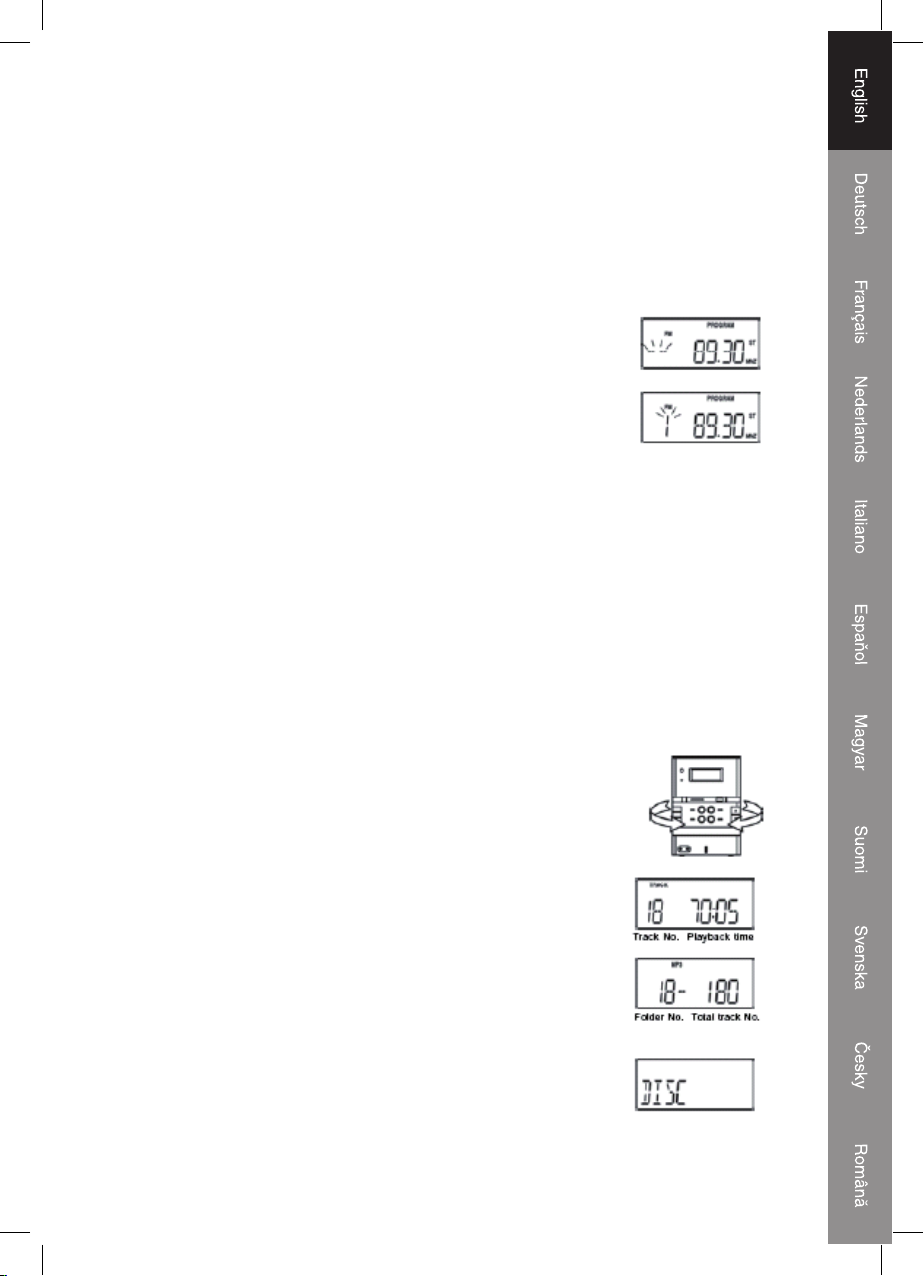
Loading discs
1. Press the STANDBY (5, 30) button to turn “ON” the unit.
2. Press the CD/USB/SD (9, 46) button repeatedly until “CD” indicates in
the Display to select CD mode.
3. Press the OPEN CLOSE (10, 39) button to open CD tray (21).
4. Place the CD into the tray with the label side up.
5. Press the OPEN/CLOSE (10, 39) button again to close CD tray (21).
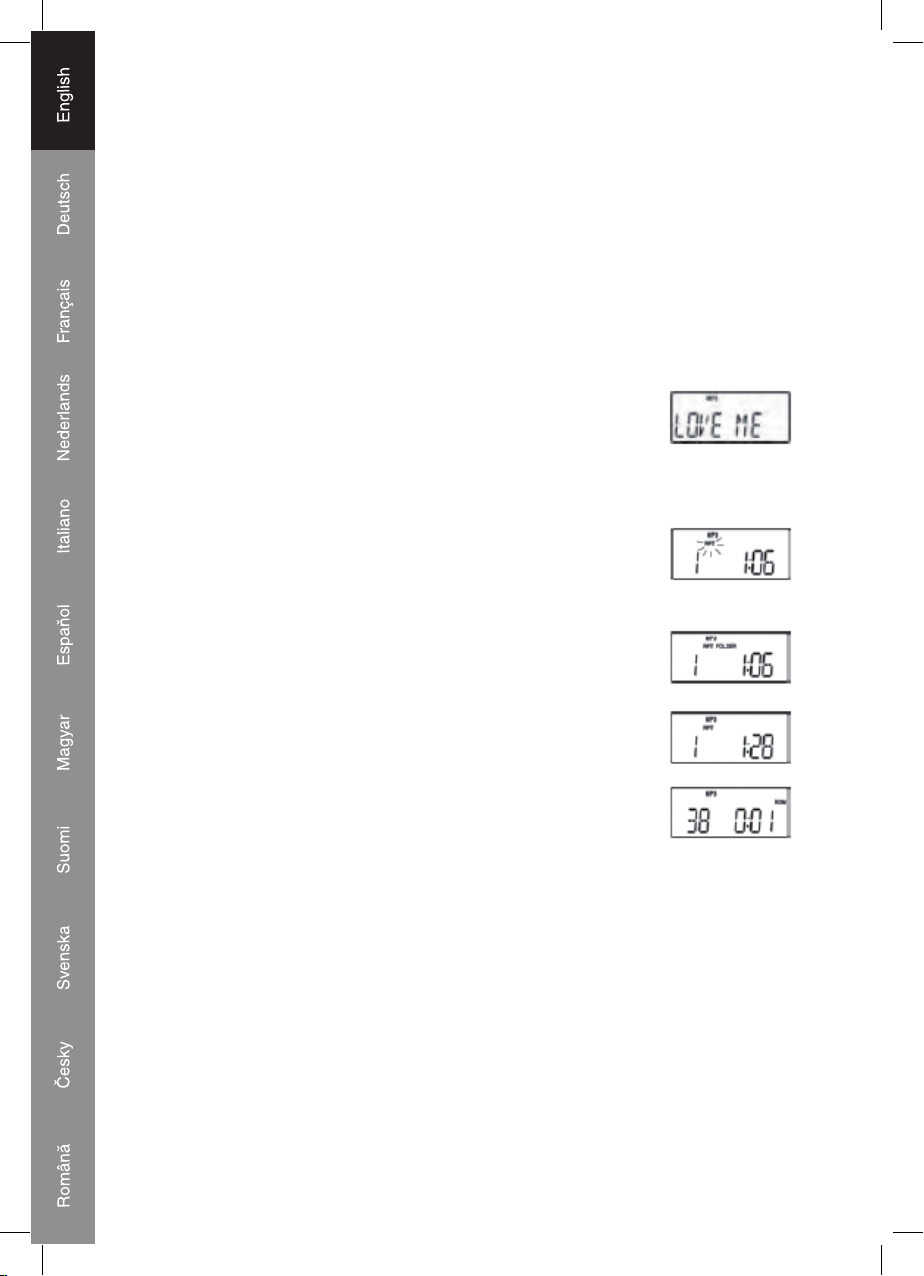
The CD player will automatically scan the disc. The total number of
tracks and the playback time will show in the display. If the scanned
disc is a MP3 or WMA disc, the total number of tracks and folders will
show in the display.
If there is no disc in the unit, the display will show “DISC”

8
COMPACT DISC OPERATION
Normal Playback
After loading a CD, press the PLAY/PAUSE (14, 47) button to
start playback. The track number and playing time are indicated in the
display.
Pause control
To temporarily pause during CD playback press the PLAY/PAUSE
(14, 47) button. The disc playback will pause and the elapsed track time
will flash in the display. Press the PLAY/PAUSE (14, 47) button again to
resume playback.
Skip track and high-speed music search
During playback, press the //TUNING or //TUNING (20, 35) buttons to
skip to the next or previous tracks. During playback, press and hold the //TUNING
or //TUNING (20, 35) buttons to search forwards or backwards through the current
track.
When the desired part of the track is located, release the button and playback will resume.
Using numerical buttons
You can use the Numerical 0-9 (49) buttons to directly select a track to play. Note that to select
tracks between 1-9, the 0 button must be pressed first, for example:
Track no. 2 - Press “0” first, then press “2” .
Track no. 12 - Press “1” first, then press “2” .
PLAY MODE CONTROL
1. Repeat the entire track
Select the track to be repeated and begin playback. Press the PLAY
MODE (17, 33) button once. The RPT indicator will show in the display
and the selected track will be repeated continuously.
2. Repeat all
Press the PLAY MODE (17, 33) button twice. The RPT indicator will
show in the display and all the tracks on the disc will be repeated
continuously.
3. Random playback
The Random playback feature allows you to play all the tracks on the
current disc in a random order. This function can be selected when the
disc is playing or when in stop mode. Press the PLAY MODE (17, 33)
button three times for random playback mode. The RDM indicator is shown in the display. If
necessary, press the PLAY/PAUSE (14, 47) button to begin playback. The player will randomly
select a track to play from the disc.
4. Intro playback
Press the PLAY MODE (17, 33) button four times to play a brief intro
of each track for 10 seconds and the INTRO indicator is shown in the
display. To cancel INTRO mode, press the PLAY MODE (17, 33) button
again and normal playback will resume.

9
Programmed Playback
It is possible to program a selection of up to 32 tracks for playback.
Individual tracks can be programmed more than once.
1. After loading a disc, Press the PROG / CLK ADJ (6, 38) button in stop
mode.
PROGRAM and - - PR01 will show in the display.
2. Press the //TUNING or //TUNING (20, 35)
buttons repeatedly to select the desired track number.
3. Press PROG / CLK ADJ (6, 38) button to confirm the first programmed
track.
- - PR02 now shows in the display and waiting for next programming.
4. Repeat steps 2 and 3 to store further tracks.
5. When programming is complete, press the PLAY/PAUSE (14, 47) button to begin
playback of the selected tracks.
Clear Program (Resume Normal Playback)
Press the STOP (15, 32) button twice in the program mode, or open the CD door (21), or change
to another mode to erase the programmed tracks.
MP3 OR WMA DISC OPERATION
Normal Playback
After loading a MP3 or WMA disc, press the PLAY/PAUSE (14, 47) button to start playback.
The folder number, MP3 or WMA, and current track number indicates in the display.
Pause control
To temporarily pause during CD playback press the PLAY/PAUSE (14, 47) button. The disc
playback will pause and the elapsed track time will flash in the display. Press the PLAY/
PAUSE (14, 47) button again to resume playback.
Skip track and high-speed music search
The procedure for skipping and searching through tracks is the same as previously described
in the CD operation section of this manual.
Using numerical buttons
You can use the Numerical 0-9 (49) buttons to directly select folders and tracks to play.
1. In stop mode
Press “0” first, the display indicates as Fig. A. Then input the desired folder number. For the
folder number 1-9, you must press “0” first. After selecting the folder number “02” , for example,
the display indicates as Fig. B. Press “0” again, the display indicates as Fig. C. Then input the
desired file number of the selected folder. For file numbers 1-9, you must press “0” first. After
selecting the file number “18” the display indicates as Fig. D. After 2-3 seconds, the selected
file 18 in folder 2 will be played automatically.
Fig. A Fig. B Fig. C Fig. D

10
2. In play mode
You can directly input the file number in the currently playing folder to allow direct access to
that particular file. Press “0” , the display indicates as Fig. C. Then input the desired file (track)
number. For file (track) number 1-9, you must press “0” first. After selecting the file number “18”
the display indicates as Fig. D. the player will skip to the selected file and play it automatically.
Skip Folder
In stop mode or during playback, press FOLDER- (51) or FOLDER+ (41) on the remote control
to skip to the next or previous folder. Playback will begin at the first track in the selected
folder.
ID3 FUNCTION
During MP3 disc playback, press the ID3 (36) button to display any ID3
tagging information that may be encoded onto the disc.
Information such as album, title and artist will scroll across the display
when this function is selected.
PLAY MODE CONTROL
1. Repeat the entire track
Select the track to be repeated and begin playback. Press the PLAY
MODE (17, 33) button once. The RPT indicator will flash in the display and
the selected track will be repeated continuously.
2. One Folder Repeat
Select the folder to be repeated and begin playback. Press the PLAY
MODE (17, 33) button twice. The RPT and FOLDER indicator will show in
the display and the selected folder will be repeated continuously.
3. Repeat all
Press the PLAY MODE (17, 33) button three times. The RPT indicator
shows in the display and all the tracks of the disc will be repeated
continuously.
4. Random playback
The random playback feature allows you to play all the tracks of the
current disc in random order. You can select random playback while the
discs are playing or when the player is stopped. Press the PLAY MODE
(17, 33) button three times to start random playback mode, The RDM
indicator is shown in the display. If necessary, press the PLAY/PAUSE (14, 47) button to begin
playback. The player will randomly select a track to play from the disc.

11
Programmed Playback
It is possible to program a selection of up to 32 files for playback. Individual
tracks can be programmed more than once.
1. In stop mode, after a CD containing MP3 or WMA tracks is loaded,
Press the PROG / CLK ADJ (6, 38) button. In stop mode, PROGRAM
and - - PR01 will show in the display.
2. Press the FOLDER- (51) or FOLDER+ (41) repeatedly to select the
desired folder number.
3. Press the / TUNING or / TUNING (20, 35) buttons repeatedly to select
the desired file number in the selected folder.
4. Press the PROG / CLK ADJ (6, 38) button to confirm the file in the first
program location.
- - PR02 will show in the display and ready for the next file to be programmed.
5. In order to add more tracks to the program repeat step 2 and 3 until the memory is full.
6. When programming is complete, press the PLAY/PAUSE (14, 47) button begin playback of
the selected folders/files.
Clear Program (Resume Normal Playback)
Press the STOP (15, 32) button twice in the program mode, open the CD door (21), or change
to another mode to erase the programmed tracks.
iPod® OPERATION
This unit is equipped with a dock system to allow you to connect your iPod® and enjoy the
sound via the speakers. The dock system is able to adapt to fit most types of currently available
iPod®, by using one of 5 different sized dock adaptors supplied. Please note that as new
iPod® models become available, new dock adaptors may be required. This unit can also
charge the iPod® battery when connected via the dock.
To fit a dock adapter
Select the appropriate dock adaptor for your iPod®. Take care to use the correct one, as this
will ensure that the iPod® is held securely in place.
1. Gently press the iPod® dock adapter into the dock at the top of the unit.
2. Carefully place your iPod® into the dock. (The iPod® must not be in a case or “Skin” )
To remove/replace a dock adapter
First remove your iPod®, and then grip the dock adapter and pull gently upwards.

12
Declaration of conformity
We,
Nedis B.V.
De Tweeling 28
5215MC ’s-Hertogenbosch
The Netherlands
Tel.: 0031 73 599 1055
Email: info@nedis.com
Declare that product:
Name: KONIG
Model: HAV-MCS30
Description: Audio set
Is in conformity with the following standards
EMC: EN55013:2001+A1:2003+A2:2006
EN55020:2002+A1:2003+A2:2005
EN61000-3-2:2000+A2:2005
EN61000-3-3:1995+A1:2001+A2:2005
LVD: EN60065:2002
Following the provisions of the 2006/95/EC and 2004/108/EC directive.
‘s-Hertogenbosch, 2008, June 23
Mrs. J. Gilad
Purchase Director

13
Safety precautions:
CAUTION
RISK OF ELECTRIC SHOCK
DO NOT OPEN
To reduce risk of electric shock, this product should ONLY
be opened by an authorized technician when service is
required. Disconnect the product from mains and other
equipment if a problem should occur. Do not expose the product to water or moisture.
Maintenance:
Clean only with a dry cloth. Do not use cleaning solvents or abrasives.
Warranty:
No guarantee or liability can be accepted for any changes and modifications of the product or
damage caused due to incorrect use of this product.
General:
Designs and specifications are subject to change without notice.
All logos brands and product names are trademarks or registered trademarks of their respective
holders and are hereby recognized as such.
Attention:
This product is marked with this symbol. It means that used electrical and electronic
products should not be mixed with general household waste. There is a separate
collections system for these products.
Copyright ©

14
DEUTSCH
Hauptgerät
1. iPod®-Buchse
2. FERNBEDIENUNGSSENSOR
3. Vordere Linse
4. STECKPLATZ FÜR SD/MMC-KARTE
5. STANDBY-Taste
6. PROG/UHREINST-Taste
7. TUNER/BAND-Taste
8. iPod®-Taste
9. CD/USB/SD-Taste
10. ÖFFNEN/SCHLIESSEN-Taste
11. AUX IN-Buchse
12. Kopfhörerbuchse
13. DISPLAY
14. WIEDERGABE/PAUSE/
SENDERSPEICHER- Taste
15. STOPP/SENDERSPEICHER+ Taste
16. USB-Port
17. WIEDERGABE-MODUS/ST/MO-Taste
18. LAUTSTÄRKE -Tasten
19. EQ-Taste
20. //ABSTIMMUNG und
// ABSTIMMUNG Tasten
21. CD-FACH
22. STANDBY-Anzeiger
23. FM-Antennendraht
24. VIDEO Ausgang
25. AUDIO Ausgang
26. SUBWOOFER-Ausgangsbuchse
27. Anschluss RECHTER Lautsprecher
28. Anschluss LINKER Lautsprecher
29. Netzkabel
Y. RÜCKSETZ-Schalter

15
Fernbedienung
30. ◙ EIN/AUS-Taste
31. iPod®-Taste
32. STOPP/PS+ Taste
33. WIEDERGABE MODUS/ST/MO-Taste
34. SCHLAF/12/24H-Taste
35. /TUNING- und /TUNING+ Tasten
36. ID3-Taste
37. TIMER-Taste
38. PROG/UHREINST-Taste
39. ÖFFNEN/SCHLIESSEN-Taste
40. MODUS/REST-Taste
41. ORDNER+ Taste
42. Infrarotsender
43. AUX-Taste
44. STUMMSCHALT-Taste
45. TUNER/BAND-Taste
46. CD/USB/SD-Taste
47. / PS- Taste
48. LAUTSTÄRKE +/- Taste
49. Die Zifferntasten 0-9 können auch für folgende Zwecke benutzt werden:
- Taste 2 für Hochrollen, Taste 8 für Herunterrollen
- Taste 4 für ΩWiederholen, 5 Taste für ENTER, Taste 6 für MENÜ
50. EQ-Taste
51. ORDNER- Taste
EINRICHTUNG UND ANSCHLUSS
Batterie für Fernbedienung wechseln
Die Fernbedienungsbatterie ist schon im Werk eingelegt
worden. Wenn die Fernbedienung nicht mehr funktioniert,
ersetzen Sie die Batterie durch eine neue.
1. Drücken Sie die gekerbte Lasche A, während Sie die
Batterietürlasche B herausziehen, um den Batteriehalter
herauszunehmen.
2. Legen Sie eine 3 V-Lithium-Batterie vom Typ “CR2025”
ein. Achten Sie auf richtige Polarität (+ und - Pol der Batterie).
3. Bringen Sie den Batteriehalter wieder in der Fernbedienung an.

16
Lautsprecheranschluss
1. Um das Lautsprecherkabel einzustecken, drücken Sie den
Klemmenhebel der RECHTEN Lautsprecherklemme (27) und
LINKEN Lautsprecherklemme (28) nach unten.
2. Sorgen Sie bitte dafür, dass die Kabel mit der richtigen Polarität
an die Lautsprecherklemmen angeschlossen werden. Schließen
Sie den linken Lautsprecher an die Klemme L und den rechten
Lautsprecher an die Klemme R an.
Kopfhöreranschluss
Um ungestört Musik zu hören, benutzen Sie einen Kopfhörer (nicht
im Paket enthalten) mit passendem 3,5 mm Klinkenstecker.
Diesen stecken Sie auf der Rückseite in die dafür vorgesehene Buchse (12). Beim einstecken
des Kopfhörers, werden automatisch die Lautsprecher abgeschaltet.
Subwooferanschluss
An der Rückseite des Gerätes, kann ein externer Subwoofer in die vorgesehene Buchse (26)
angeschlossen werden.
VIDEO-Ausgangsanschluss
Bei iPod® Modellen mit Videofunktion, hat man die Möglichkeit, das Bild über die VIDEO
out-Buchse (24) und das dazugehörige Audiosignal über die AUDIO
out-Buchse (25) auf einen Fernseher mit passendem AV- Kabel, gelber,
roter und weißer Stecker, (nicht im Paket enthalten) zu übertragen.
Bitte beachten Sie, dass die Buchsen an ihrem Fernsehgerät
so konfiguriert sein müssen, dass ein Eingangssignal und kein
Ausgangssignal ensteht.
AUX-Anschluss
1) Schließen Sie ein 3,5 mm-Stereokabel an die AUX IN-Buchse (11) an und das andere Ende
an Ihr bevorzugtes Gerät.
2) Drücken Sie an der Fernbedienung die AUX-Taste (43), anschließend wird auf dem Display
„AUX“ angezeigt.
3) Wählen Sie die Wiedergabe-Funktion am Hilfsgerät, und aus dem Microsystem wird ein Ton
zu hören sein.
Netzanschluss
1. Wickeln Sie das Netzkabel (29) vollständig aus.
2. Stecken Sie den Netzstecker in eine Wandsteckdose.
3. Solbald das Gerät angeschlossen ist, geht das Gerät automatisch, in die Standby-Funktion,
in Betrieb. Bitte beachten Sie, dass Sie das Gerät vollständig abschalten, bevor Sie den
Netzstecker ziehen.
Rot
Rot
Schwarz

17
UHR UND TIMER
Wenn das Gerät das erste Mal benutzt wird oder der Netzstecker
irgendwann gezogen wurde, blinkt auf der Uhrenanzeige "AM 12:00".
1. Drücken Sie im Standby-Modus die PROG/UHREINST-Taste (6/38),
und die Stundenziffern werden blinkend angezeigt.
2. Drücken Sie die SCHLAF/12/24H-Taste (34), um zwischen 12 und 24
Stunden zu wechseln.
3. Drücken Sie mehrmals die Taste //TUNING oder //
TUNING (20, 35), um die richtige Stunde auszuwählen.
4. Drücken Sie anschließend wieder mehrmals die PROG / UHREINST-
Taste (6, 38), dann drücken Sie die Taste //TUNING oder
//TUNING (20, 35), um die richtige Minute auszuwählen.
5. Drücken Sie die PROG / UHREINST-Taste (6, 38) noch einmal, um die Einstellung der Zeit
zu beenden.
Einstellung von TIMER AN und AUS (automatisches An- und Ausschalten des Geräts)
1. Drücken Sie im Standby-Modus die MODUS/REST-Taste (40). Es
wird “TMR-ON” angezeigt, und “O” blinkt auf dem Display. Drücken
Sie die PROG/UHREINST-Taste (6, 38), und die Stundenziffer
blinkt.
2. Drücken Sie mehrmals dieTasten //TUNING oder /
/TUNING (20, 35), um die gewünschte Stunde einzustellen.
Zum Beispiel “2:00” .
3. Drücken Sie die PROG/UHREINST-Taste (6, 38), und die
Minutenziffer blinkt.
4. Drücken Sie mehrmals dieTasten //TUNING oder /
/TUNING (20, 35), um die gewünschte Minute einzustellen.
Zum Beispiel “2.08” .
5. Drücken Sie die PROG / UHREINST-Taste (6, 38) noch einmal, um
die Einstellung zu bestätigen.
6. Drücken Sie die MODUS/REST-Taste (40) noch einmal. Es wird
“TMR-OFF” angezeigt, und “ ” blinkt. Drücken Sie die PROG/
UHREINST-Taste (6, 38), und die Stundenziffer blinkt.
7. Drücken Sie mehrmals dieTasten //TUNING oder /
/TUNING (20, 35), um die gewünschte Stunde einzustellen.
Zum Beispiel “4:00” .
8. Drücken Sie die PROG/UHREINST-Taste (6, 38), und die
Minutenziffer blinkt.
9. Drücken Sie mehrmals dieTasten //TUNING oder /
/TUNING (20, 35), um die gewünschte Minute einzustellen. Zum
Beispiel “4.08” .
10. Drücken Sie die PROG / UHREINST-Taste (6, 38) noch einmal, um
die Einstellung zu bestätigen.
11. Drücken Sie die MODUS/REST-Taste (40), um zur Anzeige der
aktuellen Zeit zurückzukehren.
12. Drücken Sie die TIMER-Taste (37), bis "0" angezeigt wird. Das Gerät schaltet sich zur
entsprechenden Zeit an und aus.
13. Drücken Sie die TIMER-Taste (37) noch einmal, bis "0" verschwindet, und die Timer-Funktion
wird beendet.

18
Hinweis:
- Achten Sie bitte darauf, dass die richtige Zeit eingestellt ist, bevor die Funktion Timer an/aus
eingestellt wird.
- Die Funktion Timer an/aus geht nur, wenn das Gerät in den Standby-Modus geschaltet ist
und nicht benutzt wird. Im Timer-Modus schaltet sich das Gerät im zuletzt benutzten Modus
an.
Wenn Sie mit Musik von Ihrem iPod® geweckt werden möchten, muss der iPod®
angeschlossen sein.
Wenn Sie mit Musik von einer CD geweckt werden möchten, muss eine CD eingelegt sein.
Wenn Sie vom Radio geweckt werden möchten, ist dafür zu sorgen, dass ein Rundfunksender
eingestellt ist.
Wenn Sie mit Musik vom USB oder SD/MMC geweckt werden möchten, sorgen Sie bitte dafür,
dass ein USB-Gerat angeschlossen oder eine SD/MMC-Karte eingeschoben ist.
SCHLAF-Einstellung (Automatisches Ausschalten)
Das Gerät kann so programmiert werden, dass es sich nach einer
eingestellten Zeit während der Benutzung ausschaltet, z.B. wenn Sie
beim Zuhören einschlafen möchten.
Die Schlafzeit kann in 10, 20, 30, 40, 50, 60, 70, 80 oder 90 Minuten eingestellt werden.
Drücken Sie die SCHLAF/12/24H-Taste mehrmals, bis die gewünschte Schlafzeit angezeigt
wird.
Das Gerät schaltetet sich zur ausgewählten Schlafzeit automatisch aus.
Hinweis:Wenn die CD-Wiedergabezeit kürzer ist als Ihre ausgewählte Schlafzeit, hört die
Musik am Ende der Disk auf.
NORMALER BETRIEB
Gerät anschalten
Drücken Sie die STANDBY-Taste (5, 30), um das Gerät an- oder auszuschalten.
Bedienung der Modusauswahl
Drücken Sie die TUNER/BAND-Taste (7, 45), die Taste (8,31), die CD/USB/SD-Taste (9, 46)
oder die AUX-Taste (43), um die verschiedenen Betriebsarten auszuwählen.
WIEDERGABE/PAUSE/SENDERSPEICHER-Taste (14, 47):
Drücken Sie diese Taste, um mit der Wiedergabe zu beginnen oder eine CD zu unterbrechen.
Wenn Sie diese Taste im Tuner-Modus drücken, springen Sie zu einem vorher gespeicherten
Rundfunksender.
STOPP/SENDERSPEICHER+ Taste (15, 32):
Drücken Sie diese Taste, um die Wiedergabe einer CD anzuhalten. Wenn
Sie diese Taste im Tuner-Modus drücken, springen Sie zum nächsten
gespeicherten Rundfunksender.
LAUTSTÄRKE-Taste (18, 48):
Mehrmals drücken, um die Lautstärke von 00 (Minimum) bis 40 (Maximum)
einzustellen.
STUMMSCHALT-Taste (44):
Drücken Sie diese Taste, um den Ton aus dem Gerät abzuschalten. Es
wird "VOL-OFF" angezeigt. Um den Ton wieder herzustellen, drücken Sie
die Taste noch einmal. Es wird "VOL-ON" angezeigt.
EQ-Taste (19, 50):
Drücken Sie diese Taste, um eine von 5 voreingestellten
Tonequalizereinstellungen auszuwählen. Diese sind FLAT, ROCK, JAZZ, POP und CLASSIC.

19
RADIO-BETRIEB
Manueller Betrieb
1. Drücken Sie die STANDBY-Taste (5, 30), um das Gerät anzuschalten.
2. Drücken Sie mehrfach die TUNER/BAND-Taste, um MW (AM) oder UKW (FM)
auszuwählen.
3. Drücken Sie die Tasten //TUNING oder //TUNING (20, 35), um im
aktuellen Frequenzband in Schritten von 0,05 MHz Sender auf- oder abwärts zu suchen.
Automatische Suche
1. Halten Sie die Tasten //TUNING oder //TUNING (20, 35) gedrückt,
um automatisch den nächsten oder vorigen Rundfunksender mit starkem Signal zu suchen.
Sender mit schwachem Signal können manuell eingestellt werden.
2. Halten Sie die Taste //TUNING oder //TUNING (20, 35) etwa 1 Sekunde
lang gedrückt, um die Sendersuche wieder zu beginnen.
Hinweis:Während des Suchvorgangs wird der Ton automatisch abgeschaltet.
Senderspeicher
Dieses Gerät kann bis zu 24 UKW- und 16 MW-Rundfunksender
speichern.
1. Wählen Sie im Tuner-Modus das UKW- oder MW-Frequenzband aus.
2. Stellen Sie einen Rundfunksender entweder durch manuelle oder
automatische Suche ein.
3. Drücken Sie die PROG/UHREINST-Taste (6, 38). Es wird
“PROGRAM” angezeigt, und "--" blinkt, um Ihnen anzuzeigen, dass ein
Rundfunksender gespeichert werden kann.
4. Drücken Sie mehrmals die Taste SENDERSPEICHER- (14, 47) oder SENDERSPEICHER+
(15, 32), bis die gewünschte Senderspeichernummer angezeigt wird.
5. Drücken Sie die PROG/UHREINST-Taste (6, 38) noch einmal, um den programmierten
Sender zu speichern.
6. Um die restlichen Sender zu speichern, wiederholen Sie die Schritte 2-5 entsprechend.
ST/MO-Taste (17, 33)
Drücken Sie diese Taste mehrmals, um zwischen Stereo- und Monoempfang umzuschalten.
• Wenn das Gerät auf eine Stereosendung mit gutem Signal eingestellt wird, wird "ST"
angezeigt.
• Wenn eine Stereosendung empfangen wird, die gestört ist, wird empfohlen, in den Mono-
Modus umzuschalten.
Auswahl der Tunersenderspeicher
Drücken Sie die Tasten SENDERSPEICHER- (14, 47) oder SENDERSPEICHER+ (15, 32), um
die gespeicherten Sender auszuwählen.
Hinweis: Um auf die Senderspeicher 1-9 zuzugreifen, müssen Sie zuerst "0" drücken.
Tipps zum Empfang
UKW: Ziehen Sie den FM-Antennendraht (23) vollständig aus, um den
besten Empfang zu erhalten. Wenn eine Stereosendung empfangen wird,
wird "ST" angezeigt.
MW: Dieses Gerät ist mit einer eingebauten Ferritrichtantenne ausgestattet.
Bewegen und drehen Sie das Gerät, um den besten Empfang zu
erhalten.

20
Disks einlegen
1. Drücken Sie die STANDBY-Taste (5, 30), um das Gerät
einzuschalten.
2. Drücken Sie mehrmals die CD/USB/SD-Taste (9, 46), bis "CD"
angezeigt wird, um den CD-Modus auszuwählen.
3. Drücken Sie die ÖFFNEN/SCHLIESSEN-Taste (10, 39), um das CD-
Fach (21) zu öffnen.
4. Legen Sie die CD mit dem Etikett nach oben in das Fach ein.
5. Drücken Sie die ÖFFNEN/SCHLIESSEN-Taste (10, 39), um das CD-
Fach(21)zuschließen.DerCD-PlayerdurchsuchtdieDiskautomatisch.
Es wird die Gesamtzahl der Tracks und die Wiedergabezeit angezeigt.
Wenn die durchsuchte Disk eine MP3- oder WMA-Disk ist, wird die
Gesamtzahl der Tracks und Ordner angezeigt.
Wenn sich keine Disk im Gerät befindet, wird "DISK" angezeigt.
CD-BETRIEB
Normale Wiedergabe
Drücken Sie nach dem Einlegen einer CD die WIEDERGABE/PAUSE-
Taste (14, 47), um die Wiedergabe zu beginnen. Es werden die
Titelnummer und die Wiedergabezeit angezeigt.
PAUSE-Taste
Um die CD-Wiedergabe vorübergehend zu unterbrechen, drücken Sie
die WIEDERGABE/PAUSE-Taste (14, 47). Die Wiedergabe der Disk
wird unterbrochen, und die verstrichene Zeit wird blinkend angezeigt.
Drücken Sie die WIEDERGABE/PAUSE-Taste (14, 47) noch einmal, um
die Wiedergabe fortzusetzen.
Titel überspringen und Suche von Musik in hoher Geschwindigkeit
Drücken Sie während der Wiedergabe die Titel //TUNING oder //TUNING
(20, 35), um zum nächsten oder vorigen Track zu springen. Halten Sie während der Wiedergabe
die Tasten //TUNING oder //TUNING (20, 35) gedrückt, um den aktuellen
Titel vorwärts oder rückwärts zu durchsuchen.
Wenn der gewünschte Teil des Titels gefunden ist, lassen Sie die Taste los, und die Wiedergabe
wird fortgesetzt.
Benutzung der Zifferntasten
Sie können die Zifferntasten 0-9 (49) benutzen, um den wiederzugebenden Track direkt
auszuwählen. Beachten Sie, dass für die Titel 0-9 zuerst eine "0" gedrückt werden muss,
z.B.:
Titelnr. 2 - Drücken Sie zuerst "0", dann "2".
Titelnr. 12 - Drücken Sie zuerst "1", dann "2".
Other manuals for HAV-MCS30
1
Table of contents
Languages:
Other König Electronic Stereo System manuals

König Electronic
König Electronic HAV-MCS50 User manual

König Electronic
König Electronic HAV-MCS30 User manual

König Electronic
König Electronic IPD-SPEAKER40 User manual

König Electronic
König Electronic HAV-SDC20 User manual

König Electronic
König Electronic HAV-MCS42 User manual

König Electronic
König Electronic HAV-PMS10 User manual

König Electronic
König Electronic HAV-MCS35 User manual

König Electronic
König Electronic HAV-MC100 User manual

König Electronic
König Electronic HAV-MCS52 User manual

König Electronic
König Electronic HAV-MCS42 User manual