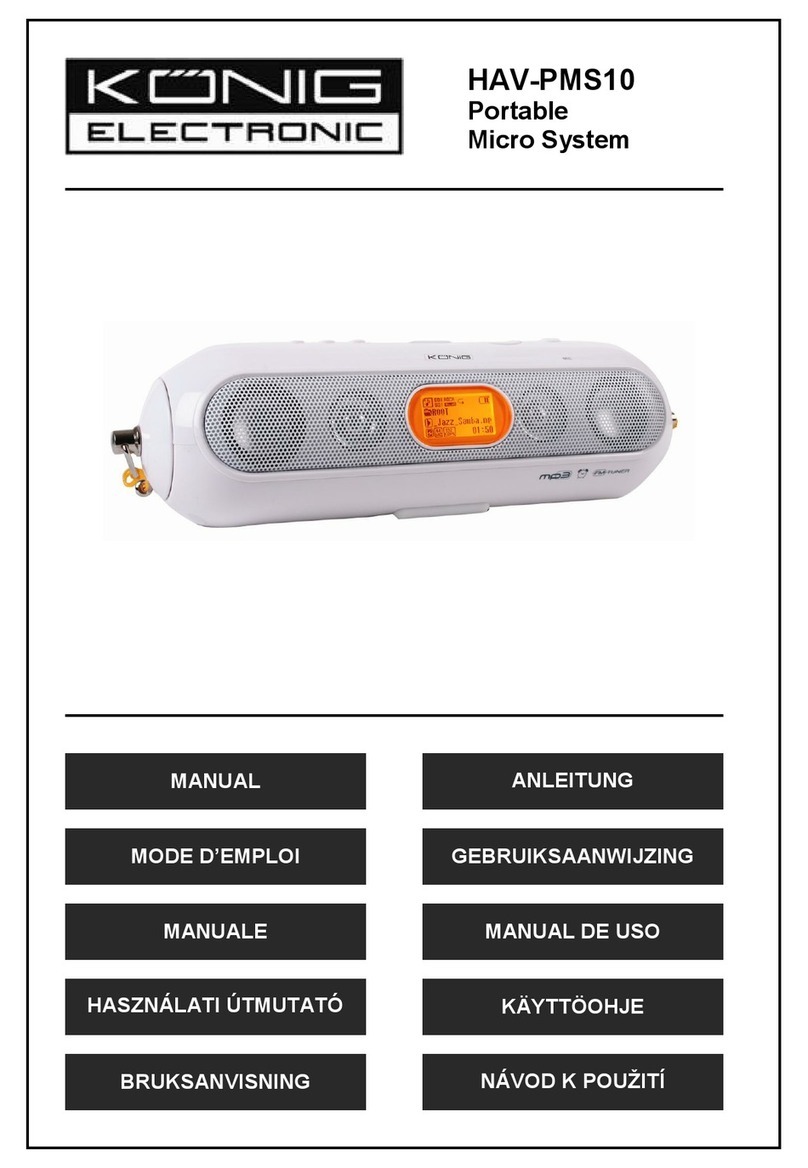
König Electronic HAV-MCS30 User manual

154
ZVUKOVÁ SOUPRAVA
121
AUDIOSETTI
86
EQUIPO DE SONIDO
52
AUDIOSET
18
AUDIO-SET
171
SISTEM AUDIO
138
AUDIO SET
103
AUDIÓ SZETT
69
IMPIANTO AUDIO
35
SYSTÈME AUDIO
AUDIO SET
HAV-MCS30

2
ENGLISH
IMPORTANT SAFETY INFORMATION
CAUTION
CLASS 1 LASER PRODUCT
Use of contents, adjustments to the performance or procedures other than those specified
herein may result in hazardous radiation exposure.
LASER SAFETY
This unit employs a laser. Only qualified service personnel should attempt
repair.
DANGER: INVISIBLE LASER RADIATION WHEN OPEN AND INTERLOCK FAILED OR
DEFECT. AVOID DIRECT EXPOSURE TO BEAM.
CAUTION: HAZARDOUS LASER RADIATION WHEN OPEN AND INTERLOCK
DEFECT.
Safety Information
• Do not expose the device to water or any other liquids. Do not place glasses, vases or
anything else containing liquids on top of the device.
• To turn off the device completely you have to disconnect it from the mains socket. After
unplugging the mains plug the device is completely off, otherwise it remains in standby.
• Make sure the mains plug of the device is never obstructed, so the device can be easily
disconnected from the mains circuit.
WARNING: TO REDUCE THE RISK OF FIRE OR ELECTRIC SHOCK, DO NOT EXPOSE
THIS APPLIANCE TO RAIN OR MOISTURE. DANGEROUS HIGH VOLTAGES ARE
PRESENT INSIDE THE ENCLOSURE. DO NOT OPEN THE CABINET.
REFER FOR ALL SERVICING TO QUALIFIED PERSONNEL

3
Main Unit
1. iPod®Socket
2. REMOTE SENSOR
3. Front Lens
4. MMC/SD CARD SLOT
5. STANDBY Button
6. PROGRAM/CLK ADJ Button
7. TUNER/BAND Button
8. iPod®Button
9. CD/USB/SD Button
10.OPEN/CLOSE Button
11.AUX IN Socket
12.PHONES Socket
13.DISPLAY
14.PLAY/PAUSE/PRESET– Button
15.STOP/PRESET+ Button
16.USB Port
17.PLAY MODE/ST/MO Button
18.VOLUME Buttons
19.EQ Button
20./ / TUNING and
// TUNING Buttons
21.CD tray
22.STANDBY Indicator
23.FM Wire Antenna
24.VIDEO OUT Socket
25.AUDIO OUT Sockets
26.SUBWOOFER Output Socket
27.RIGHT Speaker Terminal
28.LEFT Speaker Terminal
29.AC Power Cord
30.RESET Switch

4
Remote Control
31.Infrared Transmitter
32.STANDBY Button
33.iPod®Button
34.PLAY MODE/ST/MO Button
35.STOP/PS+ Button
36.VOL + Button
37. / TUNING+ Button
38.SLEEP/12/24HR Button
39.ID3 Button
40.TIMER Button
41.PROG/CLK ADJ Button
42.OPEN/CLOSE Button
43.MODE Button
44.FOLDER+ Button
45.MUTE Button
46.AUX Button
47.TUNER/BAND Button
48.CD/SD/USB Button
49./ PS– Button
50. / TUNING – Button
51.VOL – Button
52.Numerical 0 - 9 Buttons
- “2” button with roll up, “8” button with roll down
- “4” button with Repeat, “5” button with ENTER, “6” button with MENU
53.EQ Button
54.FOLDER – Button
SETTING UP AND CONNECTING
Replacing battery of the Remote Control
The remote control battery is already installed at the factory. If the remote control stops
operating, replace the battery with a new one.
1. Squeeze the notched tab A while pulling the battery
door latch B out to take the battery holder out.
2. Insert a “CR2025” 3V lithium battery. Make sure the
polarity (the + and – side of the battery) is correct.
3. Replace the battery holder back in the remote control
BATTERY PRECAUTIONS
Follow these precautions when using a battery in this device.
1. Use only the size and type of battery specified in this manual.
2. Make sure you install the battery according to the polarity indicated in the battery
compartment. Reversed polarity may cause damage to the device.
3. If the device is not going to be used for a long period of time, remove the battery to
prevent damage or injury caused by possible battery leakage.
4. Do not try to recharge the battery, it’s not intended to be recharged and doing so
may cause the battery to rupture or leak.

5
Red
Red
Black
Speaker connection
1. To insert the speaker cable, push down the terminal lever of the
RIGHT speaker terminal (27) and LEFT speaker terminal (28).
2. Please ensure the cables are connected into the speaker terminal
with the correct polarities. Connect the left speaker to the terminal
marked L and the right speaker to the terminal marked R.
Headphone connection
You can use headphones (not included) to listen in privacy. Insert the headphones 3.5mm
plug into the Phones Socket (12). Use corresponding adapters (specialist shops) if you
have different plugs. The speakers will cut off automatically when the headphones are
being used.
VIDEO OUTPUT connection
The video output from certain iPod®s can be output to a TV
using the VIDEO OUT socket (24). The accompanying audio
signal can be output using the AUDIO OUT sockets (25).
A standard AV lead with yellow, red and white coloured plugs
(not supplied) can be used for this purpose. Please note that the
sockets on your TV must be configured to accept input rather
than output signals to enable this feature to work correctly.
AUX connection
1) Connect a 3.5mm stereo jack lead to the AUX IN socket (11)
and the other end to your preferred device.
2) Press the AUX button on the remote control (46) “AUX” will
show in the display.
3) Select the play function on the auxiliary device and the sound
output can then be heard over the audio system.
AC Plug
AC Outlet
Mains connection
1. Unwind the AC power cord (29) completely.
2. Insert the plug into any convenient AC outlet.
3. As soon as the unit has been connected with the mains
voltage, parts of the unit are in operation due to the standby
function. Turn off the unit completely before pulling the mains
plug out of the AC outlet.

6
CLOCK AND TIMER
When used for the first time, or if the mains plug has been removed, the clock display will
flash “AM 12:00” or “0:00”
1. In standby mode, press the SLEEP/12/24HR (38) button to change between the 12hour
or 24hour time format.
2. Hold the PROG/CLK ADJ button (6, 41) for approx 3 seconds. The
hour digits will flash in the display.
3. Press // TUNING or // TUNING Buttons (20,
37, 50) repeatedly to select the correct hour.
4. Press the PROG / CLK ADJ (6, 41) button again, the minutes will
flash in the display, then press // TUNING and /
/ TUNING Buttons (20, 37, 50) repeatedly to select the correct
minute.
5. Press PROG / CLK ADJ (6, 41) again to complete setting the current
time.
TIMER ON and OFF setting (Automatically turn on and off the unit)
1. In standby mode, press the MODE (43) button on the remote control.
“TMR-ON” shows up in the display and a “ ” flashes in the display.
Hold the PROG / CLK ADJ (6, 41) button for approx 3 seconds, and
the hour digits will start flashing.
2. Press the // TUNING or // TUNING Buttons
(20, 37, 50) repeatedly to set the desired hour.
For example “2:00”
3. Press the PROG / CLK ADJ (6, 41) button and the minute digit will
flash.
4. Press the // TUNING or // TUNING Buttons
(20, 37, 50) repeatedly to set the desired minute.
For example “2:08”
5. Press the MODE (43) button again. “TMR-OFF” shows up in the
display and a “ ” will flash in the display.
6. Press the PROG / CLK ADJ (6, 41) button and the hour digits will
flash.
7. Press the // TUNING or // TUNING Buttons
(20, 37, 50) repeatedly to set the desired hour. For example “4:00”.
8. Press the PROG / CLK ADJ (6, 41) button again and the minute’s
digit will flash.
9. Press the // TUNING or // TUNING buttons
repeatedly set to the desired minute. For example “4:08”.
10.Press the MODE (43) button to return to the normal display indicating
the current time.
11.Press the TIMER (40) button until “ ” shows up in the display. The
unit will automatically turn on and off at the set time.
12.Press the TIMER (40) button again (until “ ” disappears) to cancel the timer function.

7
Note:
- Please ensure the correct time is set before setting the timer on/off function.
- If you wish to wake to music from your iPod®ensure that the iPod®is connected.
- If you wish to wake to music from a CD, ensure that a CD is loaded.
- If you wish to wake to radio, ensure that a radio station is tuned.
- If you wish to wake to music from USB or SD/MMC, please ensure that a USB device or
- SD/MMC card is inserted.
SLEEP setting (Automatically turn off)
The unit can be programmed to automatically switch off after a set time, for example:
If you wish to go to sleep while listening. The sleep time can be set at
10, 20, 30, 40, 50, 60, 70, 80 or 90 minutes. Press the SLEEP/12/24HR
(38) button repeatedly until the desired sleep time is shown in the
display. The unit will automatically switch off after the selected sleep
time.
Note: If the CD playing time is shorter than your selected sleep time, the music will stop
at the end of the disc.
BASIC OPERATION
Turn on the unit
Press the STANDBY (5, 32) button to turn on or turn off the unit.
Operating mode selection
Press the TUNER/BAND (7, 47) button, iPod®(8, 33) button, CD/USB/SD (9, 48) button
or AUX (43) button to select one of the different operating modes.
PLAY / PAUSE / PRESET– (14, 49) button:
Press this button to begin playback or pause a CD. In tuner mode, press this button to
skip to a previous preset radio station.
STOP / PRESET+ (15, 35) button:
Press this button to stop the playback of a CD. In tuner mode, press this button to skip to
the next preset radio station.
VOLUME (18, 36, 51) button:
Press repeatedly to adjust the sound level output from 00 (minimum) to 30 (maximum).
MUTE (45) button:
Press this button to mute the sound output from the unit. “MUTE” will show in the display.
To restore the sound output, press the button again
EQ (19, 53) button:
Press this button to select one of the 5 preset sound equalizer settings. These are PASS,
ROCK, JAZZ, POP and CLASSIC.
TUNER OPERATION
Manual operation
1. Press the STANDBY (5, 32) button to turn on the unit
2. Press TUNER/BAND (7, 47) button repeatedly to select MW or FM.
3. Press // TUNING or // TUNING Buttons
(20, 37, 50) to manually tune up or down the current waveband in
0.05 MHz steps.

8
Automatic search operation
1. Press and hold the // TUNING or // TUNING Buttons (20, 37,
50) to automatically search for the next or previous radio station with a strong signal.
Stations with a weak signal can be tuned manually.
2. Press and hold // TUNING or // TUNING Buttons (20, 37, 50)
approx 1 second, to start the station search again.
Note: During the search operation the sound level will be muted automatically.
Preset memory
This unit is able to store 24 FM and 16 MW radio stations in the preset memory.
1. In TUNER mode, select FM or MW waveband.
2. Tune to a radio station either manually or by automatic search.
3. Press the PROG / CLK ADJ (6, 41) button, “MEMORY” shows in
the display, and “- -“will flash, to indicate that a radio station can be
preset.
4. Press the PRESET – (14, 49) or PRESET+ (15, 35) button repeatedly
until the desired memory position number appears in the display.
5. Press the PROG / CLK ADJ (6, 41) button again to save the programmed station.
6. In order to store the remaining stations, repeat steps 2 – 5.
Selecting the tuner preset station memories
Press the PRESET – (14, 49) or PRESET+ (15, 35) buttons to select preset stations that
are stored in the memory.
Note: To access preset stations 1-9, you must press “0” first.
Reception tips
FM: Extend the FM Wire Antenna (23) completely for optimal reception.
If a broadcast is in stereo, “ST” will indicate in the display.
MW: This unit is equipped with a built-in directional ferrite antenna,
move and rotate the unit for best reception.
PLAYING CDS
Loading discs
1. Press the STANDBY (5, 32) button to turn “ON” the unit.
2. Press the CD/USB/SD (9, 48) button repeatedly until “CD” indicates
in the display to select CD mode.
3. Press the OPEN/CLOSE (10, 42) button to open the CD tray (21).
4. Place the CD into the tray with the label side pointing upwards.
5. Press the OPEN/CLOSE (10, 42) button again to close the CD
tray (21). The CD player will automatically scan the disc. The total
number of tracks and the playback time will show in the display. If
the scanned disc is a MP3 or WMA disc, the total number of tracks
and total folder number shows in the display.
If there is no disc in the unit, the display will show “NO DISC”.
Track No. Playbacktime
Folder No. Total playtime
9
Normal Playback
After loading a CD, press the PLAY/PAUSE (14, 49) button to
start playback. The track number and playing time are indicated in
the display.
Pause control
To pause temporarily during CD playback press the PLAY/PAUSE
(14, 49) button. Playback will pause; the total amount of tracks and
total playtime will show in the display. Press the PLAY/PAUSE (14, 49)
button again to resume playback.
Skip track and high-speed music search
During playback, press the // TUNING or // TUNING Buttons (20,
37, 50) to skip to the next or previous track.
During playback, press and hold the // TUNING or // TUNING
Buttons (20, 37, 50) to search forwards or backwards through the current track.
When the desired part of the track is located, release the button and playback will
resume.
Using numerical buttons
You can use the Numerical 0-9 (52) buttons to directly select a track to play.
PLAY MODE CONTROL
1. Repeat the entire track
Select the track to be repeated and begin playback. Press the
PLAY MODE (17, 34) button once. The RPT indicator will show in
the display and the selected track will be repeated continuously.
2. Repeat all
Press the PLAY MODE (17, 34) button twice. RPT ALL will show
in the display and all the tracks on the disc will be repeated
continuously.
3. Intro playback
Press the PLAY MODE (17, 34) button three times to play a brief
intro of each track for 10 seconds. When activated the INTRO
indicator is shown in the display. To cancel INTRO mode, press
the PLAY MODE (17, 34) button twice and normal playback will
resume.
4. Random playback
The random playback feature allows you to play all the tracks on
the current disc in a random order. This function can be selected
when the disc is playing or when in stop mode. Press the PLAY
MODE (17, 34) button four times to start random playback mode.
The RANDOM indicator is shown in the display. If necessary, press the PLAY/PAUSE
(14, 49) button to begin playback.The player will randomly select a track to play from the
disc.
To cancel RANDOM mode, press the PLAY MODE (17, 34) button once and normal
playback will resume.

10
Programmed Playback
It is possible to program a selection of 64 tracks for playback. Individual tracks can be
programmed more than once.
1. After loading a disc, Press the PROG / CLK ADJ (6, 41) button while
in stop mode.
MEMORY and P--01 will show in the display.
2. Press the // TUNING or // TUNING Buttons
(20, 37, 50) repeatedly to select the desired track number.
3. Press PROG / CLK ADJ (6, 41) to confirm the first programmed
track.
P--02 will show in the display and the device will be waiting for the
next programming.
4. Repeat steps 2 and 3 to store further tracks.
5. When programming is complete, press the PLAY/PAUSE (14, 49) button to begin
playback of the programmed tracks.
Clear Program (Resume Normal Playback)
Press the STOP (15, 35) button in the program mode, or open the CD tray (21), or change
to another mode to erase the programmed tracks.
MP3 OR WMA DISC OPERATION
Normal Playback
After loading a MP3 or WMA disc, press the PLAY/PAUSE (14, 49)
button to start playback. The folder number, MP3 or WMA, and current
track number shows in the display.
Pause control
To pause temporarily during CD playback press the PLAY/PAUSE
(14, 49) button the disc playback will pause and the elapsed track time
will flash in the display. Press the PLAY/PAUSE (14, 49) button
again to resume playback.
Skip track and high-speed music search
The procedure for skipping and searching through tracks is the same as previously
described in the CD operation section of this manual.
Using the numerical buttons
You can use the numerical 0-9 buttons (52) to directly select a track to play.
Input your desired file (track) number directly and then press PLAY/PAUSE/PRESET–
(14, 49) button, the file and track will be played, and the file and track number indicate on
the display by turns.
Skip Folder
In stop mode or during playback, press FOLDER– (54) or FOLDER+ (44) on the remote
control to skip to next or previous folder. Playback will begin at the first track in the
selected folder.

11
ID3 Function
During MP3 disc playback, press the ID3 (39) button to display any
ID3 tagging information that may be encoded onto the disc.
Information such as album, title and artist will scroll across the display
when this function is selected.
PLAY MODE CONTROL
1. Repeat the entire track
Select the track to be repeated and begin playback. Press the PLAY
MODE (17, 34) button once. The RPT indicator will flash in the display
and the selected track will be repeated continuously.
2. One Folder Repeat
Select the folder to be repeated and begin playback. Press the PLAY
MODE (17, 34) button twice. The RPT and ALBUM indicator will show
in the display and the selected folder will be repeated continuously.
3. Repeat all
Press the PLAY MODE (17, 34) button three times. The RPT ALL
indicator alights in the display and all the tracks of the disc will be
repeated continuously.
4. Intro playback
Press the PLAY MODE (17, 34) button four times to play a brief intro
of each track for 10 seconds, the INTRO indicator is shown in the
display.
5. Random playback
The random playback feature allows you to play all the tracks of the
current disc in a random order. You can select random playback while
the discs are playing or when playback is stopped. Press the PLAY
MODE (17, 34) button five times to start random playback mode, The
RDM indicator is shown in the display. If necessary, press the PLAY/PAUSE (14, 49)
button to begin playback. The player will randomly select a track to play from the disc.
Programmed Playback
It is possible to program a selection of up to 64 files for playback.
Individual tracks can be programmed more than once.
1. In stop mode, after a CD containing MP3 or WMA tracks is loaded,
Press the PROG / CLK ADJ (6, 41) button. In stop mode, MEMORY
and P--01 will show in the display.
2. Press the FOLDER– (54) or FOLDER+ (44) repeatedly to select the
desired folder number.
3. Press the pressing // TUNING or // TUNING
(20, 37, 50) buttons repeatedly to select the desired file number in
the selected folder.
4. Press the PROG / CLK ADJ (6, 41) button to confirm the file in the first program
location. P--02 will show in the display and the device will be ready for the next file to be
programmed.

12
5. In order to store the remaining program repeat above steps 2~ 3 until the memory is
full.
6. When programming is complete, press the PLAY/PAUSE (14, 49) button to begin
playback of the selected folders/files.
Clear Program (Resume Normal Playback)
Press the STOP (15, 35) button in the program mode, open the CD tray (21), or change
to another mode to erase the programmed tracks.
iPod®OPERATION
This unit is equipped with a dock system to allow you to connect your iPod®and enjoy
the music on it via the speakers. The dock system is able to fit most types of currently
available iPods®, by using one of the 5 different sized dock adaptors supplied. Please
note that as new iPod®models become available, new dock adaptors may be required.
This unit can also charge the iPod®battery when connected via the dock.
To fit a dock adapter
Select the appropriate dock adaptor for your iPod®. Make sure you
use the correct one, as this will ensure that the iPod®is held securely
in place.
1. Gently press the iPod®dock adapter into the dock at the top of the
unit.
2. Carefully place your iPod®into the dock. (The iPod®can not be in a
case or “Skin”)
To remove/replace a dock adapter
First remove your iPod®, and then grip the dock adapter and pull gently upwards.
Operating iPod®with the main unit
1. Press the iPod®buttons. The display indicates iPod®.
2. Select your desired music, photos or videos, and play the connected
iPod®as usual.
3. You can select the next or previous track by pressing // TUNING or /
/ TUNING repeatedly. Press PLAY/PAUSE (14, 49) to play or pause.
4. The numerical buttons 2,4,5,6 and 8 on the remote control can be used to operate the
menu and other functions of the iPod®. Press MENU/6 to show the menu screen of the
iPod®, then use /2 or /8 to highlight the item you want to operate, press ENTER/5
to confirm. Press /4 once to repeat one track, press twice to repeat all. (Available in
iPod®play only)
5. Press VOLUME (18, 36, 51) to adjust to the desired sound level.
Note:
- If want to watch photos and videos from the iPod®, please connect the VIDEO and
AUDIO sockets on the rear of the unit as described in the “Setting up and Connecting”
section of this user guide.
- In iPod®mode, you also can select the next or previous tracks by pressing FOLDER–
(54) or FOLDER+ (44) on the remote control.

13
Charging your iPod®
Please make sure you are using the correct dock adapter for your iPod®and that it is
properly connected to the iPod®dock on top of the unit. Failure to do so may cause
damage to your iPod®.
While your iPod®is docked in the system, it recharges until fully charged. Note that other
non-docking types of iPod®will NOT be charged.
iPod®Adapter Information
This system includes 5 different adapters designed to allow you to securely connect any
“dock able” iPod®model to the docking station. Refer to the chart below to select the
proper adapter for your particular iPod®model and insert that adapter into the docking
station before connecting your iPod®.
• No adapters are included for the 5G (fifth generation) 30GB and 60GB iPod®s with
video capability. Please use the adapters that were included with these iPod®s at time
of purchase. They will fit properly into the docking station of this system.
The package includes one flat adapter with no opening at all. This serves, as a dust
cover that can be inserted in the docking station if no iPod®will be connected to the
system for an extended period of time.
iPod®Version
Adapters
iPod
®
Capacities
Docking Station Dust Cover. Install this cover in the Docking Station if no iPod will
be docked for an extended period of time
4G iPod iPod photo
(20 GB) (20/30 GB)
3G iPod
(10/15 GB)
3G iPod 4G iPod
(30/40 GB) (40 GB)
iPod photo
(40/60 GB)
iPod mini
iPod nano
Dust Cover

14
PLAYING MP3/WMA MUSIC FILES FROM A USB DEVICE
MP3 or WMA music files can be played via a suitable USB device. These USB devices
can be connected via the USB port on the audio system.
1. Press the CD/USB/SD (9, 48) button to select USB mode. The
display will show USB.
2. Connect the USB/SD device to the USB port on the front panel
of the unit. After a few seconds, the unit detects the USB device
automatically and starts to play the first MP3 or WMA music file.
3. Press FOLDER- (54) or FOLDER+ (44) repeatedly to select the
desired folder number.
4. Press the // TUNING or // TUNING buttons repeatedly to select
the desired file number in the selected folder.
Note: Before removing an USB device from the unit, make sure that the current file is
stopped. Do not remove the USB device whilst music files are playing.
PLAYING MP3/WMA MUSIC FILES FROM A SD/MMC CARD
Music files in MP3 or WMA format can be played by connecting a suitable SD/MMC card
containing such files into the card slot on the front of the unit.
1. Press the CD/USB/SD (9, 48) button repeatedly to select SD/MMC
mode. The display will show “CARD”.
2. Insert the SD or MMC card into the SD slot on the front panel of
the unit. After a few seconds, the unit detects the SD or MMC card
automatically and starts to play the first MP3 or WMA music file.
3. Press the FOLDER- (54) or FOLDER+ (44) button repeatedly on the
remote control to select the desired folder number.
4. Press the // TUNING or // TUNING buttons repeatedly to select
the desired file number in the selected folder.
Note: Before removing a SD/MMC card from the unit, make sure that the current file is
stopped. Do not remove the SD/MMC card whilst music files are playing.
CARE AND MAINTENANCE
CLEANING THE UNIT
• To prevent fire or shock hazard, disconnect your unit from the AC power source when
cleaning.
• If the cabinet becomes dusty, wipe it with a soft dry dust cloth. Do not use any wax or
polish spray on the cabinet.
• If the cabinet becomes dirty or smudged with fingerprints it may be cleaned with a soft
cloth slightly dampened with a mild soap and water solution. Never use abrasive cloths
or polishes, as this will mar the finish of your unit.
• This product is not intended for commercial use
CAUTION: Never allow any water or other liquids to get inside the unit while cleaning.

15
TROUBLESHOOTING GUIDE
RESET THE UNIT
• If the unit exhibits abnormal operation, or fails to respond to button
presses, use a pointed non-metallic object such as a pencil tip to
press the RESET (30) button located on the bottom of the unit (see
picture).
• Disconnect the AC power from the wall socket and wait a few
seconds for the built-in microcomputer to reset.
SPECIFICATIONS
GENERAL
Power source AC 220V- 240V ~50Hz
Power Consumption 50 Watts
Dimension Main Unit: 149(W) x 214(H) x 243(D) mm
(without iPod®dock adaptor)
Speaker Box: 145(W) x 214(H) x 167(D) mm
TUNER SECTION
Frequency range FM: 87.5 – 108 MHz
MW: 522 – 1620 kHz
AUDIO SECTION
Power Output 10 Watts RMS
Speaker impedance 4 ohms
Headphone Impedance 8 – 32 ohms
AUX input sensitivity 300 mV

16
Declaration of conformity
We,
Nedis B.V.
De Tweeling 28
5215MC ’s-Hertogenbosch
The Netherlands
Tel.: 0031 73 599 1055
Email: info@nedis.com
Declare that product:
Name: KÖNIG
Model: HAV-MCS30
Description: Audio set
Is in conformity with the following standards
EMC: EN55013: 2001+A1+A2
EN55020: 2007
EN61000-3-2: 2006
EN61000-3-3: 1995+A1+A2
LVD: EN60065: 2002+A1: 2006
Following the provisions of the 2006/95/EC and 2004/108/EC directive.
‘s-Hertogenbosch, 2008, June 23
Mrs. J. Gilad
Purchase Director

17
Safety precautions:
RISK OF ELECTRIC SHOCK
DO NOT OPEN
CAUTION To reduce risk of electric shock, this product should
ONLY be opened by an authorized technician when
service is required. Disconnect the product from mains
and other equipment if a problem should occur. Do not expose the product to water or
moisture.
Maintenance:
Clean only with a dry cloth. Do not use cleaning solvents or abrasives.
Warranty:
No guarantee or liability can be accepted for any changes and modifications of the
product or damage caused due to incorrect use of this product.
General:
Designs and specifications are subject to change without notice.
All logos brands and product names are trademarks or registered trademarks of their
respective holders and are hereby recognized as such.
Attention:
This product is marked with this symbol. It means that used electrical and
electronic products should not be mixed with general household waste. There
is a separate collections system for these products.
Copyright ©

18
DEUTSCH
WICHTIGE INFORMATION ZUR SICHERHEIT
VORSICHT
LASERPRODUKT DER KLASSE 1
Wenn der Inhalt, die Leistungseinstellungen oder Verfahren anders als hier angegeben
benutzt werden oder erfolgen, können Sie einer gefährlichen Strahlung ausgesetzt
werden.
LASERSICHERHEIT
Dieses Gerät benutzt einen Laser. Nur qualifizierte Servicetechniker dürfen eine
Reparatur ausführen.
ACHTUNG: SICHTBARE UND UNSICHTBARE LASERSTRAHLUNG BEI OFFENEM
GERÄT UND DEFEKT ODER UMGEHEN DER VERRIEGELUNG. SETZEN SIE SICH
DEM STRAHL NICHT DIREKT AUS.
Sicherheitsinformationen
• Lassen Sie kein Wasser oder andere Flüssigkeiten an das Gerät herankommen. Stellen
Sie keine Gläser, Vasen oder anderen Gefäße, die Flüssigkeiten enthalten, auf das
Gerät.
• Um das Gerät völlig auszuschalten, müssen Sie es von der Netzsteckdose trennen.
Nach dem Abtrennen von der Netzsteckdose ist das Gerät vollkommen ausgeschaltet,
sonst bleibt es im Standby-Modus.
• Achten Sie darauf, dass der Netzstecker des Geräts niemals versperrt ist, damit das
Gerät leicht vom Netz getrennt werden kann.
ACHTUNG: UM EINEN BRAND ODER EINEN STROMSCHLAG ZU VERHINDERN,
SETZEN SIE DIESES GERÄT AUF KEINEN FALL REGEN ODER HOHER
FEUCHTIGKEIT AUS. IM INNEREN DES GEHÄUSES GIBT ES GEFÄHRLICHE HOHE
SPANNUNGEN. ÖFFNEN SIE DAS GEHÄUSE NICHT.
WENDEN SIE SICH WEGEN SÄMTLICHER REPARATUREN AN QUALIFIZIERTE
TECHNIKER.

19
Hauptgerät
1. iPod®-Buchse
2. FERNBEDIENUNGSSENSOR
3. Vordere Linse
4. STECKPLATZ FÜR MMC/SD CARD
5. STANDBY-Taste
6. PROGRAM/CLK ADJ-Taste
7. TUNER/BAND-Taste
8. iPod®-Taste
9. CD/USB/SD-Taste
10.OPEN/CLOSE-Taste
11.AUX IN-Buchse
12.PHONES-Buchse
13.DISPLAY
14.PLAY/PAUSE/PRESET– Taste
15.STOP/PRESET+ Taste
16.USB-Anschluss
17.PLAY MODE/ST/MO -Taste
18.VOLUME -Tasten
19.EQ-Taste
20./ / TUNING und
// TUNING -Tasten
21.CD-Fach
22.STANDBY-Anzeiger
23.FM-Antennendraht
24.VIDEO OUT-Buchse
25.AUDIO OUT-Buchsen
26.SUBWOOFER-Ausgangsbuchse
27.Anschluss RECHTER Lautsprecher
28.Anschluss LINKER Lautsprecher
29.Netzkabel
30.RESET-Taste

20
Fernbedienung
31.Infrarotsender
32.STANDBY-Taste
33.iPod®-Taste
34.PLAY MODE/ST/MO-Taste
35.STOP/PS+ Taste
36.VOL+ Taste
37. / TUNING+ Taste
38.SLEEP/12/24H-Taste
39.ID3-Taste
40.TIMER-Taste
41.PROG/CLK ADJ-Taste
42.OPEN/CLOSE-Taste
43.MODE-Taste
44.FOLDER+ Taste
45.MUTE-Taste
46.AUX-Taste
47.TUNER/BAND-Taste
48.CD/SD/USB-Taste
49./ PS- Taste
50. / TUNING- Taste
51.VOL– Taste
52.Zifferntasten 0-9
- Taste 2 mit für Hochrollen, Taste 8 mit für Herunterrollen
- Taste 4 mit Repeat (Wiederholen), Taste 5 mit ENTER, Taste 6 mit MENU
53.EQ-Taste
54.FOLDER- Taste
EINRICHTUNG UND ANSCHLUSS
Batterie für Fernbedienung wechseln
Die Fernbedienungsbatterie ist schon im Werk eingelegt worden. Wenn die Fernbedienung
nicht mehr funktioniert, ersetzen Sie die Batterie durch eine neue.
1. Drücken Sie die gekerbte Lasche A, während Sie
die Batterietürlasche B herausziehen, um den
Batteriehalter herauszunehmen.
2. Legen Sie eine 3 V-Lithium-Batterie vom Typ “CR2025”
ein. Achten Sie auf richtige Polarität (Pole + und - der
Batterie).
3. Bringen Sie den Batteriehalter wieder in der
Fernbedienung an.
Other manuals for HAV-MCS30
1
Table of contents
Languages:
Other König Electronic Stereo System manuals

König Electronic
König Electronic IPD-SPEAKER40 User manual

König Electronic
König Electronic HAV-MCS42 User manual

König Electronic
König Electronic HAV-MCS50 User manual

König Electronic
König Electronic HAV-MC100 User manual

König Electronic
König Electronic HAV-MCS35 User manual

König Electronic
König Electronic HAV-MCS30 User manual

König Electronic
König Electronic HAV-MCS42 User manual

König Electronic
König Electronic HAV-PMS10 User manual

König Electronic
König Electronic HAV-MCS52 User manual

König Electronic
König Electronic HAV-SDC20 User manual