König Electronic HAV-MCS42 User manual

214
AUDIO SYSTÉM
168
AUDIOJÄRJESTELMÄ
120
SISTEMA DE AUDIO
72
AUDIOSYSTEEM
24
AUDIOSYSTEM
237
SISTEM AUDIO
191
LJUDSYSTEM
144
AUDIORENDSZER
96
IMPIANTO AUDIO
48
SYSTÈME AUDIO
AUDIO SYSTEM
HAV-MCS42

2
ENGLISH
INSTRUCTION MANUAL
PLEASE READ THIS INSTRUCTION MANUAL BEFORE CONNECTING OR
OPERATING THE APPLIANCE. SAVE IT FOR FUTURE REFERENCE.
Table of Contents Page No
CAUTION.................................................................................................................... 3
SAFETY INFORMATION............................................................................................ 4
LOCATION OF CONTROLS AND FUNCTION........................................................... 5
SETTING UP AND CONNECTING............................................................................. 7
BASIC OPERATION ................................................................................................. 10
SETTING THE CLOCK AND TIMER.........................................................................11
DIGITAL TUNER OPERATION ................................................................................. 12
IMPORTANT NOTES ON PLAYING CD................................................................... 13
COMPACT DISC PLAYER OPERATION .................................................................. 14
MP3 or WMA DISC OPERATION ............................................................................. 15
OPERATION AN iPod WITH THE MAIN UNIT ......................................................... 17
PLAYING MP3/WMA MUSIC FILES FROM A USB DEVICE ................................... 19
CARE AND MAINTENANCE .................................................................................... 19
TROUBLESHOOTING GUIDE.................................................................................. 20
SPECIFICATIONS .................................................................................................... 21

3
CAUTION
IMPORTANT SAFETY INFORMATION – PLEASE READ IT CAREFULLY
WARNING: DANGEROUS HIGH VOLTAGES ARE PRESENT INSIDE THIS UNIT. DO
NOT OPEN THE CASING.
RISK OF ELECTRIC SHOCK
DO NOT OPEN
CAUTION
CAUTION: TO REDUCE THE RISK OF ELECTRIC
SHOCK, DO NOT REMOVE COVER. NO
USER-SERVICEABLE PARTS INSIDE.
REFER SERVICING TO QUALIFIED
SERVICE PERSONNEL
This symbol indicates that dangerous
voltage constituting a risk of electric
shock is present within this unit.
This symbol indicates that there are
important operating and maintenance
instructions in the literature
accompanying this unit.
WARNING
TO PREVENT FIRE OR ELECTRIC SHOCK, DO NOT EXPOSE THIS APPLIANCE
TO RAIN OR MOISTURE.
THIS APPLIANCE IS NOT A TOY.
DRIPPING WARNING
KEEP THIS UNIT AWAY FROM DRIPPING OR SPLASHING WATER. ENSURE THAT
NO OBJECTS FILLED WITH LIQUIDS, SUCH AS VASES, ARE PLACED ON OR
NEAR THE UNIT.
VENTILATION WARNING
THIS UNIT REQUIRES VENTILATION IN ORDER TO OPERATE SAFELY. NEVER
COVER OR BLOCK THE VENTS AND OPENINGS ON THE UNIT.
CAUTION
CLASS 1 LASER PRODUCT
Operation the unit in a way other than
specified herein, or making adjustments
to the unit may result in hazardous
radiation exposure
LASER SAFETY
This unit employs a laser. Only qualified
service personnel should attempt repair.
WARNING: RISK OF
INVISIBLE LASER
RADIATION WHEN CD LID
IS OPEN OR INTERLOCKS
FAIL. AVOID DIRECT
EXPOSURE TO THE BEAM

4
SAFETY INFORMATION
• Please read this manual carefully before use.
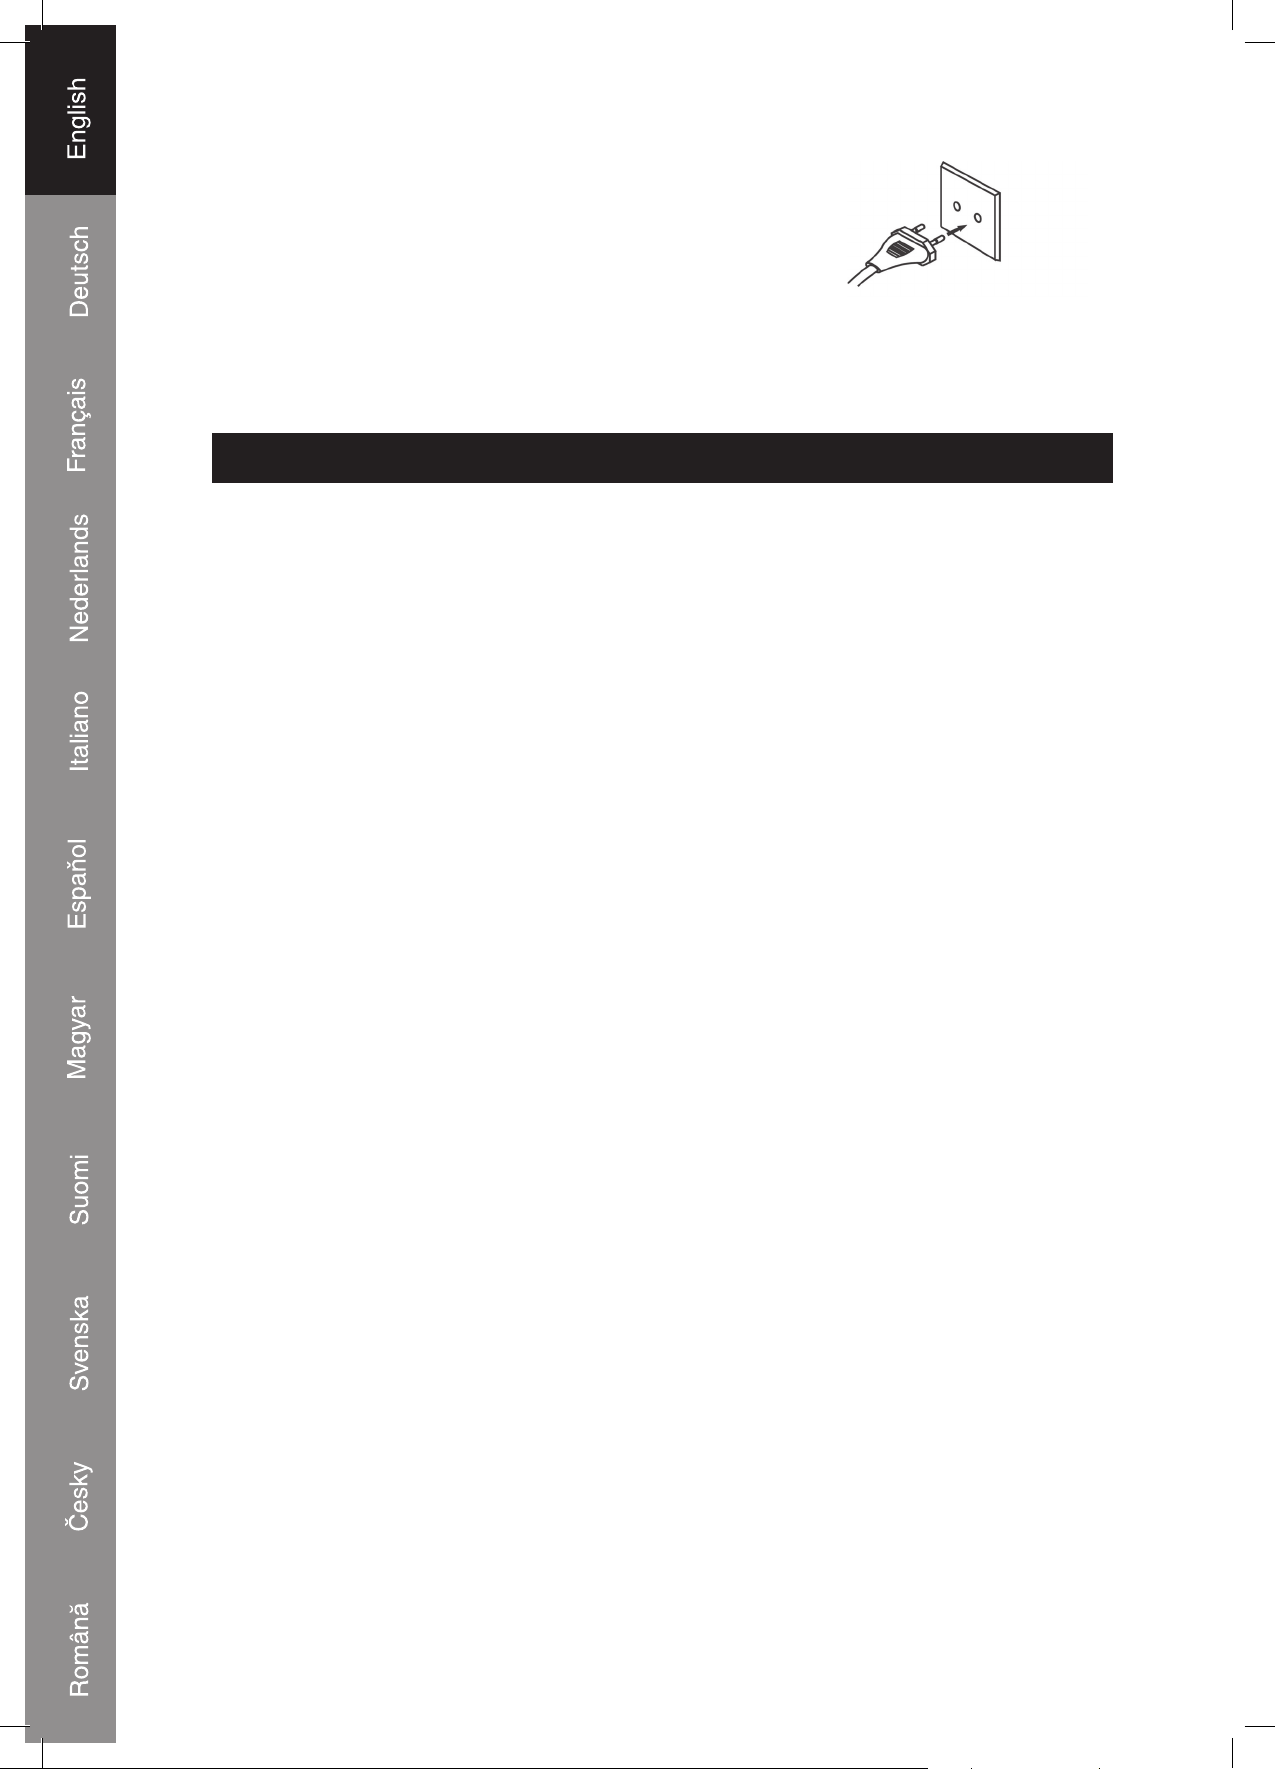
• Ensure the apparatus is plugged into AC 230~240V 50 Hz outlet. The use of incorrect
outlets could cause the unit to malfunction or fire hazard. Turn the unit off before
unplugging it from power source.
• Do consult your dealer if you are ever in doubt about the installation, operation or safety
of your equipment. Do not continue to operate the equipment if you are ever in doubt
whether it works normally, or if it is damaged in any way. Switch it off, withdraw the
mains plug and consult your dealer.
• Do not attempt to dismantle or repair this unit yourself. This unit should be repaired by
qualified service technician only.
• Do not remove any fixed covers as this may expose you to dangerous voltages.
• The apparatus shall not be exposed to dripping or splashing and no objects filled with
liquids, such as vases, shall be placed on apparatus.
• To disconnect the power input completely, the mains plug of apparatus shall be
disconnected from the mains.
• The main plug of apparatus should not be obstructed OR should be easily accessed
during intended use.
• The marking information is located at the back of apparatus.
• Do not expose this unit to direct sunlight or heat radiating sources.
• Do not expose the product to temperatures above 35°C. Keep it in moderate climates.
• Keep the power cord and product away from heated surfaces.
• Place the product where there is good air circulation. Ventilation should not be impeded
by covering the ventilation openings.
• Keep the player clean and never store it next to a heat source or in dirty, humid or wet
places. Keep it out of direct sunlight.
• Press the player’s buttons gently. Pressing them or the screen too hard can damage the
player.
• Do not use the player in an extremely dry environment, as this can lead to static discharge
which can damage the player.
• Do not obstruct the ventilation vents on the equipment, for example with newspaper,
dusters, curtains or other soft furnishings.
• No naked flame sources, such as candles, should be placed on the product.
• Do not listen to music at very high volumes using the earphones as this can permanently
damage your hearing. Excessive sound pressure from earphones and headphones can
cause hearing loss.
• Earphone cables may be hazardous to young children. Store the product carefully when
it is not in use.
• Keep “Earbud” earphones out of reach of small children. “Earbud” earphones may be
swallowed if placed in mouth.
• Ensure that your earphones are inserted into the player before it is switched on. Inserting
them afterwards can potentially damage the earphones and the player.
• Attention should be drawn to the environmental aspects of battery disposal.
• Never let anyone, especially children, push anything into holes, slots or any other
opening, as this could result in a fetal electric shock.
• Care is required for the use of this apparatus in tropical and/or moderate climates.
• Do not allow children to operate the unit without adult’s supervision.
• Do not subject the product to harsh impacts. Do not drop the appliance. This may result
in damage to the product and loss of data.
MOST IMPORTANTLY:
NEVER let anyone, especially children, push anything into holes, slots or any other opening
in the unit’s casing as this could result in a fatal electric shock.

5
LOCATION OF CONTROLS AND FUNCTION
Main unit
1. iPod Dock
2. CD Door
3. ST-MO / CD-MODE Button
4. TIMER/SLEEP Button
5. STANDBY/ ON Button/ STANDBY
indicator
6. STOP Button
7. TUNER Button
8. CD/USB Button
9. iPod Button
10. M-UP/ FOLDER UP Button
(MEMORY-UP/ FOLDER UP +)
11. VOLUME (+/-) Button
12. PLAY/PAUSE/BAND Button
13. Display
14. Remote Sensor
15. MEM./CLK.ADJ/ PROG. Button
(MEMORY/ CLOCK / PROGRAM)
16. /or /Buttons
(TUNE/ SKIP PREV./ NEXT)
17. M-DN/ FOLDER-DN Button
(MEMORY DOWN/ FOLDER
DOWN - )
18. CD DOOR OPEN/ CLOSE Button
19. USB Port
20. EQ Button (ROCK, JAZZ, CLASSIC,
POP, PLAT)
21. PHONES Socket (3.5 mm)
22. AUX IN Socket
23. Left/ Right audio out jack
24. FM Antenna
25. VIDEO OUT jack
26. SUBWOOFER out jack
27. SPEAKER Connectors
28. RESET Switch
29. AC Power Cord

6
Remote control
30. STANDBY/ ON Button
31. iPod®mode button
32. PLAY MODE/ ST-MO Button
33. STOP Button
34. VOLUME+ Button
35. NEXT / TUNING +Button
36. SLEEP/ TIMER Button
37. M-UP/ FOLDER+ Button
38. M-DN/ FOLDER- Button
39. PROG/ CLK ADJ Button
40. CD DOOR OPEN/ CLOSE Button
41. ID3 Button
42. MUTE Button
43. AUX Button
44. TUNER Button
45. CD /USB Button
46. PLAY/ PAUSE/ BAND Button
47. PREVIOUS / TUNING - Button
48. VOLUME- Button
49. Numeric Keys (0-9)
50. EQ Button

7
SETTING UP AND CONNECTING
1. Remove all the accessories from the display carton carefully. Verify that you have
all the necessary accessories before you dispose of the carton.
2. Remove all the packing materials from the individual components. Do not remove
any labels or stickers on the back panels of the main unit.
Standard accessories
Please check if you have the following accessories:
• Instruction manual x 1
• Main unit x 1
• Remote control x 1
• Main speaker x 2
Replacing battery for the Remote Control
The remote control battery is already installed at the
factory. If the remote control stops operating, replace the
battery with a new one.
1. Squeeze the notched tab A while pulling the battery
door latch B out to take the battery holder out.
2. Insert a “CR2025” 3V lithium battery. Make sure the
polarity (the + and – side of the battery) is correct.
3. Replace the battery holder on the remote control.
BATTERY PRECAUTIONS
Follow these precautions when using battery in this device.
1. Use only the size and type of battery specified.
2. Be sure to follow the correct polarity when installing the battery as indicated in
the battery compartment. Reversed polarity may cause damage to the device.
3. If the device is not to be used for a long period of time, remove the battery to
prevent damage or injury from possible battery leakage.
4. Do not try to recharge battery, it is not intended to be recharged and doing so
may cause the battery to rupture or leak.
5. Battery shall not be exposed to excessive heat such as direct sunlight, fire or
the like.
CAUTION: Danger of explosion if battery is incorrectly replaced. Replace only
with same or equivalent type.

8
Rear connection
FM antenna
The rating labels are located at the rear of the system.
Speaker connection
1. To insert the speaker cable, push down the terminal lever of
the RIGHT Speaker Terminal and LEFT Speaker Terminal.
2. Please ensure the cables are connected into the speaker
terminals with the correct polarities. Connect the left
speaker to the terminals L and the right speaker to the
terminals R. Plug red wire to “+” and black wire to “-”.
(Notes: Do not connect more than one speaker to any of part
of -/+ speaker terminals. Do not connect speakers with an
impedance lower than the speakers supplied, please refer to
the specifications section of the manual.)
BLACK
RED RED
Headphones connection
You can use headphones (not included) to listen in privacy. Insert the headphones
3.5mm plug into Phones Socket. Use corresponding adapters if you have different
plugs. The speakers will cut off automatically when the headphones are being used.
WARNING:
1. Excessive sound pressure from earphones and headphones can cause hearing
loss.
2. Turn the volume down before listening to headphones, then once you begin
listening, adjust volume up to your desired sound level. This prevents the
headphones suddenly activating at a high level.

9
AUX connection
1. Connect a 3.5mm stereo jack lead (not included) to
the AUX Socket and the other end to your device
such as MP3 player.
2. Press the STANDBY button to turn on the unit.
3. Press AUX button on the remote hand set to AUX
mode.
4. Play your home equipment.
VIDEO OUTPUT connection
When an iPod®is plugged into the iPod® dock of the unit, videos can be viewed on
another display screen by connecting the Video out jack to the rear of the unit. (Audio/
Video cable is not supplied) The accompanying audio signal can be outputted using
the AUDIO OUT sockets. Please refer to the figure on the right.
A standard Audio/Video cable with yellow, red and white plugs (not supplied) can be
used for this purpose.
Please note that the sockets on your TV must be configured to accept input rather
than output signals to enable this feature to work correctly.
Note: Please make sure the TV out is set to ON in the iPod®video setting menu,
otherwise, the video signal will not be able to shown on the display. (For details, please
check the iPod®video instruction manual.)
TV
Video In Audio In
Yellow Red White
Subwoofer connection
Connect one end of an RCA signal wire (not included) to the SUBWOOFER output
socket An external Subwoofer speaker can be connected to the socket marker
“Subwoofer” on the rear of the main unit.
Connecting the mains cord
This system was designed to operate with AC 230~240V ~ 50 Hz power supply.
Connecting the unit to a power supply with different voltages could damage the unit
and also void your warranty. If the AC plug supplied does not fit into your outlet you
should get a qualified electrician to change the outlet.

10
1. Unwind the AC Power Cord to its full length.
2. Insert the plug into any convenient AC outlet.
3. Once the unit is connected to the main supply, the unit
will enter standby mode. The standby indicator will light
up. To turn the unit off completely, you must remove
the main plug from the AC outlet.
4. Please disconnect the mains plug from the AC outlet if the device is not going to
be used for a long period of time.
AC Plug
AC Outlet
BASIC OPERATION
Turn the unit on/ off
Press STANDBY/ ON button on the unit or remote control to turn the unit “ON” or
“OFF”. The system will switch to the last selected source. When the unit is in standby
mode, the clock will be shown in the display.
TUNER button Press the tuner button to select TUNER mode.
CD/USB button Press the CD/USB button to select to CD/USB mode.
iPod button Press the iPod button to select to iPod mode.
AUX button (Remote only) Press the AUX mode button to select AUX mode.
BAND/ button Press the BAND/ button to listen broadcasting
with selected band and frequency in tuner mode.
Press this button to play and pause compact disc in
CD mode.
VOLUME +/- button Press volume +/- button to increase or decrease the
volume level. Display shows the volume level – “VOL”
with a number from MIN.0 (muted) to 39 MAX.
MUTE button (Remote only) Press the mute button on the remote control to
interrupt sound reproduction instantly. Playback
will continue without sound and the display shows
“-MUTE-”. To activate sound reproduction, you can:
press the mute button again to resume; or adjust the
volume controls; or change source.
EQ button Press the EQ button repeatedly to select your favorite
sound effect. The selected music mode appears in
the display for approximately 2 seconds and then you
will be back to the latest status: FLAT, ROCK, JAZZ,
CLASSIC and POP music mode.
ST-MO/ CD-MODE Press the ST-MO/ CD-MODE to select repeat function
in CD mode. Press the ST-MO/ CD-MODE button in
tuner mode to switch in between stereo and mono
reception.

11
SETTING THE CLOCK AND TIMER
After the unit is plugged into a mains supply, the display will show “0:00”. The unit
should be in standby mode to set the current time.
Setting the digital clock at standby mode
1. Press the MEM./ CLK.ADJ button 24H or 12H
indicates and blinks on the display.
2. Press the PREVIOUS /or NEXT /
button repeatedly to change 12H or 24H hour format.
3. Press the MEM./ CLK.ADJ button again; the hour
digits on the display will blink.
4. Press the PREVIOUS /or NEXT /
button repeatedly until correct hour is selected.
5. Press the MEM./ CLK.ADJ button again. The minute
digits on the display will blink.
6. Press /or /button repeatedly until
correct minute is selected.
7. Press the MEM./ CLK.ADJ button again to confirm the currently time and go
back to standby mode.
Setting the Timer at standby mode
The system can be used as an alarm clock. If the unit is kept on standby mode, it will
be automatically turn on when setting time is reached.
Don’t forget to place disc into the CD compartment or iPod to the iPod socket if your
selected music source is CD or iPod at step 5, 6.
To deactivate the timer function, press TIMER/ SLEEP button until disappears on
the display.
Whereby the unit is switched on at a set time. The clock time needs to be set first
before the timer can be used. During setting, if no button is pressed within a fews
seconds, the system will exit time setting mode automatically.
1. Press the TIMER/ SLEEP button on the unit or remote control, the hour digits will
blink.
2. Press the /or /button repeatedly until correct hour is selected.
3. Press the TIMER/ SLEEP button, the minute digits will blink.
4. Press the PREVIOUS /or NEXT /button repeatedly until correct
minute selected.
5. Press the TIMER/ SLEEP button, USB, CD, TUNER or iPod blinks in the
display.
6. Press the PREVIOUS /or NEXT /button repeatedly to select
desired music source (CD/USB, Tuner or iPod).
7. Press the TIMER/ SLEEP button, the volume level
number will blink.
8. Press the PREVIOUS /or NEXT /
button repeatedly to adjust the sound level.
9. Press TIMER/ SLEEP button to confirm the timer setting. The timer icon
indicates on the display.

12
Sleep function
The sleep time enables the system to switch off by itself
after the set period of time. In power on status, press
TIMER/ SLEEP button to go to sleep setting mode. Press
TIMER/ SLEEP button repeatedly to select the desired
sleep time of 120, 90, 60, 30, 15, 0 minutes. The icon “SLEEP” will be shown on the
display when the sleep time is selected. To deactivate the sleep function, set the time
to “0”. To cancel sleep function, press either power button or sleep button once or
more until sleep indicator disappears from the display.
Note: If the playing time is shorter than the selected sleep time while CD/USB or iPod
is playing, the music will stop at the end of the disc.
DIGITAL TUNER OPERATION
Manual tuning operation
1. Press the STANDBY button to turn the unit “ON”.
2. Press the TUNER button to select TUNER mode.
3. Press the BAND button repeatedly to select your desired waveband MW or FM.
The desired band will show on the display.
4. Press PREVIOUS /or NEXT /button repeatedly to select a
desired station.
Automatic tuning
1. Press and hold the PREVIOUS /or NEXT /button for around
2 seconds and the tuner will automatically start searching for available radio
stations. When it finds a station it will automatically stop. The automatic search
operation applies for tuning strong stations. Weak signal stations can be tuned by
searching manually.
2. Press and hold the PREVIOUS /or NEXT /button to leave a
station and resume automatic tuning.
Note: During search operation the sound level is muted automatically.
Programming the tuner’s memory
In TUNER mode, select FM or MW reception. The tuner has a memory that can store
up to 20 FM stations and 20 MW stations.
1. Search for stations (as described above in “Automatic/ manual tuning
operation” mentioned.
2. Once you find a station you wish to save, Press MEM./ CLK.ADJ. button and
“PROGRAM” will be showed on the display, and the icon “--” will blink at the
same time. Press M-DN/ FOLDER- or M-UP/ FOLDER+ button until the required
memory position number appears on the display.
3. Press the MEM./ CLK.ADJ. Button again to confirm
and save the station.
4. Repeat steps 2-3 steps to store further stations.
Note: if you wish to save a new station over a current one,
follow the steps above. Any station already stored in
the memory will be overwritten by the new station.

13
ST-MO/ CD-MODE button
Press the ST-MO/ CD-MODE button repeatedly to switch in between stereo and mono
reception.
• The stereo broadcasting in FM band, the indicator of “ST” appears on the
display.
• If a stereo station has poor reception (noisy interference), we recommend that you
change to mono reception by pressing the ST-MO/ CD-MODE button. In mono
mode, “ST” disappears from the display.
Recalling Preset Stations
Press the M-DN/ FOLDER- or M-UP/ FOLDER+ button to move up or down the
stations that are stored in the unit’s memory. Alternatively you can use the numerical
0-9 to enter a preset station’s number. To select stations 1-9, you must press “0” first.
Hints For Better Reception
FM: Extend the FM ANTENNA wire completely to get
the best reception. If a stereo broadcast signal is
received, “ST” will be shown on the display.
MW: This unit has an in-built directional ferrite antenna.
Move/ rotate the entire unit to get the best reception
in MW.
IMPORTANT NOTES ON PLAYING CD
Safety information for playing CD discs
• Press the CD/USB button to select CD mode. Press OPEN/ CLOSE button to
open the CD Door. “OPEN” is displayed when the compartment cover slides up.
Insert a disc with the printed side facing up. Press OPEN/ CLOSE button again
to close the CD door. Take care that no any foreign objects can fall into the unit
when the CD Door opens.
• The lens of the CD player should never be touched. Never look at the laser beam
directly.
• To remove the disc, hold it by the edges and remove it from the holder.
Loading discs
1. Press STANDBY button to turn “ON” the unit.
2. Press CD/USB button to select CD mode, then press OPEN/ CLOSE button to
open CD Door.
3. Insert a disc with the printed side facing up. Press the center of the disc onto the
black holder fitted with 3 retaining bearing until locked.
4. Press OPEN/ CLOSE button to close CD Door.
The disc will begin spinning and the total number of
the tracks on the disc and its playback time will be
shown on the display, if there is no discs currently in
the player, the icon “NO DISC” will be shown on the
display.
5. Press STOP button to stop playing. Total number
of tracks and total playing time will be shown on the
display. If MP3 or WMA disc is in the compartment,
total number of folders and tracks will be shown on
the display.
Total track No. Total play time
Track No. Playback time

14
Note on MP3, WMA, CD-R / RW discs
• Because of non-standardized format definition/ production of MP3, WMA, CD-R/
RW playback quality and performance are not guaranteed.
• Playback of MP3, WMA, CD-R / CD-RW may depend on recording conditions.
• Do not attach a seal or label to either side (the recordable side or the labeled
side) of a CD-R / RW disc. It may cause malfunction.
• Do not load a blank CD-R/ RW disc. It will take over 30 seconds to read the disc.
The disc may be damaged if you try to open the CD Door while reading the disc.
• CD-ROM, CD-I, CDV, VCD, DVD or computer CDs, however, is not possible to be
read.
COMPACT DISC PLAYER OPERATION
Normal Playback
Press the OPEN/ CLOSE button to open the CD door. Insert a disc with the printed
side facing up. Press the OPEN/ CLOSE button again to close the CD compartment.
“TOC READ” is displayed as the unit scans the contents of the disc. Total number of
tracks and total playing time of the tracks are displayed. If MP3 or WMA disc is in the
compartment, total number folders and tracks will be shown on the display. For around
1 second later and the player will automatically start playing the first track of the disc.
PLAY/PAUSE control
Press the PLAY/ PAUSE/ BAND button to pause a
track during playback. The sound will stop and the playing
time will flash on the display (but the disc will still continue
spinning), Press the PLAY/PAUSE/BAND button
again to resume playback at the same point.
Skip track and high-speed music search
During playback, repeatedly press PREVIOUS /or NEXT /button to
skip backwards/ forwards to the previous/ next track. Playback will begin at the start of
the selected track.
During playback, press and hold the PREVIOUS /or NEXT /button
to skip/ search through a track at high speed. When you release the PREVIOUS
/or NEXT /button, normal speed playback will resume at that point.
Using the numerical buttons
Using the numerical 0-9 buttons to directly select a track in a CD disc to play. If you
wish to select tracks 1-9, you must press “0” first.
Track no. 2 - Press “0” first, then press “2”
Track no. 12 - Press “1” first, then press “2”
Play mode control
1. Repeat a track
Press the ST-MO/ CD-MODE button once during
the playback. And then the “RPT” indicator will blink
on the display and the current track will be played
repeatedly.

15
2. Repeat all tracks
Press the ST-MO/ CD-MODE button twice during the
playback. And then the “RPT” indicator will be shown
and stay on the display and all the current tracks of
the disc will be played repeatedly.
3. Random Playback
This feature allows you to play all the tracks on a CD
in random order. Press the STO-MO/ CD-MODE
button three times to activate random playback mode
and RND will appear on the display. The player will
now randomly select tracks to play from the disc.
Programmed Playback
The CD player can be programmed to play any sequence
of up to 20 tracks.
1. Load compact disc into CD compartment.
2. Always press the STOP button before starting
programming. Press the MEM./ CLK,ADJ/ PROG
button in stop mode. PROGRAM and P01 00 appear
in the display.
3. Press /or /button repeatedly to
select the desired track number.
4. Press the MEM./ CLK,ADJ/ PROG button to confirm
your selection. PROGRAM and P02 00 appear on the
display and wait for the next programming. Repeat
the previous steps and the tracks will be stored in order.
5. In order to store the remaining program, repeat the above step 3~ 4 until memory
is full.
6. When programming is completed, press BAND/ button to play the programmed
sequence of tracks. PROGRAM appears on the display.
Clear Program (Resume Normal Playback)
Press STOP button twice in the program mode, or open the CD Door, or switch to
another function mode to clear the program.
MP3 OR WMA DISC OPERATION
Normal Playback
When an MP3 or WMA disc is loaded into the unit, the unit
will begin scanning automatically and the total number of
tracks will show on the display. The player will begin to
play automatically from the first track. The folder number
and the track number always flash in the display by turns.
Pause control
The same process as CD operation (above).
Skip track and high-speed music search
The same process as CD operation (above).

16
Select desired folder
In the stop mode Press the FOLDER-DN or FOLDER-UP button repeatedly to select
a desired folder number. Press the BAND/ button to start playback from the first
track of the folder. Then press the previous or next button to select the desired track.
During the playback, Press the FOLDER-DN or FOLDER-UP button repeatedly to
select a desired folder number, then press the previous or next button to select the
desired track. The player will start playback the first track of the selected folder.
Using the numerical buttons
You can use the numerical 0-9 buttons to directly select a track to play.
1 If your desired file (track) number is not over ten, you must press “0” first. The
display indicates as Fig. A. Then input your desired file (track) number.
For example:
File (track) no. 2 - Press “0”, then press “02”
File (track) no.32 - Press “0” first, then press “32”
2 If the desired file (track) number is over one hundred,
you can input the file (track) number directly as
Fig B.
For example:
File (track) no. 125 - Press “1”, “2” and “5”.
After inputting the number, the selected file (track) will be played automatically,
and the track number and its folder number indicate on the display by turns.
Fig. A
Fig. B
ID3 Function
When playing an MP3 disc, press the ID3 button on remote hand set to change the
display to show and roll out the currently playing track’s title, artist name etc. Press the
ID3 button again and the display will revert to its normal state.
Play mode control
1. One Track Repeat
During the playback, press the ST-MO/ CD-MODE
button once. “RPT” indicator will flash on the display
and the current track will be played repeatedly.
2. One Folder Repeat
Select the folder to be repeated and begin playback.
Press the ST-MO/ CD-MODE button twice. RPT
FOLDER indicator will show on the display and
all the tracks in the selected folder will be played
repeatedly.
3. All track Repeat
Press the ST-MO/ CD-MODE button three times.
RPT indicator will be shown and stay on the display.
All tracks on the disc will now be played repeatedly.

17
4. Random Playback
The Random playback feature is the same as CD
operation as the above.
Programmed Playback
The CD player can be programmed to play any sequence of up 20 titles as desired.
1. Load a compact disc into CD compartment.
2. Press the MEM./CLK.ADJ/PROG. Button in stop
mode, PROGRAM and P01 F-00 will appear on the
display.
3. Press the PREVIOUS /or NEXT /
button repeatedly to select the desired folder
number.
4. Press MEM./CLK.ADJ/PROG. button again to
confirm the folder on the first program location.
P01 000 appears on the display and waits for the
track number of the desired folder.
5. Press the PREVIOUS /or NEXT /
button repeatedly to select the desired track number.
6. Press the MEM./CLK.ADJ/PROG. button to confirm
the track number on the first program location.
P02 F-00 will appear on the display and waits for
next programming.
7. Repeat the previous steps to select the desired track numbers. The track will be
stored in order.
8. When you have entered all the tracks you want, press BAND/button to play
the programmed track list. PROGRAM appears on the display.
Clear Program (Resume Normal Playback)
Press STOP button twice in the program mode, or open the CD Door, or switch to
another function mode to clear the program.
OPERATION AN IPOD WITH THE MAIN UNIT
This unit is compatible with most different kinds of iPod®, such
as iPod®Mini, iPod®Photo, iPod®Video etc. It also acts as a
iPod®battery charger.
The unit is designed a universal docking station for iPod own
inserts.
Apple iPod model with 30-pin dock connector as below: Nano
1st/ 2nd /3rd generation, iPod 5th generation (video), iPod touch
and iPod classic.
Carefully place your iPod®(not included) into the dock. (The
iPod®must not be in a case or “skin”)
Grip the iPod and pull it upwards and out carefully.

18
Operating iPod®with the main unit
1. Press iPod®buttons to select iPod mode. The icon
“iPod” is blinked on the display. The display indicates
iPod® . When the iPod is not docked, the icon “No
iPod” is displayed on the display.
2. Select your desired music, photos or videos, etc and play the connected iPod®as
usual.
3. Press BAND/button to play or pause.
4. You can also control the iPod®by pressing the PREVIOUS /or NEXT
/button on the unit or remote control to skip to the previous or next track,
or press and hold the buttons to search within a playing track at high speed to
locate a specific musical passage.
The numerical buttons 2, 4, 5, 6 and 8 on the remote control can be used to operate
the menu and other functions of the iPod®. Press iPod®MENU/6 button to enter to the
previous menu; and then using the /2 or /8 buttons to highlight the item you want
to operate, then press ENTER/5 button to confirm and enter the selected menu. Press
/4 button once to repeat one track, press twice to repeat all. (Available in iPod®play
only)
5. Press VOL+/- button on the unit or remote control to adjust the sound level.
If you want to view photos and videos from the iPod®, please refer to the VIDEO
OUTPUT connection section.
Charging your iPod®
While your iPod®is docked to the unit, it will automatically recharge until fully charged
in iPod, CD, FM mode or AUX mode. (iPod®cannot be charged at MW mode. Other
non-docking types of iPod®will NOT be charged.)
iPod®is a registered trademark of Apple Computer Corporation.
OPERATING AUX IN CONNECTION
1. You can listen to the sound of the connected external
device through your system’s speakers. Connect one
end to a 3.5mm plug signal wire (not included) to the
AUX IN SOCKET and the other end to your home
equipment. (Such as portable CD player, or VCR)
2. Press the STANDBY/ ON button to turn the unit “ON”.
3. Press the AUX button on the remote to select AUX IN mode and “AUX” will be
shown on the unit’s display.
4. The unit is now set up to play your home equipment.
5. Press the VOL+/- button to adjust the volume level.

19
PLAYING MP3/WMA MUSIC FILES FROM A USB DEVICE
Music files in MP3 or WMA format can be played by connecting a suitable USB device
containing such files into the USB port on the front of the unit.
1. Connect the USB device to the USB port on the front panel of the unit.
2. Press the CD/USB button repeatedly to select USB mode. The unit detects the
USB devise automatically and the display will show “USB READ”. After a few
seconds, the total folder number and total tracks will show in the display about
2 seconds then automatically start to play from its MP3 or WMA music file.
3. Press M-UP/FOLDER- or M-UP/FOLDER+ repeatedly to select the desired folder
number.
4. Please refer to the other functions control and programming steps to MP3/WMA
DISC OPERATION section.
NOTE: Before pulling out the USB device from the USB port, make sure the unit is not
in USB function or press STANDBY/ ON Button to turn off the unit. Remove
the USB device from the unit and unplug the unit when you don’t intend to use
the product.
CARE AND MAINTENANCE
COMPACT DISCS
• Treat the disc carefully. Handle the disc only by its edges. Never allow your fingers
to contact with the shiny unprinted side of the disc.
• Do not attach adhesive tape, stickers etc., on either side of a disc.
• Clean the disc periodically with a soft, lint-free and dry cloth. Never use detergents
or adhesive cleaners to clean the disc. If necessary, use a CD cleaning kit.
• If a disc skips or gets stuck on a section of the disc, it is probably dirty or damaged
(scratched).
• When cleaning the disc, wipe in straight lines from the center of the disc to the
edge of the disc. Never wipe in circular motions.
• To remove a disc from its storage case, press down on the center of the case and
lift the disc out, holding it carefully by the edges.
• Fingerprints and dust should be carefully wiped off the disc’s recorded surface
with a soft cloth. Unlike conventional records, compact discs have no groove to
collect dust and microscopic debris, so gently wiping with a piece of soft cloth
should remove most particles.

20
CLEANING THE UNIT
• To prevent fire or shock hazard, disconnect your unit from the AC power source
when cleaning.
• If the cabinet becomes dusty, wipe it with a soft dry dust cloth. Do not use any
wax or polish sprays on the cabinet.
• If the cabinet becomes dirty or smudged with fingerprints it may be cleaned with
a soft cloth slightly dampened with a mild soap and water solution. Never use
abrasive cloths or polishes, as this will mar the finish of your unit.
• This product is not intended for commercial use. Household Use Only
CAUTION: Never allow any water or other liquids to get inside the unit while cleaning.
TROUBLESHOOTING GUIDE
If you have a problem, please check the following chart to see if you can fix it before
consulting a servicing professional.
Symptom Possible cause Solution
Radio
No signal from the Radio The unit is not in Radio
mode
Press the TUNER button to
select TUNER mode
Noise or sound distorted
on MW or FM broadcasting
Station is not tuned
properly for MW or FM.
Retune the MW or FM
broadcast station
FM: Wire antenna is not
extended enough.
Extend FM wire antenna
MW: The unit is not
positioned correctly.
Reposition the unit until the
best reception is obtained
FM STEREO indicator
does not light
FM signal is not strong
enough or the station is not
in stereo broadcasting.
Extend antenna or find
another FM stereo station
MW or FM no sound The unit is not at TUNER
function MW or FM band.
Press the BAND button to
select MW or FM band.
Volume is at minimum. Increase the volume level
CD/MP3 Player
CD Player doesn’t play The unit is not in CD mode. Press CD button to enter
CD mode
CD is not placed or placed
incorrectly.
Load a CD; check that the
CD is placed in the tray
with the label side facing
upward
Disc is non-standard. Use the correct disc
Disc is not compatible with
format.
Change it to compatible
CD format.
CD skips while playing Disc is dirty or scratched. Wipe the disc with a soft
dry cloth or use another
disc.
Other manuals for HAV-MCS42
1
Table of contents
Languages:
Other König Electronic Stereo System manuals

König Electronic
König Electronic HAV-PMS10 User manual

König Electronic
König Electronic HAV-MC100 User manual

König Electronic
König Electronic HAV-MCS35 User manual

König Electronic
König Electronic HAV-MCS30 User manual

König Electronic
König Electronic HAV-MCS50 User manual

König Electronic
König Electronic HAV-MCS30 User manual

König Electronic
König Electronic HAV-SDC20 User manual

König Electronic
König Electronic HAV-MCS42 User manual

König Electronic
König Electronic HAV-MCS52 User manual

König Electronic
König Electronic IPD-SPEAKER40 User manual