K-Tool KTI63131A User manual

KTI63131A 01/18/18
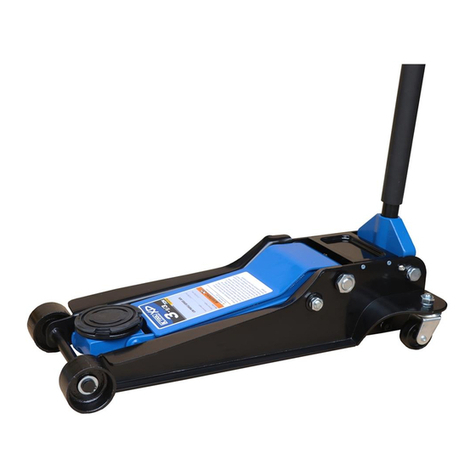
3 TON COMPACT SERVICE JACK
OWNERS MANUAL
SPECIFICATIONS
KTI63131A
Low Height.................................................................5.5"
Raised Height.........................................................18.75"
Length.........................................................................24"
Chassis Width ..........................................................13.4"
Handle Length..........................................................39.4"
Saddle Diameter ......................................................3.75"
Shipping Weight...................................................65.7 Lb.
Complies with ASME PASE-2014 Safety Standard

KTI63131A 2 01/18/18
This is the safety alert symbol. It is used to alert you to
potential personal injury hazards. Obey all safety messages
that follow this symbol to avoid possible injury or death.
IMPORTANT: READ THESE INSTRUCTIONS BEFORE OPERATING
BEFORE USING THIS DEVICE, READ THIS MANUAL COMPLETELY AND THOROUGHLY, UNDERSTAND ITS OPERATING
PROCEDURES, SAFETY WARNINGS AND MAINTENANCE REQUIREMENTS.
It is the responsibility of the owner to make sure all personnel read this manual prior to using the device. It is also the responsibility of
the device owner to keep this manual intact and in a convenient location for all to see and read. If the manual or product labels are lost
or not legible, contact K-Tool International for replacements. If the operator is not uent in English, the product and safety instructions
shall be read to and discussed with the operator in the operator's native language by the purchaser/owner or his designee, making
sure that the operator comprehends its contents.
THE NATURE OF HAZARDOUS SITUATIONS
The use of portable automotive lifting devices is subject to certain hazards that cannot be prevented by mechanical means, but only
by the exercise of intelligence, care, and common sense. It is therefore essential to have owners and personnel involved in the use and
operation of the equipment who are careful, competent, trained, and qualied in the safe operation of the equipment and its proper
use. Examples of hazards are dropping, tipping or slipping of loads caused primarily by improperly securing loads, overloading, off-
centered loads, use on other than hard level surfaces, and using equipment for a purpose for which it was not designed.
METHODS TO AVOID HAZARDOUS SITUATIONS
• Read, study, understand and follow all instructions before operating this device.
• Inspect the jack before each use. Do not use if damaged, altered, modied, in poor condition, leaking hydraulic uid or
unstable due to loose or missing components. Make corrections before using.
• Use only on a hard level surface free from obstructions so the jack is free to reposition itself during lifting and lowering
operations.
• Lift only on areas of the vehicle as specied by the vehicle manufacturer.
• User and bystanders must wear eye protection that meets ANSI Z87.1 and OSHA standards.
• Do not use jack beyond its rated capacity. Do not shock load.
• This is a lifting device only. Immediately after lifting, support the vehicle with jack stands capable of sustaining the
load before working on the vehicle.
• Center load on saddle. Be sure setup is stable before working on vehicle.
• Do not move or dolly the vehicle while on the jack.
• Do not use any materials that may serve as risers, spacers or extenders between the stock lifting saddle and the load.
• Do not use any adaptors that replace the stock lifting saddle unless approved or supplied by the jack manufacturer.
• Do not use (or modify) this product for any other purpose than that for which it was designed without consulting the
manufacturer's authorized representative.
• Always lower the jack slowly and carefully.
• This product contains chemicals known to the State of California to cause cancer and birth defects or other reproductive
harm. Wash hands thoroughly after handling.
• Failure to heed these warnings may result in serious or fatal personal injury and/or property damage.
CONSEQUENCES OF NOT AVOIDING HAZARDOUS SITUATIONS
Failure to read this manual completely and thoroughly, failure to understand its OPERATING INSTRUCTIONS, SAFETY WARNINGS,
MAINTENANCE INSTRUCTIONS and comply with them, and failure to comply with the METHODS TO AVOID HAZARDOUS
SITUATIONS could cause accidents resulting in serious or fatal personal injury and/or property damage.
WARNING: Indicates a hazardous situation
which, if not avoided, could result in death
or serious injury.
WARNING
WARNING
WARNING
WARNING
WARNING INFORMATION

KTI63131A 3 01/18/18
SETUP
PLEASE REFER TO THE EXPLODED VIEW DRAWING IN THIS MANUAL IN ORDER TO IDENTIFY PARTS.
1. Secure the 2 Pc. handle #27 together with the bolt #30.
2. Insert the handle in the handle yoke #18 and rotate it back and forth until the release linkage inside the yoke ts up inside the
bottom of the handle. Secure the handle to the handle socket using the handle bolt #19.
3. Air may become trapped in the hydraulic system during shipping and handling. Trapped air will affect the pumping performance of
the jack. If this occurs, follow the air purging procedure below:
a) Rotate the handle in a clockwise direction until tight. Rotate the handle in a counterclockwise direction two complete
revolutions. Pump the handle approximately 15 complete pump strokes.
b) Rotate the handle in a clockwise direction until tight. Proceed to pump the jack to maximum lift height.
c) Repeat steps a) and b) until all air has been purged from the system.
OPERATING INSTRUCTIONS
This is the safety alert symbol used for the OPERATING INSTRUCTIONS section of this manual to alert you to potential
personal injury hazards. Obey all instructions to avoid possible injury or death.
IMPORTANT: Before attempting to raise any vehicle, check vehicle service manual for recommended lifting surfaces.
OPERATION
1. To raise load: Turn the handle in a clockwise direction until tight. Position the jack under the load. Proceed to pump the handle in
order to raise the lift arm to the load. As the saddle at the end of the lift arm gets closer to the load, reposition the jack so the
saddle will contact the load rmly and the load is centered on the saddle. Make sure the saddle is correctly positioned. Raise the
load to the desired work height. Place jack stands of appropriate capacity at the vehicle manufacturer's recommended support
areas that provide stable support for the raised vehicle. DO NOT CRAWL UNDER VEHICLE WHILE LIFTING VEHICLE OR
PLACING OR REMOVING THE JACK STANDS! Once jack stands are positioned, turn the handle VERY SLOWLY in a counter
clockwise rotation. Lower the load to rest on the jack stands. Inspect the relationship between the jack stands and load to make
sure the setup is stable and safe. If the setup is not stable or safe, follow the preceding steps until corrected.
2. To lower load: Follow the procedures mentioned in "To raise load" section of the OPERATING INSTRUCTIONS in order to raise
the load off the jack stands. Once the load has cleared the jack stands, remove the stands from under the load and away from the
work area. Turn handle very slowly in a counterclockwise direction until the load is completely lowered to the ground. Once the
jack's lifting saddle has cleared the load, remove the jack from under the load. DO NOT CRAWL UNDER VEHICLE WHILE
LIFTING VEHICLE OR PLACING OR REMOVING THE JACK STANDS! CAUTION: Keep hands and feet away from the
hinge mechanism of the jack.
PREVENTATIVE MAINTENANCE
This is the safety alert symbol used for the PREVENTATIVE MAINTENANCE section of this manual to alert you to potential
personal injury hazards. Obey all instructions to avoid possible injury or death.
1. Always store the jack in a well protected area where it will not be exposed to inclement weather, corrosive vapors, abrasive dust,
or any other harmful elements. The jack must be cleaned of water, snow, sand, grit, oil, grease or other foreign matter before
using.
2. The jack must be lubricated periodically in order to prevent premature wearing of parts. A general purpose grease must be
applied to caster wheels, front axle, elevator arm, handle base pivot bolts, release mechanism and all other bearing surfaces.
Worn parts resulting from inadequate or no lubrication are not eligible for warranty consideration. IMPORTANT: In order to
prevent seal damage and jack failure,never use alchol, hydraulic brake uid, or transmission oil in the jack. Use hydraulic jack oil,
a light turbine oil, Chevron AW ISO 32 or Unocal Unax AW 150.
3. Every jack owner is responsible for keeping the jack label clean and readable. Use a mild soap solution to wash external surfaces
of the jack but not any moving hydraulic components.
4. Inspect the jack before each use. Do not use the jack if any component is cracked, broken, bent, shows sign of damage. Do not
use the jack if it has loose or missing hardware or components, or is modied in any way. If the vehicle is pushed off the jack or
the jack is subjected to a shock load, discard the jack and do not use again.
5. Do not attempt to make any hydraulic repairs unless you are a qualied hydraulic repair person that is familiar with this
equipment.
TROUBLESHOOTING
Important: Service jacks are self-contained devices used for lifting, but not sustaining, a partial vehicular load. In accordance with ASME-PALD Load
Sustaining Test: “A load not less than the rated capacity…shall not lower more than 1/8" (3.18mm) in the rst minute, nor a total of .1875" (4.76mm) in
10 minutes.” Lowering within this range is considered normal operation and is NOT a warrantable defect.

KTI63131A 4 01/18/18
PROBLEM: UNIT WILL NOT LIFT RATED LOAD.
ACTION: Purge air from hydraulic system by following procedure under SETUP.
PROBLEM: UNIT WILL NOT SUSTAIN RATED LOAD OR FEELS "SPONGY" UNDER RATED LOAD.
ACTION: Purge air from hydraulic system as above.
PROBLEM: UNIT WILL NOT LIFT TO FULL HEIGHT.
ACTION: Purge air from hydraulic system as above or check oil level in reservoir.
PROBLEM: HANDLE TENDS TO RAISE UP WHILE THE UNIT IS UNDER RATED LOAD.
ACTION: Pump the handle rapidly several times to push oil past ball valves in power unit.
PROBLEM: UNIT STILL DOES NOT OPERATE.
ACTION: Contact your place of purchase for details on handling warranty.
K-Tool International 1 Year Limited Warranty
K-Tool International Lifting Equipment is warranted to be free from defects in material and workmanship within one year from the date of
original purchase. This warranty is extended to the original retail purchaser only. If any jack or service-related item proves to be
defective during this period, it will be replaced or repaired, at K-Tool International’s option, without charge. This warranty does not apply
to damage from accident, overload, misuse or abuse, nor does it apply to any equipment which has been altered or used with special
attachments other than those recommended. This warranty does not cover repairs made by anyone who is not a K-Tool International
Professional Lifting Equipment Authorized Repair Center.
All Standard Duty jacks or service-related equipment will be replaced or repaired at K-Tool International’s option during the 1 year
warranty period. During the 1 year warranty period, all alleged defective products and/or parts must be shipped, freight prepaid, along
with proof of date-of-purchase, to your nearest K-Tool International Professional Lifting Equipment Authorized Warranty Center. Be
certain to include your name, address and phone number along with proof-of-purchase information, and a brief description of the alleged
defect. The product will be returned to the customer, freight prepaid.
Many alleged defectives may simply be handled by calling your nearest Service Center for parts. See pages 14-16 for a listing of
authorized warranty service centers.
In no event shall K-Tool International be liable for incidental or consequential damages. The liability on any claim for loss or damage
arising out of the sale, resale or use of a jack or related service equipment, shall in no event exceed the purchase price. SOME STATES
DO NOT ALLOW THE EXCLUSION OR LIMITATION OF INCIDENTAL OR CONSEQUENTIAL DAMAGES, SO THE ABOVE LIMITATION
MAY NOT APPLY TO YOU.
THIS WARRANTY IS THE SOLE AND EXCLUSIVE WARRANTY PROVIDED IN CONNECTION WITH THE SALE OF K-TOOL
INTERNATIONAL PROFESSIONAL LIFTING EQUIPMENT. ALL OTHER WARRANTIES, INCLUDING ANY IMPLIED WARRANTIES OF
MERCHANTABILITY OR FITNESS FOR A PARTICULAR PURPOSE, ARE EXCLUDED. THIS WARRANTY GIVES YOU SPECIFIC LEGAL
RIGHTS AND YOU MAY ALSO HAVE OTHER RIGHTS WHICH VARY FROM STATE TO STATE.
WARRANTY HANDLING PROCEDURES & GUIDELINES KTI STANDARD DUTY SERIES

KTI63131A 5 01/18/18
Only reference numbers identified by part number are available separately.
Item# Part # Description Qty.
1 Retaining Ring, 18mm 2
2 Flat Washer, 18mm 2
3 KTP63131A01 Front Wheel (Black) 2
4 Main Frame 1
5 Retaining Ring, 16mm 2
6 Lift Arm Assembly 1
7 Link Rod 2
8 KTP63131A02 Saddle (Black) 1
9 Retaining Ring, 25mm 2
10 Connecting Rod 1
11 Cotter Pin, 4×45mm 1
12 KTP63131A04 Complete Hyd. Power Unit (Black) 1
13 Safety Cover 1
14 Tension Spring 1
15 Short Bolt For Handle Socket 1
16 Spring Washer, 18mm 2
17 Torsion Spring 1
18 KTP63131A05 Handle Yoke (Red) 1
19 M12 Handle Screw 1
20 Pump Core Pin 1
21 M10 Nut 1
22 Spring Washer, 10mm 1
23 Flat Gear 1
3 TON COMPACT SERVICE JACK
PARTS LIST AND DRAWING
KTI63131A
Item# Part # Description Qty.
24 Flat Washer, 16mm 1
25 Cotter Pin, 2.5×16mm 1
26 Gear Shaft 1
27 KTP63131A06 2 Pc. Handle (Black) 1
28 M10 Nut 2
29 Spring Washer, 10mm 2
30 M6×35 Handle Screw 1
31 KTP63131A07 Handle Grip 1
32 Reforcing Spindle 1
33 Bolt For Handle Yoke 1
34 M16 Nut 2
35 16 Spring Washer 4
36 KTP63131A08 Rear Swivel Caster 2
37 M12×25 Inner Hexagon Screw 2
38 Spring Washer, 12mm 2
39 M16 Nut 2
40 Limit Lever 2
41 Spring Washer, 6mm 2
42 M6*15 Hex Head Screw 2
43 Bolt For Link Rod 2
44 Retractor 1
KTP63131APLK Label Kit (not shown) 1

KTI63131A 6 01/18/18
3 TONELADAS GATO DE SERVICIO COMPACTO
MANUAL DE OPERATIÓN
KTI63131A
ESPECIFICACIONES
Altura mínima ............................................................5.5"
Altura máxima .......................................................18.75"
Longitud......................................................................24"
Anchura de chasis ...................................................13.4"
Longitud del mango.................................................39.4"
Diámetro de la silla.................................................. 3.75"
Peso de embarque..........................................65.7 Libras
Fabricado para cumplir con la norma PASE-2014 de ASME.

KTI63131A 7 01/18/18
IMPORTANTE: LEA ESTAS INSTRUCCIONES ANTES DE USAR EL DISPOSITIVO
ANTES DE USAR ESTE DISPOSITIVO, LEA ESTE MANUAL DETENIDAMENTE. PROCURE ENTENDER SUS
PROCEDIMIENTOS OPERATIVOS, ADVERTENCIAS DE SEGURIDAD Y FORMA DE MANTENIMIENTO.
El propietario es responsable de asegurarse de que todo el personal lea este manual antes de usar el dispositivo. Asimismo, es
responsabilidad del propietario mantener este manual en buenas condiciones en una ubicación conveniente para su consulta. Si
las etiquetas del manual o producto son ilegibles o no están en su lugar, deberá ponerse en contacto con K-Tool International para
obtenerlas gratis. El comprador/propietario o una persona designada deberá leer y comentar el producto y las advertencias de
seguridad en la lengua materna del operario que no hable inglés uido, a n de asegurarse de que comprende el contenido.
NATURALEZA DE LAS SITUACIONES DE RIESGO
El uso de dispositivos de elevación de automotores se halla sujeto a ciertos riesgos que no se pueden prever por medios mecánicos,
sino por la información, la diligencia y el sentido común. Es imprescindible contar con personal cuidadoso, competente, capacitado o
calicado involucrado en el uso adecuado y operación segura del gato al momento de brindar mantenimiento a los vehículos de motor y
sus componentes. Los ejemplos de los peligros incluyen las caídas, inclinaciones y deslizamientos de las cargas ocasionados princi-
palmente por la sujeción inadecuada de la carga, las sobrecargas, las cargas no centradas, su uso en supercies que no son duras ni
aniveladas y el uso del equipo para propósitos para el cual no fue destinado.
FORMAS DE EVITAR LAS SITUACIONES DE RIESGO
• Lea, estudie, comprenda y observe todas las instrucciones antes de operar este dispositivo.
• Verique el gato antes de usarlo. No lo use si tiene roturas, alteraciones, fugas de líquido hidráulico o está en malas
condiciones, como tampoco si presenta inestabilidad debido a piezas metálicas o partes desajustadas o faltantes. Tome las
medidas de corrección apropiadas antes de usarlo.
• Use el gato únicamente en supercies niveladas rmes en las que no haya obstáculos, de modo que el dispositivo pueda
posicionarse durante las operaciones de elevación y descenso.
• Utilice el dispositivo de elevación únicamente en las áreas del vehículo especicadas por su fabricante.
• Use protección para los ojos que cumpla con las normas ANSI Z87.1 y OSHA.
• No use el gato para elevar pesos superiores a su capacidad. No sujete la carga a ningún choque
• Este dispositivo se debe utilizar únicamente para levantar cargas. No bien haya elevado la carga, sujete el vehículo
con torres que tengan la capacidad para sostenerlo antes de comenzar a trabajar.
• Centre la carga en el asiento. Asegúrese de que el armado del dispositivo sea estable antes de comenzar a trabajar.
• No use ningún material el que pueda fungir como tarima, separador o extensor entre la silla de elevación estándar y la carga.
• No use ningún adaptador el que reponga la silla de elevación estándar al menos que sea aprobado o suministrado
por el fabricante del gato.
• No use (ni modique) este producto para ningún otro propósito excepto para el cual fue destinado sin consultar al
representante autorizado del fabricante.
• Baje el gato siempre despacio y con cuidado.
• Este producto contiene sustancias químicas consideradas por el Estado de daños en el sistema reproductivo. Lávese bien
las manos después demanipular el producto.
• No cumplir con estas indicaciones puede provocar lesiones graves o peligro de muerte, así como daños materiales.
CONSECUENCIAS DE NO PREVENIR LAS SITUACIONES DE RIESGO
Hacer caso omiso, al no leer este manual detenidamente y de forma completa, y no comprender sus INSTRUCCIONES DE
OPEARACIÓN, ADVERTENCIAS DE SEGURIDAD, INSTRUCCIONES DE MANTENIMIENTO y cumplir con ellas, y desatender los
MÉTODOS PARA EVITAR LAS SITUACIONES PELIGROSAS podría ocasionar accidentes, resultando en lesiones personales serias
o fatales y/o daños a la propiedad.
Este símbolo indica una alerta de seguridad y se usa para
advertir sobre peligro de accidentes personales. Observe
todala información de seguridad que sigue a este símbolo
para evitar la posibilidad de que ocurran lesiones o muerte.
ADVERTENCIA: Indica una situación
peligrosa que si no se evita, puede
provocar la muerte o lesiones graves.
ADVERTENCIA
ADVERTENCIA
ADVERTENCIA
ADVERTENCIA
INFORMACIÓN DE ADVERTENCIA

KTI63131A 8 01/18/18
MONTAJE
CONSULTE POR FAVOR EL DIBUJO DE VISTA EN DETALLE EN ESTE MANUAL PARA IDENTIFICAR
LAS PARTES.
1. Secure the 2 Pc. handle #27 together with the bolt #30.
2. Inserte el mango en el casquillo del mango #18 y gírelo de un lado para otro hasta que el vínculo de liberación adentro del casquillo
se encaje en la parte inferior del mango. Sujete el mango en el casquillo del mango usando el perno del mango #19.
3. Se puede atrapar aire en el sistema hidráulico durante el envío y transporte. El aire atrapado podrá afectar el rendimiento de bombeo
del gato. Si esto mismo se ocurre, siga el procedimiento de purga a continuación:
a) Gire el mango en el sentido de las agujas del reloj hasta que esté apretado. Gire el mango dos rotaciones completas en el sentido
de las agujas del reloj. Bombee el mango aproximadamente 15 recorridos de bombeo completos.
b) Gire el mango en el sentido de las agujas del reloj hasta que esté apretado. Proceda a bombear el gato hasta lograr
su máxima altura.
c) Repita los pasos a) y b) hasta que se haya purgado todo el aire del sistema.
INSTRUCCIONES DE USO
Este símbolo indica una alerta de seguridad y se utiliza en la parte de este manual que versa sobre las INSTRUCCIONES
DE USO, con el n de advertir sobre los peligros de accidentes personales. Observe todas las instrucciones para evitar
lesiones o peligros de muerte. IMPORTANTE: antes de comenzar a elevar un vehículo, consulte su manual de servicio
para conocer las supercies de elevación recomendadas.
FORMA DE USO:
1. Para levantar la carga: Gire el mango en el sentido de las agujas del reloj hasta que esté apretado. Coloque el gato debajo de la
carga. Proceda a bombear el mango para levantar el brazo de levantamiento hasta el nivel de la carga. En le medida que la silla en el
extremo del brazo de levantamiento se acerque a la carga, posicione el gato de nuevo, con el n de que la silla tenga contacto rme
con la carga y la carga esté centrada sobre la silla. Asegúrese que la silla esté posicionada correctamente. Levante la carga hasta la
altura de trabajo deseada. Coloque los soportes del gato de la capacidad adecuada en los puntos de soporte recomendados por el
fabricante, los que brindan un soporte estable para el vehículo levantado. ¡NO SE ARRASTRE DEBAJO DEL VEHÍCULO
MIENTRAS QUE SE ESTÉ LEVANTANDO EL VEHÍCULO O AL MOMENTO DE QUITAR LOS SOPORTES DEL GATO! Una vez
que los soportes del gato estén posicionados, gire el mango MUY LENTAMENTE. Baje la carga hasta que se recargue sobre los
soportes del gato. Inspeccione la relación entre los soportes de gato y la carga para asegurar que el montaje esté estable y seguro.
Si el montaje no esté seguro ni estable, siga los pasos anteriores hasta que esté corregido.
2. Para bajar la carga: Siga los procedimientos mencionados en la sección de "para levantar la carga" de las INSTRUCCIONES DE
OPERACIÓN para levantar la carga fuera de los soportes del gato. Una vez que la carga sea liberada de los soportes del gato, quite
los soportes de debajo de la carga y colóquelos lejos del área de trabajo. Gire el mango muy lentamente en el contrasentido de las
agujas del reloj hasta que la carga esté completamente bajada al piso. Una vez que la silla de levantamiento del gato se haya
despejado de la carga, quite el gato de debajo de la carga. ¡NO SE ARRASTRE DEBAJO DEL VEHÍCULO MIENTRAS QUE SE
ESTÉ LEVANTANDO EL VEHÍCULO O AL MOMENTO DE QUITAR LOS SOPORTES DEL GATO!
PRECAUCIÓN: Mantenga las manos y los pies lejos del eje de articulación del gato.
MANTENIMIENTO DE SEGURIDAD
Este símbolo indica una alerta de seguridad y se utiliza en la parte de este manual que versa sobre el MANTENIMIENTO
DE SEGURIDAD, con el n de advertir sobre los peli ros de accidentes personales. Observe todas las instrucciones para
evitar lesiones o peligros de muerte.
1. Siempre guarde el gato en un área protegida, en donde no quede expuesto a las condiciones climáticas, gases corrosivos,
sustancias abrasivas u otros materiales perjudiciales. Previo al uso, el gato debe estar limpio de agua, nieve, arena, arenilla,
aceite, grasa y otro material foráneo.
2. El gato deberá estar lubricado periódicamente con el n de prevenir el desgaste prematuro de las partes. Una grasa de uso general
deberá aplicarse a las ruedas de rodaja, el eje delantero, el brazo elevador, los pernos de pivote de la base de la manivela, el
mecanismo de liberación, y todas las demás supercies de soporte de carga. Las partes des gastadas resultando de la lubricación
inadecuada o faltante no serán elegibles para consideraciones de garantía. IMPORTANTE: Con el n de prevenir daños al sello y fallas
del gato, nunca use alcohol, líquido hidráulico para frenos ni aceite de transmisiones en el gato. Use un aceite hidráulico para gatos,
un aceite ligero para turbinas, aceite AW ISO 32 de Chevron o AW 150 Unax de Unocal.
3. Cada propietario de gato será responsable por mantener limpias y legibles las etiquetas del gato. Use una solución de jabón suave
para lavar las supercies externas del gato pero no lave ningún componente hidráulico móvil.
4. No intente realizar ninguna reparación hidráulica al menos que usted sea un individuo calicado en las reparaciones hidráulicas
familiarizado con este equipo. Si el vehículo se empuje fuera del gato, o si el gato está sujetado a una carga de choque, descarte el
gato y no lo use de nuevo.
5. No intente realizar ninguna reparación hidráulica al menos que usted sea un individuo calicado en las reparaciones hidráulicas
familiarizado con este equipo.
KTI63131A 9 01/18/18
DIAGNÓSTICO DE AVERÍAS
Importante: Los gatos de servicio son dispositivos autónomos usados para el levantamiento, pero no para el sostenimiento, de una carga vehicular parcial.
De acuerdo con la norma de ASME-PALD, de la prueba de sostenimiento de carga: “Una carga no menos que la capacidad nominal …no deberá más de
1/8" (3.18mm) en el primer minuto, ni un total de .1875" (4.76mm) en 10 minutos.” Bajar dentro de este rango se considera como una operación normal y
NO es un defecto garantizable.
PROBLEMA: EL EQUIPO NO LEVANTARÁ LA CARGA.
ACCÍON: Expulsa el aire del sistema hidráulico al seguir el procedimiento bajo LAS INSTRUCCIONES DE OPERACIÓN.
PROBLEMA: EL EQUIPO NO SOSTENDRÁ LA CARGA O SE SIENTE.
ACCÍON: Expulsa el aire del sistema hidráulico como indicado anteriormente.esponjoso bajo la carga.
PROBLEMA: EL EQUIPO NO LAVANTARÁ LA CARGA HASTA LA LATURA NORMAL.
ACCÍON: Expulsa el aire del sistema hidráulico como indicado anteriormente. Revisa que los niveles de aceite no estén ni altos ni bajos.
PROBLEM: EL MANGO TIENDE A LEVANTARSE MIENTRAS EL EQUIPO.
ACCÍON: Sube y baja el mango rápidamente varias veces para empujar sostiene una carga. el aceite más allá de las válvulas de cojinete
en el aparato de capacidad eléctrica.
PROBLEM: ELEQUIPO AÚN NO FUNCIONA.
ACCÍON: Comuníquese por favor con su tienda por los detalles de garantía.
K-Tool International Garantía limitada de un año
K-Tool International El equipo de levantamiento está garantizado de ser libre de defectos en cuanto al material y mano de obra a partir
de un año de la fecha de compra original. Esta garantía se extiende sólo al comprador detallista original. Si cualquier gato o artículo
relacionado con el servicio se demuestra ser defectuoso durante este periodo, éste será reemplazado o reparado, sin cargos, a la
discreción de K-Tool International. Esta garantía no aplica a los daños por accidentes, sobrecarga, mal uso o abuso, ni aplica a ningún
equipo el cual ha sido modificado o usado con complementos especiales excepto los recomendados. Esta garantía no cubre
reparaciones hechas por cualquier entidad que no sea un centro de reparaciones de equipo de levantamiento profesional autorizado de
K-Tool International.
Todos los estándar gatos o equipo relacionado con el mantenimiento serán repuestos o reparados a la opción de K-Tool International
durante periodo de garantía de un año. Durante el periodo de garantía de un año, todos los productos y/o partes defectuosos supuestos
deberán ser enviados, con el flete prepagado, junto con la comprobación de la fecha de compra, al centro más cercano de garantía de
equipo de levantamiento profesional autorizado de K-Tool International. Asegúrese de incluir su nombre, dirección, y número telefónico
junto con la información de comprobación de compra, y una breve descripción del defecto supuesto. El producto le será devuelto a
consumidor, con el flete prepagado.
Muchos defectos supuestos pueden abordarse al simplemente llamar a su centro de servicio más cercano por las partes. Consulte las
páginas 14 a 16 por una lista de centro servicio s de de garantía autorizados.
En ningún caso será responsable K-Tool International por los daños incidentales ni consiguientes. La responsabilidad de cualquier
reclamación por pérdida o daños que surgen de la venta, reventa o uso del gato o equipo relacionado con el mantenimiento, de ninguna
forma excederá el precio de compra. ALGUNOS ESTADOS NO PERMITIRÁN LA EXCLUSIÓN NI LIMITACIÓN DE LOS DAÑOS
INCIDENTALES O CONSIGUIENTES, ASÍ QUE LA LIMITACIÓN ANTERIOR PUEDE NO APLICARLE A USTED.
ESTA GARANTÍA ES LA ÚNICA Y EXCLUSIVA GARANTÍA PROVISTA EN CONEXIÓN CON LA VENTA DE EQUIPO DE LEVANTAMIENTO
PROFESIONAL DE K-TOOL INTERNATIONAL. TODAS LAS DEMÁS GARANTÍAS, PARA INCLUIR CUALQUIER GARANTIÍA IMPLICADA
DE COMERCIALIZACIÓN O IDÓNEIDAD PARA UN PROPÓSITO PARTICULAR, SON EXCLUIDAS.
ESTA GARANTÍA LE BRINDA DERECHOS LEGALES ESPECIFÍCOS Y USTED PODRÁ CONTAR TAMBIÉN CON DERECHOS
ADICIONALES LOS CUALES VARÍAN DE ESTADO A ESTADO.
PROCEDIMIENTOS DE MANEJO DE GARANTÍA & DIRECTRICES
DE KTI DE LA SERIE DE USO ESTÁNDAR

KTI63131A 10 01/18/18
3 TONNES CRIC UTILITAIRE COMPACT
MANUEL D'OPERATIÓN
KTI63131A
SPÉCIFICATIONS
Altura baja ..............................................................5,5 po
Altura elevada.....................................................18,75 po
Longueur..................................................................24 po
Largeur de la base................................................13,4 po
Longueur de la poignée........................................39,4 po
Diamètre de selle..................................................3,75 po
Poids d'expédition .......................................... 65,7 Livres
Ce produit satisfait à la norme ASME-PASE 2014.

KTI63131A 11 01/18/18
INFORMATION D'AVERTISSEMENT
IMPORTANT : LIRE CES CONSIGNES AVANT L'UTILISATION.
PRIÈRE DE LIRE CES CONSIGNES ATTENTIVEMENT ET DE S'ASSURER DE BIEN COMPRENDRE LES PROCÉDURES
D'UTILISATION, LES AVERTISSEMENTS DE SÉCURITÉ ET LES BESOINS EN MATIÈRE D'ENTRETIEN DE L'OUTIL AVANT DE
L'UTILISER.
Le propriétaire doit s'assurer que tous les employés lisent ce manuel avant d'utiliser l'outil. Le propriétaire de l'outil doit aussi main-
tenir ce manuel en bon état et le ranger dans un endroit facilement accessible à tous ceux qui doivent le lire. Si le manuel ou les
étiquettes de l'outil sont perdus ou illisibles, communiquer avec K-Tool International pour obtenir un remplacement. Si l’utilisateur ne
parle pas couramment le français, les consignes de sécurité et le mode d'emploi de l'outil devront lui être lues à haute voix et être
discutées avec l'utilisateur, dans sa langue maternelle, par le propriétaire/acheteur ou une personne désignée, an d’assurer que
l’utilisateur en comprenne les bien le contenu.
LE TYPE DE SITUATIONS DANGEREUSES
L'utilisation de dispositifs de levage portatifs pour automobiles expose l'utilisateur à certains dangers qui ne peuvent pas être évités
par des moyens mécaniques, mais seulement en faisant preuve d'intelligence, d'attention et de bon sens. Il est donc essentiel que les
propriétaires et les employés qui utiliseront ce dispositif soient prudents, compétents, qualiés et formés à l’utilisation sécuritaire de
l’équipement. Des exemples de dangers comprennent le renversement, le glissement ou la chute soudaine de la charge. Ces dangers
sont principalement imputables à une charge mal répartie, une utilisation sur une surface meuble ou inclinée, ou une utilisation à des
ns autres que celles pour lesquelles le dispositif a été conçu.
MÉTHODES POUR ÉVITER LES SITUATIONS DANGEREUSES
` • Lire, comprendre et appliquer toutes les consignes avant d'utiliser ce dispositif.
• Inspecter le cric avant chaque utilisation. Ne pas utiliser le cric s'il est endommagé, modié, en mauvais état, instable en raison
de pièces ou de quincaillerie manquantes ou lâches ou s'il y a fuite de uide hydraulique. Effectuer les réparations ou les réglages
nécessaires avant l'utilisation.
• Utiliser le cric seulement sur une surface de niveau et solide. Celle-ci doit être exempte d'obstructions an que le cric puisse se
repositionner durant le levage et la descente.
• Placer le cric uniquement aux points spéciés par le constructeur du véhicule.
• Porter des lunettes de sécurité qui répondent aux normes de l'OSHA et aux exigences de la norme ANSI Z87.1.
• Ne pas dépasser la capacité nominale du cric. Ne faites pas fonctionner par à-coups.
• Ce dispositif sert uniquement au levage. Immédiatement après avoir levé le véhicule, placer les chandelles ap
propriées avant de travailler sur le véhicule.
• Centrer la charge sur la selle. S'assurer de la stabilité de l'installation avant de travailler sur le véhicule.
• Ne pas déplacer le véhicule lorsqu'il est supporté par le cric.
• N’utilisez pas de matériaux pouvant servir d’entretoises, de séparateurs ou de rallonges entre la selle de levage et la charge.
• N’utilisez pas d’adaptateurs en remplacement de la selle de levage sinon ceux fournis par le fabricant du cric ou ayant reçu son
approbation.
• N'utilisez pas cet outil à d'autres ns que celles prévues et ne le modiez pas pour en faire un usage différent sans consulter au
préalable le représentant autorisé du fabricant.
• Toujours abaisser le cric lentement et prudemment.
• Ce produit contient des produits chimiques reconnus par l'État de la Californie comme causant le cancer, des anomalies
congénitales ou d'autres effets nuisibles sur la reproduction. Se laver minutieusement les mains après avoir utilisé le produit.
• L'inobservance de ces méthodes peut causer des dommages matériels, des blessures corporelles graves ou mortelles, ou les deux.
CONSÉQUENCES DE NE PAS ÉVITER DES SITUATIONS DANGEREUSES
Le manquement de lire ce manuel complètement et avec attention et l’incompréhension des CONSIGNES D'UTILISATION,
AVERTISSEMENTS DE SÉCURITÉ, INSTRUCTIONS D'ENTRETIEN et de se conformer à elles, et en négligeant les MÉTHODES
POUR ÉVITER DES SITUATIONS DANGEREUSES peut causer des accidents ayant comme conséquence des blessures sérieuses
ou mortelles et/ou des dégâts matériels
Ce symbole indique un danger potentiel. Il est utilisé pour
avertir l'utilisateur des risques potentiels de blessures
corporelles. Prière de respecter toutes les consignes de
sécurité qui suivent ce symbole afin d'éviter les blessures
ou la mort potentielles.
AVERTISSEMENT : Ce symbole
indique une situation dangereuse
qui pourrait causer la mort ou des
blessures graves si elle n'est pas
évitée.
AVERTISSEMENT
AVERTISSEMENT
AVERTISSEMENT
AVERTISSEMENT

KTI63131A 12 01/18/18
INSTALLATION
VEUILLEZ CONSULTER LA VUE ÉCLATÉE POUR IDENTIFIER LES PIÈCES.
1. Secure the 2 Pc. handle #27 together with the bolt #30.
2. Insérer le manche dans le manchon d'assemblage (no 18) et le tourner légèrement de gauche à droite jusqu'à ce que la tige de
relâchement située dans le manchon s'engage dans le bas du manche. Fixer le manche à son siège à l'aide du boulon (no 19).
3. Il arrive que de l'air soit piégé dans le système hydraulique durant l'expédition ou la manutention du cric. L'air piégé dans le système
affectera l'efcacité du pompage. Si tel est le cas, purger l'air du système hydraulique en respectant les directives suivantes :
a) Tourner le manche dans le sens horaire, jusqu'à ce qu'il soit bien serré. Tourner le manche dans le sens antihoraire sur deux tours
complets. Pomper à fond environ quinze (15) fois à l'aide du manche.
b) Tourner le manche dans le sens horaire, jusqu'à ce qu'il soit bien serré. Pomper à fond pour déployer le cric à sa hauteur
maximale.
c) Répéter les étapes a) et b) jusqu'à ce que l'air soit complètement purgé du système.
MODE D'EMPLOI
Ce symbole sert à identier les risques de blessures dans la rubrique MODE D'EMPLOI. Suivre les consignes an d'éviter
les risques de blessure ou de mort. IMPORTANT: Avant d'effectuer une tentative de levage d'un véhicule quelconque,
consulter le manuel du propriétaire du véhicule pour en connaître les points d'appuis recommandés par le constructeur.
MODE D'EMPLOI :
1. Pour soulever la charge : Tournez la poignée dans le sens des aiguilles d'une montre jusqu'à ce qu’elle soit bien serrée. Placez le cric
sous la charge. Commencez à pomper la poignée an de soulever le bras de levage jusqu'à la charge. Alors que la selle à l'extrémité
du bras de levage s'approche de la charge, replacez le cric an que la selle entre fermement en contact avec la charge et an que la
charge soit centrée sur la selle. Assurez-vous que la selle est correctement positionnée. Soulevez la charge à la hauteur de travail
désirée. Placez les chandelles de la capacité appropriée aux emplacements de soutien recommandés par le fabricant du véhicule an
de fournir un soutien stable pour le véhicule soulevé. NE RAMPEZ PAS SOUS LE VÉHICULE LORS DU SOULÈVEMENT DE
CELUI-CI OU NE RETIREZ PAS LES CHANDELLES! Une fois que les chandelles sont placées de manière appropriée, tournez
la poignée TRÈS LENTEMENT. Abaissez la charge an qu'ils reposent sur les chandelles. Inspectez le rapport entre les chandelles et
la charge an de vous assurer que l'installation est stable et sécuritaire. Si l'installation n'est pas stable ou sécuritaire, suivez les
étapes précédentes jusqu'à ce que la situation soit corrigée.
2. Pour abaisser la charge : Suivez les procédures mentionnées dans la section « Pour soulever la charge » des INSTRUCTIONS
D'UTILISATION an de soulever la charge hors des chandelles. Une fois que la charge a libéré les chandelles, retirez les chandelles
de dessous la charge et loin de la zone de manoeuvre. Tournez la poignée très lentement dans le sens contraire des aiguilles d’une
montre jusqu'à ce que la charge soit complètement abaissée au sol. Une fois que la selle de levage du cric a libéré la charge, retirez le
cric du dessous de la charge. NE RAMPEZ PAS SOUS LE VÉHICULE LORS DU SOULÈVEMENT DE CELUI-CI OU NE
RETIREZ PAS LES CHANDELLES!
ATTENTION : Gardez les mains et les pieds hors de portée du mécanisme de charnière du cric.
ENTRETIEN PRÉVENTIF
Ce symbole sert à identier les risques de blessures dans la rubrique ENTRETIEN PRÉVENTIF. Suivre les consignes an
d'éviter les risques de blessure ou de mort.
1. Toujours ranger le cric dans un endroit bien protégé des intempéries, des vapeurs corrosives, de la poussière abrasive ou de tout
autre élément dommageable. Le cric doit être nettoyé de toute eau, neige, sable, poussière, huile, graisse ou autre corps étranger
avant son utilisation.
2. Le cric doit être lubrié périodiquement an d'éviter l'usure prématurée des pièces. Une graisse à usage général doit être
appliquée sur tous les embouts graisseurs, les roulettes, l'essieu avant, le bras de levage, l'axe d'articulation du support du
manche, le mécanisme de dégagement et toutes les surfaces portantes. Les pièces usées résultant d'une lubrication insatisfaisante
ou d'aucunelubrication ne sont pas admissibles à la garantie. IMPORTANT: Pour prévenir les dommages aux joints d’étanchéité et
la défectuosité du cric, ne jamais utiliser d’alcool, de liquide à freins hydrauliques ni d’huile à transmission dans le cric. Utiliser de
l'huile légère à turbine, l'huile Chevon AW ISO 32 ou Unocal Unax AW 150.
3. Il incombe au propriétaire du cric de garder propres et lisibles les étiquettes du cric. Laver les surfaces externes du cric à l'aide d'un
savon doux, tout en évitant les pièces hydrauliques mobiles.
4. Une inspection visuelle du cric devrait être effectuée avant chaque utilisation. Ne pas utiliser le cric si des pièces présentent des
signes de dommages tels que des ssures, des fuites ou des pièces endommagées, déformées ou manquantes. Ne pas utiliser le cric
si des pièces sont manquantes, lâches ou ont été modiées d'une façon quelconque. Effectuer les correctifs nécessaires avant
d'utiliser le cric à nouveau.
5. Ne pas tenter d'effectuer des réparations hydrauliques à moins d'être une personne qualiée pour ce faire et connaissant bien cet
équipement.

KTI63131A 13 01/18/18
DÉPANNAGE
Important: Les crics de levage sont des mécanismes autonomes qui servent à soulever des charges et non à soutenir une charge partielle de véhicule.
Conformément à normes de l’ASME-PALD, portant sur le test de soutien d’une charge : « Une charge qui ne dépasse pas la capacité nominale…ne
s’abaissera pas de plus 1/8 po (3,18 mm) la première minute, et ne s’abaissera pas de plus de 0,1875 po (4,76) au bout de 10 minutes. » Une fuite en-deçà
de cette marge est considérée normale et n’est pas considérée comme un vice de fabrication pouvant se réclamer de la garantie.
PROBLÈME: L'UNITÉ NE LÈVERA PAS LA CHARGE.
ACTION: Purger l'air du système hydraulique en suivant la procédure selon la conguration.
PROBLÈME: L'UNITÉ NE SUPPORTERA PAS LA CHARGE OU EST 'SPONGIEUSE' SOUS LA CHARGE.
ACTION: Purger l'air du système hydraulique comme mentionné ci-dessus.
PROBLÈME: LA POIGNÉE TEND À AUGMENTER VERS LE HAUT TANDIS QUE L'UNITÉ EST SOUS LA CHARGE.
ACTION: Pompez la poignée rapidement plusieurs fois de pousser l'huile après des robinets à tournant sphérique dans l'unité de
puissance.
PROBLÈME: L'UNITÉ NE FONCTIONNE TOUJOURS PAS.
ACTION: Pour connaître les détails de la garantie, communiquez avec le au point de vente.
K-Tool International Garantie limitée de 1 an
K-Tool International Équipement de levage est garanti contre tout défaut de matériel et de fabrication pendant 1 an à compter de sa date
d'achat. Cette garantie n’est offerte qu’à l’acheteur au détail original. Si un cric ou un article de service associé est défectueux au cours
de cette période, il sera remplacé ou réparé, au choix de K-Tool International, sans frais. Cette garantie ne s’applique pas aux
dommages dûs à un accident, une surchage, une mauvaise utilisation ou un abus, de plus elle ne s’applique pas à un équipement ayant
été modifié ou utilisé avec des accessoires spéciaux autres que ceux recommandés. Cette garantie ne couvre pas les réparations
effectuées ailleurs que dans un centre de réparation d’équipements de levage professionnels K-Tool International autorisé.
Tous les autres crics ou équipements de service seront remplacés ou réparés, au choix de K-Tool International, durant la période de
garantie de 1 an.
Au cours de la période de garantie de 1 an, tous les produits et/ou pièces qui sont présumés défectueux, doivent être expédiés, frais de
transport prépayés, accompagnés d’une preuve de la date d’achat, à votre centre de service/garantie d’équipements de levage
professionnels K-Tool International autorisé. Assurez-vous d’inclure votre nom, adresse et numéro de téléphone, accompagnés des
informations de preuve d’achat, et une brève description de la défectuosité présumée. Le produit sera retourné au client, frais de
transport prépayés.
Plusieurs défectuosités présumées peuvent être traitées en appelant votre centre de service le plus près pour des pièces. Voir les pages
14 - 16 pour la liste des centres de service autorisés au titre de la garantie.
En aucun temps, K-Tool International ne sera tenu responsable pour dommages accessoires ou indirects. La responsabilité pour toute
réclamation de perte ou dommages liés à la vente, revente ou utilisation du cric ou équipements de service associés, ne dépassera en
aucun temps le prix d’achat. CERTAINS ÉTATS NE PERMETTENT PAS L’EXCLUSION OU LA LIMITATION DE DOMMAGES
ACCESSOIRES OU INDIRECTS. DONC LA LIMITATION CI-DESSUS POURRAIT NE PAS S’APPLIQUER À VOUS.
CETTE GARANTIE EST LA SEULE ET UNIQUE GARANTIE FOURNIE EN LIEN AVEC LA VENTE D’ÉQUIPEMENTS DE LEVAGE
PROFESSIONNELS K-TOOL INTERNATIONAL. TOUTES AUTRES GARANTIES, INCLUANT DES GARANTIES TACITES ASSOCIÉES À LA
QUALITÉ MARCHANDE OU À L’ADÉQUATION POUR UN USAGE PARTICULIER, SONT EXCLUSES.
CETTE GARANTIE VOUS ACCORDE DES DROITS LÉGAUX SPÉCIFIQUES ET VOUS POURRIEZ ÉGALEMENT JOUIR DE DROITS
SUPPLÉMENTAIRES, QUI PEUVENT VARIER D’UN ÉTAT À L’AUTRE.
PROCÉDURES ET INDICATIONS DE TRAITEMENT
DE GARANTIE POUR SÉRIE KTI SERVICE STANDARD

KTI63131A 14 01/18/18
ALABAMA
SOUTHEASTERN JACK • 500 4TH AVENUE NORTH • BIRMINGHAM, AL 35204 • (205) 252-1511
ARIZONA
TIRE EQUIPEMENT SERVICE • 4002 E. ELWOOD ST., STE. 4. • PHEONIX, AR 85040 • (602) 437-0499
ARKANSAS
CLARKS HYDRAULIC SERVICE • 2901 CONFEDERATE BLVD. • LITTLE ROCK, AR 72206 • (501) 375-1252
CALIFORNIA
JACK-X-CHANGE • 1609 N. ORANGETHORPE WAY • ANAHEIM, CA 92801 • (714) 871-4966
J-MRK'S T.E.A.M REPAIR • 945 RAMONA AVE. • SPRING VALLEY, CA 91977 • (619) 469-6275
EGGIMAN'S HYDRAULIC GARAGE • 1112 E. HARDING WAY • STOCKTON, CA 95205 • (209) 465-2870
AAA HYDRAULICS • 511A HARBOR BLVD. • W. SACRAMENTO, CA 95691 • (916) 617-2656
CT&S • 1805 E. MAIN ST., STE. E • VISALIA, CA 93292 • (559) 623-2157
COLORADO
WILLIAM’S SALES & SERVICE • 11380 W. EXPOSITION AVE. • LAKEWOOD, CO 80226 • (303) 985-8868
CONNECTICUT
TOOL & EQUIP SERV SOLUTIONS • 2554 STATE ST. • HAMDEN, CT 06517 • (203) 248-7553
FLORIDA
P & H HYDRAULICS • 6530 TRIXEY ST. • JACKSONVILLE, FL 32219 • (904) 781-3558
TRI-CITY HYDRAULICS • 4628 N. FLORIDA AVE. • TAMPA, FL 33603 • (813) 232-1280
J. R. JACK & EQUIP REPAIR • 4513 CLEMENTS RD. • LAKELAND, FL 33811 • (863) 646-8087
R & R TOOL REPAIR • 13591 LINDEN DR. • SPRING HILL, FL 34609 • (352) 263-3587
STIRLING JACK SERVICE • 2110 S.W. 56TH AVE. • WEST PARK, FL 33023 • (954) 987-6910
GEORGIA
INDUSTRIAL CONTROLS • 1710 EASTMAN DR. • TIFTON, GA 31793 • (229) 386-2929
BOB'S HYDRAULIC REPAIR • #8 BROWN FOX DR. • ROME, GA 30165 • (706) 234-4471
TOOL SERVICE CO. • 178 MARBLE MILL RD. • MARIETTA, GA 30060 • (404) 524-4249
HAWAII
C & C AIR & HYDRAULICS • 94-148 LEOWAENA ST. BLDG.T • WAIPAHU, HI 96797 • (808) 671-8598
ILLINOIS
PRO-POINT CO. • 5328 GRAND AVE. • DOWNERS GROVE, IL 60515 • (630) 852-7233
HYDRAULIC SPECIALTY, INC. •1300 WEST ELM ST. • WEST FRANKFORT, IL 62896 • (618) 937-4099
INDIANA
ABC SPECIALTY CO. • 1075 KENWOOD AVE. • FORT WAYNE, IN 46805 • (260) 483-8913
TOOLS & EQUIPMENT SERVICE • 6718 EAST 38TH ST. • INDIANAPOLIS, IN 46226 • (317) 632-2208
B&K HYDRAULICS • 2184 S. SALEM RD. • MONROE, IN 46772 • (260) 592-7122
IOWA
HYDRA QUIP • 3400 DELAWARE AVE. • DES MOINES, IA 50313 • (515) 265-1453
BROZENE HYDRAULICS • 1400 MT. PLEASANT • BURLINGTON, IA 52601 • (319) 752-4017
KANSAS
ACME HYDRAULICS • 815 KANSAS AVE. • KANSAS CITY, KS 66105 • (913) 321-6385
KENTUCKY
PEMBERTON TOOL REPAIR • 822 EXETER AVE. • MIDDLESBORO, KY 40965 • (606) 248-7907
LOUISIANA
EAGLE SERVICE COMPANY • 2224 LEE ST. • ALEXANDRIA, LA 71301 • (318) 445-6140
MAINE
B & M HYDRAULIC JACK REPAIR • 576 MAIN ST. • MADAWASKA, ME 04756 • (207) 728-6713
MARYLAND
HYDRAULIC SERVICE, INC • 3304 BARCLAY ST. • BALTIMORE, MD 21218 • (410) 467-9459
LIST OF AUTHORIZED WARRANTY SERVICE CENTERS / LISTA DE CENTROS DE SERVICIO
AUTORIZADOS / LISTE DES CENTRES DE SERVICE AUTORISÉS AU TITRE DE LA GARANTIE :

KTI63131A 15 01/18/18
MASSACHUSETTS
BOSTON HYDRAULICS • 1601 COLUMBUS AVE., BOX 190744 • BOSTON, MA 02119 • (617) 427-2200
MICHIGAN
GRAND VALLEY HYDRAULICS • 6703 18TH AVE., STE. G • JENISON, MI 49428 • (616) 662-1992
HYDRAULICS UNLIMITED • 2091 SOUTH HURON RD. • KAWKAWLIN, MI 48631 • (989) 686-3594
KIRK’S AUTOMOTIVE • 9330 ROSELAWN ST. • DETROIT, MI 48204 • (313) 933-7030
K-TOOL INTERNATIONAL • 31133 WIXOM RD. • WIXOM, MI 48393 • (800) 762-6002, ext. 4149.
MINNESOTA
TOOL WAREHOUSE INC. • 9 LINCOLN AVE. S.E. • ST. CLOUD, MN 56304 • (320) 253-7150
TOOL WAREHOUSE INC • 3410 EAST 42ND ST. • MINNEAPOLIS, MN 55406 • (612) 722-4260
MISSISSIPPI
M & W HYDRAULIC • 4626 VAN WINKLE PARK DR. • JACKSON, MS 39209 • (601) 922-4418
MISSOURI
ARROW HYDRAULICS • 5231 MANCHESTER RD. • ST. LOUIS, MO 63110 • (314) 371-2358
A & B ELECTRIC CO. • 32553 WEST 119TH ST. • EXCELSOR SPRINGS, MO 64024 • (816) 630-8359
TOOL SERVICE CENTER • 2431 RAYMOND DR. • ST. CHARLES, MO 63301 • (636) 940-2525
HEARTLAND PNEUMATICS • 3527-C PERRYVILLE RD. • CAPE GIRARDEAU, MO 63701 • (573) 334-9085
MONTANA
NORTHERN HYDRAULICS • 2600 17TH ST. NE • BLACK EAGLE, MT 59414 • (406) 761-8079
NEBRASKA
FLOHR ELECTRIC SERVICE • 4356 SO. 90TH ST. • OMAHA, NE 68127 • (402) 331-6863
NEW HAMPSHIRE
AMERICAN HYDRAULIC CORP. • 1064 GOFFS FALLS RD. • MANCHESTER, NH 03108 • (603) 623-5444
NEW JERSEY
COUGAR ELECTRONICS • 622 BROADWAY • LONG BRANCH, NJ 07740 • (732) 870-3302
METRO HYDRAULIC JACK • 1271 MC CARTER HIGHWAY • NEWARK, NJ 07104 • (973) 350-0111
NEW MEXICO
A-ONE EQUIPMENT LTD. • 1108 RHODE ISLAND N.E. • ALBUQUERQUE, NM 87108 • (505) 256-0074
NEW YORK
ACE HYDRAULIC SERVICE • 6720 VIP PARKWAY • SYRACUSE, NY 13211 • (315) 454-8989
HYDRAULIC JACK/CYLINDER REPAIR • 13457 GENESEE ST. • ALDEN, NY 14004 • (716) 937-6008
AUTOMATIC REPAIR • 130 FLORIDA ST. • FARMINGDALE, NY 11735 • (631) 420-0103
NORTH CAROLINA
SOUTHERN HYDRAULIC SERVICE • 6914 STATESVILLE RD. • CHARLOTTE, NC 28269 • (704) 597-9244
CAROLINA TOOL REPAIR • 807 HUFFMAN ST. • GREENSBORO, NC 27405 • (336) 275-6124
NORTH DAKOTA
TOOL WAREHOUSE INC. • 127 WEST MAIN AVE. • WEST FARGO, ND 58078 • (701) 282-6151
OHIO
MATS EQUIPMENT CO. INC. • 51 PIERCE AVE. • WEST CARROLLTON, OH 45449 • (937) 859-8057
DINGER’S TOOL SERVICE • 22540 STIVERSON RD. • SUGAR GROVE, OH 43155 • (740) 746-0240
A & A HYDRAULIC REPAIR • 5301 W. 161ST ST. • CLEVELAND, OH 44142 • (216) 362-4000
OKLAHOMA
HYDRAULIC EQUIPMENT CO. • 2800 WEST CALIFORNIA, STE. A • OKLAHOMA CITY, OK 73107 • (405) 235-3318
OREGON
KARN REPAIR SERVICE • 1800 N.W. 169TH PLACE, STE. D300 • BEAVERTON, OR 97006 • (503) 690-9500
PENNSYLVANIA
HYDRAULIC IND. SUPPLY • HOLLY & MADISON AVE. BLDG #1 • CLIFTON HEIGHTS, PA 19018 • (610) 284-2100
HUMPHREY'S HYDRAULICS • 2214 HUCKLEBERRY RD. • ALLENTOWN, PA 18104 • (610) 435-9287

KTI63131A 16 01/18/18
SOUTH CAROLINA
AIR & HYDRAULIC SERVICE • 315 HAWKINS RD. • TRAVELERS REST, SC 29690 • (866) 867-5359
SOUTH DAKOTA
ALL-AROUND AUTO LLC • 105 ZIEBACH ST. • BELLE FOURCHE, SD 57717 • (605) 723-6272
TENNESSEE
AUTHORIZED EQUIPMENT SERVICE • 812 POLK AVE. • MEMPHIS, TN 38126 • (901) 774-0850
LUBRICATION EQUIPMENT • 2501 MITCHELL ST. • KNOXVILLE, TN 37917 • (865) 525-8401
TEXAS
AAA PNEUMATICS & SUPPLY • 907 EDEN ROC ST. • VICTORIA, TX 77904 • (361) 573-9920
STAR HYDRAULIC & TOOL SERVICE • 7012 LONG POINT • HOUSTON, TX 77055 • (713) 681-4105
VMW MAINTENANCE SOLUTIONS • 2328 BLANCO RD. • SAN ANTONIO, TX 78212 • (210) 736-4285
HYDRAULIC SERVICE & SUPPLY • 100 HOWELL ST. • DALLAS, TX 75207 • (214) 748-6015
WATCO EQUIPMENT SERVICES • 6005 MILWEE ST., STE. 706 • HOUSTON, TX 77092 • (713) 290-9033
UTAH
GUSTIN HYDRAULIC • 151 W. 2125 SOUTH • SALT LAKE CITY, UT 84115 • (801) 487-0624
VIRGINIA
JACK-MAN • 110 ANN ST. • MADISON HEIGHTS, VA 24572 • (434) 847-6963
HYDRAULIC SERVICE COMPANY • 3215 VICTORY BLVD. • PORTSMOUTH, VA 23702 • (757) 487-2513
SARVERS HYDRAULICS • 2550 JOHNSON AVE. • ROANOKE, VA 24017 • (540) 344-0799
WASHINGTON
SPOKANE PUMP • 3626 E. TRENT AVE. • SPOKANE, WA 99202 • (509) 535-9771
UNIVERSAL REPAIR • 1611 BOYLSTON AVE. • SEATTLE, WA 98122 • (206) 322-2726
WEST VIRGINIA
GILLETTE REPAIR SERVICE • ROUTE 8, BOX 128-A • FAIRMONT, WV 26554 • (304) 366-3119
WISCONSIN
AFI DIRECT SERVICES • 7515 S. 10TH ST. • OAK CREEK, WI 53154 • (414) 764-1160
CANADA
ALBERTA
PRECISION HYDRAULICS • 940-48 AVE. SE • CALGARY, ALBERTA T2G 5B1 • (403) 243-5997
DAN’S POWER TOOL REPAIR • 8149 WAGNER RD. NE • EDMONTON, ALBERTA T6E 4N6 • (780) 490-1955 OR (780) 490-1956
BRITISH COLUMBIA
RAMTORC TOOLS, INC. • 160-11960 HAMMERSMITH WAY • RICHMOND, BRITISH COLUMBIA V7A 5C9 • (604) 271-3220
MANITOBA
ACCUTOOL SERVICE • 465 LUCAS AVE. • WINNEPEG, MANITOBA R3C 2E6 • (204) 772-6523
ONTARIO
MONARCH REBUILDING, INC. • 97 BESSEMER RD. UNIT 5 • LONDON, ONTARIO N6E 1P9 • (519) 681-5640
QUEBEC
INSTRUMENT SALES & SERVICE • 6059 DE MAISONNEUVE BLVD. • W. MONTREAL, QC H4A 3R8 • (514) 481-8111
MINI HYDRAULIQUE INC. • 2732 RUE DE LA FAUNE • QUEBEC, QC G3E 1H4 • (418) 843-6177
MR. TANGUAY & FILS • 1110 CROISSIANT CLAIRE • LACHINE, QUEBEC H8S 1A1 • (514) 933-8073 OR (514) 639-8825
Table of contents
Languages:
Other K-Tool Jack manuals

K-Tool
K-Tool KTI-63105A User manual

K-Tool
K-Tool XD KTI-63133A User manual

K-Tool
K-Tool KTI-63131B User manual

K-Tool
K-Tool KTI-63517A User manual

K-Tool
K-Tool PRO Series Instructions for use

K-Tool
K-Tool KTI63105 User manual

K-Tool
K-Tool KTI63092 User manual

K-Tool
K-Tool KTI63100 User manual

K-Tool
K-Tool XD KTI63101 User manual

K-Tool
K-Tool KTI63500 User manual