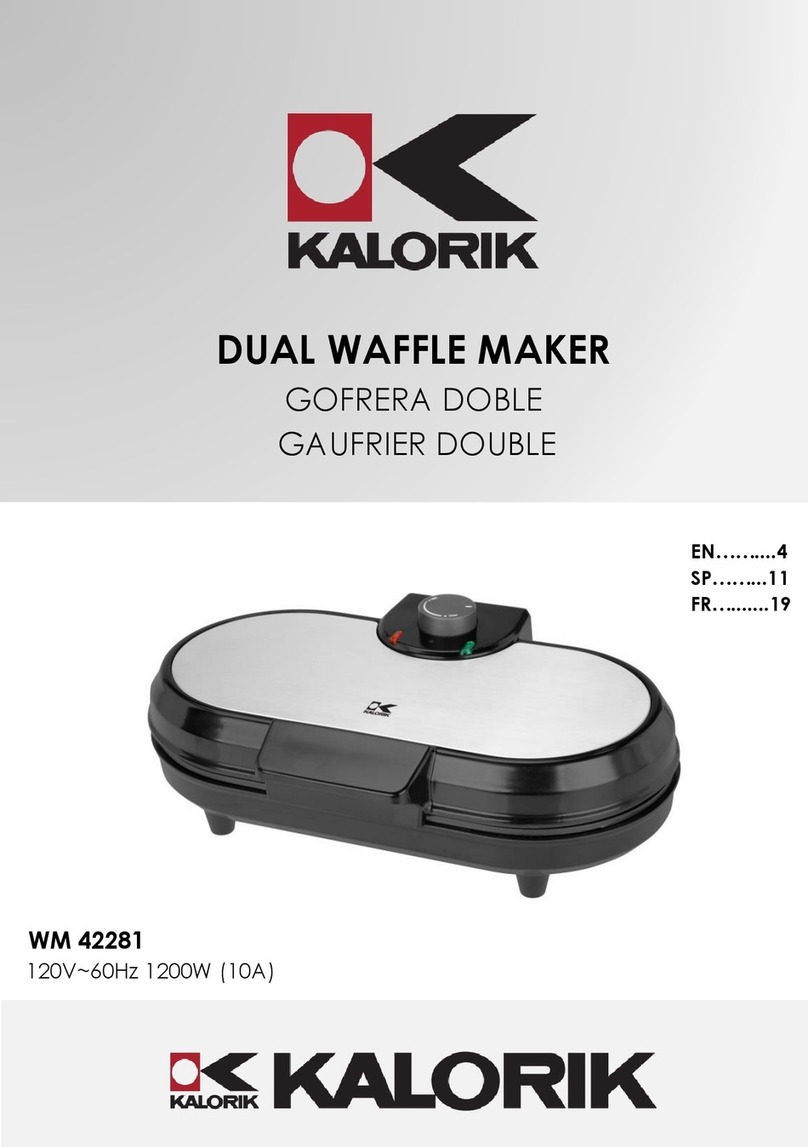
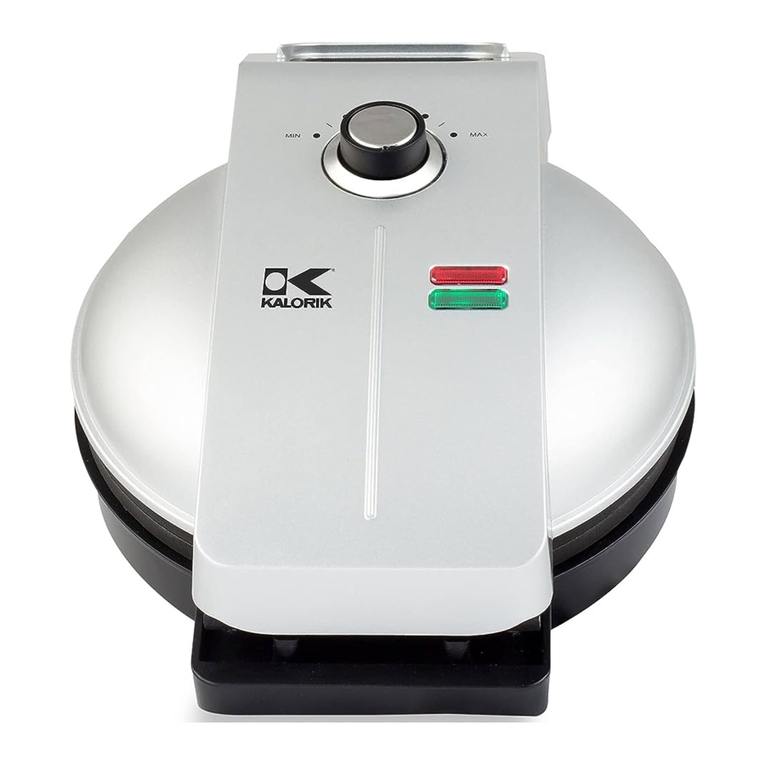
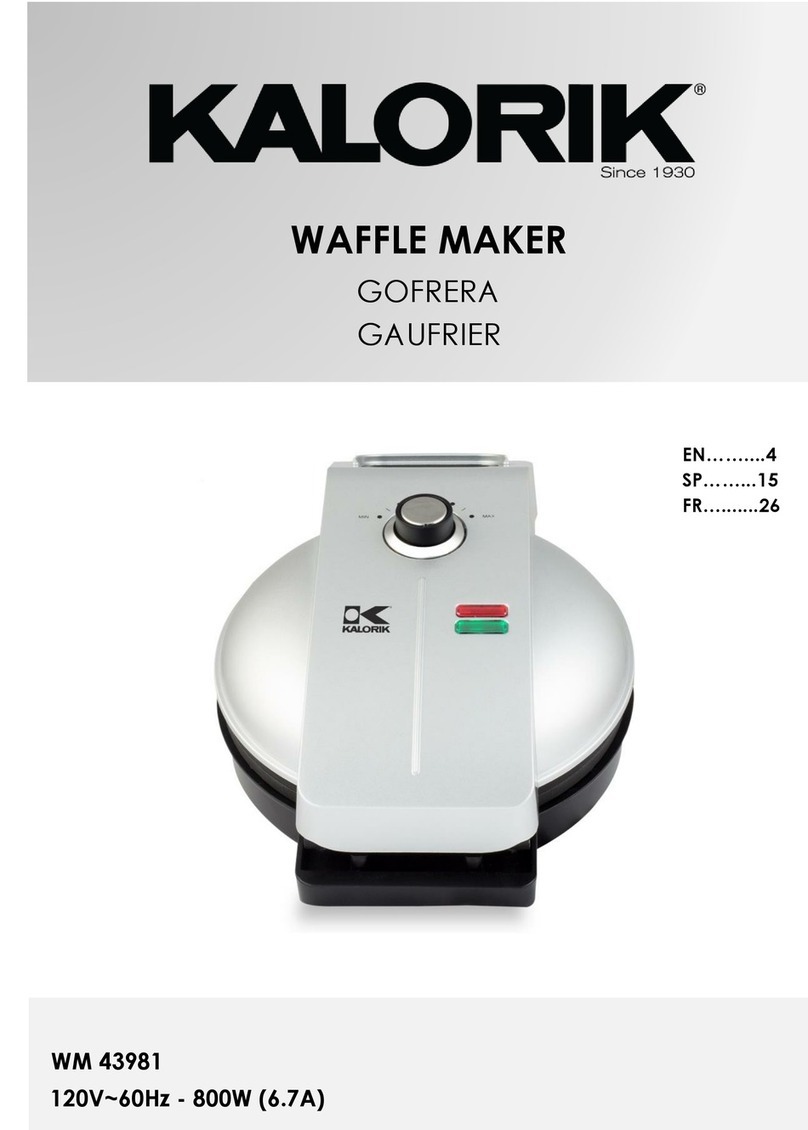
Kalorik WM 41684 User manual

Copies of the I/B. Please reproduce them without any
changes except under special instruction from Team
International USA. The pages must e reproduced and folded
in order to o tain a ooklet A5 (+/- 148.5 mm width x 210 mm
height). When folding, make sure you keep the good
num ering when you turn the pages of the I/B. Don’t change
the page num ering. Keep the language integrity. Print only
what is inside the frame.
Front cover page (first page)
Assem ly page 1/32
Fax +1 305 430 9692
Waffle maker
Gofrera
Gaufrier
WM 4
1684
120V~60 z 1000W (8.3A)
www.KALORIK.com

Copies of the I/B. Please reproduce them without any
changes except under special instruction from Team
International USA. The pages must e reproduced and folded
in order to o tain a ooklet A5 (+/- 148.5 mm width x 210 mm
height). When folding, make sure you keep the good
num ering when you turn the pages of the I/B. Don’t change
the page num ering. Keep the language integrity. Print only
what is inside the frame.
2 WM 41684 - 120501
Assem ly page 2/32
Fax +1 305 430 9692
IMPORTANT SAFEGUARDS
When using electrical appliances, basic safety precautions should
always be followed, including the following:
1. READ ALL INSTRUCTIONS BEFORE USE
2. Check that the voltage in your home corresponds to that stated
on the rating plate of the appliance, efore using the appliance.
3. Do not touch hot surfaces. Use the handles and uttons.
4. To protect against electrical shock, do not immerse cord, plug, or
the appliance in water or other liquid.
5. Close supervision is necessary when the appliance is used y or
near children. This appliance shall not e used y children.
6. Please keep out of reach of children and pets. This product is not
intended for use y children, y persons with reduced physical,
sensory or mental capa ilities, or lacking experience or
knowledge, unless they have een given supervision or instruction
concerning the use of the product, y a person responsi le for
their safety. Extra caution is always necessary when using this
product.
7. Unplug from outlet when not in use and efore cleaning. Allow to
cool efore cleaning the appliance.
8. Do not operate any appliance with a damaged cord or plug or
after the appliance malfunctions or has een damaged in any
manner. Return appliance to the nearest authorized service
facility for examination, repair, or adjustment.
9. The use of accessory attachments not recommended y the
appliance manufacturer may cause fire, electric shock or serious
personal injuries.
10. Do not use outdoors.
11. Do not let cord hang over edge of ta le or counter or touch hot
surfaces.
12. Do not place on or near a hot gas or electric urner, or in a
heated oven.
13. Extreme caution must e used when moving an appliance
containing hot oil or other hot liquids.

Copies of the I/B. Please reproduce them without any
changes except under special instruction from Team
International USA. The pages must e reproduced and folded
in order to o tain a ooklet A5 (+/- 148.5 mm width x 210 mm
height). When folding, make sure you keep the good
num ering when you turn the pages of the I/B. Don’t change
the page num ering. Keep the language integrity. Print only
what is inside the frame.
3 WM 41684 - 120501
Assem ly page 3/32
Fax +1 305 430 9692
14. To disconnect, turn the temperature control to the minimum
setting, and remove the plug from the wall outlet.
15. Do not use the appliance for other than intended use.
16. When using this appliance, provide adequate airspace a ove
and on all sides for air circulation. On surfaces where heat may
cause a pro lem, an insulated hot pad is recommended.
17. Do not leave unit unattended during use.
18. Always use the product on a clean, flat, hard, dry and heat
resistant surface. There should e no material such as a
ta lecloth or plastic etween the unit and surface. A fire may
occur if the waffle maker is covered or touching flamma le
material, including curtains, draperies, walls, and the like, when in
operation.
19. It is a solutely necessary to keep this appliance clean at all times
as it comes in direct contact with food.
20. Be careful not to scratch the non-stick coating of the cooking
plate, as you might get little pieces of this coating into the food. If
scraping is necessary, unplug the appliance and use a wooden
spatula or a heat resistant plastic one.
21. DO NOT touch the cover during use. HOT SURFACE!
22. Never impact this unit or drop from a high place.
SAVE T ESE INSTRUCTIONS
OUSE OLD USE ONLY
POLARIZED PLUG INSTRUCTIONS
This appliance is equipped with a polarized plug (one lade is wider
than the other). To reduce the risk of electric shock, this plug will fit
into the polarized outlet only one way. If the plug does not properly
fit into the outlet at first, reverse it. If it still does not fit, contact a
competent qualified electrician. Do not attempt to modify the plug in
any way.

Copies of the I/B. Please reproduce them without any
changes except under special instruction from Team
International USA. The pages must e reproduced and folded
in order to o tain a ooklet A5 (+/- 148.5 mm width x 210 mm
height). When folding, make sure you keep the good
num ering when you turn the pages of the I/B. Don’t change
the page num ering. Keep the language integrity. Print only
what is inside the frame.
4 WM 41684 - 120501
Assem ly page 4/32
Fax +1 305 430 9692
S ORT CORD INSTRUCTIONS
A short power supply cord is provided to reduce the hazards resulting
from ecoming entangled in, or tripping over a longer cord.
Extension cords may e used if care is exercised in their use.
• The electrical rating of the extension cord should e at least
that of the appliance. If the electrical rating of the extension
cord is too low, it could overheat and urn.
• The resulting extended cord should e arranged so that it will
not drape over the counter top or ta letop where it can e
pulled on y children or tripped over.
PART DESCRIPTION
1. Power-on light (red) and
heating-on light (green)
2. Locking clip
3. Handles
4. Rotating hinge
5. Plate release utton
6. Base/Detacha le drip tray
7. Waffle plates
BEFORE T E FIRST USE
• Before using the appliance for the first time, remove and peel off
all promotional and packaging materials. Check that the
cooking plates are clean and free of dust.
• Clean the waffle maker (See "Cleaning and Care") and place the
unit on a flat, dry, and heat-resistant surface.
7

Copies of the I/B. Please reproduce them without any
changes except under special instruction from Team
International USA. The pages must e reproduced and folded
in order to o tain a ooklet A5 (+/- 148.5 mm width x 210 mm
height). When folding, make sure you keep the good
num ering when you turn the pages of the I/B. Don’t change
the page num ering. Keep the language integrity. Print only
what is inside the frame.
5 WM 41684 - 120501
Assem ly page 5/32
Fax +1 305 430 9692
• It is recommended to heat the waffle maker for a out 10 minutes
without any foodstuff on its surfaces. This helps to eliminate any
grease that may have adhered during manufacturing and to
eliminate the "new" appliance smell.
• Ventilate the room during this period. When your waffle maker is
heated for the first time, it may emit slight smoke or odor. This is
normal with many heating appliances. This does not affect the
safety of your appliance.
OPERATION
• Place the unit on a flat, dry, and heat-resistant surface.
• Close the appliance and plug into the electrical outlet. The red
power light will come on to indicate that the appliance is
switched on and that your waffle maker is preheating.
• When the green pilot light goes on, it means that the desired
temperature is reached. Baking temperature should e reached in
3 to 4 minutes. During use, this light will come on and off regularly.
This simply means that the thermostat is regulating the appliance's
temperature.
Caution: during operation, the aking plates heat up. Use caution to
avoid urns. Use oven mitts and heat-resistant wooden or plastic
utensils!
• Open the appliance and lightly rush the plates with
oil or non-
stick cooking spray.
• Pour some of the atter evenly onto the middle of the ottom
aking plate, but not all the way to the edges! The atter may
overflow if too much is poured as it expands while cooking.
• Close the lid down in order to spread the atter evenly on the
aking plates. Don’t forget to press the locking clip in to keep the
waffle maker secure efore rotating.
• Holding oth handles, rotate the aker 180 degrees so that the
opposite side of the aker is now facing up.
• Bake until golden rown (approximately 5 min).
• When the waffles are ready unlatch the locking clip and open
the waffle maker.
• Remove them with a plastic or wooden spatula. Never use any
sharp metallic o jects, as this might damage the non-stick
coating.

Copies of the I/B. Please reproduce them without any
changes except under special instruction from Team
International USA. The pages must e reproduced and folded
in order to o tain a ooklet A5 (+/- 148.5 mm width x 210 mm
height). When folding, make sure you keep the good
num ering when you turn the pages of the I/B. Don’t change
the page num ering. Keep the language integrity. Print only
what is inside the frame.
6 WM 41684 - 120501
Assem ly page 6/32
Fax +1 305 430 9692
• When aking is finished, unplug the cord from the socket and
leave the appliance open to cool.
ASSEMBLY AND REMOVAL OF PLATES
• Hold the plate and line up the two rear locking pins (see Fig. 1) on
the ack of the plate with the receptacles in the rear of the unit.
• Gently lay the plate down and apply pressure to snap the plate
into place. You will hear a click indicating that the plate has
locked into place.
• To ensure that the plate is locked, gently try to lift it up.
• To remove the plate from the waffle maker, press the plate
release utton and pull the plate away from the appliance.

Copies of the I/B. Please reproduce them without any
changes except under special instruction from Team
International USA. The pages must e reproduced and folded
in order to o tain a ooklet A5 (+/- 148.5 mm width x 210 mm
height). When folding, make sure you keep the good
num ering when you turn the pages of the I/B. Don’t change
the page num ering. Keep the language integrity. Print only
what is inside the frame.
7 WM 41684 - 120501
Assem ly page 7/32
Fax +1 305 430 9692
WAFFLE RECIPES
S ORTBREAD WAFFLES
14 t sp. utter
1 cup sugar
4 eggs
Twist of lemon
1 ½ cup of plain flour
YEAST WAFFLES
3 t sp. yeast
1 cup milk
9 t sp. utter
¼ cup sugar
6 eggs
Twist of lemon
Pinch of salt
3 cups of plain flour
TRADITIONAL WAFFLES
9 t sp. utter
¾ cup sugar
Twist of lemon
Pinch of salt
3 eggs
1 cup milk
2 cups of plain flour
1 tsp. aking powder
CRISP WAFFLES
14 t sp. utter
¾ cup sugar
4 eggs
3 cups of plain flour
1 t sp. rum
Few drops of vanilla essence
2/3 to 3/4 cup water (not milk)
APPLE WAFFLES
11 t sp. utter
1 cup sugar
4 eggs
1 tsp. aking powder
2 cups of plain flour
Pinch of salt
Small pinch of ground cloves
1 tsp. cinnamon
2 apples peeled and diced
OW TO PREPARE T E WAFFLE BATTER
• In a mixing owl, com ine the flour with the aking soda, salt,
and sugar. Make a well in the center of the owl.
• Add the egg yolk and milk, gradually working them into the flour
using a spatula.
• Beat gently until smooth.
• Carefully stir in the melted utter.
• In a separate owl, whisk the egg whites until stiff peaks form.
Carefully fold the whites into the atter using a large spoon or
whisk.
• Please see a ove examples for ideas on how to create different
varieties of waffles.

Copies of the I/B. Please reproduce them without any
changes except under special instruction from Team
International USA. The pages must e reproduced and folded
in order to o tain a ooklet A5 (+/- 148.5 mm width x 210 mm
height). When folding, make sure you keep the good
num ering when you turn the pages of the I/B. Don’t change
the page num ering. Keep the language integrity. Print only
what is inside the frame.
8 WM 41684 - 120501
Assem ly page 8/32
Fax +1 305 430 9692
CLEANING AND MAINTENANCE
• Before cleaning, unplug the appliance and wait for it to cool
down completely.
• Remove the waffle plates according to the instructions
referenced in the “Assem ly and Removal of Plates” section of
this manual.
• The waffle plates can e cleaned easily with warm soapy water.
Do NOT put the cooking plates in the dishwasher.
• Always dry plates thoroughly efore assem ling them in the
waffle maker.
• The ase of the waffle maker also serves as a drip tray and can
e completely detached for easy cleaning. Simply rotate the
waffle maker 90 degrees and remove the rotating hinge from the
ase. Wash the ase in warm soapy water, or place it in the
dishwasher.
• Wipe the outside with only a slightly moistened cloth ensuring that
no moisture, oil or grease enters the cooling slots.
• Wipe the inside and the edges of the plate with paper towel or a
soft cloth.
• Do not clean the inside or outside of the unit with any a rasive
scouring pads or steel wool as this will damage the finish.
• If there is any hard-to-remove atter residue aked onto the
cooking plates, we would advise using vegeta le oil to soften it,
waiting 5 minutes efore removing with a paper towel.
• DO NOT place the waffle maker in the dishwasher.
• NEVER clean or rinse the appliance under running water.
• DO NOT IMMERSE T E WAFFLE MAKER IN WATER OR ANY OT ER
LIQUID.
• Any other servicing should e performed y an authorized
service representative.

Copies of the I/B. Please reproduce them without any
changes except under special instruction from Team
International USA. The pages must e reproduced and folded
in order to o tain a ooklet A5 (+/- 148.5 mm width x 210 mm
height). When folding, make sure you keep the good
num ering when you turn the pages of the I/B. Don’t change
the page num ering. Keep the language integrity. Print only
what is inside the frame.
9 WM 41684 - 120501
Assem ly page 9/32
Fax +1 305 430 9692
WARRANTY
We suggest that you complete and return the enclosed Product
Registration Card promptly to facilitate verification of the date of
original purchase. However, return of the Product Registration Card is
not a condition of these warranties. You can also fill out this warranty
card online, at the following address: www.KALORIK.com
This KALORIK product is warranted in the U.S.A. for 1 year from the
date of purchase against defects in material and workmanship. This
warranty is not transfera le. Keep the original sales receipt. Proof of
purchase is required to o tain warranty performance.
During this period, if the KALORIK product, upon inspection y
KALORIK, is proven defective, it will e repaired or replaced, at
Kalorik’s option, without charge to the customer. If a replacement
product is sent, it will carry the remaining warranty of the original
product.
This warranty does not apply to any defect arising from a uyer's or
user's misuse of the product, negligence, failure to follow KALORIK
instructions noted in the user’s manual, use on current or voltage
other than that stamped on the product, wear and tear, alteration
or repair not authorized y KALORIK, or use for commercial purposes.
There is no warranty for glass parts, glass containers, filter asket,
lades and agitators, and accessories in general. There is also no
warranty for parts lost y the user.
ANY WARRANTY OF MERCHANTABILITY OR FITNESS WITH RESPECT TO
THIS PRODUCT IS ALSO LIMITED TO THE ONE YEAR LIMITED WARRANTY
PERIOD.
Some states do not allow limitation on how long an implied warranty
lasts or do not allow the exclusion of incidental or consequential
damages, so the a ove limitations may not apply to you. This
warranty gives you specific legal rights, and you may also have other
rights which vary from state to state.
Copies of the I/B. Please reproduce them without any
changes except under special instruction from Team
International USA. The pages must e reproduced and folded
in order to o tain a ooklet A5 (+/- 148.5 mm width x 210 mm
height). When folding, make sure you keep the good
num ering when you turn the pages of the I/B. Don’t change
the page num ering. Keep the language integrity. Print only
what is inside the frame.
10 WM 41684 - 120501
Assem ly page 10/32
Fax +1 305 430 9692
If the appliance should ecome defective within the warranty
period and more than 30 days after date of purchase, do not return
the appliance to the store: often, our Customer Service
Representatives can help solve the pro lem without having the
product serviced. If servicing is needed, a Representative can
confirm whether the product is under warranty and direct you to the
nearest service location.
If this is the case, ring the product, or send it, postage prepaid y
the user (all Kalorik customers are responsi le for the initial shipment
ack to the warranty center), along with proof of purchase and a
return authorization number indicated on the outer package, given
y our Customer Service Representatives. Send to the authorized
KALORIK Service Center (please visit our we site at
www.KALORIK.com or call our Customer Service Department for the
address of our authorized KALORIK Service Center).
When sending the product, please include a letter explaining the
nature of the claimed defect.
If you have additional questions, please call our Customer Service
Department (please see elow for complete contact information),
Monday through Thursday from 9:00am - 5:00pm (EST) and Friday
from 9:00am - 4:00pm (EST). Please note hours are su ject to change.
If you would like to write, please send your letter to:
KALORIK Customer Service Department
Team International Group of America Inc.
1400 N.W 159th Street, Suite 102
Miami Gardens, FL 33169 USA
Or call:
Toll Free: +1 888-521-TEAM / +1 888-KALORIK
Only letters can be accepted at this address above. Shipments and
packages that do not have a return authorization number will be
refused.

Copies of the I/B. Please reproduce them without any
changes except under special instruction from Team
International USA. The pages must e reproduced and folded
in order to o tain a ooklet A5 (+/- 148.5 mm width x 210 mm
height). When folding, make sure you keep the good
num ering when you turn the pages of the I/B. Don’t change
the page num ering. Keep the language integrity. Print only
what is inside the frame.
11 WM 41684 - 120501
Assem ly page 11/32
Fax +1 305 430 9692
MEDIDAS DE SEGURIDAD IMPORTANTES
Al usar aparatos electrodomésticos, se deben tener en cuenta
precauciones de seguridad básicas, entre ellas:
1. LEA TODAS LAS INSTRUCCIONES.
2. Antes de utilizar el aparato, comprue e que el voltaje de la red
eléctrica coincide con el indicado en la placa de datos técnicos
del aparato.
3. No toque las superficies calientes. Utilice siempre las pegas.
4. Para protegerse contra una descarga eléctrica, no sumerja el
aparato, el ca le de alimentación o el enchufe en agua o en
otros líquidos.
5. Es siempre necesaria la supervisión cercana cuando este
aparato esté utilizado cerca de niños. Este aparato no de e ser
usado por niños.
6. Manténgalo fuera del alcance de los niños y mascotas. Este
producto no está destinado a ser utilizado por niños, personas
con discapacidades físicas, sensoriales o mentales, o que
carecen de experiencia o conocimiento, a menos que no sean
supervisados o instruidos acerca del uso del producto, por una
persona responsa le de su seguridad. Cuando se utiliza este
producto siempre es necesaria una precaución extrema.
7. Desconecte el aparato de la toma de corriente cuando la
unidad no se encuentra en uso o antes de limpiarla. Deje enfriar
el aparato antes de limpiarlo.
8. No opere este y ningún aparato si el ca le o el enchufe están
quemados o dañados, o después de que el aparato ha
funcionado inadecuadamente o ha sido dañado en cualquier
manera. El aparato de e ser reemplazado por el fa ricante o
por un centro de servicio autorizado o por una persona similar
cualificada.
9. El uso de accesorios no recomendados por el fa ricante pueden
causar incendios, descargas eléctricas o lesiones.
10. No use en exteriores.
11. No permita que el ca le cuelgue del orde de la mesa o del
mostrador o toque las partes calientes.

Copies of the I/B. Please reproduce them without any
changes except under special instruction from Team
International USA. The pages must e reproduced and folded
in order to o tain a ooklet A5 (+/- 148.5 mm width x 210 mm
height). When folding, make sure you keep the good
num ering when you turn the pages of the I/B. Don’t change
the page num ering. Keep the language integrity. Print only
what is inside the frame.
12 WM 41684 - 120501
Assem ly page 12/32
Fax +1 305 430 9692
12. No coloque este aparato cerca de quemadores de gas o
eléctricos, o dentro de un horno caliente.
13. Tenga mucho cuidado cuando desplace un aparato lleno de
aceite caliente u otros líquidos calientes.
14. Para desconectar el aparato, gire el control de temperatura al
ajuste mínimo, en desenchúfelo.
15. No use este aparato más que para lo que ha sido diseñado.
16. Asegúrese de que el espacio li re alrededor del aparato esté
suficiente mientras esté en funcionamiento, a fin que el aire
circule ien. En las superficies donde el calor pueda causar
pro lemas, se recomienda usar un posa-fuentes aislante.
17. No deje el aparato sin vigilancia mientras esté en uso.
18. Siempre use el producto so re una superficie limpia, plana, dura,
seca y resistente al calor. Nunca coloque materiales como por
ejemplo un mantel o un plástico entre la unidad y la superficie.
Puede ocurrir un incendio si el aparato está en funcionamiento y
se encuentra en contacto o cu ierto con materiales inflama les,
incluyendo cortinas, tapicerías, paredes, etc.
19. Es indispensa le guardar el aparato limpio, ya que está en
contacto directo con los alimentos.
20. Procure no rallar el revestimiento anti-adherente de la placa de
cocción, ya que en caso contrario podría encontrar partículas
del revestimiento en la comida. Si es necesario raspar las placas,
desenchufe el aparato y utilice sólo una espátula de madera o
de plástico resistente al calor.
21. NO toque la tapa durante el uso. SUPERFICIE CALIENTE!
22. Evite los choques en el aparato y no deje que caiga de lo alto.
GUARDE ESTAS INSTRUCCIONES
SOLAMENTE PARA USO DOMESTICO
INSTRUCCIONES SOBRE EL ENC UFE POLARIZADO
Este aparato está equipado con un enchufe polarizado (una clavija
es más ancha que la otra). Para reducir el riesgo de descarga
eléctrica, este enchufe entra en el tomacorriente polarizado en un
solo sentido. Si el enchufe no entra de inicio completamente en el

Copies of the I/B. Please reproduce them without any
changes except under special instruction from Team
International USA. The pages must e reproduced and folded
in order to o tain a ooklet A5 (+/- 148.5 mm width x 210 mm
height). When folding, make sure you keep the good
num ering when you turn the pages of the I/B. Don’t change
the page num ering. Keep the language integrity. Print only
what is inside the frame.
13 WM 41684 - 120501
Assem ly page 13/32
Fax +1 305 430 9692
tomacorriente, gire el enchufe. Si aun así no encaja, contacte a un
técnico electricista calificado.
No intente modificar el enchufe de ninguna manera.
INSTRUCCIONES SOBRE EL CABLE CORTO
Se proporciona un ca le de alimentación corto para reducir los
riesgos de que se enrede o tropiece con un ca le largo. Los ca les
de extensión pueden usarse si se tiene cuidado en su uso.
• La clasificación eléctrica del ca le de extensión de e ser al
menos igual a la del aparato. Si la clasificación eléctrica del
ca le de extensión es demasiado aja, este podría
recalentarse e incendiarse.
• El ca le extendido resultante de e colocarse de manera que
no cuelgue del mostrador o mesa en donde los niños
pudieran halarlo o tropezar con él.
PARTES
1. Luz de encendido (rojo)
y luz de calentamiento
(verde)
2. Broche de loqueo
3. Manijas
4. Eje giratorio
5. Botón li erador de
placas
6. Base desmonta le de
andeja de goteo
7. Placas de gofres

Copies of the I/B. Please reproduce them without any
changes except under special instruction from Team
International USA. The pages must e reproduced and folded
in order to o tain a ooklet A5 (+/- 148.5 mm width x 210 mm
height). When folding, make sure you keep the good
num ering when you turn the pages of the I/B. Don’t change
the page num ering. Keep the language integrity. Print only
what is inside the frame.
14 WM 41684 - 120501
Assem ly page 14/32
Fax +1 305 430 9692
ANTES DE UTILIZAR POR PRIMERA VEZ EL APARATO
•
Antes de utilizar el aparato por primera vez, quite todo el
material de em alaje y comprue e que las placas de cocina
están limpias y li res de polvo
•
Limpie el gofrera (Cf. "Limpieza”). Coloque el aparato en so re
una superficie lisa, seca y resistente al calor.
•
La primera vez que se enchufa, sale humo y huele. Esto es
normal, puesto que en su fa ricación se pueden ha er adherido
grasas que se estén quemando.
•
Le recomendamos que tenga encendido el aparato durante 10
minutos sin comida y que ventile la ha itación durante este
tiempo. Cuando su gofrera se calienta por primera vez, puede
emitir un poco de humo o el olor. Es algo normal que ocurre con
muchos aparatos de calor. Esto no afecta a la seguridad de su
aparato.
MODO DE EMPLEO
• Coloque el aparato so re una superficie lisa, seca y resistente al
calor.
• Cierre el aparato y enchufe la clavija a la red eléctrica. La luz
roja se encenderá indicando que el aparato está en
funcionamiento.
• Cuando la luz verde se enciende, la temperatura deseada está
alcanzada. Durante el funcionamiento esa luz se irá encendiendo
y apagando regularmente. Esto indica que el termostato está
regulando la temperatura del aparato.
Atención: Durante la utilización, las placas se calientan. Téngalo en
cuenta para evitar quemaduras. Use guantes de cocina y utensilios
de madera o de plástico resistentes al calor.
• A ra el aparato y aplique un poco de aceite o un spray de
aceite antiadherente para cocinar en las placas de cocción.
• Vierta un poco de la mezcla uniformemente en la placa de
cocción inferior, ¡PERO NO HASTA EL BORDE! La mezcla se
expandirá durante el calentamiento y si es vertido hasta el
orde, la mezcla se des ordará.
• Presione la tapa hacia a ajo con el fin de difundir la mezcla
uniformemente so re las placas de cocción. No olvides presionar

Copies of the I/B. Please reproduce them without any
changes except under special instruction from Team
International USA. The pages must e reproduced and folded
in order to o tain a ooklet A5 (+/- 148.5 mm width x 210 mm
height). When folding, make sure you keep the good
num ering when you turn the pages of the I/B. Don’t change
the page num ering. Keep the language integrity. Print only
what is inside the frame.
15 WM 41684 - 120501
Assem ly page 15/32
Fax +1 305 430 9692
el roche de loqueo para mantener la gofrera segura antes de
rotarla.
• Mantenga sujetadas las dos manijas, rote la unidad 180 grados al
lado opuesto para colocar la parte inferior de la unidad hacia
arri a.
• Deje cocinar hasta o tener un gofre dorado (aproximadamente
5 minutos).
• Cuando los gofres estén listos, a rir el roche de loqueo para
poder a rir la unidad.
• Una vez que termine de utilizar la unidad, desconecte el ca le
de la electricidad y deje la unidad a ierta para dejar enfriar.
MONTAJE Y ELIMINACIÓN DE PLATOS
• Sujetar la placa y alinear los dos roches de loqueo (ver Fig. 1)
en la parte de atrás de los platos con los receptores en la parte
de atrás de la unidad.
• Suavemente colocar la placa y aplicar presión hasta escuchar
sonido indicando que la placa fue correctamente insertada.
• Para asegurar que la placa fue correctamente insertada,
suavemente mueva hacia arri a la placa y la misma se quedara
en su lugar.
• Para remover la placa de la gofrera, presione el otón de
li eración en la parte de atrás de la unidad y extraiga las placas
de la unidad.
Broches de loqueo
Receptores

Copies of the I/B. Please reproduce them without any
changes except under special instruction from Team
International USA. The pages must e reproduced and folded
in order to o tain a ooklet A5 (+/- 148.5 mm width x 210 mm
height). When folding, make sure you keep the good
num ering when you turn the pages of the I/B. Don’t change
the page num ering. Keep the language integrity. Print only
what is inside the frame.
16 WM 41684 - 120501
Assem ly page 16/32
Fax +1 305 430 9692
RECETAS DE GOFRES
GOFRES "POLVORON"
½ l de mantequilla
½ l de azúcar
4 huevos
Rodaja de limón
½ l de harina
GOFRES DE LEVADURA
0.8 oz de levadura
8.5 fl. oz. de leche
¼ l de mantequilla
1.7 l de azúcar
6 huevos
Rodaja de limón
Pizca de sal
0.8 l de harina
GOFRES TRADICIONALES
¼ l de mantequilla
1/3 l de azúcar
Rodaja de limón
Pizca de sal
3 huevos
8.5 fl. oz. de leche
½ l de harina
1 cucharadita de levadura
química
GOFRES CRUJIENTES
½ l de mantequilla
1/3 l de azúcar
4 huevos
¾ l de harina
1 cucharadita de ron
Algunas gotas de esencia de
vainilla
5-7 fl. oz. de agua (non leche)
GOFRES DE MANZANA
1/3 l de mantequilla
0.4 l de azúcar
4 huevos
1 cucharadita de levadura
química
½ l de harina
Pizca de sal
Una pequeña pizca de clavos
1 cucharadita de canela
2 manzanas peladas y cortadas
en dados

Copies of the I/B. Please reproduce them without any
changes except under special instruction from Team
International USA. The pages must e reproduced and folded
in order to o tain a ooklet A5 (+/- 148.5 mm width x 210 mm
height). When folding, make sure you keep the good
num ering when you turn the pages of the I/B. Don’t change
the page num ering. Keep the language integrity. Print only
what is inside the frame.
17 WM 41684 - 120501
Assem ly page 17/32
Fax +1 305 430 9692
PREPARACIÓN DE LA PASTA PARA GOFRES
• En un tazón, mezclar la harina con la levadura, la sal y el azúcar.
Hacer un espacio en el centro y añadir las yemas de huevo.
• Añadir poco a poco la leche y vaya mezclándola con la harina
con la ayuda de una espátula.
• Mezclar hasta que la pasta sea lisa y suave.
• Añadir lentamente la mantequilla derretida.
• En otro tazón/recipiente, atir las claras hasta hacer clara de
nieve, y agréguela a la preparación utilizando una cuchara
grande o un mezclador de cocina.
• Más arri a le presentamos variantes y otros ingredientes que le
ayudarán a crear diferentes tipos de gofres.
LIMPIEZA Y MANTENIMINETO
• Desenchufe y deje enfriar el aparato completamente antes de
limpiarlo.
• Remover las placas de gofres siguiendo las instrucciones en la
sección de “MONTAJE Y ELIMINACIÓN DE PLATOS” de este
manual.
• Las placas de gofres pueden ser fácilmente limpiadas con agua
y ja ón.
No se de e colocar las placas de cocción en el
lavaplatos.
• Siempre deje las placas secar completamente antes de ponerlas
otra vez en la gofrera.
• La ase de la unidad tam ién sirve como andeja de goteo y
puede ser completamente extraída de la unidad. Simplemente
rote la unidad 90 grados y remueva el eje giratorio de la ase.
Lave la ase con agua y ja ón o colóquela en el lavaplatos.
• Limpie el exterior del aparato con un paño ligeramente
humedecido, asegurándose de que no haya humedad, aceite o
grasa que se infiltre en las secciones que enfrían el aparato.
• Limpie el interior de su aparato con un papel a sor ente o un
trapo suave.
• No limpie nunca su aparato (exterior o interior) con productos
a rasivos ya que estropearía el revestimiento.

Copies of the I/B. Please reproduce them without any
changes except under special instruction from Team
International USA. The pages must e reproduced and folded
in order to o tain a ooklet A5 (+/- 148.5 mm width x 210 mm
height). When folding, make sure you keep the good
num ering when you turn the pages of the I/B. Don’t change
the page num ering. Keep the language integrity. Print only
what is inside the frame.
18 WM 41684 - 120501
Assem ly page 18/32
Fax +1 305 430 9692
• Si queda mezcla cocida en la placa, aconsejamos que utilice
aceite vegetal para a landarla y espere 5 minutos antes de
quitarla con un papel a sor ente.
• NO coloque en el lavaplatos
• Nunca limpie o enjuague el aparato ajo el grifo.
• NO SUMERJA EL APARATO EN AGUA NI EN NINGÚN OTRO LÍQUIDO.
• Cualquier otro servicio de e realizarse por un representante de
servicio autorizado.

Copies of the I/B. Please reproduce them without any
changes except under special instruction from Team
International USA. The pages must e reproduced and folded
in order to o tain a ooklet A5 (+/- 148.5 mm width x 210 mm
height). When folding, make sure you keep the good
num ering when you turn the pages of the I/B. Don’t change
the page num ering. Keep the language integrity. Print only
what is inside the frame.
19 WM 41684 - 120501
Assem ly page 19/32
Fax +1 305 430 9692
GARANTÍA
Le sugerimos rellenen y nos envíen rápidamente la Tarjeta de
Registro de Producto adjunta para facilitar la verificación de la
fecha de compra. Por lo tanto, la devolución de esa Tarjeta de
Registro de Producto no es una condición imprescindi le para la
aplicación de esa garantía. Puede tam ién rellenar dicha tarjeta de
garantía en línea en la dirección siguiente: www.KALORIK.com
A partir de la fecha de compra, este producto KALORIK está
garantizado un año contra los defectos materiales y de fa ricación,
en los Estados Unidos. Esta garantía no es transferi le. Conserve la
prue a de compra original. Se exige una prue a de compra para
o tener la aplicación de la garantía.
Durante este período, si el producto KALORIK después de una
inspección por parte de KALORIK, se manifiesta defectuoso, será
reparado o remplazado, según lo que decida KALORIK, sin gastos
para el consumidor. Si se envía un producto de remplazo, se
aplicará la garantía que queda del producto original.
Esta garantía no se aplica a los defectos causados por una mala
utilización por parte del comprador o del usuario, o una negligencia
al no respeto del manual de instrucciones KALORIK, o una utilización
en un circuito eléctrico cuyo voltaje es diferente al que figura en el
producto, o un desgaste normal, o modificaciones o reparaciones
no autorizadas por KALORIK, o por un uso con fines comerciales. No
existe garantía por las partes de cristal, jarras de cristal, filtros, cestos,
cuchillas y accesorios en general. No existe tampoco garantía por
las piezas perdidas por el usuario.
Toda garantía de valor comercial o de adapta ilidad a este
producto está limitada a un año tam ién.
Algunos estados no ponen límites a la duración de la garantía tácita
o no autorizan la exclusión de daños y perjuicios accesorios o
indirectos, por lo que puede que las restricciones anteriormente
mencionadas no le sean aplica les a Usted. Esta garantía le otorga
derechos legales particulares, pero usted puede tener tam ién otros

Copies of the I/B. Please reproduce them without any
changes except under special instruction from Team
International USA. The pages must e reproduced and folded
in order to o tain a ooklet A5 (+/- 148.5 mm width x 210 mm
height). When folding, make sure you keep the good
num ering when you turn the pages of the I/B. Don’t change
the page num ering. Keep the language integrity. Print only
what is inside the frame.
20 WM 41684 - 120501
Assem ly page 20/32
Fax +1 305 430 9692
derechos que varían de un estado a otro y algunos derechos
pueden variar de un estado a otro.
Si el aparato tuviera un defecto durante el periodo de garantía y / o
más de 30 días después de que se compró, no devuelva el aparato
en la tienda donde le compró: a menudo, nuestro Servicio al
Consumidor puede ayudar a resolver el pro lema sin que el
producto tenga que ser reparado. Si hace falta una reparación, uno
de nuestros representantes puede confirmar si el producto está ajo
garantía y dirigirle al servicio post-venta más próximo.
Si fuera el caso, traiga el producto (o envíelo, correctamente
franqueado) con la prueba de compra que mencione el número de
autorización de devolución indicado por nuestro Servicio al
Consumidor, al servicio post-venta KALORIK más próximo. (Visite
nuestra we www.KALORIK.com o llame al Servicio al Consumidor
para o tener la dirección del Servicio post-venta KALORIK exclusivo
más próximo).
Si envía el producto, le rogamos añadan una carta explicando la
naturaleza del defecto.
Si tiene preguntas adicionales, por favor llame al Servicio al
Consumidor (véase a ajo para los datos completos), de lunes a
jueves
, de las 9:00 a las 17:00 (EST), y el viernes de las 9:00 a las 16:00
(EST). Note que las horas pueden ser modificadas.
Si quiere escri irnos, puede hacerlo a la dirección siguiente:
KALORIK Servicio al Consumidor
Team International Group of America Inc.
1400 N.W 159th Street, Suite 102
Miami Gardens, FL 33169 USA
O llame gratuitamente (U.S.A.) al +1 888-521-TEAM / +1 888-KALORIK
Las cartas se aceptan solamente en la dirección anteriormente
mencionada. Los envíos y paquetes que no tengan número de
autorización de devolución serán rechazados.
Table of contents
Languages:
Other Kalorik Waffle Maker manuals

Kalorik
Kalorik USK WM 17885 User manual

Kalorik
Kalorik USK WM 36589 User manual

Kalorik
Kalorik WM 47480 BK User manual

Kalorik
Kalorik WM 42054 User manual

Kalorik
Kalorik WM 43981 User manual

Kalorik
Kalorik USK GRB 32231 S User manual

Kalorik
Kalorik USK CC 20575 User manual

Kalorik
Kalorik WM 36377 User manual

Kalorik
Kalorik USK WM 30821 User manual

Kalorik
Kalorik WM 47669 User manual