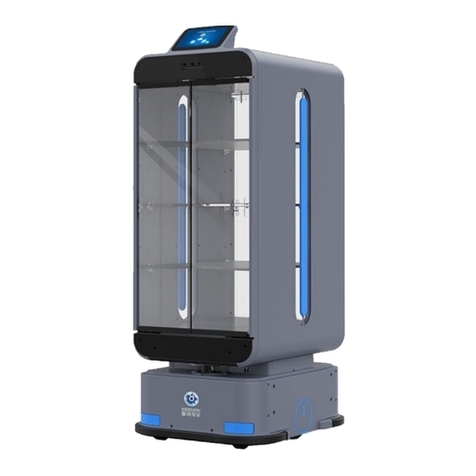
Keenon Robotics PEANUT Owner's manual

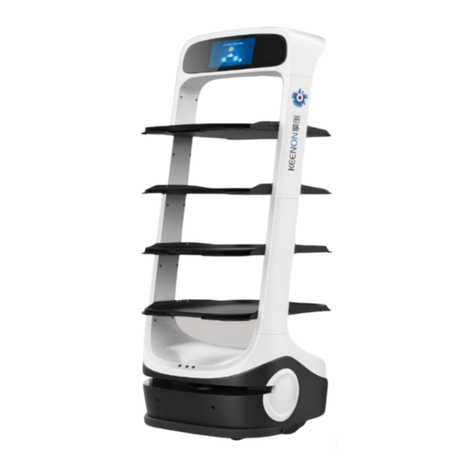
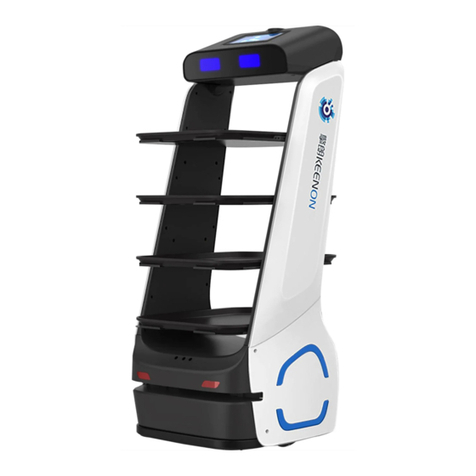
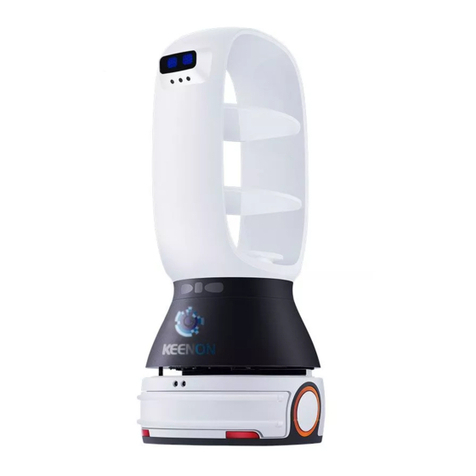
PEANUT intelligent transporting robots
Product specification

·
2
·
Statement
Copyright©2017 Shanghai Keenon Robotics Co.,
Ltd All right reserved, keep all rights
Any enterprise or individual can’ t self imitate, copy, copy out or transmit
part of full content of this specification if no clear writing permission of
Shanghai Keenon Robotics Co., Ltd, and can’ t purpose to benefit through
disseminate at any way (electric, photo- printing, record, etc).
This specification mentioned product specification and information only for
reference, please understand that we not specially inform if content updated.
Except the special stipulates, this specification only been use as operating
guidance, the statements all are not formed any types guarantees.

·
4
·
Brief introduction of specification
This specification mainly introduced the function characteristics, installation &
use methods and the needed note items during using of PEANUT intelligent
transporting robots.
This specification contain the below contents:
1.
Robot introduce:
Briefly describe the basic function characteristics of robot and detailed exhibit
the structure information ofrobots.
2.
Operating steps:
Introduce the preparation worksand noticesduring the processof install and use
robots.
3.
Appendix:
Introduce the common failure, detail technical parameters and safety notices of robots.
4.
Three guarantee certificate

·
5
·
Catalog
Statement 2
Foreword 3
Specification brief introduce 4
Robot introduce 7
Main body structureof robot 7
Operating steps(Use robot) 8
Dispatching 13
Charging 14
Sound talking 15
Emergency handle 15
Transport robots 17
Appendix 18
Abnormal(Listand troubleshooting) 18
Performance parameter 19
Safety notices 20
Three guarantee certificate 22

·
6
·
(Front view) (Back view)
(
Side view
)
1.
Hand touch area
2.
Expressionboard
3.
3- dimension
vision
4.
Decorate belt
5.
Laser
6.
Gap at laserlayer
7.
Ultrasonic sensor
8.
PSD
9.
Anti impact plate
10.
Front turnlamp
11.
Safety touch
edge
12.
Universal wheel
13.
Drive wheel
14.
Touch screen
15.
Sound microphone
16.
Emergency stop switch
17.
Handle charging port
18.
Rear turn lamp
19.
Up pallet
20.
Middle pallet
21.
Down pallet
22.
Infrared ray response
23.
Lamp ring
24.
Automatic chargingport
Picture 1 Structure diagram of PEANUT intelligent transporting robots
Note:the above picture only for reference, the detail product appearance and color subject

·
7
·
to

·
8
·
the entity.

·
9
·
Robot introduce(Know therobot)
●
PEANUT intelligent transporting robots operating in indoor environment,
suitable to apply in the public indoor field like restaurant, hotel, supermarket,
cinema, KTV and business office, etc.
●
PEANUT intelligent transporting robots realize the core functions like
complete self fix position navigation and intelligence evade barrier though
machine vision and laser radar, ability to complete self motion in the indoor field,
and able to sound intelligent interaction with people. Provide the service like
transmit dish and send food in restaurant, transmit office documents and
expressdelivery dispatching, etc.
●
Currently the products described in this specification divided into T1 and
T2 two models. Thereinto, T1 is the send food service robot, T2 is office express
delivery service robot. Same hardware configuration at T1 and T2, but part
different software because different application scene. The software operating
introduce of this specification mainly described asT1.
Main body structure of robot
Picture 1 is the main body structure of PEANUT intelligent transporting robots.
Chassis of robot is two- wheels drive, four-wheels driven structure. It realize the self fix
position through machine vision and laser radar, merged multiple sensors like infrared
ray, ultrasonic and touch switch, realize the intelligence evade barrier. It’ s touch
screen provided to users operating and use the robot system, sound microphone port
can intelligent interaction with users, the special application users use hand touched
the “ Hand touch area” also can do interaction.
Picture 2 is the charging pile structure diagram of PEANUT intelligent transporting
robots. The robot has intelligent self return charging function. The robot able to
self search, match and touch the charging pile, realize automatically return
charging.
·
10
·
Operating steps(Use robot)
(Front view)
(Back view)
(Top view)
13.
Indicate lamp
14.
Heat radiation holes
15.
Charging touch sheet
Picture 2 Structure picture of charging piles
Please follow the below steps and start use your
robot. Installation
1.
Robot construct picture
Before robot self move, the robot need know well about it’ s move
environment, it saveand discriminate the running environment by the map
method, thisstep called construct map.(Finished by professional technicians,
needn’ t user self operating ) When indoor environment of robot happened
important changes(example newly decorate, transport the robot to new
running field or goods in room place again), please contact customer service
400-9651-808, need newly construct map.
2.
Arrange charging piles
The robot has automatically return charging function, need arrange the
charging piles in it’ s running field convenient for charging, installation of
charging piles need be finished by manufacture’ s technicians. Please don’ t self
move once fixed.
If need change the position of charging piles, please contact 400- 9651- 808
newly set the position of chargingpiles.


·
10
·
(Part perspective indicate diagram of power supply
switch)
(Part amplify diagram of power supply
switch)
Start machine
1. Start/close power supply key
Power supply switch locate left-down of emergency stop switch where up surface of laser
layer gap(can’ t see this switch from exterior top view), find the power supply switch
at the place where shown as picture 3, finger upward pressdown the power supply
switch then can start robot, able to observed the lamp musical ring circle rotating at the
left/rightwheelswhich under the machine immediately, the blue lamp belt at the laser
layer gap lighting.The systemstart and need waiting about 40sthen can normally use.
When need close the power supply of robot, please closethe power supply switch as the
same method. The machine power off immediately once power supply switch closed.
Picture 3 Location diagram of power supply switch
PEANUT APP start
①
After start the power supply switch, thesystemtable sequenceindicate machinestart
LOGO, PEANUT animation and Android table, time length of systemstart about 40s.
②
The systemwill automatically open PEANUTAPPunder the default setting after started.
If systemnot start PEANUT APP, please find the PEANUT APP icon on the systemtable,
shown as picture 4, click this icon then can start APP.
You can normally use PEANUT robot after PEANUT APPstarted.
Picture 4 PEANUT APP icon

·
11
·
Setting
The user can do relatesetting of robot through PEANUTAPP, the stepsof enter
into setting page of robot as below:
①
clickthe“ Three” iconattheupleftcornerofhomepage,enterintothesubjectmenu
pageof software function.
②
click PEANUT APP [Robot Setting] icon and enter into setting page.
1.
Connect WIFI
Please connect the robot in network through WIFI when first time use it, the
setting process as below:
①
open system WLAN(WIFI) function, research the usable WIFI.
②
selected usable WIFI, enter into password.
③
click [Connect] button till WIFI connect successfully.
2.
Charge setting
Robot [Automatically return charging capacity]set operating process as below:
①
click [Power supply management] menu, indicate power supply management setting menu.
②
upward sliding page, find and click [Automatically return capacity].
③
enter into value and save.
Robot [The lowest use power] set operating process shown as below:
①
click [Power supply management] menu, indicate power supply management setting menu.
②
upward sliding page, find and click [The lowest use power].
③
enter into value and save.
During the working period, the robot will automatically arrive the appointed chargingpile
charging
w
h
e
n
r
o
b
o
t
o
pe
r
a
t
i
n
g p
o
w
e
r
l
o
w
e
r
t
h
a
n
[
A
u
t
o
ma
t
i
c
a
ll
y
r
e
t
u
r
n
c
apa
c
i
t
y
]
;
i
f
adm
i
n
i
s
t
r
a
t
o
r
c
a
n
c
e
l i
t
during charging process, the robot will trigger automatically return
charging again when operating
power lower than [The lowest use power].
The operating process of robot automatically return charging time setting as
below:

·
12
·
The robot has intelligent automatically return charging function, the users can set the robot
working
time as below in the PEANUT APP:
①
after enter into [Robot setting] page, select [Power supply management], find out the
“ Working time period” function setting line.
②
click working time period add button, enter into time setting interface.
③
enter into time setting page, pop out time select page, click the right side [Confirm] after
selected time, the time indicated at the place of left start time(enter into time setting page,
automaticpop out
time select page and corresponding the start time).
④
if change start time, finish time, click the indicated time(example 9:00), time select page
indicate from down to up, must click [Confirm] after selected time, the time indicated on
the corresponding
position.
⑤
theworkingday defaultedas7days,themachinewillautomaticallyreturn tochargingpile
chargingafterevery dayworkingreachtofinish time; canselectthe working dayaccordingto
r
eq
u
i
r
eme
n
t
s
;
i
f
s
e
l
e
c
t
“
On
e
”
t
h
e
n
ma
c
h
i
n
e
o
n
l
y
w
o
r
k
i
n
g a
t
M
o
n
da
y
,
a
u
t
o
ma
t
i
c
a
ll
y
r
e
t
u
r
n
t
o
c
h
a
r
g
i
n
g
pile charging after every day working reach to finish time.
⑥
Set well timeand working day, click[Save] button, the addedworking time period valid,
default as
start status, start button beorange.
⑦
the added use working time period can’ t be modified, can be deleted or closed, the close
button
appearinghoary;workingtimeperiodbeatclosestatus,machinewillnot
automaticallycometo charging pile charging after reach to working finish time.
3.
Adjust size ofvolume
If thebelow screenindicatesystemmenuline, directlyclickvolumekeyto
adjust the size of volume. If not, operating as the below:
①
click PEANUT APP [Robot setting] icon enter into setting management page.
②
Select[Systemsetting] menu, cancel[Hidden menuline], find the volumecontrolkey at the
below
screen.
③
click right side volume adjust button, volume increase.
④
click the left side volume adjust button, volume reduce.
4.
Hidden statusline
①
open the software select page menu, enter into APP setting page.

·
13
·
②
click [System setting] menu.
③
click [Hidden statusline] then indicate blue tick type icon, the statusline on table been hidden,
click
again [Hidden statusline] then blue tick type icon disappeared, statusline indicate.
5.
Guard mode setting
When robot [Guard mode] start, robot will automatically detect whether PEANUTAPP
running,
automatically start PEANUTAPP. It’ s operating processasbelow:
①
enter into robot setting page, click [System setting] to right sliding the right button of [Guard
mode], button change to be green with “ Start” word, guard mode start, PEANUT APP will
automatically start
again after been unexpectedclose.
②
click the right button of [Guard mode], button left sliding, button change to be white with
“ Close” word, guard mode function will be closed, PEANUTAPP will not automatically open after
closed, must
handle click APP icon then can start running.
6.
Start machine self start setting operate processas below:
Under the default situation, the system will automatically start PEANUT APP. When PEANUT
APP has no start machine automatically start, please set the PEANUT APP start machine
automatically start as
the below operatesetting:
①
enter intorobotsetting page, click [Systemsetting] to right slidingthe right button of[Start
machine automatically start], button change to be greenwith “ Start” word, start machine
automatically start
valid; after settingsuccessfully,therobotwillselfstartPEANUTAPPat
everytimestartmachine.
②
click right side button of [Start machine self start], button left sliding, button change to be
white
with “ Close” word, start machine self start been closed.
7.
Robot name setting operate processas below:
①
Enterintorobotsettingpage,click[Robotname]of[Systemsetting]andenterinto
name (nickname) setting page.

·
14
·
Dispatching
②
Setting namewell, click[Save]button at up right cornerofpage, returntosystem
setting page then the name can be indicated.
The robot can working for you after working staffs constructed maps well, the
operating process asbelow:
①
Put the goods which need be dispatched on the pallet of robot.
②
Automatically start PEANUT APP after system start machine. The up left part of
home page indicate the restaurant room type table page; select [Hall] or [Balcony]
respectively then can enter into the corresponding pages.
③
Select table number on the [Hall] page, select room number on the [Balcony] page,
the corresponding label will blue highlight indicate after selected, the right side robot
icon will real time indicate the destination.
④
Click the down right [Move immediately] button.
⑤
Page jump to [On the way] interface, then the robot start to carriage the goods
moveto the destination with soundreminding.
⑥
The robot will sound reminding after arrived destination, click [Return] after take
away goods, or use hand touch the hand type touch area at top of eyes then robot
return to original, the page automatically return to home page.

·
15
·
Charging
1.
Robot self intelligent return charging
The robot has self intelligent self return charging function, when meet the
below two conditions, the robot will self return charging pile to do charging.
Please make ensure the position of charging pilesfixed, better power on.
The power volumeofrobot lower than user setreturn charging power
volume. Therobot beoutthe working period, andthepower volumenot
reachto100%.
The setting of self return charging trigger condition please reference the setting part of
this
manual “ Charging set” .
2.
User manual trigger robot charging
The users can trigger and control robot to automatically return charging through
PEANUT APP operation. The detail operating process as below:
①
Click[Powersupplymanagement]menu,indicatepowersupplymanagement
setting page.
②
Click[Automaticcharging] button, therobotwill automaticallysearchthe
chargingpile charging.
③
The robot will start self match connecting charging pile after the robot
arrived the position of charging piles.
④
Robot start chargingafter matching connected the power pile, the page jump to
be charging indicate page.
The usersalsocan manual push the robot to charging pile and charging, the detail
operating asbelow:
①
Click [Power supply] menu and indicate power supply setting page.
②
Click [Manual charging] button, the page jump to manual charging page.
③
Manual push the robot to the position of charging piles, page jump to reminding page.
④
Make the back of robot align to power supply pile, then push the robot on
the power supply pile, makethe automatically return chargingport on the
bottomof robot touch the charging contact sheet of charging pile.
⑤
After touched successfully, the page will indicate that connected successfully, will
indicate charging volume page after waiting 5s.
* Note:
Theabove
①
and
②
all need charging therobot throughchargingpile, must
guarantee the power supply pile be at better charging and robot correctly connect the
power supply pile, please note the potential safety hazard which caused by bad
operations.

·
16
·
Emergency handle
3.
Adaptercharging(notadviseuse,forbidoperatingrobotduringtheadapter
charging) Under the situation that robot battery power volume completely
exhausted and can’ t start machine, can charging the robot as the below process:
①
Close machine’ s power supply switch.
②
Open the exterior silica gelcover of [Manual charging pot] at back of robot,
use the charging plug of adapter connect robot.
③
The adapter indicate lamp change to be red after connected successfully, means
the charging progressive.
④
It means charging finished after adapter indicate lamp change to be
green. Please break the adapter and fill in the silica gel cover outside the
charging port of robot well.
Sound talking
The robot can do intelligent interactive with people through sound, the process as below:
①
Click the robot icon on the home page, enter into software [Function menu]
page.
②
Click [Sound chatting] page, enter into chatting mode.
③
Click the up left [<] return button, return to the software menu select page.
④
Soundchattingsupportonlinemode(connectnetwork),offlinemode(not
connect network).
The userscan make the robot stop running through pressdown the emergency
stop switch which at the back of robot when the emergency situation that robot
be at abnormal running statusor occur unexpected situation and maybe caused
harmful the surrounding environment. The position and operating process of
emergency switch shown aspicture 5:

·
17
·
(Part amplified view)
First step, open the exterior cover
of emergency stop switch
16.
Emergency stop switch
25.
Emergency stop switch button
26.
Exterior cover of emergency stopswitch
Second step, pressdown the red
emergency stop button then OK
Picture 5 The part amplified view after open the exterior cover of emergency stop
switch
The emergency stop switch ofrobot at the back ofrobot, meansthe mark number 16in
picture indicated position, start emergency stop switch need firstly outward open the
exterior cover of emergency stop switch, the second, break the PMMAprotection plate at
mediumlayer, press down the red emergency stop switch finally, emergency stop robot.
* Note:
The start ofemergency stop switch need break the emergency stop switch equipment, forbid
too start emergency stop switch under non-emergency situation.

·
18
·
Transport robots
The robotis valuable equipment, please strictly follow the below
instructionsto operate whenneed manual transport robots.
Shown as picture 6, the up part (The arrow appointed surface) at robot laser
layer gap can be stressed, you can up lift the robot through these part. Please use
hand lift the up part of laser layer when transporting, please note that always
keep robot be at up-right gesture during transporting.
Note:should use hand buckle the laser
layer gap between body and base
during transporting the robot.
Picture 6 Transporting diagram
* Note:
The above laser layer gap is the only one stressed part for transporting. Please
transporting robot strictly follow the instruction. Strictly forbid directly drag and lift
the
b
o
tt
o
m
o
f
r
o
b
o
t
d
u
r
i
n
g
t
r
a
n
s
p
o
r
t
i
n
g
;
s
t
r
i
c
t
l
y
i
n
c
li
n
e
t
h
e
r
o
b
o
t
;
s
t
r
i
c
t
l
y
f
o
r
b
i
d d
i
r
e
c
t
l
y
d
r
a
g
a
n
d
lift face and head of robot. Users self duty for the damage of robot which
caused by the incorrect operation during transporting.

·
19
·
Appendix
Abnormal list and troubleshooting
Failure appearance
Possible reasons and solutions
Robot can’ t
normally start
Emergency switch been pressed down, check whether the PMMAplate of
emergency switch been broken
Please contact customer service staffs handle if it been broken
No enough power, please charging through adapter connect robot
Please contact customer service staff handle if other reasons
Robot can’ t
normally
charging
The position of charging piles moved. Please place the charging piles at the
original setting place
Charging piles not connect the power supply, please connect the charging
pile to power supply
Charging piles been baffled, please guarantee no baffles before the charging
piles
Please contact customer service staff handle if other reasons
Robot can’ t do
motion
navigation
When robots are in map blind area, please close the robot and push to
nearby the charging pilesand start navigation again
Visual module been covered, please make ensure the visual fix position
module not been covered
Robot radar failure, please check whether laser radar normally rotating
Robot impact switch failure, please check whether impact switch been
squeezed
Please contact customer service staff handle if other reasons
Robot can’ t
broadcast
sound
Robot sound closed or too small volume, please set the sound again
Please contact customer service staff handle if other reasons
Abnormal robot
motion
Please shut off the power supply of machine immediately, contact customer
service staffs handle
Robot fallen
Please shut off the power supply of machine immediately, contact customer
service staffs handle
Other manuals for PEANUT
2
Table of contents
Other Keenon Robotics Robotics manuals

Keenon Robotics
Keenon Robotics T5LS User manual

Keenon Robotics
Keenon Robotics PEANUT T2 User manual

Keenon Robotics
Keenon Robotics PEANUT T6 User manual

Keenon Robotics
Keenon Robotics T5 User manual

Keenon Robotics
Keenon Robotics PEANUT User manual

Keenon Robotics
Keenon Robotics W3 User manual

Keenon Robotics
Keenon Robotics PEANUT User manual

Keenon Robotics
Keenon Robotics PEANUT M2 User manual

Keenon Robotics
Keenon Robotics PEANUT T1 Owner's manual