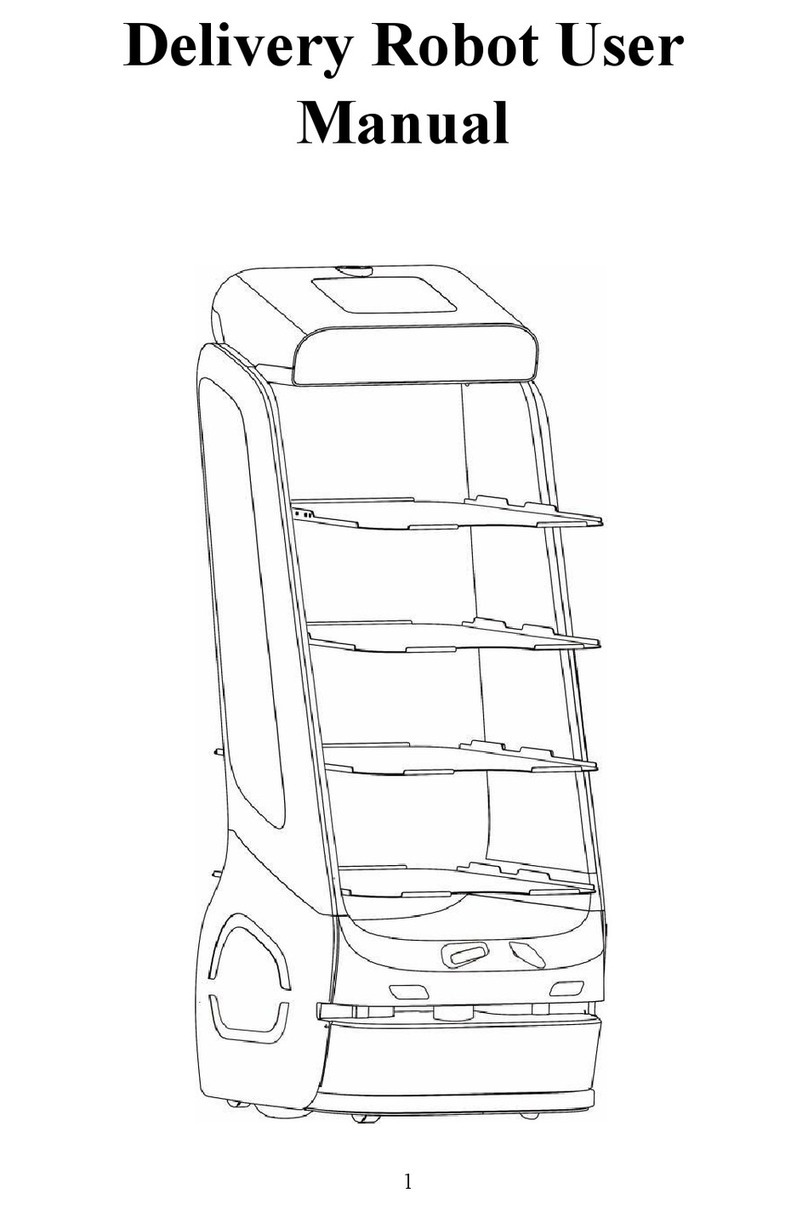
Keenon Robotics PEANUT User manual

PEANUT Intelligent Distribution
Robot
W3 Product Manual

2222222
Declaration
Copyright © 2019 Keenon Robotics Co., Ltd.
All Rights Reserved
This Product Manual shall not be partially or completely imitated, copied,
transcribed or translated by any unit or individual without the express written
permission of Keenon Robotics Co., Ltd., or be disseminated by any means
(electronic, photocopying, recording, etc.) for profit.
The product specifications and information mentioned in this Manual are for
reference only. No further notice will be made for any update from time to time.
Unless otherwise specified, this Manual is for guidance only, and the statement
does not constitute any form of guarantee.

4444444
Overview
This Manual mainly introduces the functional characteristics, installation and use
methods of PEANUT Intelligent Distribution Robot and the cautions in use.
This Manual includes following contents:
1. Introduction to robot: briefly describe the basic functional characteristics of
the robot and demonstrate the structural information of the robot in detail.
2. Operation steps: Introduce the preparation and precautions during the
installation and use.
3. Appendixes: Introduce common faults, detailed technical parameters and
safety precautions.
4. Warranty Certificate.

5555555
Table of Contents
PEANUT Intelligent Distribution Robot ................................................................. 1
Declaration .............................................................................................................. 2
Preface ..................................................................................................................... 3
Overview ................................................................................................................. 4
Introduction to Robot (Get to Know Robot)............................................................ 7
Main Structure ......................................................................................................... 8
Operation Steps (Use of Robot)............................................................................... 9
Installation ....................................................................................................... 9
Start ............................................................................................................... 10
Settings .......................................................................................................... 12
Distribution .................................................................................................... 16
Charging ........................................................................................................ 17
Emergency Treatment .................................................................................... 18
Handling Robot ............................................................................................. 19
Appendixes ............................................................................................................ 21
Abnormity List and Fault Removal ............................................................... 21
Performance Parameters of the Machine ....................................................... 23
Safety Instructions ......................................................................................... 26
Warranty Certificate .............................................................................................. 29

6666666

7777777
正视图 Front view 双立体视觉 Double stereo vision
后视图 Rear view 超声波 Ultrasonic wave
侧视图 Side view 转向灯 Turn lamp
触摸显示屏 Touch display screen
防撞条 Anti-collision bar
装饰灯带 Decorative lamp belt
万向轮 Universal wheel
舱体 Cabin body 主动轮 Driving wheel
麦克风 Microphone 装饰带 Decorative belt
急停开关 Emergency stop
switch
手动充电口 Manual charging port
喇叭 Horn 自动充电口 Automatic charging
port
激光雷达 Laser radar 图1 W3 酒店机器人
结构图
Fig. 1 W3 Hotel
Robot Structure
Chart
Introduction to Robot (Get to Know
Robot)
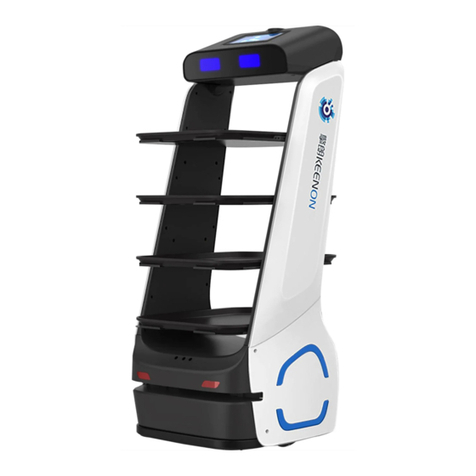
PEANUT Intelligent Distribution Robot runs in indoor environment and is
applicable to public indoor occasions such as hotel, office building,
restaurant, supermarket in mall, cinema, KTV, etc.
PEANUT Intelligent Distribution Robot realizes the core functions of
autonomous positioning & navigation and intelligent obstacle avoidance
through machine vision and laser radar, and can move autonomously in

8888888
indoor scenario and interact intelligently with human voice to provide
terminal distribution, office document transmission, goods, take-out and
express delivery and other services.
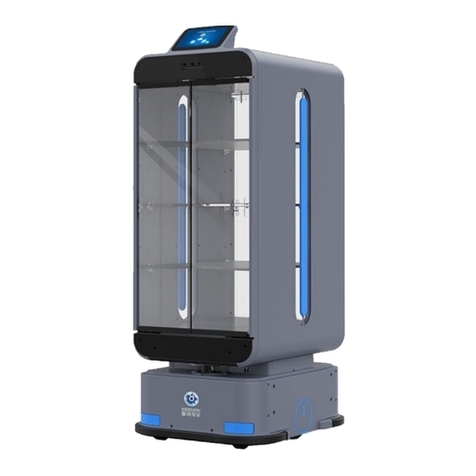
The product described in this Manual is Model w3 Distribution Service
Robot.
Main Structure
Fig. 1 is the main structure chart of PEANUT Intelligent Distribution Robot. The
robot chassis is in two-wheel driving and four-wheel driven structure. It realizes
autonomous positioning through machine vision and laser radar, and realizes
intelligent obstacle avoidance by sensor fusion such as touch switches. Users
operate and use the robot system through the touch screen.
Fig. 2 is the structure chart of charging pile of PEANUT Intelligent Distribution
Robot. The robot has the function of intelligent autonomous recharging. It can
find, match and come into contact with the charging pile independently to realize
automatic recharging.

9999999
Fig. 2 Charging Pile Structure Chart
正视图 Front view 指示灯 Indicator lamp
后视图 Rear view 散热孔 Heat dissipation
hole
俯视图 Vertical view 充电接触片 Charging contact
chip
Operation Steps (Use of Robot)
Please comply with the following steps to start using your robot.
Installation
1. Mapping of Robot

10101010101010
The robot needs to be familiar with the moving environment before moving
autonomously. It stores and identifies the running environment in the form of
map, and this step is called mapping. (It is completed by professional
technicians without user operation)
When the indoor environment of the robot changes greatly (such as
redecorating, moving the robot to a new operating place or rearranging indoor
items, etc.), please contact customer service staff at 400-9651-808 for
re-mapping.
2. Charging Pile Layout
The robot has the function of automatic recharging, so the charging pile
should be laid out in the convenient charging place inside its operating place,
and the installation is completed by the manufacturer's technicians. Please do
not move the charging pile without authorization once it is fixed, or contact
customer service staff at 400-9651-808 to reset the charging pile position.
Start
1. Start/Stop Power Button
Power switch is at the chassis behind the robot. Open the silicone cover
under the chassis, there is a button on the right, which is the power switch.
Find the position of the power switch as shown in Figure 3, press the power
switch to start the robot and observe that the blue lamp belt in the gap of
laser layer lights up. After started, the system can be used normally in about
40 seconds.
When the robot is to be turned off, please turn off the power switch in the
11111111111111
same way. The machine is powered off immediately after the power switch is
turned off.
Fig. 3 Schematic Chart of Power Switch Position
打开橡胶盖,开关电源位于其中 Open the rubber cover, in which there is the
power switch
2. PEANUT APP Startup
① After starting the power switch, the startup LOGO, PEANUT animation
and Android desktop will be displayed in turn on the system desktop, and
it takes about 40 seconds to start the system.
② Under the default setting, the PEANUT APP will open automatically
after the system starts. If PEANUT APP is not started by the system,
please find the PEANUT icon on the system desktop as shown in Fig. 4,
and click this icon to start the APP.

12121212121212
Fig. 4 PEANUT APP Icon
After PEANUT APP is started, the Peanut robot can be used normally.
Settings
Users can set the robot through the PEANUT APP. Access the robot setting page
as follows:
① Click the "three-line" icon in the upper left corner of the homepage to
enter the PIN password input page.
② The default PIN code is "0000";
Enter the setting page after inputting it correctly.
1. Function Operation
The functions mainly include opening and closing of cabin door, modifying of
task, canceling of task, etc.
① Opening and closing of cabin door: The cabin door can be opened or
closed by clicking the [Cabin Door Switch] button;
② Modifying of task: If the robot finds error in task input information after
departure, enter this page and click [Modify Task] to return to the main
delivery interface and re-input the task information;
③ Canceling of task: If the current task does not need to be executed or

13131313131313
there is no task, click [Cancel Task] button to cancel the current task, and
the robot returns to the origin for standby.
2. Volume Adjustment
Click the volume button directly to adjust the volume.
3. Working Hour Setting
Set the working hours of robot automatic recharging as follows:
① Click ‘add working hours’ button to enter the time setting interface.
② Enter the time setting page, the time selection page will pop up. Select
time and click [OK] on the right, the time will be displayed at the start
time on the left (enter the time setting page, and the automatically
popped up time selection page corresponds to the start time).
③ To change the start time and end time, click the displayed time (for
example, 9:00), and the time selection page will be displayed from
bottom to top. Click [OK] after selecting the time, and the time will be
displayed in the corresponding position.
④ The working days are seven days by default, and the robot will return to
the charging pile automatically for charging at the end of every day. The
working days can be selected as appropriate. For "One", it only works on
Monday, and will automatically return to the charging pile for charging
at the end of the day.
⑤ Set the time and working day, and click [Save] button. The added
working hours will be valid, and the robot is in open state by default.
Press the orange button to start.
⑥ The added working hours cannot be modified, but can be deleted or
closed, and the close button is gray; when the working hours are closed,
the machine will not move to the charging pile for charging

14141414141414
automatically at the end of the day.
4. Modify Password
The password of the robot is "0000" by default. Operate as follows to modify
the password:
① Click [Modify Password] button and the page to input old password will
pop up;
② After the old password is input correctly, the page to input the new
password will pop up;
③ Input the new password, and the page to re-input the new password will
pop up;
④ After the same password is input twice, the new password is set
successfully;
5. Auxiliary Functions
① Hiding room number: When the robot is started, the robot will hide the
room number on the interface during operation;
② Self-introduction: The robot will broadcast the self-introduction voice
during operation;
③ Background music: Whether to play background music is selectable
during operation;
6. Triggering Charging Manually
There are two ways to trigger the charging of the robot manually.
The first way is as follows: click [Charge Now] button directly, and the robot
will find the charging pile to charge automatically.
The second way is as follows: push the robot onto the charging pile for
charging manually, and detailed operation steps are as follows:
① Click [Power Management] in the left navigation bar to display the

15151515151515
power management setting page.
② Click [Manual Charging] button, and the page will go to the manual
charging page.
③ Push the robot to the charging pile position manually, and the page goes
to the prompt page.
④ Align the back of the robot with the charging pile, and push the robot to
the pile, to enable the automatic recharging interface at the bottom of the
robot to come into contact with the charging contact chip of the charging
pile.
⑤ After the contact is successful, the page shows successful connection,
and the charging capacity page will be displayed in 5 seconds.
7. Model Selection
The optional models are single cabin and double cabin. Please select the
proper model according to the purchased robot.
8. Fetching Notice Method
After the robot arrives at destination, the notice will be made by voice,
telephone and SMS. Please select according to the actual situation.
① Voice notice: The robot notifies the delivery of goods by displaying the
name of destination for timely fetching. It is applicable to public
scenarios such as company;
② Telephone notice: Telephone notice is available if corresponding user has
purchased a telephone module of Keenon and such module has been
connected to internal fixed-line telephone of the scenario. The robot will
call the internal telephone of the destination after reaching the
destination to inform "Your goods have been delivered, please fetch in
time". This method is applicable to scenarios such as hotel.

16161616161616
③ SMS notice: The robot will push a text message and make telephone call
to the corresponding user after reaching the destination to inform the
user to fetch the goods at the destination (the waiting time of the robot is
5 minutes at present)
9. Voice Broadcasting
If the robot is blocked during operation, it can actively broadcast voice and
prompt not to block it. The frequency of voice broadcasting can be set here,
including seldom, frequent, once and mute. Please select according to the
actual scenario.
10. Others
There are also some other functions. For example, after purchasing the
counter products from Keenon, please turn on relevant functions such as
counter docking function and mobile phone tail number security verification.
If corresponding user hasn’t purchased such products, please close relevant
options.
Distribution
The robot works after the staff has created the map and completed the debugging.
The operation steps are as follows:
① Input the correct password, and the robot will open the cabin door;
② Input the mobile phone number or destination floor number/area number,
and place the goods to be distributed on the tray.
③ Click Start Now; for example, after the on-site gates and elevators are
installed by IOT, the robot can normally pass through the gate and take

17171717171717
the elevator to go to the destination floor.
④ After the robot reaches the destination point, the user will be notified to
fetch the goods according to the set notification method.
⑤ The robot will return to the charging point/fixed docking point after the
user fetches the goods and clicks ‘Close the Door’ button. If the user
forgets to click ‘Close the Door’ button, the robot has a timeout door
closing mechanism.
Charging
1. Autonomous Intelligent Recharging
The robot has intelligent autonomous recharging function. When the
following two conditions are met, the robot will return to the charging pile
position for charging autonomously. Please ensure that the charging pile
position is fixed and electrified.
The capacity is lower than the recharging capacity value set by the user.
The robot is out of working time, and the capacity is not up to 100%.
For setting of the triggering conditions of autonomous recharging, please
refer to "Charging Setting" in Settings section of this Manual.
2. Manually-Triggered Charging by User
Users can trigger and control the robot to recharge automatically on the
setting page through the PEANUT APP. For specific operation steps, see
Settings section of this Manual.
* Note:
The two methods above charge robot with charging pile, so it must ensure that the

18181818181818
charging pile is electrified and the robot is connected to pile correctly. Please note
the potential safety hazards caused by improper operation.
3. Adapter charging (It is not recommended. It is forbidden to operate the
robot during adapter charging.)
When the robot battery is out of power and cannot be started, it can be
charged through the adapter according to the following steps:
① Turn off the power switch.
② Open the silicone cover outside the [Manual Charging Interface] on the
back of the robot, and connect the robot with the charging plug of the adapter.
③ After successful connection, the indicator lamp of the adapter turns red, and
the screen interface goes to the charging page, indicating that charging is in
progress.
④ When the indicator lamp of adapter turns green, charging is completed.
Please disconnect the adapter and plug the silicone cover outside the charging
interface of the robot.
Emergency Treatment
The user needs to push and move the robot with hand when it is in operation, or
press the emergency stop switch on the back of the robot to stop robot when it is
in abnormal operation state which may cause harm to the surrounding
environment or lead to other emergency situations. The position and operation
steps of emergency stop switch are shown in Fig. 5:

19191919191919
急停开关 Emergency Stop Switch
Fig. 5 Partial Enlarged View after Opening the Outer Cover of Emergency Stop Switch
The emergency stop switch of the robot is at the top of the robot, i.e., the position
shown as No. 19 in the figure. The robot can be stopped urgently by pressing the
red emergency stop switch.
Handling Robot
Robot belongs to expensive equipment. When robot needs to be moved manually,
please strictly comply with the following instructions.
As shown in Fig. 6, the upright posts on both sides of the robot are stress-bearing
areas. Hold these parts with both hands to lift the robot, and always keep it upright
during handling.

20202020202020
可受力区域 Stress-bearing area
Fig. 6 Schematic Chart of Handling
* Note:
The middle on both sides of the robot is the only transportable stress-bearing part.
Please handle the robot in strict accordance with the instructions. In the process of
handling, it is forbidden to directly lift the bottom of the robot, dump the robot,
lift the tray directly, lift the gap in the laser layer directly, and lift the face and
head of the robot directly. Any damage caused by improper operation during
handling of the robot shall be borne by the user.

21212121212121
Appendixes
Abnormity List and Fault Removal
Fault Possible Reasons and Solutions
The robot fails to
be started up
normally.
1. Low battery. Please charge the robot with adapter.
2. For other reasons, please contact the customer service
staff.
The robot fails to
be charged
normally.
1. The charging pile position is moved. Please place the
charging pile to the initially set position.
2. The charging pile is not connected to the power supply.
Please connect the charging pile to the power supply.
3. The charging pile is blocked. Please make sure the
charging pile is free from obstacles in front.
4. For other reasons, please contact the customer service
staff.
The robot fails to
move and
navigate.
1. The robot is in the blind area of the map. Please turn off
the robot and push it to the charging pile to restart
navigation.
2. The visual module is covered. Please make sure that the
visual positioning module is not covered.
3. The robot radar is out of order. Please check whether the
Other manuals for PEANUT
2
This manual suits for next models
1
Table of contents
Other Keenon Robotics Robotics manuals

Keenon Robotics
Keenon Robotics PEANUT User manual

Keenon Robotics
Keenon Robotics T5 User manual

Keenon Robotics
Keenon Robotics PEANUT T6 User manual

Keenon Robotics
Keenon Robotics PEANUT M2 User manual

Keenon Robotics
Keenon Robotics PEANUT T1 Owner's manual

Keenon Robotics
Keenon Robotics PEANUT Owner's manual

Keenon Robotics
Keenon Robotics T5LS User manual

Keenon Robotics
Keenon Robotics PEANUT T2 User manual

Keenon Robotics
Keenon Robotics W3 User manual