10 11
OPERATION OPERATION
CLEANING
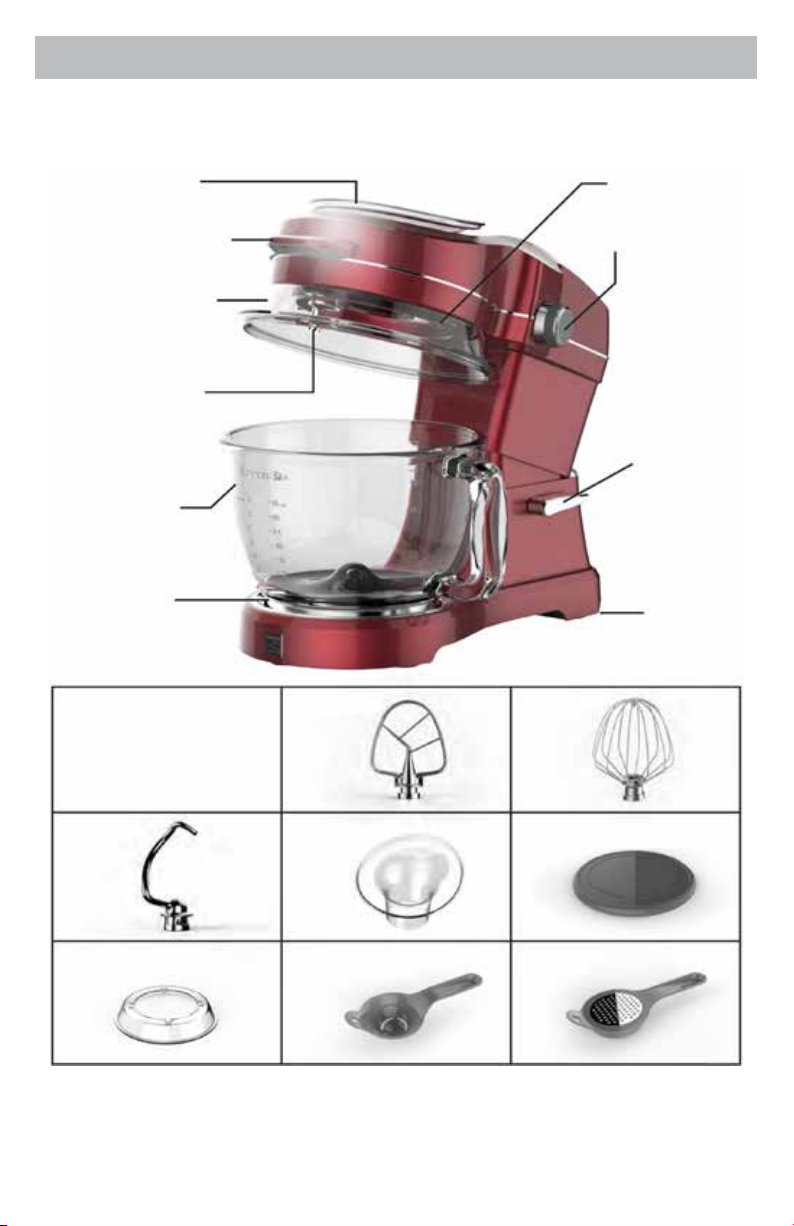
HOW TO USE THE MIXER FUNNEL
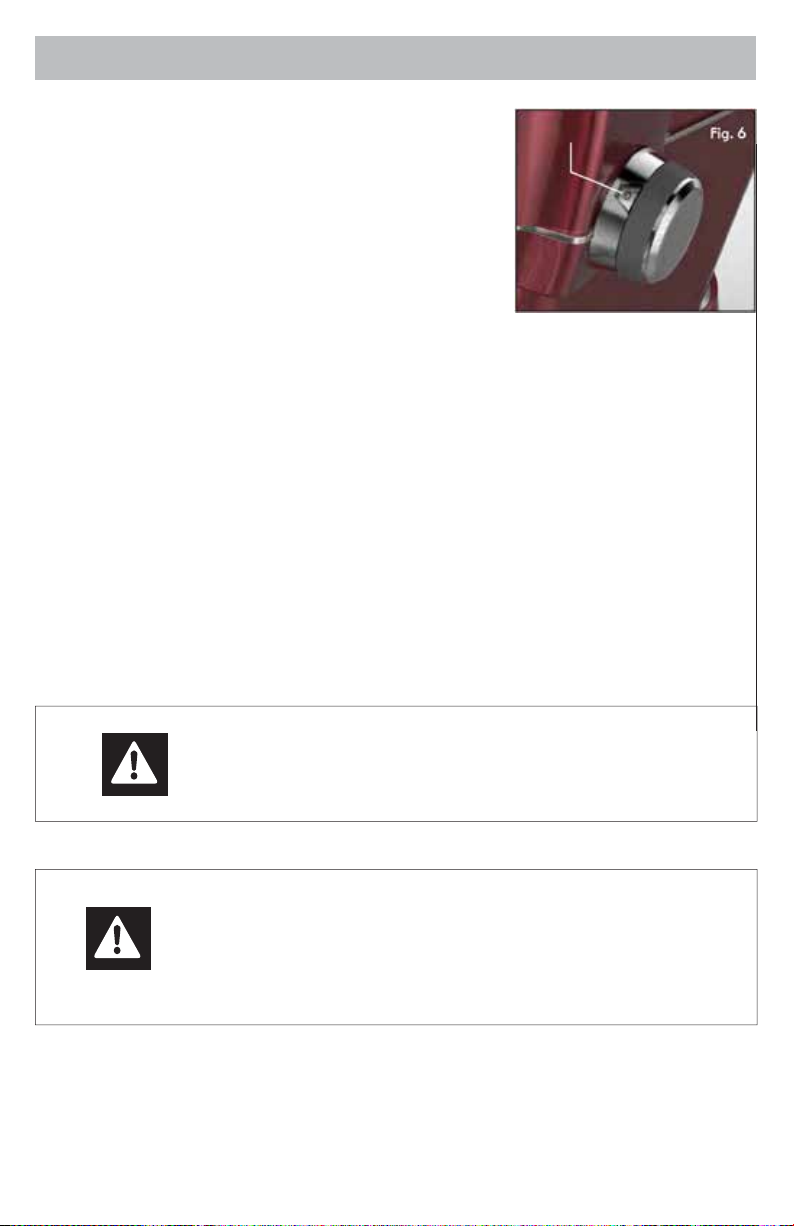
WIRE WHISK ADJUSTMENT
(See Fig. 7)
The Wire Whisk may be adjusted to a lower position to reach a low level of
ingredients in the bowl. Adjust as follows:
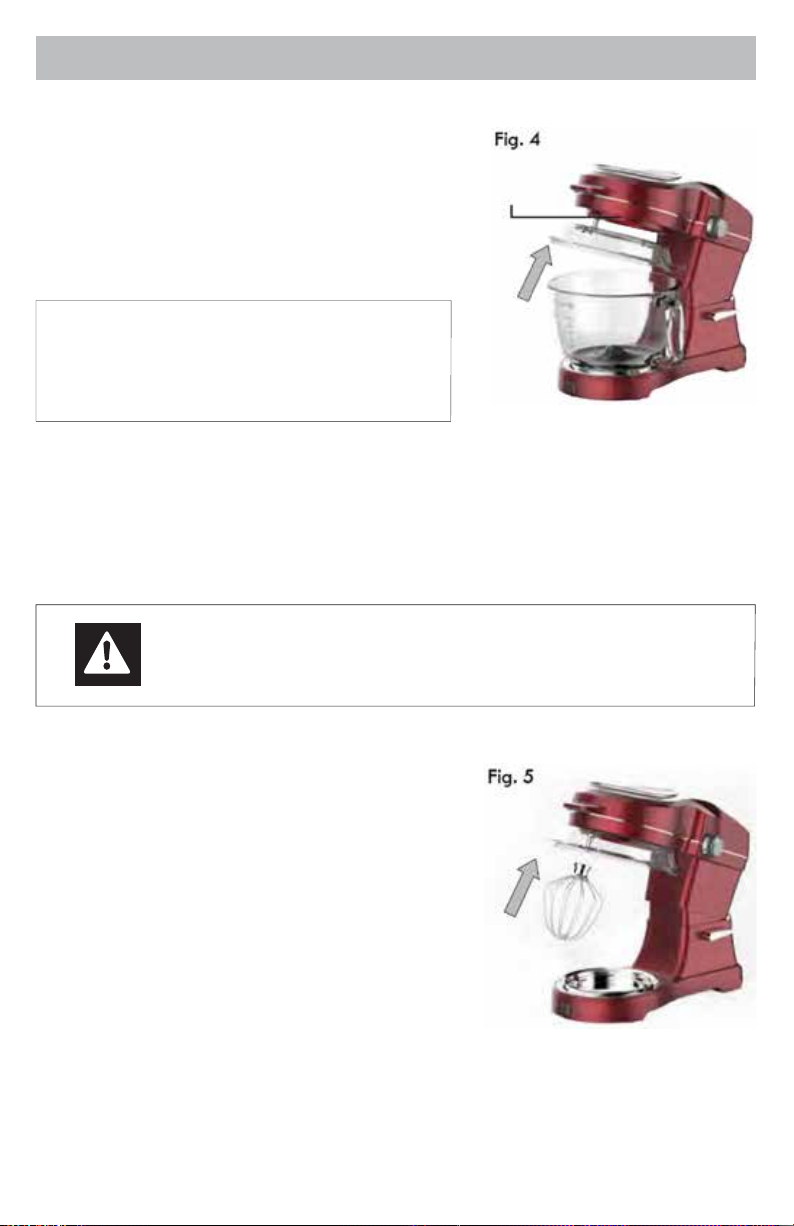
1. Turn speed dial to 0.
2. Unplug Mixer from electrical outlet.
3. Press down release lever to tilt head back and lock in place.
4. Remove the whisk from the shaft.
5. Use a at blade screwdriver to turn the adjustment set screw in the top of the whisk.
- To raise the whisk in the bowl, lower the set screw by turning clockwise.
- To lower the whisk in the bowl, raise the set screw by turning counterclockwise.
6. Reattach the whisk to the mixer shaft.
MIXING TIPS
• Observe the batter or dough in bowl while mixing.
Mix only until contents achieve the appearance called for in recipe, such as “smooth” or“creamy.”
• Follow recipe guidelines when adding nuts, raisins or candied fruits to a mixture.
Fold such solid ingredients into the bowl in the last few seconds of slow stirring (speed 1), when
batter is suciently thick to prevent them from sinking to the bottom of baking pan. Dust sticky,
candied fruits with our for equal distribution throughout the batter.
• If not using Splash Guard, mixtures containing large amounts of liquid ingredients should be
initially mixed at lower speeds to avoid splashing. Once mixture thickens increase speed.
CAUTION
Be careful not to turn set screw too far
down or up or it may fall out.
Also, if turned too far down, the screw
may obstruct attaching whisk to shaft.
adjustment
set screw
NOTE
Regular use of the Easy Pour Funnel accessory is
highly recommended. The accessory inserts into
the Mixer Funnel, is removable for convenient
cleaning, and using it helps keep Mixer Funnel
surfaces free of ingredient residue.
Using one ingredient at a time, slowly add into pour funnel.
Mixer can be operating at low speed when ingredients are being added as long as the Splash
Guard is in place.
Gradually continue to add remaining ingredients through the pour funnel.
If you need to scrape down sides of bowl, rst turn speed dial to 0 and raise up tilt head.
When pouring liquids through funnel make sure to place speed setting on 0 or low number to
keep ingredients from splashing.
Course ingredients such as nuts, dried fruits, or morsels should be folded into the mixture at the
nal stage of mixing.
TIP: Lightly dust coarse ingredients with all-purpose our to keep them from retreating to the
bottom of the bowl.
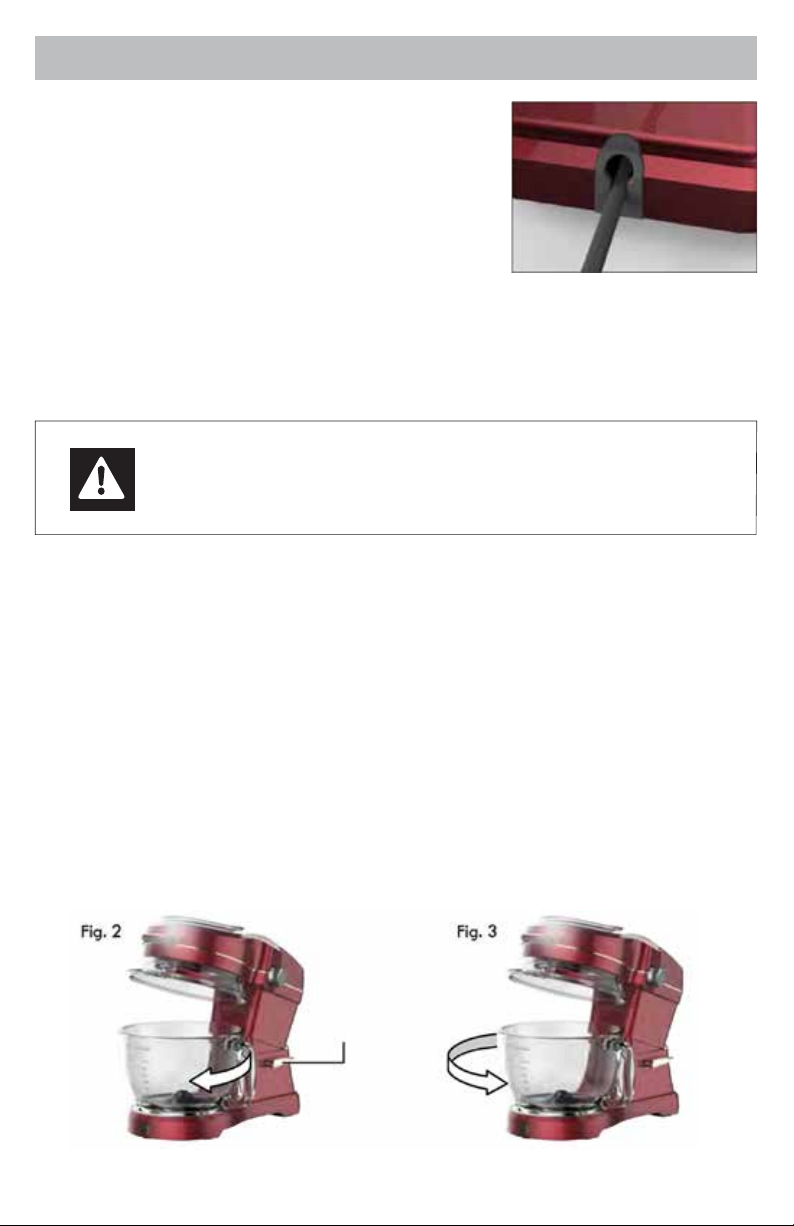
Once all ingredients are well-combined, raise up tilt head and twist mixing bowl counterclock-
wise to remove bowl from clamping plate.
After nished using mixer, clean exterior surfaces by wiping with a damp cloth.
Use dry cloth to wipe thoroughly free of moisture before putting mixer away.
• Always unplug Mixer before cleaning. NEVER immerse Mixer in water. The exterior of the Mixer
should only be cleaned with a soft damp cloth.
• Do not use abrasive cleansers or scouring pads when cleaning Mixer.
• Always remove accessories before cleaning Mixer. If washing accessories by hand, rinse and dry
completely. Most accessories and the glass bowl are dishwasher safe. Only place the bowl lid in
the upper dishwasher rack. Only hand wash the Wire Whisk.
• Wash accessories and bowl as soon as possible after use to keep food from drying on them.
WARNING
Unplug Mixer before touching beaters or other accessories.
Failure to do so can result in broken bones, cuts or bruises.