6 7
OPERATING THE CONTROL PANEL OPERATING YOUR STAND MIXER
USING THE COUNT-UP TIMER MODE
The Count-Up Timer Mode can be especially useful to record mixing
time. When the recipe does not specify a specic mixing time, you can
monitor the time it takes to thoroughly mix the ingredients, so the
next time you mix the same ingredients you can set the Count-down
Timer for the specic time. The Count-up timer automatically begins
counting as soon as the Speed.
Control Knob is turned on. When you turn the Mixer back to OFF, the
Counter resets to zero. At any time you can press the Timer Set / Pause Button and the Mixer will
enter Count-down Timer Mode.
USING THE PAUSE MODE
While the Mixer is running, you can push the Timer Set / Pause Button once and it will pause the
Mixer. The time elapsed will ash in the LCD Display. With this feature you can assess the mixing
process or add additional ingredients without aecting the timer. To resume mixing, just push the
button again and the Timer will resume from where it stopped. If you want, you can reset the
Timer at this point by turning Speed
THE TIMER SET / PAUSE BUTTON
Another way to cancel out the time on the Timer is to press and hold down on the Timer Set /
Pause button until the LCD Display shows all zeroes.
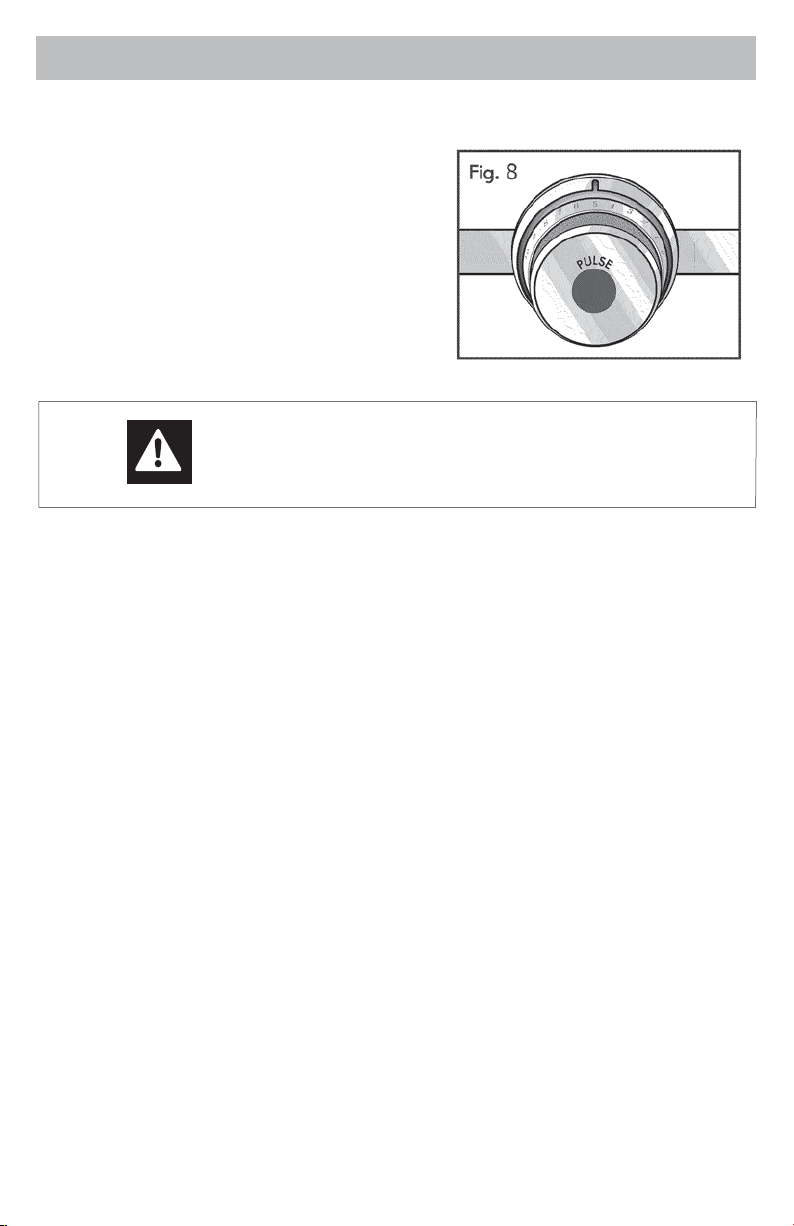
THE PULSE FEATURE
A special feature of this Mixer is the Pulse Mode. Sometimes it is
necessar to be able to stir in ingredients very slowly and gradually.
The Pulse Mode is perfect for this. To use the Pulse Mode, put the
Speed Control Knob on 1. This is the only speed in which the Pulse
Mode will work. While on setting 1 (Pulse), press in on the center of
The Speed Control Knob. This is the Pulse button. Each time you push
the button, the Beater /Attachment will revolve about 2 times and stop.
When you have nished with the Pulse Mode, turn the Speed Control Knob back to OFF. If the
Mixer stays in the pulse mode for too long without being used, a message of E3 will ash in the
LCD Display. Turn the Speed Control Knob to OFF and the message will clear.
WORK LIGHT AND POWER INDICATOR LIGHT
When the Mixer is plugged in and turned ON, a blue LED Light encircling the Speed Knob comes
on. A Work Light also comes on to illuminate the work area above the bowl. When you turn the
Mixer OFF, the blue LED Light around the Speed Knob goes out. The Work Light stays on for 3
minutes, then shuts o.
NOTE: LCD Display stays on whenever the Stand Mixer is Plugged in.
MIXING ACTION
1. Make sure the Speed Control Knob is in the OFF position before plugging Mixer into a proper
120V power outlet. The LCD Display Panel illuminates blue to show the Mixer is plugged in.
2. The Control Panel Display will show all zeros. If the Speed Control Knob is at any speed setting
the LCD Display will ash El indicating an error. Turn the Speed Control Knob OFF to resume.
3. When the Mixer is turned ON, a blue LED Light encircling the Speed Control Knob comes on.
A Work Light also comes on the illuminate the work area above the bowl. Start with the slowest
speed and work up. When ingredients start to mix, turn speed up as called for in recipe. See the
“Speed Control Guide”.
SING THE COUNT-DOWN TIMER MODE
The Count-Down Timer Mode is useful for any recipe that species a length of time ingredients
should be mixed. To set the Count-Down Timer, press the Timer Set /Pause button. The LCD
Display will ash all zeroes. Press the Min or Sec Button until the desired mixing time is displayed.
If you make a mistake, press and hold the Pause button and the Timer is reset to zeroes. Once you
have selected a time, turn Mixer on with the Speed Control Knob and Timer will count down.
Mixer will run the set amount of time and then turn O.
SPEED CONTROL
The Speed Control Knob is located on the right side of
the Mixer (with the front facing you}, has increments
from P, and has the following settings: Pulse (1),
Continuous (2 through 10), and OFF.
Always start the Mixer on the slowest possible speed.
When ingredients start to mix, turn speed up as called
for in recipe. See the“Speed Control Guide”.
CAUTION
When mixing is complete, turn Speed Control Knob to OFF
and unplug Stand Mixer for safety.