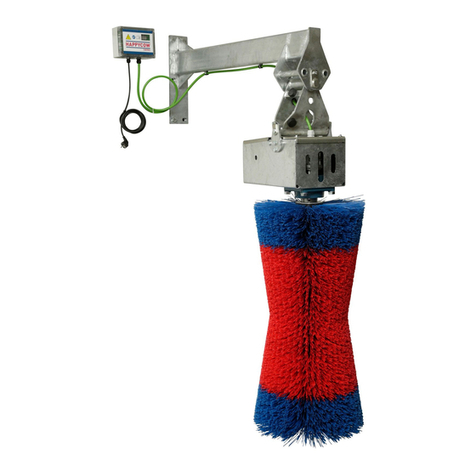
Kerbl HAPPYCOW Free Maxi User manual

Free Maxi #18865
DE Bedienungsanleitung
FR Mode d‘emploi
EN Operating instructions
IT Istruzioni per l‘uso
NL Gebruiksaanwijzing
ES Instrucciones de uso
SV Bruksanvisning
DA Brugsanvisning
FI Käyttöohje
PL Instrukcja obslugi
RU Инструкция по эксплуатации

2

3
Inhaltsverzeichnis
1. Vorwort . . . . . . . . . . . . . . . . . . . . . . . . . . . . . . . . . . . . . . . . . . . . . . . 4
1.1 Informationen zur Anleitung . . . . . . . . . . . . . . . . . . . . . . . . . . . . . . . . . . . . . . . . . . . . . . . . . . . . . 4
1.2 Vermerke zur Bedienungsanleitung . . . . . . . . . . . . . . . . . . . . . . . . . . . . . . . . . . . . . . . . . . . . . . . . . 4
1.3 Darstellung von Sicherheitshinweisen . . . . . . . . . . . . . . . . . . . . . . . . . . . . . . . . . . . . . . . . . . . . . . . . 4
1.3.1 Sicherheitshinweise in der Bedienungsanleitung. . . . . . . . . . . . . . . . . . . . . . . . . . . . . . . . . . . . . . . . . . 4
1.4 Herstellerdaten . . . . . . . . . . . . . . . . . . . . . . . . . . . . . . . . . . . . . . . . . . . . . . . . . . . . . . . . . . . . 4
2. Sicherheit . . . . . . . . . . . . . . . . . . . . . . . . . . . . . . . . . . . . . . . . . . . . . . 5
2.1 Allgemein. . . . . . . . . . . . . . . . . . . . . . . . . . . . . . . . . . . . . . . . . . . . . . . . . . . . . . . . . . . . . . . 5
2.2 Allgemeine Sicherheits- und Warnhinweise . . . . . . . . . . . . . . . . . . . . . . . . . . . . . . . . . . . . . . . . . . . . . 5
3. Beschreibung . . . . . . . . . . . . . . . . . . . . . . . . . . . . . . . . . . . . . . . . . . . . 5
3.1 Beschreibung des Geräts . . . . . . . . . . . . . . . . . . . . . . . . . . . . . . . . . . . . . . . . . . . . . . . . . . . . . . . 5
3.2 Lieferumfang . . . . . . . . . . . . . . . . . . . . . . . . . . . . . . . . . . . . . . . . . . . . . . . . . . . . . . . . . . . . . 6
3.3 Bestimmungsgemäßer Gebrauch. . . . . . . . . . . . . . . . . . . . . . . . . . . . . . . . . . . . . . . . . . . . . . . . . . . 6
3.4 Technische Daten . . . . . . . . . . . . . . . . . . . . . . . . . . . . . . . . . . . . . . . . . . . . . . . . . . . . . . . . . . . 6
3.5 Umbauten oder Veränderungen . . . . . . . . . . . . . . . . . . . . . . . . . . . . . . . . . . . . . . . . . . . . . . . . . . . 6
4. Montage und Inbetriebnahme . . . . . . . . . . . . . . . . . . . . . . . . . . . . . . . . . . . 6
4.1 Lieferumfang . . . . . . . . . . . . . . . . . . . . . . . . . . . . . . . . . . . . . . . . . . . . . . . . . . . . . . . . . . . . . 6
4.2 Überprüfung vor der Inbetriebnahme . . . . . . . . . . . . . . . . . . . . . . . . . . . . . . . . . . . . . . . . . . . . . . . . 6
4.3 Montage . . . . . . . . . . . . . . . . . . . . . . . . . . . . . . . . . . . . . . . . . . . . . . . . . . . . . . . . . . . . . . . 6
4.3.1 Montagehöhe . . . . . . . . . . . . . . . . . . . . . . . . . . . . . . . . . . . . . . . . . . . . . . . . . . . . . . . . . . . 7
4.3.2 Montageschritte . . . . . . . . . . . . . . . . . . . . . . . . . . . . . . . . . . . . . . . . . . . . . . . . . . . . . . . . . . 7
5. Periodische Wartung und Reinigung . . . . . . . . . . . . . . . . . . . . . . . . . . . . . . . . 8
5.1 Übersicht Wartungsplan . . . . . . . . . . . . . . . . . . . . . . . . . . . . . . . . . . . . . . . . . . . . . . . . . . . . . . . 8
5.2 Sicherheitstechnische Sichtprüfung mechanisch + elektrisch . . . . . . . . . . . . . . . . . . . . . . . . . . . . . . . . . . . . 8
5.3 Schraubverbindungen . . . . . . . . . . . . . . . . . . . . . . . . . . . . . . . . . . . . . . . . . . . . . . . . . . . . . . . . 8
5.4 Bürsten . . . . . . . . . . . . . . . . . . . . . . . . . . . . . . . . . . . . . . . . . . . . . . . . . . . . . . . . . . . . . . . . 8
5.4.1 Bürstenwechsel. . . . . . . . . . . . . . . . . . . . . . . . . . . . . . . . . . . . . . . . . . . . . . . . . . . . . . . . . . . 8
5.4.2 Bürstenreinigung . . . . . . . . . . . . . . . . . . . . . . . . . . . . . . . . . . . . . . . . . . . . . . . . . . . . . . . . . . 9
5.5 Gesamtes Gerät. . . . . . . . . . . . . . . . . . . . . . . . . . . . . . . . . . . . . . . . . . . . . . . . . . . . . . . . . . . . 9
5.6 Entsorgung . . . . . . . . . . . . . . . . . . . . . . . . . . . . . . . . . . . . . . . . . . . . . . . . . . . . . . . . . . . . . . 9
6. Anhang . . . . . . . . . . . . . . . . . . . . . . . . . . . . . . . . . . . . . . . . . . . . . . . 9
6.1 Abkürzungen . . . . . . . . . . . . . . . . . . . . . . . . . . . . . . . . . . . . . . . . . . . . . . . . . . . . . . . . . . . . . 9
Abbildung 13 - 17
Ersatzteile . . . . . . . . . . . . . . . . . . . . . . . . . . . . . . . . . . . . . . . . . . . . . . .80

4
(DE) Lesen und beachten Sie die Bedienungsanleitung vor der Montage und ersten
Inbetriebnahme! Diese Bedienungsanleitung für künftige Verwendung aufbewahren!
1. Vorwort
1.1 Informationen zur Anleitung
Änderungen durch technische Weiterentwicklung gegenüber den in dieser Anleitung genannten Daten und Abbildungen behalten wir uns vor.
Nachdrucke, Übersetzungen und Vervielfältigungen in jeglicher Form, auch auszugsweise, bedürfen der schriftlichen Zustimmung des Herstellers.
Abkürzungen, Einheiten, Fachbegriffe, spezielle Bezeichnungen oder branchenübliche Terminologien, die in dieser Anleitung verwendet werden,
werden im Kapitel „Anhang” näher erklärt.
Diese Anleitung ist Bestandteil des Lieferumfangs.
• Sie ist in Zugriffsnähe bereitzuhalten und bleibt auch bei Verkauf des Gerätes beim Gerät.
• Diese Anleitung unterliegt keinem Änderungsdienst. Der jeweilige aktuelle Stand kann über den Fachhandel oder direkt vom Hersteller bezogen
werden.
• Sie ist modular aufgebaut und bezieht sich ausschließlich auf das genannte Produkt.
• Diese Bedienungsanleitung beschreibt die Arbeitsweise, die Bedienung und die Wartung des Geräts.
Die Sicherheitshinweise dienen der Vermeidung von Personenschäden, Schäden an Tieren und des Geräts. Alle Bediener sind verpflichtet, diese
Sicherheitshinweise zu lesen und stets zu beachten. Für Schäden und Betriebsstörungen, die sich aus Nichtbeachtung der Bedienungsanleitung
ergeben, übernimmt der Hersteller keine Haftung und Gewährleistung!
1.2 Vermerke zur Bedienungsanleitung
Dokumenten-Nr.: 2866675
Version/Revision: 1.0
Erstelldatum: 2022-04-20
Letzte Änderung: 2022-04-20
Sprache der Originalbedienungsanleitung: Deutsch
1.3 Darstellung von Sicherheitshinweisen
1.3.1 Sicherheitshinweise in der Bedienungsanleitung
Gefahr!
Unmittelbar drohende Gefahr, die zu schweren Körperverletzungen oder zum Tod führt.
Vorsicht!
Gefahr von Personen-, Tier- und Sachschädigung durch unsachgemäßen Gebrauch!
Achtung!
Möglicherweise schädliche Situation, bei der das Produkt oder eine Sache in der Umgebung beschädigt werden könnte.
Hinweis
Dieses Piktogramm kennzeichnet Informationen, die zum besseren Verständnis der Arbeitsabläufe beitragen.
1.4 Herstellerdaten
Albert Kerbl GmbH
Felizenzell 9
D-84428 Buchbach
Tel. +49 (0)8086 933 100
Fax +49 (0)8086 933 500
E-Mail [email protected]
Web www.kerbl.de

5
Kontaktinformationen für das Vereinigte Königreich von Großbritannien und Nordirland:
Kerbl UK Limited
8 Lands End Way
Oakham, Rutland
LE15 6RF UK
Tel. +44 (0)1572 722558
Fax +44 (0)1572 757614
E-Mail [email protected]
Web www.kerbl.co.uk
2. Sicherheit
2.1 Allgemein
• Lesen Sie die nachfolgenden Hinweise sorgfältig, bevor Sie das Gerät montieren und verwenden.
• Jede Person, die im Betrieb des Anwenders mit der Inbetriebnahme, Bedienung, Wartung und Reparatur beauftragt ist, muss die Bedienungsan-
leitung und besonders das Kapitel der Sicherheit gelesen und verstanden haben.
• Eine Nichtbeachtung einzeln angeführter Punkte der Bedienungsanleitung kann Personen- und Sachschäden verursachen, wofür vom Hersteller
keine Haftung übernommen wird.
2.2 Allgemeine Sicherheits- und Warnhinweise
Vorsicht!
Gefahr von Personen-, Tier- und Sachschädigung durch unsachgemäßen Gebrauch!
• Vor der Inbetriebnahme und dem Betreiben des Geräts, ist diese Bedienungsanleitung genau zu lesen und zu beachten.
• Kinder und gebrechliche Personen vom Gerät fernhalten.
• Sicherheits- und Wartungshinweise beachten.
• Wartungs- und Reinigungsarbeiten nur von geschultem Personal durchführen lassen.
• Der Bediener hat dafür zu sorgen, dass nur autorisierte Personen mit bzw. an dem Gerät arbeiten.
• Das Gerät ist ausschließlich gemäß bestimmungsgemäßer Verwendung und in sicherheitstechnisch einwandfreiem Zustand zu benutzen!
Die Betriebssicherheit des Geräts ist nur bei bestimmungsgemäßer Verwendung gewährleistet. Eine Nichtbeachtung einzeln angeführter Punkte
der Bedienungsanleitung kann Personen- und Sachschäden verursachen, wofür vom Hersteller keine Haftung übernommen wird.
• Es ist jegliche Arbeitsweise zu unterlassen, die die Sicherheit am Gerät beeinträchtigt.
• Das Betreiben des Geräts ist nur mit Bauteilen und Ersatzteilen gestattet, die im Lieferumfang enthalten bzw. in der Ersatz- und Verschleißteil-
liste aufgeführt sind.
• Bei Bürstenwechsel: Bürste fällt nach unten wenn Schraube komplett gelöst wurde.
• Nur Original-Ersatzteile verwenden.
3. Beschreibung
3.1 Beschreibung des Geräts
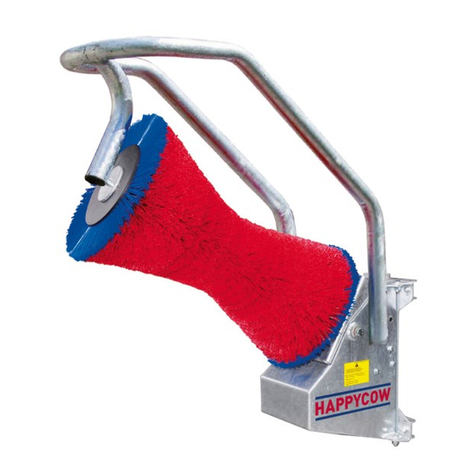
Viehbürste Modell: HAPPYCOW Free Maxi
Die Geräte sind dafür konzipiert, dass sich die Tiere selbstständig an der Bürste scheuern und somit das Fell reinigen können.
Bei der Verwendung dieser Geräte können Gefahren für Leib und Leben des Benutzers oder Dritter, bzw. Beeinträchtigungen an dem Gerät oder
an anderen Sachwerten entstehen.
3.2 Lieferumfang
• Bürsteneinheit, Gelenkstück und vormontiert
• Hängearm
• Bedienungsanleitung
3.3 Bestimmungsgemäßer Gebrauch
Dieses Gerät darf nur zur trockenen Säuberung von Großtieren eingesetzt werden.
Das Gerät darf mit max. 60 Tieren betrieben werden.
Dabei sind die in dieser Bedienungsanleitung angegebenen Vorschriften zu beachten.
Eine andere Verwendung des Geräts, z.B. in anderen Bereichen als beschrieben, gilt als nicht
bestimmungsgemäß. Für daraus resultierende Personen- und/oder Sachschäden wird vom
Hersteller keine Haftung übernommen.

6
3.4 Technische Daten
Artikelnummer/Typenbezeichnung: 18865
Abmessungen: 49 x 120 x 150 mm (H x B x D)
Befestigungslochabstand: Abbildung 3
Gewicht: ca. 49 kg
Bürstendurchmesser: Ø 350 mm / Ø 490 mm
Bürstenlänge: 1010 mm
3.5 Umbauten oder Veränderungen
Bei eigenmächtigen Umbauten und Veränderungen an dem Gerät erlischt jegliche Haftung und Gewährleistung durch den Hersteller. Umbauten
und Änderungen dürfen nur nach schriftlicher Zustimmung des Herstellers vorgenommen werden.
4. Montage und Inbetriebnahme
Gefahr!
•
• Die Maschine ist während der Montage stets gegen Herunterfallen oder Umkippen zu sichern – Lebensgefahr!
• Haltegurte durch Gelenkstück legen und mit Hebezeug sichern!
• Bürsteneinheit erst montieren, wenn der Hängearm sicher montiert ist.
• Während der Montage niemals zwischen das Gelenkstück greifen.
4.1 Lieferumfang
Das Gerät wird auf einer Palette geliefert. Die Bürsteneinheit ist bereits gebrauchsfertig montiert. Der Hängearm ist separat auf der Palette befe-
stigt. Der Achsbolzen für die Lagerung direkt unterhalb des Hängearms ist am Hängearm vormontiert und muss zur Montage der Antriebs- und
Bürsteneinheit demontiert werden!
4.2 Überprüfung vor der Inbetriebnahme
Vor Inbetriebnahme des Geräts muss diese unbedingt auf Vollständigkeit, sichtbare Mängel bzw. eventuelle Gefahrenherde kontrolliert werden.
Folgende Maßnahmen zur Überprüfung sollten getroffen werden:
• Kontrollieren des Geräts auf lockere und herabhängende Teile bzw. Transportschäden.
4.3 Montage
Eine optimale Platzierung und stabile Befestigungsmöglichkeit ist besonders wichtig für den problemfreien Betrieb dieses hochbeanspruchten
Geräts.
Es ist zu beachten:
• Gerät nicht an einer Engstelle im Stall anbringen.
• Zur Vermeidung von Stauungen, Gerät nicht unmittelbar vor oder nach dem Melkstand montieren.
• Maschine nicht in der Nähe von staubempfindlichen Geräten anbringen.
• Gerät auf einem festen, stabilen und ebenen Untergrund montieren.
• Bei Ziegelwänden wird eine große, druckfeste Unterlage empfohlen.
• Das Gerät muss durch alle 4 Befestigungsbohrungen des Hängearms mit der Wand verbunden werden.
• Befestigungsmaterial muss durch fachkundiges Personal auf den Untergrund abgestimmt sein.
• Bei Betonwänden werden Schwerlastanker oder Klebeanker empfohlen.
• Bei der Montage auf Ziegel oder Holz werden durchgängige Gewindestangen empfohlen.
• Mindestens Gewindegröße M12 verwenden.
• Verschraubung gegen selbstständiges Lösen sichern. Dazu selbstsichernde Muttern und/oder Gewindekleber verwenden.
• Befestigung regelmäßig prüfen und ggf. nachziehen.
• Gerät nur mit geeignetem Hubmittel montieren.
• Geltende Unfallverhütungsvorschriften beachten!
Tipp
Gerät an ebener, massiver Betonwand befestigen.
4.3.1 Montagehöhe
Die Aufhängehöhe des Geräts muss an die durchschnittliche Widerristhöhe (= Ø Withers height) der Tiere angepasst werden. Die Oberkante der
Bürstenrolle selbst sollte sich ca. 100 - 200 mm über der durchschnittlichen Widerristhöhe befinden. Die Aufhängehöhe muss vor der Erstellung
der Befestigungsbohrungen ermittelt werden!
Sind innerhalb der Herde große Unterschiede in der Widerristhöhe (mehr als 20 cm), sollte sich die Aufhängehöhe nach den größeren Tieren
richten, um schnellen Verschleiß der Bürsten zu vermeiden.

7
4.3.2 Montageschritte
1. Montagehöhe ermitteln (siehe Punkt 5.3.1)
2. Hängearm auf ermittelter Höhe montieren.
3. Bürsteneinheit und Gelenkstück zur Montage vorbereiten:
1.Untere Achse aus Gelenkstück demontieren.
2.Werkzeug zum Einbau der unteren Achse bereitlegen.
4. Gelenkstück mit geeignetem Hebemittel zum montierten Hängearm heben.
5. Untere Achse durch Lagerung im Hängearm und Gelenkstück schieben und montieren.
6. Die Achse mit der Schraube M12x25, Federring A13 und Unterlegscheibe A12 befestigen.
7. Die Achse mit Schraube M12x25, Scheibe A12 und selbstsichernder Mutter M12 gegen Verdrehung sichern.
Abbildung 1: Montagehöhe
Abbildung 2: Montage

8
5. Periodische Wartung und Reinigung
Das Gerät darf nur in einwandfreiem Zustand betrieben werden!
Gerät unverzüglich stillsetzen, sobald ein Schaden oder eine Fehlfunktion festgestellt wird!
Vorsicht!
Gefahr von Personen- Tier- und Sachschäden!
• Wartungs- und Reinigungsarbeiten nur von geschultem Personal durchführen lassen.
• Halten Sie alle Sicherheits- und Gefahrenhinweise an/auf dem Gerät stets vollzählig in lesbarem Zustand.
• Beim Wechseln der Gleitlager die Motoraufhängung inklusive Bürste stets mit geeignetem Hebezeug gegen Herunterfallen oder Absacken
sichern. Verletzungsgefahr!
• Bei Bürstenwechsel: Bürste fällt nach unten wenn Schraube komplett gelöst wurde.
5.1 Übersicht Wartungsplan
5.2 Sicherheitstechnische Sichtprüfung mechanisch
• Tägliche Überprüfung des Geräts auf äußerlich erkennbare Schäden und generelle Funktionsfähigkeit.
5.3 Schraubverbindungen
Alle Schraubverbindungen wöchentlich auf festen Sitz prüfen, insbesondere die Befestigung des Geräts an der Wand. Schraubverbindungen gege-
benenfalls festziehen.
5.4 Bürsten
Die Bürste (Abb. 13 – Pos. 4) muss gewechselt werden, wenn sie abgenutzt ist und nur noch eine ungenügende Reinigungsleistung bei den Tieren
zeigt.
5.4.1 Bürstenwechsel
1. Schraube unter der Bürste lösen.
2. Bürste abziehen und durch neue Bürste ersetzen.
3. Schraube mit Gewindekleber versehen, mit Scheibe und Federscheibe wieder festziehen.
5.4.2 Bürstenreinigung
Es wird empfohlen, das Bürstenelement im Abstand von 6 Wochen mit einem geeigneten Desinfektionsmittel zu reinigen.
(Zum Beispiel #299698 Desinfektionsmittel INTERKOKASK® der Firma Albert Kerbl GmbH)
5.5 Gesamtes Gerät
Das gesamte Gerät ist regelmäßig zu reinigen.
5.6 Entsorgung
Bitte beachten Sie die örtlich gültigen Entsorgungsvorschriften! Alle Teile, Hilfs- und Betriebsstoffe des Geräts sortenrein trennen. Bei Fragen zu
Abgabemöglichkeiten und Abgabemengen wenden Sie sich an die örtlich zuständige Einrichtung.
Bauteil Reinigen Schmieren Inspizieren Häufigkeit
Sicherheitstechnische Sichtprüfung mechanisch x täglich
Schraubverbindungen x wöchentlich
Bewegliche Teile (Gleitlager, Gummipuffer, Flanschlager,
Schmiernippel Abb.12) x x wöchentlich
Bürsten x x wöchentlich
Gesamtes Gerät x vierteljährlich

9
6. Anhang
6.1 Abkürzungen
Begriff Erklärung
Ø Durchmesserangabe
Einheiten
° Grad (Winkelangabe)
°C Grad Celsius
s Sekunde
min Minute
” (in) Zoll / Inch (= 25,4 mm)
mm Millimeter
cm Zentimeter
m Meter
mm2Quadratmillimeter
mm3Kubikmillimeter
g Gramm
kg Kilogramm
kPa Kilopascal
kW Kilowatt
A Ampère (Stromstarke)
V Volt (Spannung)
Ω Ohm (Widerstand)

1. Préface . . . . . . . . . . . . . . . . . . . . . . . . . . . . . . . . . . . . . . . . . . . . . . .11
1.1 Informations spécifiques au mode d’emploi . . . . . . . . . . . . . . . . . . . . . . . . . . . . . . . . . . . . . . . . . . . . . 11
1.2 Indications du mode d’emploi . . . . . . . . . . . . . . . . . . . . . . . . . . . . . . . . . . . . . . . . . . . . . . . . . . . .11
1.3 Consignes de sécurité et pictogrammes associés. . . . . . . . . . . . . . . . . . . . . . . . . . . . . . . . . . . . . . . . . . .11
1.3.1 Consignes de sécurité dans le mode d’emploi . . . . . . . . . . . . . . . . . . . . . . . . . . . . . . . . . . . . . . . . . . . 11
1.4 Données du fabricant. . . . . . . . . . . . . . . . . . . . . . . . . . . . . . . . . . . . . . . . . . . . . . . . . . . . . . . . .11
2. Sécurité . . . . . . . . . . . . . . . . . . . . . . . . . . . . . . . . . . . . . . . . . . . . . . .12
2.1 Généralités . . . . . . . . . . . . . . . . . . . . . . . . . . . . . . . . . . . . . . . . . . . . . . . . . . . . . . . . . . . . . . 12
2.2 Consignes de sécurité et d’avertissement générales . . . . . . . . . . . . . . . . . . . . . . . . . . . . . . . . . . . . . . . . . 12
3. Description . . . . . . . . . . . . . . . . . . . . . . . . . . . . . . . . . . . . . . . . . . . . .12
3.1 Description de l’appareil . . . . . . . . . . . . . . . . . . . . . . . . . . . . . . . . . . . . . . . . . . . . . . . . . . . . . . . 12
3.2 État de livraison . . . . . . . . . . . . . . . . . . . . . . . . . . . . . . . . . . . . . . . . . . . . . . . . . . . . . . . . . . .12
3.3 Utilisation conforme à l’usage prévu . . . . . . . . . . . . . . . . . . . . . . . . . . . . . . . . . . . . . . . . . . . . . . . . .12
3.4 Caractéristiques techniques . . . . . . . . . . . . . . . . . . . . . . . . . . . . . . . . . . . . . . . . . . . . . . . . . . . . .13
3.5 Transformations ou modifications . . . . . . . . . . . . . . . . . . . . . . . . . . . . . . . . . . . . . . . . . . . . . . . . . . 13
4. Montage et mise en service. . . . . . . . . . . . . . . . . . . . . . . . . . . . . . . . . . . . .13
4.1 État de livraison . . . . . . . . . . . . . . . . . . . . . . . . . . . . . . . . . . . . . . . . . . . . . . . . . . . . . . . . . . .13
4.2 Contrôle avant la mise en service . . . . . . . . . . . . . . . . . . . . . . . . . . . . . . . . . . . . . . . . . . . . . . . . . . 13
4.3. Montage . . . . . . . . . . . . . . . . . . . . . . . . . . . . . . . . . . . . . . . . . . . . . . . . . . . . . . . . . . . . . . .13
4.3.1 Hauteur de montage . . . . . . . . . . . . . . . . . . . . . . . . . . . . . . . . . . . . . . . . . . . . . . . . . . . . . . . . 13
4.3.2 Étapes de montage. . . . . . . . . . . . . . . . . . . . . . . . . . . . . . . . . . . . . . . . . . . . . . . . . . . . . . . . .14
5. Maintenance et nettoyage périodiques . . . . . . . . . . . . . . . . . . . . . . . . . . . . . .15
5.1 Aperçu du plan de maintenance . . . . . . . . . . . . . . . . . . . . . . . . . . . . . . . . . . . . . . . . . . . . . . . . . . .15
5.2 Examen visuel de sécurité mécanique + électrique. . . . . . . . . . . . . . . . . . . . . . . . . . . . . . . . . . . . . . . . . .15
5.3 Raccords à vis . . . . . . . . . . . . . . . . . . . . . . . . . . . . . . . . . . . . . . . . . . . . . . . . . . . . . . . . . . . . 15
5.4 Brosse . . . . . . . . . . . . . . . . . . . . . . . . . . . . . . . . . . . . . . . . . . . . . . . . . . . . . . . . . . . . . . . . 15
5.4.1 Changement de la brosse. . . . . . . . . . . . . . . . . . . . . . . . . . . . . . . . . . . . . . . . . . . . . . . . . . . . . .15
5.4.2 Nettoyage de la brosse . . . . . . . . . . . . . . . . . . . . . . . . . . . . . . . . . . . . . . . . . . . . . . . . . . . . . . .15
5.5 Appareil dans l’ensemble. . . . . . . . . . . . . . . . . . . . . . . . . . . . . . . . . . . . . . . . . . . . . . . . . . . . . . .15
5.6 Élimination . . . . . . . . . . . . . . . . . . . . . . . . . . . . . . . . . . . . . . . . . . . . . . . . . . . . . . . . . . . . . . 15
6. Annexe . . . . . . . . . . . . . . . . . . . . . . . . . . . . . . . . . . . . . . . . . . . . . . .16
6.1 Abréviations . . . . . . . . . . . . . . . . . . . . . . . . . . . . . . . . . . . . . . . . . . . . . . . . . . . . . . . . . . . . . 16
Pièces de rechange . . . . . . . . . . . . . . . . . . . . . . . . . . . . . . . . . . . . . . . . . .80
(FR) Sommaire
Figure 13 - 17

11
(FR) Veuillez lire le mode d’emploi attentivement et le respecter avant le montage et
lors de la première mise en service! Veuillez conserver ce mode d’emploi pour tout
usage ultérieur!
1. Préface
1.1 Informations spécifiques au mode d’emploi
Nous nous réservons le droit d’apporter des modifications dues au perfectionnement technique aux données et illustrations du mode d’emploi.
Les réimpressions, traductions et duplications de quelques forme que ce soit, même partielles, sont subordonnées à l’accord écrit du fabricant. Les
abréviations, acronymes, unités, termes techniques, désignations spéciales ou terminologies conformes aux usages de la profession utilisés dans
ce mode d’emploi sont expliqués au chapitre de l’«Annexe».
Le présent mode d’emploi forme partie des fournitures.
• Il doit être placé à portée de main de l’utilisateur et resté avec l’appareil, même s’il est vendu.
• Le présent mode d’emploi n’est pas susceptible d’être révisé. La version actuelle est disponible auprès des revendeurs spécialises ou en
s’adressant directement au fabricant.
• Il est modulaire et se réfère exclusivement au produit y figurant.
• Le présent mode d’emploi décrit le fonctionnement, l’utilisation et l’entretien de l’appareil.
Les consignes de sécurité servent à prévenir les préjudices corporels, ainsi que les dommages causés aux animaux et à l’appareil. Tous les utilisa-
teurs sont tenus de lire les consignes de sécurité et de les respecter à tout moment. Le fabricant décline toute responsabilité pour les dommages
et dysfonctionnements résultant de l’inobservation du mode d’emploi!
1.2 Indications du mode d’emploi
No du document: 2866675
Version / révision: 1.0
Date de création: 20/04/2022
Dernière modification: 20/04/2022
Langue du mode d’emploi original: Allemand
1.3 Consignes de sécurité et pictogrammes associés
1.3.1 Consignes de sécurité dans le mode d’emploi
Danger!
Danger imminent susceptible de causer des blessures graves, voire mortelles.
Attention!
Un usage non conforme peut mettre en danger les personnes et les animaux et causer des dommages matériels!
Attention!
Situation potentiellement nocive et susceptible d’endommager le produit ou un objet environnant.
Avis
Ce pictogramme signale des informations permettant de mieux comprendre les processus de travail.
1.4 Données du fabricant
Albert Kerbl GmbH
Felizenzell 9
D-84428 Buchbach
Tél. +49 (0)8086 933 100
Fax +49 (0)8086 933 500
E-Mail [email protected]
Web www.kerbl.de

12
Informations de contact pour le Royaume-Uni de Grande-Bretagne et d’Irlande du Nord:
Kerbl UK Limited
8 Lands End Way
Oakham, Rutland
LE15 6RF UK
Tél. +44 (0)1572 722558
Fax +44 (0)1572 757614
E-Mail [email protected]
Web www.kerbl.co.uk
2. Sécurité
2.1 Généralités
• Lisez attentivement les informations ci-dessous avant de monter et d’utiliser l’appareil.
• Toute personne chargée de la mise en marche, de l’utilisation, de la maintenance et des réparations chez l’utilisateur doit avoir lu et compris le
mode d’emploi et, tout particulièrement, le chapitre relatif à la sécurité.
• Le fabricant décline toutes responsabilité pour les blessures et dommages matériels causés par l’inobservation des différents points mentionnés
dans ce mode d’emploi.
2.2 Consignes de sécurité et d’avertissement générales
Prudence!
Un usage non conforme peut mettre en danger les personnes et les animaux et causer des dommages matériels!
• Il est impératif de lire et de respecter le présent mode d’emploi avant de mettre l’appareil en service et de l’utiliser.
• Respecter les recommandations de maintenance et de sécurité.
• Les interventions de maintenance et de nettoyage doivent être effectuées par des personnes dûment formées.
• L’utilisateur doit veiller à ce que seules des personnes dûment autorisées travaillent sur et avec l’appareil.
• Utiliser l’appareil exclusivement de manière conforme à l’usage prévue et en parfait état de sécurité technique! La sécurité fonctionnelle de
l’appareil est uniquement garantie s’il est utilisé de manière conforme à l’usage prévu. Le fabricant décline toutes responsabilité pour les bles-
sures et dommages matériels causés par l’inobservation des différents points mentionnés dans ce mode d’emploi.
• Éviter tout usage critique pour la sécurité de l’appareil.
• Veiller à ce que toutes les consignes de sécurité et mentions de danger sur l’appareil soient complètes et bien lisibles.
• Le réglage de l’interrupteur DIP est uniquement permis à condition que l’alimentation électrique de l’appareil soit coupée et après avoir consul-
té le service après-vente de Kerbl.
• Changement de la brosse: la brosse tombe vers le bas dès que la vis est complètement desserrée.
• Utiliser uniquement des pièces de rechange d’origine.
3. Description
3.1 Description de l’appareil
Brosse à vaches modèle: HAPPYCOW Free Maxi
Les appareils sont conçus de sorte que les animaux puissent se frotter et se gratter en contact avec la brosse, et nettoyer leur pelage de manière
autonome.
L’utilisation de cet appareil peut toutefois blesser gravement ou mortellement l’utilisateur ou des tiers, et endommager l’appareil ou tout autre
bien matériel.
3.2 État de livraison
• Unité de brossage et élément articulé prémontées
• Bras de fixation
• Mode d’emploi
3.3 Utilisation conforme à l’usage prévu
Cet appareil est uniquement destiné au nettoyage à sec des grands animaux. L’utilisation de l’appareil est limitée à 60 animaux.
Le respect des prescriptions figurant dans le présent mode d’emploi est indispensable. Une utilisation de l’appareil à d’autres fins, par exemple
dans des zones autres que celles décrites, est réputée non conforme à l’usage prévu. Le fabricant décline toute responsabilité pour les dommages
corporels et/ou matériels en résultant.

13
3.4 Caractéristiques techniques
Référence / modèle: 18865
Dimensions: 49 x 120 x 150 mm (long. x larg. x diam.)
Écart entre les trous de fixation: Figure3
Poids: env. 49 kg
Diamètre de la brosse: Ø 350 mm / Ø 490 mm
Longueur de la brosse: 1010mm
3.5 Transformations ou modifications
Tout recours en responsabilité et garantie du fabricant prend fin en cas de transformations et de modifications de l’appareil effectuées par
l’exploitant de son propre chef. Les transformations et modifications sont subordonnées à l’accord écrit du fabricant.
4. Montage et mise en service
Danger!
• Veiller à immobiliser l’appareil contre tout risque de tomber ou de glisser pendant le montage – danger mortel!
• Installer les sangles de maintien à travers l’élément articulé et le sécuriser avec un engin de levage!
• Ne monter l’unité et de brossage qu’après le montage fiable du bras de fixation.
• Ne jamais introduire les mains entre l’élément articulé pendant le montage.
4.1 État de livraison
L’appareil est fourni sur une palette. L’unité de brossage est déjà prémontée en l’état prêt au service. Le bras de fixation est immobilisé séparé-
ment sur une palette. Le boulon d´axe pour le logement directement sous le bras de fixation est prémonté sur le bras de fixation et doit être dépo-
sé avec le montage de l’unité d’entraînement et de brossage!
4.2 Contrôle avant la mise en service
Avant de mettre l’appareil en marche, il est impératif de contrôler qu’aucune pièce ne manque, tout comme l’absence de défauts visibles et
l’inexistence d’éventuelles sources de danger.
Mesures à prendre pour le contrôle de l’appareil:
• S’assurer que l’appareil ne comporte pas de pièces détachées et suspendues, ni de dommages subis pendant le transport.
4.3. Montage
Une mise en place optimale et une fixation solide sont particulièrement importantes pour assurer une exploitation sans problème de cet appareil
soumis à de fortes sollicitations.
À savoir:
• Ne pas installer l’appareil dans un endroit étroit de l’étable.
• Ne pas installer l’appareil directement avant ou après la salle ou la station de traite afin d’éviter les embouteillages.
• Ne pas installer l’appareil à proximité d’appareils sensibles à la poussière.
• Monter l’appareil sur un support ferme, stable et plan.
• Dans le cas de murs en briques, il est recommandé d’utiliser un grand support résistant à la pression.
• L’appareil doit être relié au mur par tous les 4 trous du bras de fixation.
• Le matériau de fixation doit être adapté au support par des personnes compétentes.
• Utiliser des ancrages pour charges lourdes ou des ancrages à coller sur les murs en béton.
• Il est recommandé d’utiliser des tiges filetées traversantes pour le montage sur des briques ou du bois.
• Utiliser des tiges d’un filetage d’au moins M12.
• Bloquer les raccords à vie contre un desserrage autonome. Utiliser des écrous autobloquants et/ou de la colle pour filetage.
• Vérifier régulièrement les fixations et les resserrer si nécessaire.
• Utiliser toujours un engin de levage adapté pour le montage.
• Tenir compte des prescriptions de prévention des accidents en vigueur!
Conseil pratique
Fixer l’appareil à un mur en béton massif et plan.
4.3.1 Hauteur de montage
La hauteur de suspension de l’appareil doit être adaptée à la hauteur moyenne au garrot des animaux (= Ø Withers height (hauteur moyenne au
garrot)). Le bord supérieur de la brosse devrait se situer à environ 100 à 200mm au-dessus de la hauteur moyenne au garrot. Il faut déterminer la
hauteur de suspension avant de percer les trous d’ancrage!
S’il existe des différences de taille importantes entre les hauteurs au garrots (plus de 20cm), il convient de se baser sur la hauteur au garrot des
plus grands animaux afin d’éviter une usure trop rapide des brosses.

14
4.3.2 Étapes de montage
1. Déterminer la hauteur de montage (voir Point 5.3.1)
2. Installer le bras de fixation à la hauteur déterminée.
3. Préparation de l’unité de brossage et de l’élément articulé pour le montage :
1. Déposer l’axe supérieur de l’élément articulé.
2. Positionner les outils nécessaires à l’installation de l’axe inférieur.
4. Se servir d’un engin de levage pour transporter l’élément articulé vers le bras de fixation préalablement monté.
5. Glisser l’axe supérieur à travers le logement dans le bras de fixation et l’élément articulé, et l’installer.
6. Fixer l’axe avec la vis M12x25, la rondelle-ressort A13 et la rondelle A12.
7. Bloquer l’axe contre le gauchissement avec la vis M12x25, la rondelle A12 et l’écrou autobloquant M12.
Figure 1: Hauteur de montage
Figure 2: Montage

15
5. Maintenance et nettoyage périodiques
Utiliser l’appareil uniquement dans un état impeccable!
Arrêter immédiatement l’appareil en constatant un défaut ou un dysfonctionnement!
Attention!
Danger pour les personnes et les animaux, et risque de dommages matériels !
• Les interventions de maintenance et de nettoyage doivent être effectuées par des personnes dûment formées.
• Veiller à ce que toutes les consignes de sécurité et mentions de danger sur l’appareil soient toujours complètes et bien lisibles.
• Lors du remplacement des paliers lisses, utiliser toujours un engin de levage adapté pour sécuriser la suspension du moteur, y compris la brosse,
contre tout risque de chute ou d’affaissement. Risque de blessures!
• Changement de la brosse: la brosse tombe vers le bas dès que la vis est complètement desserrée.
5.1 Aperçu du plan de maintenance
5.2 Examen visuel de sécurité mécanique
• Vérification quotidienne de l’appareil quant à l’absence de dommages visibles et de dysfonctionnements généraux.
5.3 Raccords à vis
Vérifiez l’ajustement correct des raccords à vie chaque semaine, en particulier la fixation de l’appareil au mur. Resserrer les raccords à vis si nécessaire.
5.4 Brosse
Remplacer la brosse (Fig. 13 – Pt 4) dès qu’elle est trop usée et que le nettoyage des animaux est insuffisant.
5.4.1 Changement de la brosse
1. Desserrer la vis sous la brosse.
2. Retirer la brosse et la remplacer par une brosse neuve.
3. Enduire la vis d’une colle pour filetage, la munir d’une rondelle plate et d’une rondelle ressort, et la resserrer.
5.4.2 Nettoyage de la brosse
Il est recommandé de nettoyer l’élément de la brosse toutes les 6 semaines à l’aide d’un désinfectant adapté.
(Par exemple le désinfectant INTERKOKASK® #299698 de la société Albert Kerbl GmbH)
5.5 Appareil dans l’ensemble
Nettoyer l’appareil complet régulièrement.
5.6 Élimination
Veuillez respecter les prescriptions d’élimination locales en vigueur! Éliminer toutes les pièces et les consommables de l’appareil matière par ma-
tière. Pour toute question en rapport avec les produits et quantités acceptés, adressez-vous aux organismes locaux compétents.
Composant Nettoyage Lubrification Inspection Fréquence
Examen visuel de sécurité mécanique x quotidienne
Assemblages boulonnés x hebdomadaire
Éléments mobiles (paliers lisses, tampons en caoutchouc, flasque-
brides, graisseurs Fig.12) x x hebdomadaire
Brosses x x hebdomadaire
Appareil complet x trimestrielle

16
6. Annexe
6.1 Abréviations
Terme Explication
Ø diamètre
Unités
° degré (d’un angle)
°C degrés Celsius
s seconde
min minute
” (in) pouce/s (1 pouce = 25,4mm)
mm millimètre
cm centimètre
m mètre
mm2millimètre carré
mm3millimètre cube
g gramme
kg kilogramme
kPa kilopascal
kW kilowatt
A ampère (intensité du courant)
V volts (tension)
Ω ohm (résistance)

1. Foreword . . . . . . . . . . . . . . . . . . . . . . . . . . . . . . . . . . . . . . . . . . . . . .18
1.1 Information about the manual . . . . . . . . . . . . . . . . . . . . . . . . . . . . . . . . . . . . . . . . . . . . . . . . . . . . 18
1.2 Notes on the operating instructions . . . . . . . . . . . . . . . . . . . . . . . . . . . . . . . . . . . . . . . . . . . . . . . . .18
1.3 Representation of safety instructions. . . . . . . . . . . . . . . . . . . . . . . . . . . . . . . . . . . . . . . . . . . . . . . . .18
1.3.1 Safety instructions in the operating instructions . . . . . . . . . . . . . . . . . . . . . . . . . . . . . . . . . . . . . . . . . .18
1.4 Manufacturer data . . . . . . . . . . . . . . . . . . . . . . . . . . . . . . . . . . . . . . . . . . . . . . . . . . . . . . . . . . 18
2. Safety . . . . . . . . . . . . . . . . . . . . . . . . . . . . . . . . . . . . . . . . . . . . . . . .19
2.1 General . . . . . . . . . . . . . . . . . . . . . . . . . . . . . . . . . . . . . . . . . . . . . . . . . . . . . . . . . . . . . . . .19
2.2 General information regarding safety and warning instructions . . . . . . . . . . . . . . . . . . . . . . . . . . . . . . . . . . .19
3. Description . . . . . . . . . . . . . . . . . . . . . . . . . . . . . . . . . . . . . . . . . . . . .19
3.1 Description of the unit . . . . . . . . . . . . . . . . . . . . . . . . . . . . . . . . . . . . . . . . . . . . . . . . . . . . . . . .19
3.2 Scope of delivery . . . . . . . . . . . . . . . . . . . . . . . . . . . . . . . . . . . . . . . . . . . . . . . . . . . . . . . . . . . 19
3.3 Correct use . . . . . . . . . . . . . . . . . . . . . . . . . . . . . . . . . . . . . . . . . . . . . . . . . . . . . . . . . . . . . . 19
3.4 Technical data . . . . . . . . . . . . . . . . . . . . . . . . . . . . . . . . . . . . . . . . . . . . . . . . . . . . . . . . . . . .20
3.5 Conversions or modifications. . . . . . . . . . . . . . . . . . . . . . . . . . . . . . . . . . . . . . . . . . . . . . . . . . . . .20
4. Assembly and commissioning. . . . . . . . . . . . . . . . . . . . . . . . . . . . . . . . . . . .20
4.1 Scope of delivery . . . . . . . . . . . . . . . . . . . . . . . . . . . . . . . . . . . . . . . . . . . . . . . . . . . . . . . . . . . 20
4.2 Checks before commissioning . . . . . . . . . . . . . . . . . . . . . . . . . . . . . . . . . . . . . . . . . . . . . . . . . . . .20
4.3 Installation . . . . . . . . . . . . . . . . . . . . . . . . . . . . . . . . . . . . . . . . . . . . . . . . . . . . . . . . . . . . . . 20
4.3.1 Installation height . . . . . . . . . . . . . . . . . . . . . . . . . . . . . . . . . . . . . . . . . . . . . . . . . . . . . . . . . 20
4.3.2 Installation steps . . . . . . . . . . . . . . . . . . . . . . . . . . . . . . . . . . . . . . . . . . . . . . . . . . . . . . . . . .21
5. Periodic maintenance and cleaning . . . . . . . . . . . . . . . . . . . . . . . . . . . . . . . .22
5.1 Overview of maintenance schedule . . . . . . . . . . . . . . . . . . . . . . . . . . . . . . . . . . . . . . . . . . . . . . . . . 22
5.2 Visual inspection of mechanical + electrical safety technology . . . . . . . . . . . . . . . . . . . . . . . . . . . . . . . . . . .22
5.3 Screw connections . . . . . . . . . . . . . . . . . . . . . . . . . . . . . . . . . . . . . . . . . . . . . . . . . . . . . . . . . . 22
5.4 Brushes . . . . . . . . . . . . . . . . . . . . . . . . . . . . . . . . . . . . . . . . . . . . . . . . . . . . . . . . . . . . . . . .22
5.4.1 Changing the brushes . . . . . . . . . . . . . . . . . . . . . . . . . . . . . . . . . . . . . . . . . . . . . . . . . . . . . . . 22
5.4.2 Brush cleaning . . . . . . . . . . . . . . . . . . . . . . . . . . . . . . . . . . . . . . . . . . . . . . . . . . . . . . . . . . . 22
5.5 Entire unit . . . . . . . . . . . . . . . . . . . . . . . . . . . . . . . . . . . . . . . . . . . . . . . . . . . . . . . . . . . . . .22
5.6 Disposal . . . . . . . . . . . . . . . . . . . . . . . . . . . . . . . . . . . . . . . . . . . . . . . . . . . . . . . . . . . . . . . 22
6. Appendix . . . . . . . . . . . . . . . . . . . . . . . . . . . . . . . . . . . . . . . . . . . . . .23
6.1 Abbreviations. . . . . . . . . . . . . . . . . . . . . . . . . . . . . . . . . . . . . . . . . . . . . . . . . . . . . . . . . . . . .23
Spare parts. . . . . . . . . . . . . . . . . . . . . . . . . . . . . . . . . . . . . . . . . . . . . . .80
(EN) Table of contents
Figure 13 - 17

18
(EN) Read and pay attention to these operating instructions before assembly and initial
commissioning! Keep these operating instructions for future reference!
1. Foreword
1.1 Information about the manual
We reserve the right to make changes due to further technical development compared to the data and illustrations mentioned in this manual.
Reprints, translations and reproductions in any form, including excerpts, require the written consent of the manufacturer.
Abbreviations, units, technical terms, special designations or industry-standard terminology used in this manual are explained in more detail in
the “Appendix” section.
This manual is part of the scope of delivery.
• It must be kept close at hand and remains with the unit even if it is sold.
• This manual is not subject to a revision service. The respective current status can be obtained from the specialist trader or directly from the
manufacturer.
• It has a modular structure and refers exclusively to the named product.
• These operating instructions describe the operation, use and maintenance of the unit.
The safety instructions are intended to prevent personal injury, damage to animals and the unit. All operators are required to read and observe
these safety instructions at all times. The manufacturer accepts no liability or warranty for damage and malfunctions resulting from non-observan-
ce of the operating instructions!
1.2 Notes on the operating instructions
Document No.: 2866675
Version/revision: 1.0
Creation date: 20.04.2022
Last change: 20.04.2022
Language of the original operating instructions: German
1.3 Representation of safety instructions
1.3.1 Safety instructions in the operating instructions
Danger!
Imminent danger which leads to serious physical injury or death.
Caution!
Risk of physical injury to people and animals and material damage if used incorrectly!
Important!
Potentially harmful situation that could damage the product or an object nearby.
Note
This pictogram identifies information that contributes to a better understanding of the work processes.
1.4 Manufacturer data
Albert Kerbl GmbH
Felizenzell 9
D-84428 Buchbach
Tel. +49 (0)8086 933 100
Fax +49 (0)8086 933 500
E-mail [email protected]
Web www.kerbl.de

19
Contact information for the United Kingdom of Great Britain and Northern Ireland:
Kerbl UK Limited
8 Lands End Way
Oakham, Rutland
LE15 6RF UK
Tel. +44 (0)1572 722558
Fax +44 (0)1572 757614
E-mail [email protected]
Web www.kerbl.co.uk
2. Safety
2.1 General
• Read the following instructions carefully before assembling and using the unit.
• Anyone tasked on behalf of the user with commissioning, operation, maintenance or repair must have read and understood the operating in-
structions and in particular the chapter on safety.
• Failure to comply with the individually listed points in the operating instructions can result in physical injury or material damage for which the
manufacturer assumes no liability.
2.2 General information regarding safety and warning instructions
Caution!
Risk of physical injury to people and animals and material damage if used incorrectly!
• Before commissioning and operating the unit, these operating instructions must be read and noted carefully.
• Keep children and frail individuals away from the unit.
• Note the safety and maintenance instructions.
• Maintenance and cleaning work must only be carried out by trained personnel.
• The operator must ensure that only authorised personnel work with or on the unit.
• The unit must be used exclusively in accordance with intended use and in a technically safe condition! The operational safety of the unit is only
guaranteed if it is used for its intended purpose. Failure to comply with the individually listed points in the operating instructions can result in
physical injury or material damage for which the manufacturer assumes no liability.
• Any manner of working that impairs safety on the unit is prohibited.
• Operation of the unit is only permitted with components and spare parts that are supplied or listed in the spare and wear parts list.
• When changing brushes: the brush falls down if the screw is loosened completely.
• Only use genuine spare parts.
3. Description
3.1 Description of the unit
Cattle brush model: HAPPYCOW Free Maxi
The devices are designed to allow the animals to scrub themselves on the brush and thus clean the coat.
Use of these units can cause danger to the life and limb of the user or third parties, or damage to the unit or other material assets.
3.2 Scope of delivery
• Brush unit and joint piece pre-mounted
• Suspension arm
• Operating instructions
3.3 Correct use
This device must only be used for the dry cleaning of large animals. The unit can be operated with a maximum of 60 animals.
The regulations set out in these operating instructions must be complied with. Any other use of the unit, e.g. in any other area than those descri-
bed, shall be deemed incorrect use. The manufacturer accepts no liability for any resulting physical and/or material damage.

20
3.4 Technical data
Article number / type designation: 18865
Dimensions: 49 x 120 x 150 mm (H x W x D)
Fastening drill hole distance: Figure 3
Weight: approx. 49 kg
Brush diameter: 350 mm and 490 mm diameter
Brush length: 1010 mm
3.5 Conversions or modifications
In the event of unauthorised conversions and modifications to the unit, any liability and warranty on the part of the manufacturer will be rendered
void. Conversions and modifications may only be carried out with the written consent of the manufacturer.
4. Assembly and commissioning
Danger!
• The machine must always be secured against falling or toppling over while being installed – risk of fatal injury!
• Place a retaining strap through the joint piece and secure it with a lifting device!
• Do not mount the drive and brush unit until the suspension arm is securely mounted.
• Never reach between the joint piece during assembly.
4.1 Scope of delivery
The unit is delivered on a pallet. The brush unit is already assembled ready for use. The suspension arm is attached separately to the pallet. The
axle bolt for the bearing directly below the suspension arm is pre-assembled on the suspension arm and must be dismantled to assemble the
drive and brush unit!
4.2 Checks before commissioning
Before commissioning the unit, it must always be checked for completeness, visible defects or sources of danger.
The following checking measures should be carried out:
• Check the unit for loose or hanging parts or damage sustained during transport.
4.3 Installation
The best possible positioning and stable securing is particularly important for ensuring the problem-free operation of this heavy-duty unit.
The following must be noted:
• Do not set up the unit in a confined space in the pen.
• To avoid backlogs, do not set up the unit directly before or after the milking station.
• Do not set up the machine in proximity to equipment that is sensitive to dust.
• Mount the unit on a firm, stable and level surface.
• With brick walls, a large, compression-resistant underlay is recommended.
• The unit must be connected to the wall through all 4 mounting holes of the suspension arm.
• Fixing material must be matched to the substrate by competent personnel.
• Heavy duty anchors or adhesive anchors are recommended for concrete walls.
• When mounting on brick or wood, continuous threaded rods are recommended.
• Use at least thread size M12.
• Secure the screw connection against self-loosening. Use self-locking nuts and/or threadlocker for this purpose.
• Check attachments regularly and re-tighten if necessary.
• Only mount the unit with a suitable lifting device.
• Observe applicable accident prevention regulations!
Tip
Secure the unit to an even, solid concrete wall.
4.3.1 Installation height
The suspension height of the unit must be adapted to the average withers height of the animals. The top edge of the brush roller itself should be
approx. 100 - 200 mm above the average withers height. The suspension height must be determined before the mounting holes are made!
If there are considerable differences in withers height among the herd (more than 20 cm), the suspension height should be orientated towards
the larger animals in order to avoid rapid wear of the brushes.
This manual suits for next models
1
Table of contents
Languages:
Other Kerbl Farm Equipment manuals

Kerbl
Kerbl 1420 User manual

Kerbl
Kerbl 70239 User manual

Kerbl
Kerbl 70552 Operation manual

Kerbl
Kerbl horseGraze User manual

Kerbl
Kerbl Taon-X User manual

Kerbl
Kerbl HAPPYCOW Duo User manual

Kerbl
Kerbl PROSTREAM User manual

Kerbl
Kerbl 37102 User manual

Kerbl
Kerbl 70238 User manual

Kerbl
Kerbl BA-1274 User manual
Popular Farm Equipment manuals by other brands

PRONAR
PRONAR T669XL Operator's manual

MS Schippers
MS Schippers Blitz-Kerner 3409900 Operation manual

Johnny's Selected Seeds
Johnny's Selected Seeds Tilther instruction manual

FASTERHOLT
FASTERHOLT B2 User manual and spare parts

Raven
Raven SmarTrax installation manual

Kongskilde
Kongskilde 9200 DF Assembly / Parts