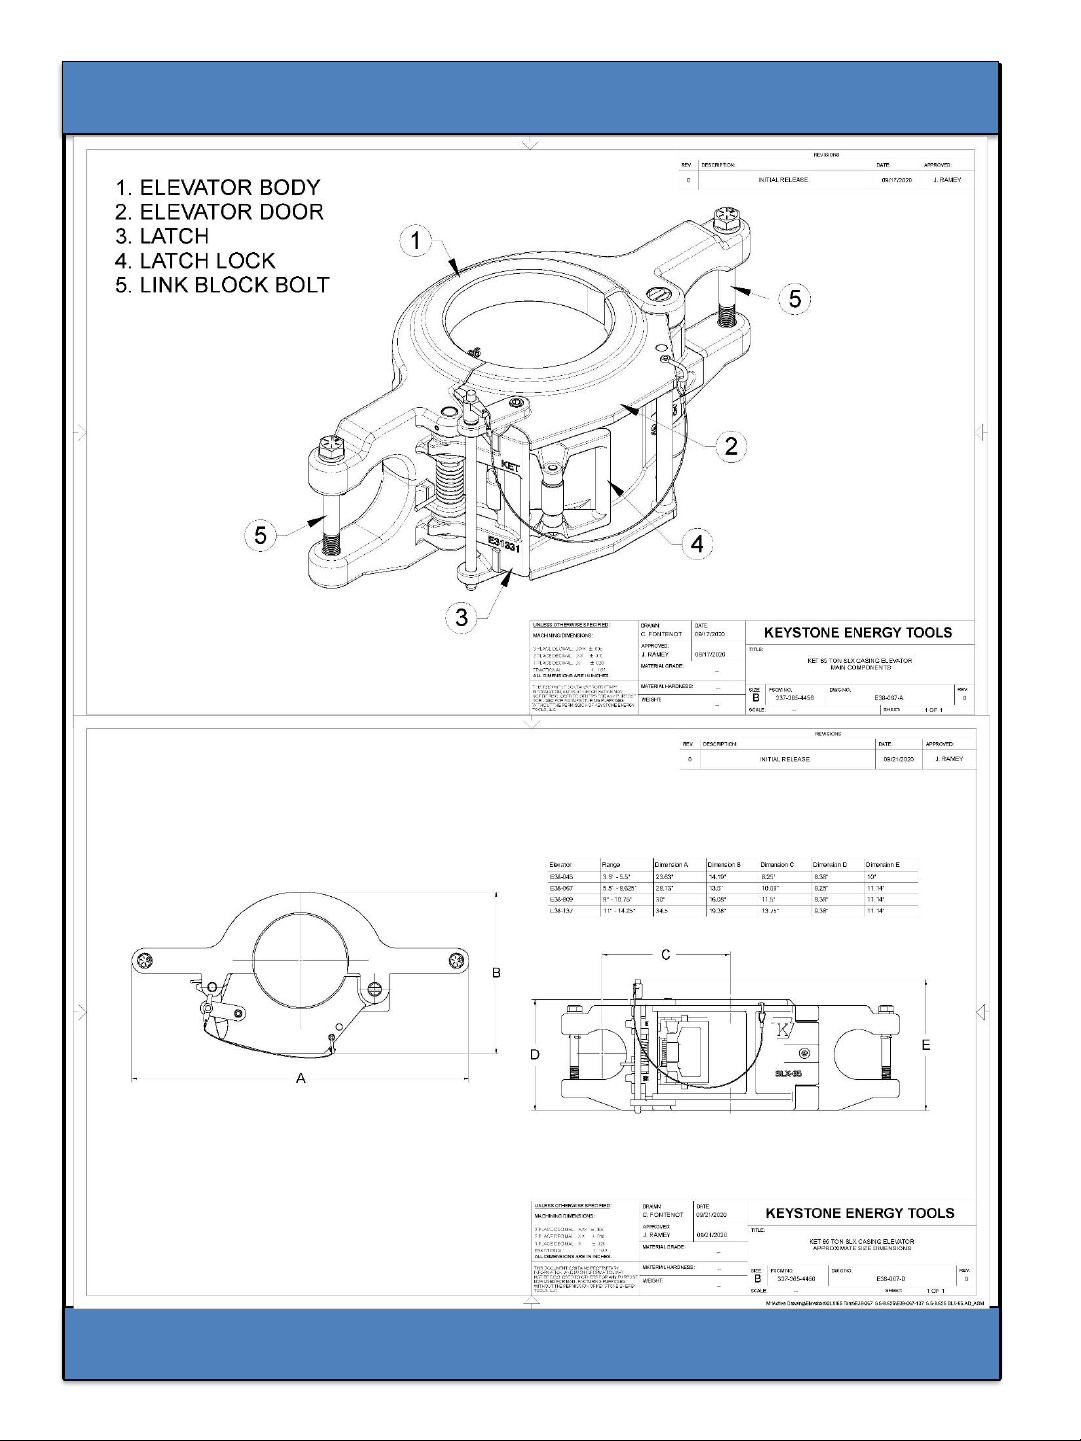
“SLX-65” SERIES ELEVATOR
The most important safety device for this tool is YOU.
Your good judgment is the best protection against
injury.
DO NOT DISCARD –GIVE TO USER Keystone ENERGY TOOLS
⚠WARINING: Do not overload
the elevator. Overloading the
recommended rating could cause
series injury or death.
⚠WARINING: Secure the Latch
Lock Pin in it’s proper position.
Failure to secure the pin when
picking up or laying down pipe
could cause serious injury or
death.
⚠WARINING: Always ensure
that the elevator and bore code
are correct for the tubular it is to
be used on. Failure to use the
proper elevator and bore code
could result in injury or death.
⚠WARINING: Always ensure
that the tool joint or collar O.D.
of the pipe is correct. Failure to
maintain adequate contact area
could result in injury or death.
⚠WARINING: To prevent injury
or elevator malfunction, inspect
the elevator bore, latch, hinge
pin, and latch pin regularly for
wear. Failure to inspect these
parts could cause injury or death.
⚠WARINING: Do not use
oversized pipe. Using oversized
pipe could make it difficult or
impossible to properly latch the
elevator.
⚠WARINING: Do not use
undersized pipe. Using
undersized pipe could cause an
inadequate load bearing area
and uneven stress distribution.
Both of which may result in
injury or death.
⚠WARINING: Do not use the
elevator if the latch or latch lock
pin is malfunctioning. Latch or
latch lock pin failure, may result
in injury or death.
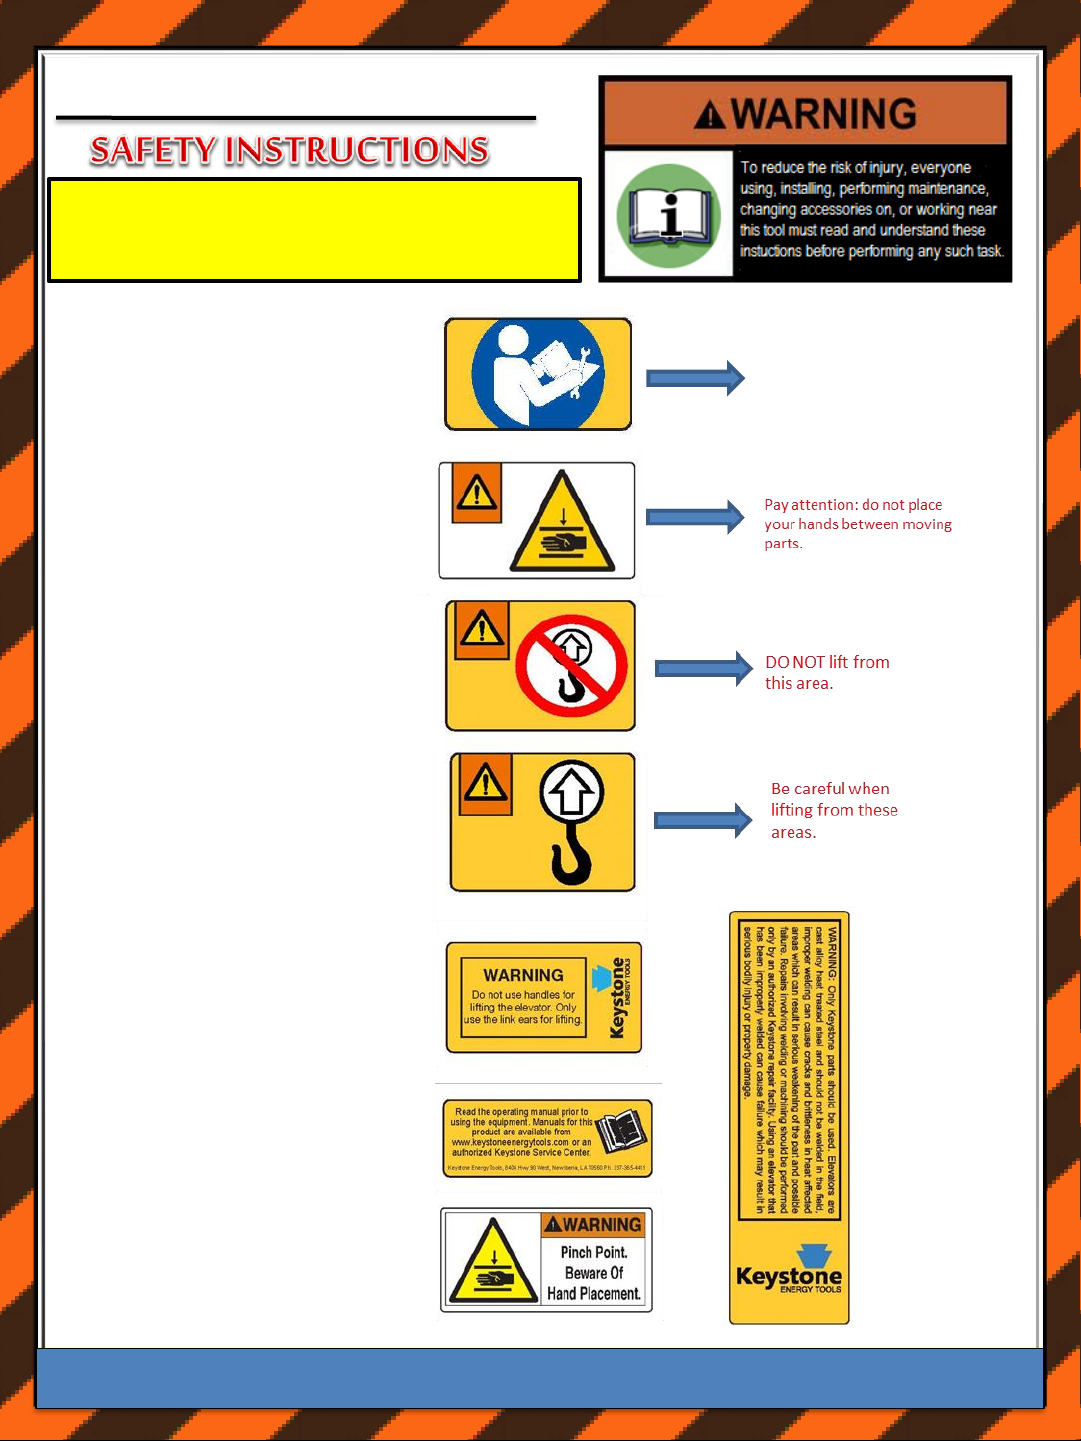
⚠WARINING: All warning labels
attached to the equipment must
be observed. The warning labels
must be present on the tool. Do
not remove the labels. If they are
missing, replacing is mandatory.
⚠WARINING: The company
operating the tool is responsible
for issuing work instructions for
safe and proper use of the
equipment.
⚠WARINING: The operating
company is responsible for
verifying that any personnel
operating, servicing, inspecting,
or otherwise involved with the
use of the tool must be properly
trained correctly.
Operating Hazards
OP-07 REV.06 07/19/2022
3