manuals.online logo
Brands
  1. Home
  2. •
  3. Brands
  4. •
  5. Kinedo
  6. •
  7. Bathroom Fixture
  8. •
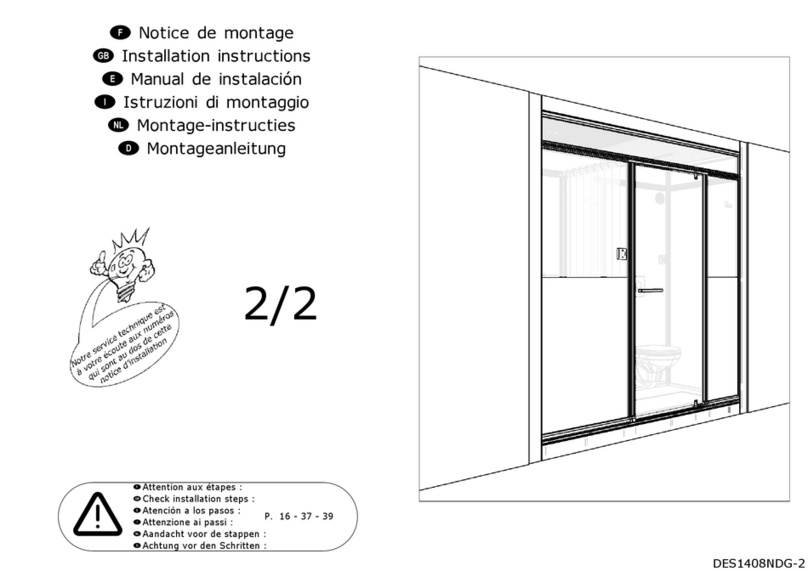
  9. Kinedo Modulo XL User manual

Kinedo Modulo XL User manual

1/2
Attenzione ai passi :
i
eAtención a los pasos :
g
Attention aux étapes :
Check installation steps :
P. 4 - 12 - 17
Achtung vor den Schritten :
 Montage-instructies
 Montageanleitung
!Aandacht voor de stappen :
 Installation instructions
 Manual de instalación
 Notice de montage
 Istruzioni di montaggio
d
n
f
DES1405NDG-1
!
fAspirer le dessous de votre sol avant la pose
gVacuum the bottom of the floor before installation
eAspirar la parte inferior de su suelo antes de instalarlo
iAspirare la parte sottostante del pavimento prima dell'installazione
Saugen Sie den Boden des Bodens vor der Installation ab
!
d
n
Stofzuig de bodem van de vloer voor de installatie
fD’éventuelles irrégularités de surface sur le dessous de votre sol
n’empêchent pas une installation conforme aux préconisations de pose.
La colle (polyuréthane ou MS polymère) comblera facilement ces manques lors
du collage.
gAny surface irregularities on the underside of the floor have no influence on
the installation according to the installation recommendations.
The adhesive (polyurethane or MS polymer) compensates for these
unevenness when bonding the feet off without any problems.
ePosibles irregularidades de la superficie en la parte inferior del suelo no
impida la instalación de acuerdo con las recomendaciones de instalación.
El adhesivo (poliuretano o polímero MS) rellenará fácilmente estos huecos al
pegar los pies.
iEventuali irregolarità della superficie nella parte sotto del pavimento non
impediscono l'installazione in base alle raccomandazioni di montaggio.
La colla (poliuretano o MS polimero) riempirà facilmente queste lacuna quando
si incollano i piedini.
nEventuele onregelmatigheden in de vlakke onderzijde van uw vloer vormen
geen belemmering voor een installatie conform aan de gestelde richtlijnen. De
lijm (polyurethaan of MS-polymeer) vult eventuele openingen makkelijk op
tijdens het lijmen.
dEventuelle Unregelmäßigkeiten der Oberfläche an der Unterseite Ihres
Bodens haben keinen Einfluss auf die Installation gemäß den
Einbauempfehlungen. Der Klebstoff (Polyurethan oder MS-Polymer) gleicht
diese Unebenheiten beim Verkleben problemlos aus.
DES1405NDG-1
2
x
B1
v
50 mm35 à 220 mm
210 à 220 mm
DES1405NDG-1
3
PCB2
B2 PB
80mm mini
1503 x 233 = 700
150
R195
150
150
10 x 170 = 1700
f
Polyurethane adhesive
ePegamento
de poliuretano
iAdesivo poliuretanico
nPolyurethaan kit
dPolyurethan-klebstoff
Colle polyuréthane
g
Polyurethan-klebstoff
d
Polyurethaan kitn
Adesivo poliuretanico
i
de poliuretano
Pegamento
e
Polyurethane adhesive
g
Colle polyuréthane
f
f Pose de sol avec pieds g Laying the floor with adjustable feet
e Instalación del suelo con pies i Posa del pavimento con piedi
n Montage van vloer op poten d Installation der Boden mit Füßen
f Pose de sol sans pieds g Laying the floor without feet
e Instalación del suelo sin pies i Posa del pavimento senza piedi
n Montage van vloer zonder poten d Installation der Boden ohne Füßen
PBB2
B2 PC
DES1405NDG-1
4
Ď
Vérifier que tous les pieds soient bien en contact avec le solf
g
d Prüfen, ob alle Füße sind in Kontakt mit den Boden berühen
n Controleer of alle voeten in contact staan met de vloer
Controllare che tutti i piedi sono in contatto con il pavimento
Check that all feet are in contact with the floor
i
Compruebe que todos los pies están en contacto con el sueloe
fSol rigide et non-humide indispensablegEnsure a solid dry surface
eSuelo rígido y sin humedad imprescindibleiIl suolo deve essere ben asciutto e non umido
nDe ondergrond moet volkomen vlak en droog zijn
dUntergrund muss fest und darf nicht feucht sein
fTracer la position de la bondegMark the position of the waste
eMarcar la posición del desagüeiTracciare la posizione della piletta
nMarkeer de plaats van de afvoerdPosition des ablaufs anzeichnen
Connect the waste pipe
Raccorder votre évacuation à la bonde
g
Das abflussrohr an den ablauf anschließen
Ggf. holzklotz vorsehen
n
d
Gebruik eventueel een houten blokje
e
f
d
Sluit de afvoer aan op het afvoerputje
n
Collegare il tubo di evacuazione alla piletta
i
evacuación al sumidero
Conectar el tubo de
fCale en bois si nécessaire
gProvide support if necessary
eSoporte de madera en caso necesario
iSupporto in legno, se necessario
A1 QF
n
Adesivo poliuretanicoi
Pegamento de poliuretano
e
Polyurethane adhesive
Polyurethan-klebstoff
d
Polyurethaan kit
g
Colle polyuréthanef
DES1405NDG-1
5
34
2
1
DES1405NDG-1
6
f Tracer g Mark
e Marcar i Tracciare
n Markeer d Zeichnen
DES1405NDG-1
7
DES1405NDG-1
8
1
AK
1940mm
AK
1940mm
VS
2
VG
Ø 6 mm
VA
2
VG
VS
Ø 6 mm
VA
AJ
1000mm
1865mm
1
AJ
1000mm
DES1405NDG-1
9
1
AJ
2000mm
2
VS
VA
Ø 6 mm
VS
1865 mm
AJ
2000mm
fCouper à longueur
gCut to length
eCortar a la medida
iTaglio a misura
nOp lengte gesneden
dAuf die Länge schneiden
DES1405NDG-1
10
PL
PL
AC
1926mm
DES1405NDG-1
11
gVue de derrière Back view
eVista traserai
nd
Vista posteriore
Zicht naar achteren Rückansicht
f
1
2
TB
fCouper si nécessaire
gCut if necessary
eRecortar si necesario
iTagliare si necessario
nSnijden indien nodig
dBei Bedarf zuschneiden
VU
VT
TB TA
DES1405NDG-1
12
TA
VT
DES1405NDG-1
13
1
A1
SI
Siebdruck außen
fSérigraphie à l'extérieur
gScreen printing on the outside
eImpresión en el fuera
iSerigrafia esterna
nGlas-print aan buitenzijde
d
B
2
3
DES1405NDG-1
14
1
Glas-print aan buitenzijde
dSiebdruck außen
B
n
fSérigraphie à l'extérieur
gScreen printing on the outside
eImpresión en el fuera
iSerigrafia esterna
A1 SK
2
3
X
DJE
X
DES1405NDG-1
15
2
1
AC
v
JE
fNe pas verrouillergDo not block
eNo bloqueariNon bloccare
nBlokkeer nietdNicht blockieren
x
!
DES1405NDG-1
16
E2
E3
+QA
1
hinstellenQB
Utiliser QB pour placer QA
Use QB to place QA
Utilice QB para colocar QA
Utilizzare QB per posizionare QA
Gebruik QB plaatsen QA
Verwenden Sie
QB
%HDFKWHQ6LHGLH0RQWDJHDQOHLWXQJ
6HUhIhUHUaODQRWLFHSRXUOHPRQWDJH
)DUHULIHULPHQWRDOOHLVWUX]LRQLSHULOPRQWDJJLR
QA
&RQVXOWHHOPDQXDOSDUDHOPRQWDMH
5DDGSOHHJGHKDQGOHLGLQJYRRUGHLQVWDOODWLH
5HIHUWRWKHLQVWUXFWLRQVIRUDVVHPEO\

0HWWUHHQFRQWDFW*HWLQWRXFK
3RQHUHQFRQWDFWR0HWWLWLLQFRQWDWWR
,QFRQWDFWNRPHQ,Q.RQWDNWNRPPHQ
2
DES1405NDG-1
17
A1 QC
Siebdruck außen
fSérigraphie à l'extérieur
gScreen printing on the outside
eImpresión en el fuera
iSerigrafia esterna
nGlas-print aan buitenzijde
d
CC
fSérigraphie à l'extérieur
gScreen printing on the outside
eImpresión en el fuera
iSerigrafia esterna
nGlas-print aan buitenzijde
dSiebdruck außen
2
A1 QM
1
A1 QM
DES1405NDG-1
18
WC-Verbindung
X
f Raccordement WC
g WC connection
e Conexión WC
i Connessione WC
n WC-verbinding
d
A1 QV
DJE
X
f Raccordement électrique g Electrical connection
e Conexión eléctrica i Connessione elettrica
n Elektrische verbinding d Elektrische Verbindung
f
Gewindestangen entfernendVerwijder draadstangenn
Rimuovere le barre filettateiRetire las varillas roscadase
Remove threaded rodsgRetirer tiges filetées
f Raccordement VMC g VMC connection
e Conexión VMC i Connessione VMC
n VMC-verbinding d VMC-Verbindung
DES1405NDG-1
19
1
2
1
fNe pas verrouillergDo not block
eNo bloqueariNon bloccare
nBlokkeer nietdNicht blockieren
2
90mm
DES1405NDG-1
20

Other manuals for Modulo XL

3

Other Kinedo Bathroom Fixture manuals

Kinedo SOLO User manual

Kinedo

Kinedo SOLO User manual

Kinedo Eden User manual

Kinedo

Kinedo Eden User manual

Kinedo Kinemagic Royal Plus User manual

Kinedo

Kinedo Kinemagic Royal Plus User manual

Kinedo SMART DESIGN SOLO WAND FACTORY User manual

Kinedo

Kinedo SMART DESIGN SOLO WAND FACTORY User manual

Kinedo Kinemagic Royal DES1295NG-D User manual

Kinedo

Kinedo Kinemagic Royal DES1295NG-D User manual

Kinedo Kinemagic Design DES1306NG-C User manual
Kinedo

Kinedo Kinemagic Design DES1306NG-C User manual

Kinedo Modulo XL User manual

Kinedo

Kinedo Modulo XL User manual

Kinedo Modulo Luxus User manual

Kinedo

Kinedo Modulo Luxus User manual

Kinedo Kinemagic Royal 2 DES1312AG-A User manual

Kinedo

Kinedo Kinemagic Royal 2 DES1312AG-A User manual

Kinedo EKINOX SOLO User manual

Kinedo

Kinedo EKINOX SOLO User manual

Kinedo Kinemagic Design DES1314AG-D User manual

Kinedo

Kinedo Kinemagic Design DES1314AG-D User manual

Kinedo Kinemagic DES1309AG-D User manual

Kinedo

Kinedo Kinemagic DES1309AG-D User manual

Kinedo Kinespace User manual

Kinedo

Kinedo Kinespace User manual

Kinedo Kinestyle P+F User manual

Kinedo

Kinedo Kinestyle P+F User manual

Kinedo Kinequartz DUO DES1143E User manual

Kinedo

Kinedo Kinequartz DUO DES1143E User manual

Kinedo Kinemagic Royal 2 DES1301AG-D User manual

Kinedo

Kinedo Kinemagic Royal 2 DES1301AG-D User manual

Kinedo Kinemagic Royal 2 DES1301NG-D User manual

Kinedo

Kinedo Kinemagic Royal 2 DES1301NG-D User manual

Kinedo Kinemagic Design DES1309NG-D User manual

Kinedo

Kinedo Kinemagic Design DES1309NG-D User manual

Kinedo Filo Quick guide

Kinedo

Kinedo Filo Quick guide

Kinedo Aquasilver Instruction Manual

Kinedo

Kinedo Aquasilver Instruction Manual

Kinedo DES. PW25 User manual

Kinedo

Kinedo DES. PW25 User manual

Kinedo Smart Design PA90160BBVED User manual
Kinedo

Kinedo Smart Design PA90160BBVED User manual

Kinedo Kineprime CA510MDT User manual

Kinedo

Kinedo Kineprime CA510MDT User manual

Kinedo Kinemagic Royal 2 DES1307NG-A User manual

Kinedo

Kinedo Kinemagic Royal 2 DES1307NG-A User manual

Popular Bathroom Fixture manuals by other brands

Bossini Syncro Neb I00633 Instructions for installation

Bossini

Bossini Syncro Neb I00633 Instructions for installation

Aqualisa Quartz Electric installation guide

Aqualisa

Aqualisa Quartz Electric installation guide

Cassellie SEA008 quick start guide

Cassellie

Cassellie SEA008 quick start guide

Miomare 274849 Assembly, operating and safety instructions

Miomare

Miomare 274849 Assembly, operating and safety instructions

Grohe Geneva 24 019 manual

Grohe

Grohe Geneva 24 019 manual

NORMBAU Inox Care 2053 030 Fixing instructions and directions for use

NORMBAU

NORMBAU Inox Care 2053 030 Fixing instructions and directions for use

Spectrum Brands Pfister Canton F-048-CN Quick installation guide

Spectrum Brands

Spectrum Brands Pfister Canton F-048-CN Quick installation guide

METHVEN 439860 installation guide

METHVEN

METHVEN 439860 installation guide

Helvex RM-13 installation guide

Helvex

Helvex RM-13 installation guide

Xibu TOWEL hybrid manual

Xibu

Xibu TOWEL hybrid manual

Viega Advantix 4982.45 Instructions for use

Viega

Viega Advantix 4982.45 Instructions for use

Insignia 1500 Series installation guide

Insignia

Insignia 1500 Series installation guide

Radaway Twist DW Assembly instruction

Radaway

Radaway Twist DW Assembly instruction

Kohler MasterShower K-74 installation instructions

Kohler

Kohler MasterShower K-74 installation instructions

Häfele 485.60.613 installation manual

Häfele

Häfele 485.60.613 installation manual

BERNSTEIN 1238 Instructions for mounting and use

BERNSTEIN

BERNSTEIN 1238 Instructions for mounting and use

Helvex Nuva RM-22 installation guide

Helvex

Helvex Nuva RM-22 installation guide

Salvatori ISHIBURO manual

Salvatori

Salvatori ISHIBURO manual

manuals.online logo
manuals.online logoBrands
  • About & Mission
  • Contact us
  • Privacy Policy
  • Terms and Conditions

Copyright 2025 Manuals.Online. All Rights Reserved.