KingSlim D1 Pro User manual

V2.1
D1 PRO
D1 PRO
DASH CAM

User Agreement
By purchasing Kingslim dash cams, you agree to Kingslim's terms and
conditions, which include precautions, user warnings, and warranty coverage. If
you do not agree to any of these terms mentioned in this manual for any
reason, you may return the product unused and in its original packaging within
the stated return window for a full refund.
1. To prevent external or internal damage, never expose this dash cam to rain,
moisture, or water under any circumstances.
2. This device is not designed to be damp-proof, so avoid placing it in damp
environments. Also, please refrain from opening the cover or attempting to repair
the product yourself. Instead, contact us for assistance if there are any problems
with accessories.
3. This camera is intended for use inside your vehicle only. Do not install it in
locations that obstruct the driver’s view of the road, such as mirrors or airbag
deployment zones.
4. Please read this manual carefully before using or installing the camera, and
keep it for future reference. It can help answer any questions or address any
difficulties you may encounter while using this product.
Pre-cautions
Please read and understand all the instructions before using this product. If any
damage is caused by failure to follow the instructions, the warranty will be voided.

Warnings
1. Please take note of safety warnings and regulations as failure to comply may result
in serious injury or death.
2. Avoid placing the camera on top of the instrument panel or in front of the airbag as
it may fall and cause harm.
3. Do not mount the camera anywhere on the windshield that may loosen or distract
you while driving.
4. Refrain from exposing the device to extreme heat or dust, and avoid using any
chemical substances or cleaning solvents to clean it.
5. When cleaning the lens, be careful and use a soft, moist cloth to prevent scratches
that can compromise video quality.
6. We recommend removing the camera from your vehicle when not in use to prevent
theft or damage from exposure to extreme heat.
7. Operating or installing the camera while driving or making any adjustments is strictly
prohibited; please pull over first and do so only when it is safe.
8. Please handle the camera with care and refrain from dropping, puncturing, or
disassembling it.
9. If the car charger cord is broken or damaged, do not use it.
10. Keep this product out of reach of children, and avoid exposing it to direct sunlight
for extended periods or temperatures exceeding 158°F (70°C).
11. Please note that some countries or states in the United States prohibit drivers
from mounting anything on certain areas of the windshield, and it is the responsibility
of the owner or operator to comply with local laws when mounting or using this
device.
12. Lastly, please be advised that the company is not liable for any loss of data or
content during operation or under any circumstances.

Camera Specifications ---------------------------------------------------------------------- 04
LED Indicators ---------------------------------------------------------------------------------- 05
Getting Started--------------------------------------------------------------------------------- 06
1. Inserting Memory Card -------------------------------------------------------------------- 06
2. First-Time Charging ------------------------------------------------------------------------- 06
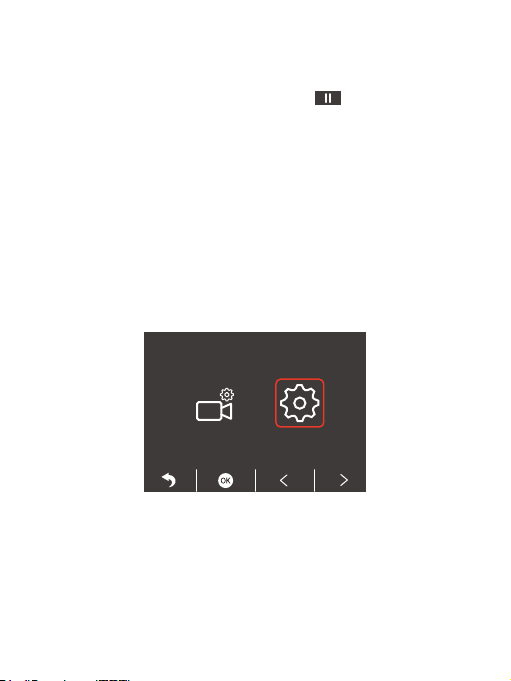
3. Settings ----------------------------------------------------------------------------------------- 06
4. Recording ------------------------------------------------------------------------------------- 06
5. Setting Time Zone--------------------------------------------------------------------------- 06
What’s in the Box------------------------------------------------------------------------------ 08
Camera Overview ----------------------------------------------------------------------------- 09
Icon Introduction ----------------------------------------------------------------------------- 10
Installation--------------------------------------------------------------------------------------- 12
1. Memory card use---------------------------------------------------------------------------- 12
2. Install the dash cam on the windshield----------------------------------------------- 13
3. Charging---------------------------------------------------------------------------------------- 14
Start Recording -------------------------------------------------------------------------------- 19
Playback Videos ------------------------------------------------------------------------------- 22
1. Playback on the dash cam---------------------------------------------------------------- 22
2. Playback on a computer------------------------------------------------------------------- 23
3. Playback on the Kingslim APP------------------------------------------------------------ 23
Camera Settings ------------------------------------------------------------------------------- 24
1. Video Settings -------------------------------------------------------------------------------- 24
2. System Settings ------------------------------------------------------------------------------ 26
Use the Kingslim APP------------------------------------------------------------------------ 29
1. Download the Kingslim APP-------------------------------------------------------------- 29
2. Connecting to the APP --------------------------------------------------------------------- 29
3. Playback videos on the APP -------------------------------------------------------------- 31
4. Download videos from the APP --------------------------------------------------------- 32
General FAQ------------------------------------------------------------------------------------- 34
Contact Us --------------------------------------------------------------------------------------- 37
Contents

LCD touch screen
Video resolution
Lens aperture
GPS
Wifi
Video format
Memory card
G-sensor
Light source frequency
Loop recording
Parking monitor
Time system
Mic/Speaker
Mini USB Function
Auto Power ON/OFF
Power Interface
Battery
Operation Temperature
2-inch IPS LCD screen
4K, 4K+1080P, 2K+1080P
F1/8
External GPS module
Built-in
MP4
Class 10 U3 or higher, capacity up to 128GB
Built-in 3-axis gyroscope
60Hz, 50Hz
Seamless loop recording
Support
12-hour and 24-hour systems
Built-in Microphone & Speaker
Support
Support
5V/2A
Built-in 300mAh li-ion battery
-4°F (-20°C) - 140°F (60°C)
Camera specifications

Tip: Dash cams are electronic devices that contain various components, including
a processor, memory, camera lens, and other circuitry. When it's in use, it generates
heat due to the power consumption and operation of these components. The
heat generated during operation can cause the camera to heat up. Rest assured
that our dash cams are equipped with radiators and vents to dissipate heat, and
they operate within a temperature range of -4°F (-20°C) to 140°F (60°C). The dash
cam can still work normally though it heats up. We recommend you turn on the
air conditioning to dispel the heat inside your car before using your camera.
Besides, we suggest parking your car in a location that allows for sufficient airflow
and to protect your dash cam from direct sunlight or extreme temperatures.
LED Indicators
Blue light staying on
Blue light flashing
Red and purple lights
flashing alternatively
Purple light staying on
Battery fully charged+not recording
Battery fully charged+ recording
Charging+recording
Charging

Getting Started
Please read and understand warnings & safety instructions before operating.
1. Inserting Memory Card
To record video, you need to insert a memory card, and complete the
formatting process. We recommend you use a Class 10 U3 or higher
memory card of well-known brands at a maximum of 128GB.
Kind reminder:
1)
Please format the memory card on the computer and then in the
camera’s settings for better compatibility.
2) We recommend you format the memory card every two months for
better performance. Reformatting will erase all data on the SD card, so
make sure you have backed up all your important files before formatting.
2. First-Time Charging
To begin using your dash cam, please plug it in. The camera will turn on
automatically as soon as it receives power and prompt you to complete the initial
setup on the screen for first-time use. It's important to keep your camera
plugged into power at all times since the internal battery is only for emergency
recording during parking mode.
Warm tips:
1) You can use your iPhone or Android phone’s USB charger to plug your dash cam
into a 110V power outlet.
2) If you don’t get the initial setup prompts for any reason, please reset your camera,
then restart it for the initial setup.
3. Settings
By default, all settings are pre-set so that you can start using the camera right
away without any additional adjustments. However, you can customize it further
by learning more about the camera by either watching How to Video on Youtube
or reading the User Manual so you can get the maximum benefit out of it and
the best user experience.

4. Recording
KINGSLIM 4K D1 Pro dash cam is programmed to turn on and start recording
automatically when it receives power. It will also start recording after you finish
changing settings. To pause recording, please press . When unplugged, this
dash cam will also automatically stop recording, safely save the last video, and
shut down within 5 seconds.
5. Setting Time Zone
Before using this dash cam, please manually set the time zone according to your
location. To do this, please press the Setup button, choose the second button, and
press the OK button to enter the system settings, then navigate to “Time Zone”,
and then press the OK button to complete the setting. When the GPS is functioning
properly, the dash cam's date and time will automatically synchronize with your
local time. You can also manually set the date and time by accessing the setup
menu.

3 4 5 6 7 8
1
2
3
4
Video Settings
System Settings
Backward
Confirm
5
6
7
8
Backward
Forward
Up
Down
1 2

Installation
1. Memory card use
To record videos, you need a compatible memory card (sold separately). We
recommend you use a Samsung/Sandisk/Kingston Class 10 U3 or high memory card
for your D1 Pro dash cam. This dash cam supports a memory card of up to 128GB.
Warm tip: 1. To make your memory card more compatible with the dash cam, please
format it on your computer first and then in the camera settings before using it.
2. Do not remove or insert the memory card when the dash cam is turned on as this
may cause damage to your card.
(1) Insert the memory card
Before inserting the memory card, please ensure that the camera is turned off.
Insert the card halfway into the slot, then use your finger or fingernail to push the
card all the way in until you hear a click indicating that it has locked into place.
Tip: Please follow the direction indicated on the camera to insert the card.

Format
GPS information
Setup
Default Setting
Version Info
SD Card
(2) Format the memory card
You need to complete the formatting process in the camera each time you insert the
card. To do this, please access the formatting screen. In case you have not yet done
so, an error message will appear prompting you to insert the memory card. Please
follow the instructions below to format the memory card.
①, then press the OK button to enter
Please press the Setup button, choose
the system settings screen.
② Press the Down button to locate the “Format” option, then press the OK
button to enter the “SD Card” screen.

All data will be deleted
Cancel
OK
③ On this screen, press the OK button to enter the formatting screen, press the
Down button to “OK”, and then press the OK button to complete formatting.
The system will then exit the menu automatically.
Kind reminder:
All data will be deleted after formatting. Be sure to back up your important
files before formatting. To ensure the memory card’s optimal performance, we
recommend formatting it every two months. Keep in mind that memory cards
have a limited lifespan, and frequent reading, writing, and erasing can shorten
their lifespan. If you’re prompted about frequent card errors or glitches, please
replace it with a new one.
(3) Remove the memory card
If you want to remove the memory card, gently push its edge inward until it clicks,
and then pops out, then simply pull it out of the slot.

2. Install the dash cam on the windshield
①Choose the right spot
Select a suitable location on your windshield where the dash cam will have a clear
and unobstructed view of the road ahead. Typically, this is near the rearview
mirror or on the passenger side of the windshield.
②Prepare the area
Clean the area thoroughly with a microfiber cloth to remove any dust, dirt, or oil
that could affect the suction cup mount's grip.
③Attach the suction cup mount
Attach the suction cup mount onto the dash cam by aligning the notches or grooves.
D1 PRO D1 PRO

D1 PRO D1 PRO
⑥Plug in the dash cam.
Simply connect the car charger to the dash cam, then insert the charger into the
car cigarette lighter for charging.
⑦Use the pry tool to hide the cables.
Tip: The electrostatic sticker's adhesive properties may diminish over time or when
exposed to rain or direct sunlight. Please do not hesitate to contact customer service
for some free stickers.
④Place the dash cam.
First, remove the film from the GPS electrostatic sticker, and apply it to the windshield.
Second, peel off the other film from the sticker, then attach the dash cam onto the sticker.
Last, press the suction cup mount firmly against the surface until it sticks securely.
⑤Adjust the angle.
Adjust the dash cam's angle by tilting the mount or rotating the camera lens until it faces
directly ahead.
Tip: You can also attach the dash cam onto the windshield without using the sticker.

3. Charging
(1) How to charge:
Insert the car charger into the car’s cigarette lighter socket, then connect the car
charger to the dash cam's mini USB port.
(Charger input: DC 12-24V, output: DC 5V 2A)
Note:
①Please charge for 30 minutes before using this dash cam powered by the
built-in battery. When charging, please turn off the camera by long pressing the
power button.
②Please do NOT connect the camera to the PC for charging. Use the 110V wall
outlet instead.
(2) Turn your camera ON/OFF
Auto Power ON:
KINGSLIM D1 Pro dash cam is designed to turn ON automatically when it receives
power, i.e. when the car engine is started.
Auto Power OFF:
The camera is also pre-configured to turn OFF automatically within a few seconds
when the power gets disconnected, i.e. when the car key is turned to LOCK
position.
D1 PRO

(3) Install the hardwire kit
Installing the hardwire kit helps prevent the camera battery from draining the car
battery thanks to its smart low voltage protection system. Above all, installing the
hardwire kit allows you to connect the camera directly to the vehicle's electrical
system, providing a continuous and stable power supply. This eliminates the need
to recharge or replace the camera's internal battery and ensures that it remains
operational even when the ignition is turned off.
Kind reminder: For your safety, we strongly advise that you have a professional
installer handle the hardwire kit installation.

1. 4K Single Recording (Front Camera).
①After turning on the camera, press the button to stop recording.
②Set the resolution. First, press the Setup button to enter the camera’s settings
screen. Second, choose the first button to enter the video settings screen.
Third, press the OK button to access the resolution settings screen. Last, press
the OK button to choose “4K”. The system will exit the menu automatically.
Tip: The dash cam is at 4K resolution by default when it's turned on.
P
Start Recording
4K
4K+1080P
2K+1080P
To use the dash cam, you can select either single or dual recording mode.
However, before doing so, you must first set the desired resolution.
Other manuals for D1 Pro
5
Table of contents
Other KingSlim Dashcam manuals

KingSlim
KingSlim D2 User manual

KingSlim
KingSlim D1 Dual User manual

KingSlim
KingSlim D4 PRO User manual

KingSlim
KingSlim D2 PRO User manual

KingSlim
KingSlim D4 User manual

KingSlim
KingSlim D1 Dual User manual

KingSlim
KingSlim D5 User manual

KingSlim
KingSlim DL12 Pro User manual

KingSlim
KingSlim D4 User manual

KingSlim
KingSlim D1 Pro User manual

KingSlim
KingSlim D2 PRO User manual

KingSlim
KingSlim D4 User manual

KingSlim
KingSlim D4 PRO User manual

KingSlim
KingSlim D1 Pro User manual

KingSlim
KingSlim DL12 Pro User manual

KingSlim
KingSlim D1 Pro User manual

KingSlim
KingSlim D6 User manual

KingSlim
KingSlim D4 User manual

KingSlim
KingSlim D5 User manual

KingSlim
KingSlim D6 User manual