Klip Xtreme TrueSonic KLS-150 User manual

KLS-150
Portable speaker
TrueSonic

English
III. Product overview
Media panel controls
Horizontal position
Vertical position
I. Introduction
Main features
II. Package content
Thank you for purchasing the Klip Xtreme KLS-150 Portable speaker with Bluetooth®wireless
technology. We encourage you to read this installation guide thoroughly to get the most out of
this innovative audio system.
• Powerful sound system with Bluetooth®wireless technology and an impressively solid
construction
• TWS capability, designed to connect and stream audio through two units simultaneously
• 600-watt PMPO of distortion free, stage quality sound
• Versatile cabinet design to place it vertically or horizontally
• Dynamic LED illumination effects, with on/off capability
• 7.4VDC lithium rechargeable battery which can be used for up to 8 hours
• FM radio tuner, USB and microSDTM ports seamlessly integrate multiple audio sources
• Treble and bass equalizer settings to adjust to the ideal sound quality
• Includes a high-quality wired microphone
• Built-in heavy duty handles which make it extremely portable
• Speaker system (1)
• Wired microphone (1)
• Micro USB charging cable (1)
• 3.5mm to 3.5mm audio cable (also works as the antenna) (1)
• Quick installation guide (1)
1. ¼in mic input jack
2. 3.5mm aux input
3. Micro SD™ card slot
4. USB port
5. Power On/Off switch
6. 5VDC Micro USB power jack
7. Numbered keys (0 to 9)
8. -Mic. vol. + knob
9. -Echo + knob
1. Built-in heavy duty handles
2. Rubber feet
10. -Volume + knob
11. LED display
12. Mode selector button
13. Light On/Off button
14. EQ button
15. Rec/Del - TWS button
16. Repeat/CH button
17. /FM- button
18. /Auto scan button
19. / FM+ button
1
11
15
19
12
16
17
18
13
14
2
4
5
6
7
8
9
10
3
1
1
2
2
1 1
22

Press this button to select the previous track on your play list. Available in
Bluetooth®, SDTM, USB and FM modes.
Note: In the FM mode, the first time the speaker is used, press and hold the
button to search available radio stations automatically.
Press this button once to move backwards to preset radio stations.
In USB, SD™ or Bluetooth®mode, briefly press this button to start and pause
media.
In the FM mode, press and hold this button to initiate the scanning of channels from
the lowest up to the highest frequency, and store them automatically as presets in
the memory.
Press this button to select the next track on your play list. Available in Bluetooth®,
SDTM, USB and FM modes.
Note: In the FM mode, the first time the speaker is used, press and hold the
button to search available radio stations automatically.
Press this button once to move forward to the preset radio stations.
18. / Auto scan button
Use this button to adjust the loudness of the treble and bass frequencies in the
speaker. The ‘H’ (treble) and ‘b’ (bass) indications will be displayed, adjust the
frequency from -5 to 5 with the and buttons. After about 2 seconds of
inactivity the unit will automatically go back to the current mode displayed. VI. Operating modes
Auxiliary mode operation
Recommendation: Use a 3.5mm to 3.5mm cable to enable audio playback from devices fitted with an
auxiliary 3.5mm jack.
a. First, connect one side of the 3.5mm cable to the auxiliary port on the speaker and the other side of the
cable to the source of choice.
b. Press the MODE button to connect the speaker to the AUX mode (the LINE indication will be displayed).
Control Description
1. ¼in mic input jack
2. 3.5mm aux input
3. Micro SD™ card slot
(TF card)
4. USB port
5. Power On/Off switch
7. Numbered keys (0 to 9)
8. - Mic. vol. + knob
9. - Echo + knob
10. - Volume + knob
11. LED display
12. Mode selector button
13. Light button
14. EQ button
6. 5VDC micro USB
power jack
16. Repeat / CH button
17. / FM- button
19. / FM-+ button
IV. Initial set up
• Use the supplied 5VDC micro USB cable to charge your portable speaker directly from your own 5V/2A AC adapter.
• Make sure that the speaker is fully charged before using it for the first time.
• The portable speaker battery has to be initially charged for at least 5 hours. Thereafter, the battery will take
4-5 hours to recharge.
• While charging, the battery LED indicator will light up in red. It will go off when the battery is fully charged.
• Turn off the speaker when not in use to conserve battery life.
• Turn the power switch to the on position.
Note: when the battery charge is below the protected voltage (6.0V) the unit will shut down automatically.
Note: the microphone will function in all modes.
Using the wired microphone
1. Plug the wired microphone in the ¼in mic input jack.
2. Turn on the microphone. The speaker will detect the device automatically.
3. Adjust the volume and echo effects of the microphone with the corresponding knobs.
This ¼in microphone input is used to connect the wired microphone supplied with
the unit, which will work in all modes.
Use it to repeat a track only in USB and SDTM modes. Also in FM mode press this
button briefly to switch channels and radio frequencies.
Connect a digital media player, a mobile phone or other audio source to this
3.5mm stereo line-in connector. Also use this input to connect the antenna
cable with a 3.5mm connector.
Enables audio playback from music files stored in a micro SDTM card.
Enables audio playback from music files stored in a USB memory stick.
Use this switch to turn the speaker on or off.
Plug the supplied micro USB power cable in this jack to charge the battery.
Note: AC adapter is not included.
In USB and SDTM modes, press any key from 0 to 9 to choose directly the tracks
you want to play. In the FM mode choose the channel or enter in the radio station
frequency you want to listen to.
This screen displays the selected input mode: Bluetooth®, USB, Aux, micro SDTM and
FM, the track being played, and the selected channel.
Press this button once to switch into the four different LED lightning effects. Press
and hold this button to turn this function off.
15. Rec/Del - TWS button This button enables the recording function when using the wired microphone. A
USB or micro SDTM memory cards are required to use this feature. The audio
captured by the microphone, auxiliary and tuner inputs can be recorded and
saved in the memory selected.
Also use this button to connect the speaker into the TWS mode.
Press this button to cycle through the different audio sources: FM, Aux in,
Bluetooth®, USB and SDTM modes.
Note: the USB and SDTM sources need to be connected to be recognized by the
unit to follow this sequence.
If these sources are not connected, it will not be recognized as an input source on
the display.
Use this knob to increase or decrease the volume level of the microphone.
Use this knob to increase or decrease the volume level of the speaker.
Use this knob to increase or decrease the echo effects of the microphone.
c. Start streaming audio files directly from the source of choice. Press the Play/Pause button, to play or pause
the audio. The PAUSE indication is displayed when the unit is mute. The rest of the buttons do not work in
this mode.
d. As soon as the AUX line is disconnected, the speaker will remain in this mode until the MODE button is
pressed to change to the mode of choice.

VII. Troubleshooting
Recommendation: Use a USB flash drive or micro SDTM card to enable audio playback from compatible files stored in
this type of devices.
a. First, connect a USB flash drive or micro SDTM card to the port of the speaker.
b. Press the MODE button to toggle through the different modes available until the preferred mode (USB or
TF) is found.
c. Start streaming audio files directly from the source of choice. Press the button, to play or pause the audio.
The PAUSE indication is displayed when the unit is paused.
d. Press the or buttons to play the next or previous track on your play list.
e. Press the button briefly to switch the playing mode into: ALL (will play the complete list), ONE (will
repeat the track) or RAND (will play the list randomly).
f. Press and hold the DEL button to delete any tracks from your play list. When the DEL indication is displayed,
press the PLAY button to delete the track currently playing.
1. Connect the antenna cable into the 3.5mm aux input to have better radio reception.
2. Press the MODE button briefly to toggle through the available audio sources and select FM. RAD will be displayed.
3. Press and hold the Play/Pause button to start scanning for radio stations automatically.
4. Once the search is complete, the unit will save active stations automatically and store them in CH01-50, the CH01
indication will be displayed.
5. Once the auto scanning has been completed, use the or to select stored channels (CH 05 or CH 06). Press the
CH button to switch to manual mode. Press the / buttons to go up and down the frequency (one at a time).
6. Press and hold the / buttons to automatically search for the next available radio station.
7. Press the Play/Pause button briefly to pause the stations.
1. Enable the Bluetooth®feature on the selected source and set it to discover the wireless speaker.
2. Place both devices not more than one meter away from each other.
3. Next, cycle to the Bluetooth®feature on the speaker by pressing the MODE button found on the media panel and
select it as the input source. The BT symbol blinks fast on the display to indicate that the speaker has entered into the
pairing mode.
4. Once the speaker appears listed (KLS-150) under the newly found Bluetooth®devices of your wireless device, it will ask
if you want to pair with it.
5. Accept by pressing Yes or Ok. If you have a lower Bluetooth®version, you may be prompted to enter the passkey 0000 (4 zeros).
6. When pairing is successful, the BT symbol stops blinking indicating that the wireless connection has been established. If
after 60 seconds the pairing process fails, please repeat steps 1 through 5 described above.
7. You can now start streaming audio through the speaker wirelessly from your favorite Bluetooth®enabled devices.
8. The speaker will re-pair automatically to the memorized device when the BT mode is selected on the unit after being
turn off and on again.
1. First, make sure to have a microphone connected to the MIC input.
2. Insert a compatible USB or memory card into the corresponding port, and press the MODE button to select
USB/SDTM.
3. When you are ready, press Play/Pause. Then press and hold the REC button for 2 seconds to enable
recording. When the device starts recording the indication REC and the recording time will be displayed on
the screen. Press once more when you wish to stop.
4. To delete the recording, select the track you want to delete from the play list, once it is played, press for 2
seconds the REC/DEL button, the DEL indication will be displayed, then press PLAY/PAUSE button to
confirm your selection.
Micro SDTM/USB mode operation
FM radio mode operation
1. Make sure both speakers are in BT mode (follow steps above to allow this function).
2. One of them will be successfully connected to your mobile device and it will become the host or main speaker. The
other one will not be able to establish the BT connection and will be designated as the secondary speaker.
3. Press and hold the REC/DEL/TWS button to enter this mode, on both speakers.
4. Once the speakers are connected successfully the BT TWS bt_A indication will be displayed on the main speaker
screen, and BT TWS bt_b will be showing on the secondary speaker screen.
5. Press and hold the REC/DEL button to exit the TWS mode.
Pairing two portable speakers with TWS technology
How to use the recording feature
Recommendation: Use a 3.5mm to 3.5mm cable to enable audio playback from devices fitted with an
auxiliary 3.5mm jack.
a. First, connect one side of the 3.5mm cable to the auxiliary port on the speaker and the other side of the
cable to the source of choice.
b. Press the MODE button to connect the speaker to the AUX mode (the LINE indication will be displayed).
V. Advanced operation
Pairing the speaker with wireless devices
Note: Before installing this product, please make sure your device is compatible with Bluetooth®.
Status Possible cause Solution
The display fails to
turn on
No sound
Distorted sound
The speaker is not connected properly
Volume adjusted at the lowest level
Check the connection and plug in the AC adapter
Power switch not on Turn on the power switch
Adjust the volume to a comfortable listening level
Decrease the master volume.
Check or replace the speaker
Check all connections and try again
Wrong input mode selected
Incorrect speaker connection.
Master volume is too high
The speaker is damaged
Choose the playback mode based on the
external source being used
Note: the last device that has been inserted will have priority at the time of reproducing music.
Note: If during the FM mode operation an audio line is connected (USB or micro SDTM), the system will automatically
switch to USB/Micro SDTM mode. Press the Mode button to switch back to FM mode.
Note: The speakers have to be "re-paired" in TWS mode once they have been turned off and on again.
c. Start streaming audio files directly from the source of choice. Press the Play/Pause button, to play or pause
the audio. The PAUSE indication is displayed when the unit is mute. The rest of the buttons do not work in
this mode.
d. As soon as the AUX line is disconnected, the speaker will remain in this mode until the MODE button is
pressed to change to the mode of choice.

Precautions
• Do NOT use this unit for anything other than its intended use.
• Do NOT expose the speaker to excessive heat or to direct sunlight for long periods of time.
• Do NOT expose the speaker to rain or water, and avoid environments with high humidity or dust.
• Do NOT disassemble, repair or modify the speaker yourself. There are no user serviceable parts inside the
unit. Only qualified personnel should be allowed to perform repairs without voiding the warranty.
• Do NOT use cleaning products that contain benzene, solvents or alcohol.
• Do NOT use near a microwave oven or wireless LAN products.
• Do NOT place containers with liquid on top or near the speaker.
• Do NOT place objects which are sources of heat on the speaker cabinet such as lighting equipment or
smoke machines.
• Do NOT stack the speaker cabinet in a manner that could cause injury should a cabinet become dislodged.
FCC statement
This equipment has been tested and found to comply with the limits for a Class B digital device, pursuant to
part 15 of the FCC rules. These limits are designed to provide reasonable protection against harmful interfe-
rence in a residential installation. This equipment generates, uses and can radiate radio frequency energy and, if
not installed and used in accordance with the instructions, may cause harmful interference to radio communi-
cations. However, there is no guarantee that interference will not occur in a particular installation. If this
equipment does cause harmful interference to radio or television reception, which can be determined by
turning the equipment off and on, the user is encouraged to try to correct the interference by one or more of
the following measures:
• Reorient or relocate the receiving antenna.
•Increase the separation between the equipment and receiver.
•Connect the equipment into an outlet on a circuit different from that to which the receiver is connected.
•Consult the dealer or an experienced radio/TV technician for help.
Technical specifications
MPN KLS-150
Device
Type
Reference RMS power
Maximun power output (P.M.P.O.)
DC input
Buttons
Driver unit
Woofer
Reference RMS power
Frequency
Impedance
Sensitivity
Signal to noise ratio
THD
Driver unit
Tweeters
Reference (RMS) power
Frequency
Impedance
Sensitivity
Signal to noise ratio
THD
Microphone
Connectivity
Directivity
Frequency
Impedance
Sensitivity
Plug
Cord length
Connectivity
Connection type
Memory card slot
Wireless RF frequency
Wireless range
Audio input
Additional inputs
Battery
Type
Charging capacity
Charging time
Run time
Standby time
Charging method
Specifications
Product dimensions (LxWxH)
Product weight
Cable length
Portable speaker
Bluetooth®compatible
60W
600W
5V/2A (external adapter)
Power, Mode, Light, EQ, Rec/Del/TWS, CH/Repeat,
Previous track -/FM, Auto Scan/Play-Pause, Next track
+/FM, Vol-/+, Echo-/+, MIC Vol-/+
Two 5in at 3Ω
24Wx2
70Hz-20KHz
8Ω
1000mV
65dB
10%
Two 1.5in at 4Ω
6Wx2
70Hz-20KHz
8Ω
1000mV
65dB
10%
Wired (included)
Unidirectional
30Hz-15KHz
600Ω±30%
54±3dB
6.3mm
10ft
Bluetooth®compatible Ver. 5.0 (DSS)
USB/microSDTM
2.402-2.480GHz
130ft
3.5mm auxiliary input
¼in mic input
18650 lithium rechargeable battery, 7.4V 4000mAh
5VDC/2A
5 hours max.
8 hours at 50% capacity / 3.25 hours at 100% capacity*
Less than 48 hours
USB cable
18.5x9.5x9.5in
8.2lb
USB cable: 3.7ft
KLS-150
Highlighted features
Lighting effect
Handles
TWS (True Wireless Stereo)
Rechargeable power
Tuner
Display
Equalizer
Additional features
Warranty
LED lights with on/off capability
Built-in, heavy duty handles
Yes
Yes
FM antenna
Yes, LED
Yes (treble and bass)
One year
*Playback times may vary depending on each individual's usage and volume settings

Español
Controles para el panel de medios
I. Introducción
Características principales
II. Contenido del empaque
Gracias por preferir el Parlante portátil KLS-150 de KlipXtreme con tecnología inalámbrica
Bluetooth®. Le recomendamos leer detenidamente la guía de instalación rápida, con el objeto de
aprovechar al máximo todas las ventajas de este innovador sistema de audio.
• Potente sistema de sonido con tecnología inalámbrica Bluetooth®y una construcción
impresionantemente sólida
• Tecnología TWS, capaz de conectar y reproducir audio a través de dos unidades simultáneamente
• 600 watts de máxima potencia de salida para una calidad de sonido sin distorsión y de calidad
excepcional
• Diseño de gabinete versátil que permite colocarlo en posición vertical u horizontal
• Efectos de iluminación LED dinámicos, con función de encendido y apagado
• Batería recargable de litio de 7,4VCC que ofrece una duración de hasta 8 horas
• Sintonizador de radio FM, puertos USB y microSD™ para la integración fluida de diversas fuentes de audio
• Ecualizador para graves y agudos para una mejor calidad de sonido
• Incluye un micrófono cableado de excelente calidad
• Resistentes asas integradas que lo hacen totalmente portátil
• Parlante portátil (1)
• Micrófono cableado (1)
• Cable micro USB para carga (1)
• Cable de audio de 3,5mm a 3,5mm (también funciona como antena) (1)
• Guía de instalación rápida (1)
1. Conector de entrada de ¼ de pulgada para el micrófono
2. Entrada auxiliar de 3,5mm
3. Ranura para tarjeta micro SD™
4. Puerto USB
5. Interruptor de Encendido/Apagado
6. Conector de entrada micro USB de 5VCC
7. Teclas numeradas (0 al 9)
8. Perrila de - Volumen del micrófono +
9. Perilla de - Eco +
10. Perilla de - Volumen +
11. Pantalla LED
12. Botón de Selector de modo
13. Botón de Encendido/Apagado de las luces
14. Botón del ecualizador (EQ)
15. Botón de Grabar/Borrar - TWS
16. Botón de Repetir/Canal
17. / Botón de FM-
18. / Botón de Búsqueda automática
19. /Botón de FM+
1
11
15
19
12
16
17
18
13
14
2
4
5
6
7
8
9
10
3
III. Descripción del producto
Posición horizontal
Posición vertical
1. Resistentes asas integradas
2. Patas de goma
1
1
2
2
1 1
22

Este botón habilita la función de grabación cuando se usa un micrófono cableado. Se
necesita una memoria USB o tarjeta microSDTM para usar esta función. El audio que
se reproduce a través del micrófono, la entrada auxiliar y del sintonizador puede
grabarse y guardarse en la memoria seleccionada.
También use este botón para conectar el parlante en el modo TWS.
Presione este botón para seleccionar la pista anterior de la lista. Disponible en los
modos Bluetooth®, SDTM, USB y FM.
Nota: En el modo FM, la primera vez que use el parlante, mantenga presionado el
botón para buscar las estaciones de radio automáticamente.
Presione este botón una vez para regresar a las estaciones de radio previamente
configuradas.
En los modos USB, SD™ o Bluetooth®, presione brevemente este botón para
reproducir o detener el audio.
En el modo FM, presione brevemente este botón para comenzar a buscar canales
desde las frecuencias más bajas a las más altas, y almacenarlos como selecciones
predeterminadas en la memoria.
Presione este botón para seleccionar la pista siguiente de la lista. Disponible en los
modos Bluetooth®, SDTM, USB y FM.
Nota: En el modo FM, la primera vez que use el parlante, mantenga presionado el
botón para buscar las estaciones de radio automáticamente.
Presione este botón una vez para adelantar las estaciones de radio previamente
configuradas.
18. Botón de
/ Búsqueda automática
Use este botón para ajustar la intensidad de las frecuencias graves y agudas en el
parlante. Las indicaciones ‘H’ (agudos) and ‘b’ (graves) aparecerán en la pantalla, ajuste
la frecuencia de -5 a 5 con los botones y . Después de 2 segundos de
inactividad la unidad volverá automáticamente al modo que se muestra en la pantalla.
VI. Modalidades de funcionamiento
Reproducción mediante entrada auxiliar
Recomendación: Use un cable de 3,5mm a 3,5mm para habilitar la reproducción de audio de dispositivos
que cuentan con un conjuntor auxiliar de 3,5mm.
a. Primero, conecte un extremo del cable de 3,5mm en el puerto auxiliar del parlante y el otro extremo del
cable a la fuente seleccionada.
Control Descripción
1. Conector de entrada de ¼
de pulgada para el micrófono
2. Entrada auxiliar de 3,5mm
3. Ranura para tarjeta
micro SD™ (TF card)
4. Puerto USB
5. Interruptor de
Encendido/Apagado
7. Teclas numeradas (0 a 9)
8. Perrila de - Volumen
del micrófono +
9. Perilla de - Eco +
10. Perilla de - Volumen +
11. Pantalla LED
12. Botón de selector
de modo
13. Botón de Luces
14. Botón del ecualizador
(EQ)
6. Cable de alimentación
micro USB de 5VCC
16. Botón de Repetir/
Canal (CH)
17. / Botón FM-
19. Botón / FM +
IV. Configuración
• Utilice el cable micro USB de 5VCC suministrado para cargar el parlante portátil directamente desde su propio
adaptador 5V/2A de CA.
• Cerciórese de cargar completamente el parlante antes de utilizarlo por primera vez.
• Inicialmente, se debe suministrar energía durante un lapso de 5 horas a la batería del parlante portátil. A contar
de entonces, el proceso de recarga de la batería tomará aproximadamente de 4-5 horas.
• Mientras se carga, el indicador LED de la batería se iluminará de color rojo. El indicador se apagará cuando la
batería haya alcanzado el nivel de carga plena.
• Apague el parlante cuando no lo esté usando para conservar la energía de la batería.
• Para encender el parlante, deslice el interruptor a la posición de encendido.
Nota: cuando la carga de la batería se encuentre por debajo del voltaje de protección (6.0V) la unidad se
apagará automáticamente.
Nota: el micrófono funcionará en todos los modos.
Uso del micrófono con cable
1. Conecte el micrófono cableado en el conjuntor de entrada para micrófono de ¼ de pulgada.
2. Encienda el micrófono. El parlante detectará el dispositivo de manera automática.
3. Ajuste el volumen y los efectos de eco del micrófono con las perillas correspondientes.
Este puerto de entrada de ¼ de pulgada se usa para conectar el micrófono con
cable suministrado con la unidad, que funcionará en todos los modos.
Use este botón para repetir la pista que desee solamente en los modos USB y
SDTM. En el modo FM también presione este botón brevemente para cambiar los
canales y las frecuencias.
Conecte un reproductor de medios digitales, un teléfono móvil o cualquier otra
fuente de audio en este conector de entrada estéreo de 3,5mm. Esta entrada
también sirve para conectar el cable de antena con un conector de 3,5mm.
Habilita la reproducción de audio de archivos de música almacenados
en una tarjeta de memoria micro SDTM.
Habilita la reproducción de audio de archivos de música almacenados en un
dispositivo de memoria USB.
Presione este interruptor para encender y apagar el parlante.
Conecte aquí el cable micro USB suministrado para cargar la batería.
Nota: no incluye adaptador de CA.
En los modos USB y SDTM, oprima cualquiera de las teclas de 0 a 9 para elegir
directamente las pistas que desea reproducir. En el modo FM elija el canal o ingrese
la estación de radio que desea escuchar.
Esta pantalla exhibe el modo de entrada seleccionado: Bluetooth®, USB, Aux,
micro SDTM y FM, la pista que está reproduciendo, y el canal seleccionado.
Presione este botón una vez para alternar entre los cuatro modos diferentes de
iluminación LED. Mantenga presionado este botón para apagar esta función.
15. Botón de Grabar/Borrar
- TWS
Presione este botón para alternar entre las distintas fuentes de audio disponibles:
Modos FM, Aux in, Bluetooth®, USB y SD™.
Nota: las fuentes para los modos USB y SD™ deben estar conectadas para ser
reconocidas por la unidad y seguir la secuencia mencionada anteriormente.
Si estas fuentes no estuvieran conectadas, no serán reconocidas como fuentes de
entrada en la pantalla.
Use esta perilla para aumentar o disminuir el nivel del volumen del micrófono.
Use esta perilla para aumentar o disminuir el nivel del audio del parlante.
Use esta perilla para aumentar o disminuir el efecto de eco del micrófono.
b. Presione el botón de MODO para conectar el parlante en el modo AUX (la indicación LINE aparecerá en
la pantalla).
c. Comience a reproducir archivos de música directamente de la fuente seleccionada. Presione el botón
Reproducción/Pausa, para reproducir o detener el audio. La indicación PAUSA aparecerá cuando la unidad se
encuentre en este modo. El resto de los botones no funcionan en este modo.
d. Al desconectar la entrada AUX, el parlante permanecerá en este modo hasta que se oprima el botón de
MODO para seleccionar otro modo de su preferencia.

Recomendación: Use un cable de 3,5mm a 3,5mm para habilitar la reproducción de audio de dispositivos
que cuentan con un conjuntor auxiliar de 3,5mm.
a. Primero, conecte un extremo del cable de 3,5mm en el puerto auxiliar del parlante y el otro extremo del
cable a la fuente seleccionada.
b. Presione el botón de MODO para conectar el parlante en el modo AUX (la indicación LINE aparecerá en
la pantalla).
c. Comience a reproducir archivos de música directamente de la fuente seleccionada. Presione el botón
Reproducción/Pausa, para reproducir o detener el audio. La indicación PAUSA aparecerá cuando la unidad se
encuentre en este modo. El resto de los botones no funcionan en este modo.
d. Al desconectar la entrada AUX, el parlante permanecerá en este modo hasta que se oprima el botón de
MODO para seleccionar otro modo de su preferencia.
Recomendación: Use un dispositivo de memoria USB o tarjeta de memoria micro SDTM para poder reproducir
archivos de audio almacenados en esta clase de dispositivos.
a. En primer lugar conecte un dispositivo de memoria USB o tarjeta micro SDTM en el puerto del parlante.
b. Presione el botón de MODO para alternar entre los distintos modos disponibles hasta encontrar en el que
desea reproducir el audio (USB or TF).
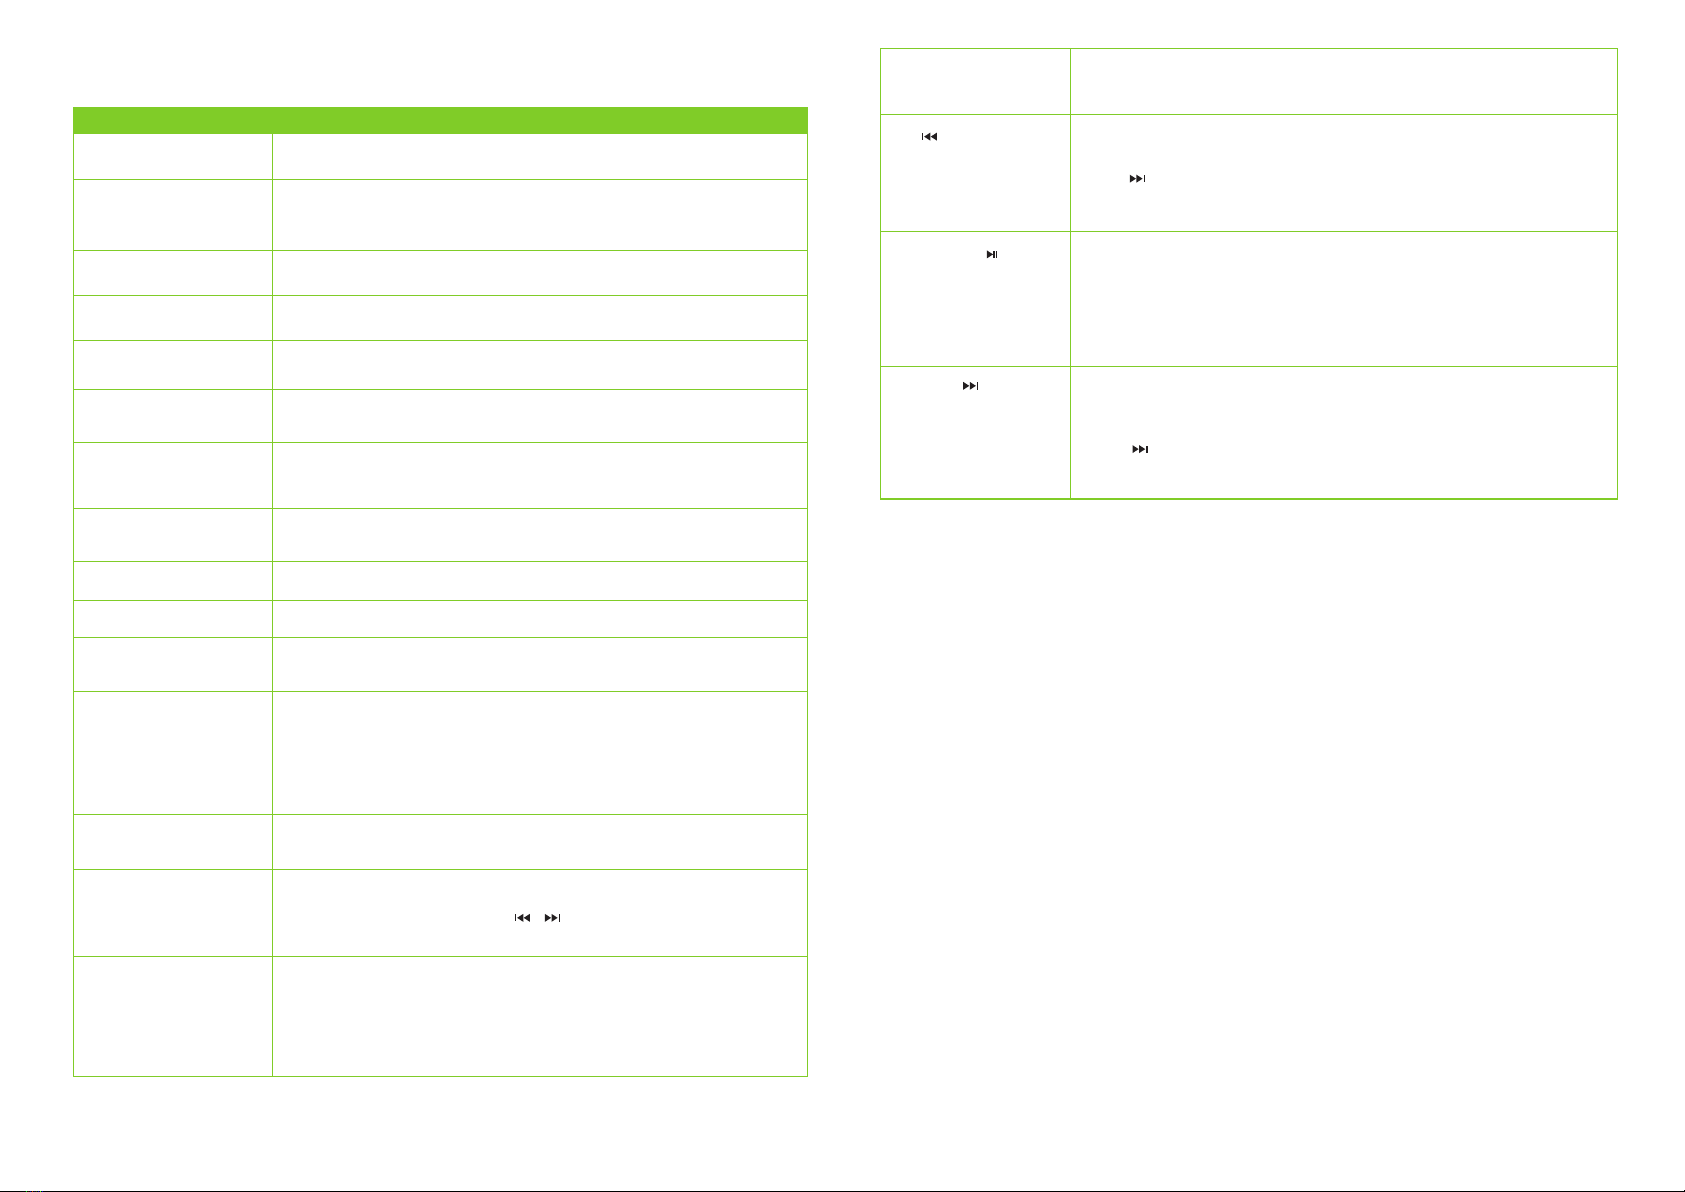
c. Comience a reproducir archivos de audio directamente de la fuente elegida. Presione el botón para
reproducir o detener el audio. La indicación PAUSA aparecerá en la pantalla cuando la unidad se encuentre
en este modo.
d. Mantenga presionado los botones o para reproducir la pista anterior o siguiente de la lista.
e. Presione brevemente el botón para alternar la selección del modo de reproducción en: TODAS
(reproducirá la lista completa), UNA (repetirá la pista que se está reproduciendo) o ALTERNAR
(reproducirá la lista al azar).
f. Mantenga presionado el botón BORRAR para eliminar las pistas que desee. Cuando la indicación BORRAR
aparezca en la pantalla, presione el botón REPRODUCIR para eliminar la pista que se está reproduciendo.
1. Conecte el cable de antena en el puerto auxiliar de 3,5mm para obtener una mejor recepción de estaciones de radio.
2. Presione brevemente el botón de MODO para alternar entre las fuentes de audio disponibles y elija FM. RAD aparecerá
en la pantalla.
3. Mantenga presionado el botón de Reproducción/Pausa para comenzar a buscar las estaciones de radio automáticamente.
4. Una vez que haya completado la búsqueda, la unidad grabará automáticamente las estaciones activas y las guardará en los
canales del 01 al 50, la indicación CH01 aparecerá en la pantalla.
5. Una vez que haya finalizado la búsqueda automática, use los botones o para elegir los canales seleccionados (CH
05 o CH 06). Presione el botón CH (Canal) para alternar al modo manual. Presione los botones / para adelantar
o retroceder en la frecuencia (de uno en uno).
6. Mantenga presionado los botones de / para buscar automáticamente la próxima estación de radio disponible.
7. Presione brevemente el botón Reproducción/Pausa para detener el audio.
1. En primer lugar, asegúrese de que haya un micrófono conectado en el puerto de entrada para el MIC.
2. Inserte una tarjeta de memoria compatible o unidad USB en el puerto correspondiente, y presione el botón
de MODO para elegir USB/SDTM.
3. Cuando haya finalizado, presione el botón de Reproducción/Pausa. Luego mantenga presionado el botón de
GRABAR durante 2 segundos para comenzar a grabar. Cuando el dispositivo comience la grabación, la
indicación GRABAR y el tiempo de grabación aparecerán en la pantalla. Vuelva a presionarlo cuando desee que
se detenga.
4. Para borrar una grabación, seleccione la pista que desea borrar de la lista. Una vez que esté siendo reproducida,
presione el botón de GRABAR/BORRAR durante 2 segundos, la indicación BORRAR aparecerá en la pantalla, a
continuación presione el botón de Reproducción/Pausa para confirmar su selección.
Reproducción micro SDTM/USB
Modalidad de operación de radio FM
Cómo usar la función de grabación
Nota: El dispositivo que se haya conectado en última instancia será el que tenga prioridad en el momento
de la reproducción del audio.
Nota: Si durante la operación del modo FM se conecta una línea de audio (USB o SDTM), el sistema automáticamente
cambiará al modo USB o SDTM. Presione el botón de Modo para cambiar al modo FM.
1. Habilite la función Bluetooth®en la fuente de audio seleccionada y prográmela para detectar el parlante inalámbrico.
2. Ubique ambos dispositivos a no más de un metro de distancia entre sí.
3. A continuación, busque la función Bluetooth®en el parlante presionando el botón de MODO que se encuentra en el
panel de medios y elíjalo como la fuente de entrada. El símbolo bt parpadea rápidamente en la pantalla para indicar que
el parlante ha entrado en el modo de emparejamiento.
4. Cuando el parlante aparece en la lista de dispositivos Bluetooth®(KLS-150), recién detectados de su dispositivo
inalámbrico, le preguntará si desea integrarlo al sistema.
5. Pulse Sí u Ok para aceptar. En caso de contar con una versión Bluetooth®inferior, es posible que se le pida
ingresar la clave 0000 (4 ceros).
6. Cuando el proceso de emparejamiento concluye satisfactoriamente, el símbolo BT deja de parpadear indicando que se ha
establecido la conexión inalámbrica. Si después de un intervalo de 60 segundos no logra emparejar el dispositivo, repita
los pasos del 1 al 5 del procedimiento anterior.
7. Ahora puede comenzar a reproducir música en forma inalámbrica desde sus dispositivos favoritos con tecnología Bluetooth®.
8. El parlante volverá a emparejarse automáticamente con el último dispositivo almacenado en memoria cuando se active
nuevamente la función Bluetooth®o cuando lo vuelva a encender luego de haberlo apagado.
1. Asegúrese de que ambos parlantes se encuentren en el modo BT (siga los pasos mencionados anteriormente para
habilitar esta función).
2. Uno de ellos se conectará exitosamente con su dispositivo móvil y dicho parlante será considerado el parlante
anfitrión o principal. El otro parlante no podrá establecer la conexión en el modo BT y será considerado como el
parlante secundario.
3. Mantenga presionado el botón GRABAR/BORRAR/TWS para habilitar este modo, en ambos parlantes.
4. Una vez que los parlantes se conecten exitosamente la indicación BT TWS bt_A aparecerá en la pantalla del parlante
principal, y la indicación BT TWS bt_b aparecerá en la pantalla del segundo parlante.
5. Mantenga presionado el botón GRABAR/BORRAR para salir del modo TWS.
Cómo emparejar dos parlantes portátiles con tecnología TWS
V. Funcionamiento avanzado
Cómo emparejar el parlante con dispositivos inalámbricos
Nota: Antes de instalar este producto, debe asegurarse de que su dispositivo sea compatible con Bluetooth®.
Nota: Necesita volver a emparejar los parlantes en el modo TWS después de haber apagado la unidad y
volverla a encender.
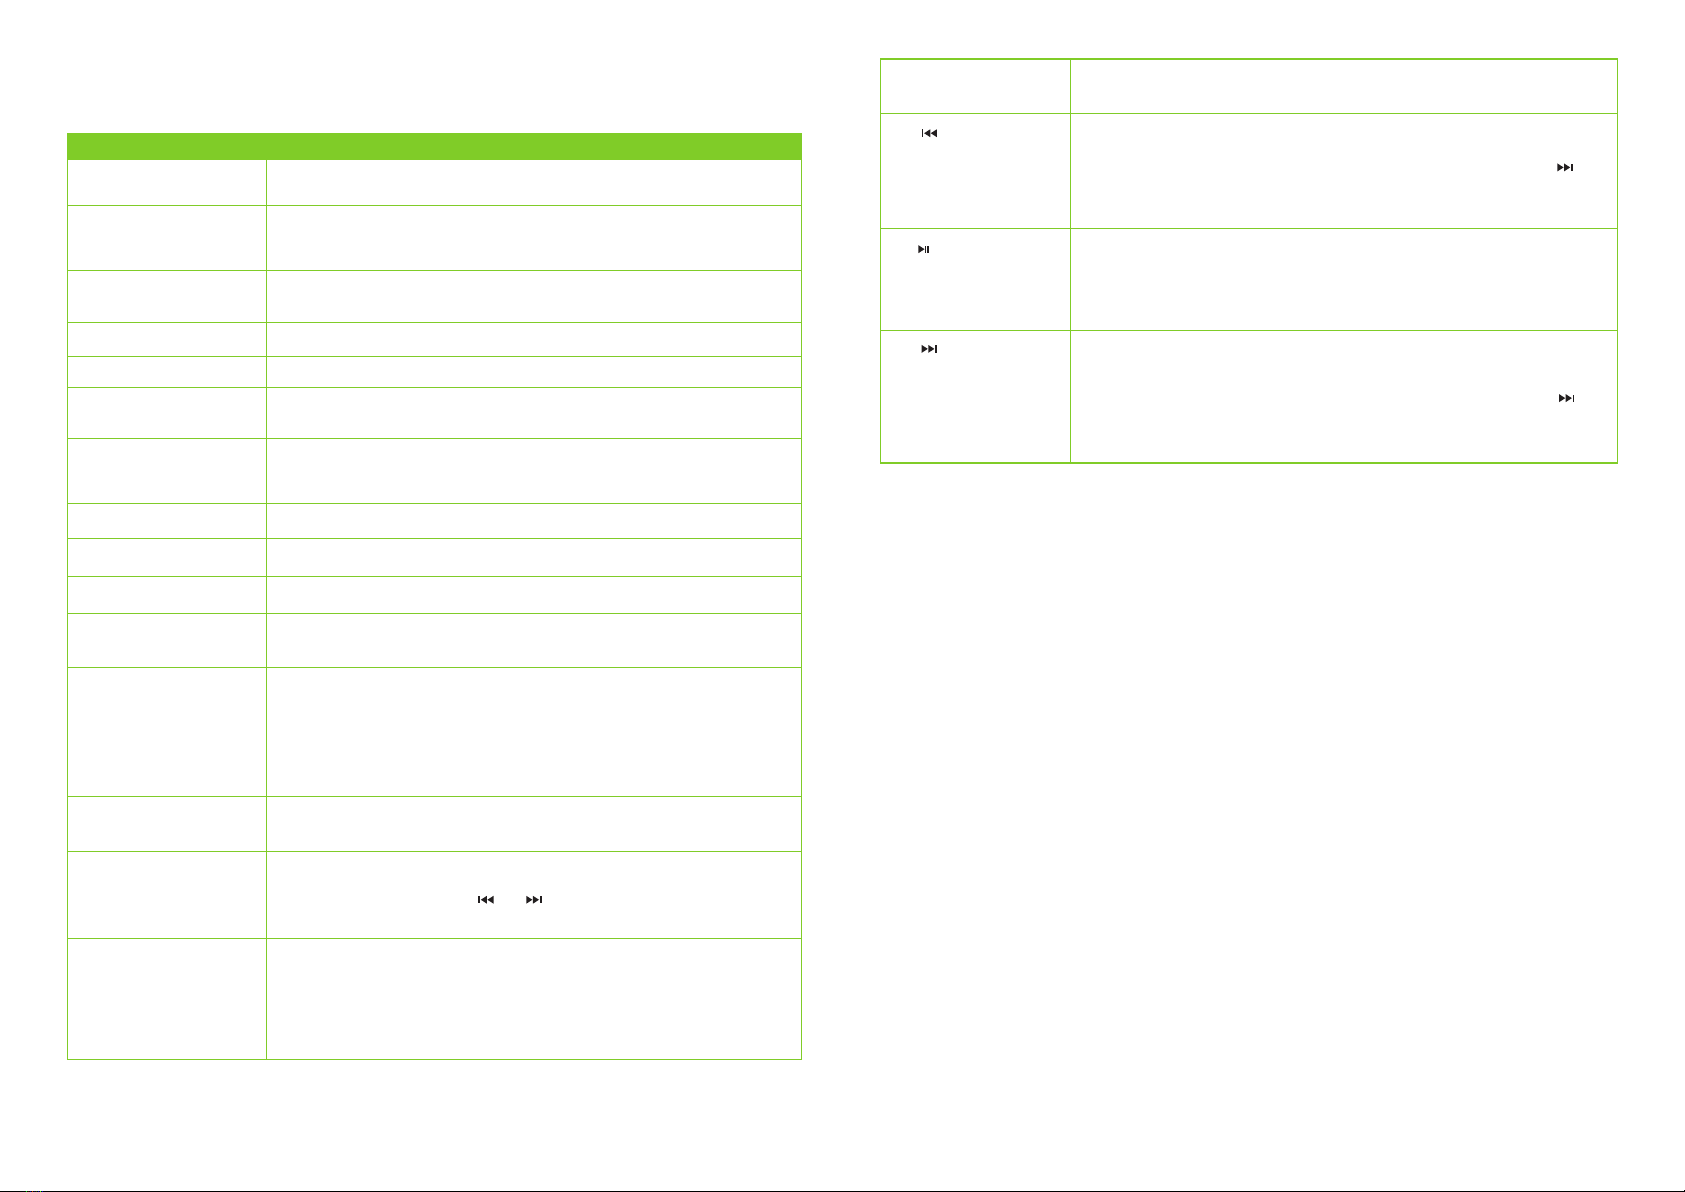
VII. Solución de problemas
Estado Posible causa Solución
La pantalla no enciende
No hay sonido
Sonido distorsionado.
El parlante no está bien conectado
Volumen ajustado al nivel más bajo
Revise la conexión y enchufe el adaptador de CA
El interruptor no está encendido Encienda el interruptor
Ajuste el volumen a un nivel de audio agradable
Disminuya el volumen principal
Revise o reemplace el parlante
Revise todas las conexiones y vuelva a intentar
Se seleccionó el modo de entrada incorrecto
Conexión del parlante incorrecta
El volumen principal es muy fuerte
El parlante está dañado
Elija el modo de reproducción basado en la
fuente externa usada

Especificaciones técnicas
MPN KLS-150
Dispositivo
Tipo
Potencia RMS de referencia
Máxima potencia de salida (P.M.P.O)
Entrada de CC
Botones
Unidad del parlante
Parlante de graves
Potencia RMS de referencia
Frecuencia
Impedancia
Sensibilidad
Relación de señal a ruido
Distorsión armónica total (DAT)
Unidad del parlante
Parlante de agudos
Potencia RMS de referencia
Frecuencia
Impedancia
Sensibilidad
Relación de señal a ruido
Distorsión armónica total (DAT)
Micrófono
Conectividad
Directividad
Frecuencia
Impedancia
Sensibilidad
Enchufe
Longitud del cable
Conectividad
Tipo de conexión
Ranura para tarjeta de memoria
Frecuencia de RF inalámbrica
Alcance inalámbrico
Entrada de audio
Entradas adicionales
Batería
Tipo
Método de carga
Tiempo de carga
Tiempo de funcionamiento
Tiempo en modo de pausa
Método de carga
Parlante portátil
Compatible con Bluetooth®
60W
600W
5V/2A (adaptador externo)
Conexión, Modo, Luces, Ecualizador, Grabar/Borrar/-
TWS, Canales/Repetir, Pista anterior -/FM, Buscador
automático/Reproducción-Pausa, Próxima pista +/FM,
Vol-/+, Eco-/+, Volumen del micrófono-/+
Dos de 5 pulgadas a 3Ω
24Wx2
70Hz-20KHz
8Ω
1000mV
65dB
10%
Dos de 1,5 pulgada a 4Ω
6Wx2
70Hz-20KHz
8Ω
1000mV
65dB
10%
Con cable (incluido)
Unidireccional
30Hz-15KHz
600Ω±30%
54±3dB
6,3mm
3m
Compatible con Bluetooth®Ver. 5.0 (DSS)
USB/microSDTM
2.402-2.480GHz
40m
Cable auxiliar de 3,5mm
Entrada para micrófono de ¼ de pulgada
Batería recargable de litio de 7,4V 4000mAh (18650)
5VCC/2A
5 horas máx.
8 horas al 50% de capacidad / 3,25 horas al
100% de capacidad*
Menos de 48 horas
Cable USB
KLS-150
Especificaciones
Dimensiones (LxWxH)
Peso
Longitud del cable
Características destacadas
Efectos de iluminación
Asas
TWS (Verdadera conexión inalámbrica estéreo)
Capacidad de recarga
Sintonizador
Pantalla
Ecualizador
Características destacadas
Garantía
47X24x24cm
3,75kg
Cable USB 1,1m
Función de encendido/apagado de las luces LED
Integradas y resistentes
Sí
Sí
Antena FM
Sí, LED
Sí (para las frecuencias graves y agudas)
Un año
*El tiempo de reproducción puede variar dependiendo de los hábitos de uso y preferencias de cada usuario
Precauciones
• Esta unidad NO debe ser usada para cualquier otro fin distinto al especificado.
• Jamás exponga el parlante al calor excesivo ni a los rayos directos del sol por períodos de tiempo
prolongados.
• Jamás exponga el parlante al agua o a la lluvia, y evite ambientes con mucho polvo y humedad.
• Jamás desarme, repare ni modifique el parlante usted mismo. No existe ninguna pieza que pueda ser
reparada por el usuario dentro del equipo. Todo trabajo de reparación deber ser realizado sólo por
personal calificado, para mantener válida la garantía que posee el aparato.
• Jamás utilice productos de limpieza que contengan bencina, solventes ni alcohol.
• Jamás utilice el dispositivo cerca de un horno microondas ni productos inalámbricos para redes LAN.
• Jamás coloque recipientes con líquidos cerca o encima de la unidad.
• JAMÁS coloque objetos generadores de calor sobre el parlante, tales como equipos de iluminación o
máquinas de humo.
• JAMÁS apile el parlante de tal forma que pueda causar lesiones si accidentalmente se cayera al suelo.
Declaración relativa a interferencias de la Comisión Federal de Comunicaciones
Tras haber sido sometido a todas las pruebas pertinentes, se ha comprobado que este equipo cumple con los
límites establecidos para dispositivos digitales Clase B, conforme a la Sección 15 del Reglamento de la FCC.
Tales límites definen los niveles máximos permisibles a las interferencias nocivas de la energía radioeléctrica en
instalaciones residenciales. Puesto que el actual equipo genera, utiliza y puede radiar energía radioeléctrica, si
no observa las instrucciones relativas a la instalación y operación del dispositivo, puede provocar interferencias
nocivas a las comunicaciones por radio. Sin embargo, no es posible garantizar que no se producirá interferencia
alguna en una instalación determinada. Dado el caso de que el equipo interfiriera en la recepción de aparatos
de radio o televisión, lo cual se puede determinar al apagar y volver a encender el dispositivo, le recomenda-
mos al usuario que intente una o más de las siguientes medidas con el objeto de corregir la situación:
• Vuelva a orientar o cambie la ubicación de la antena receptora.
•Aumente la distancia que separa al equipo del aparato receptor.
•Conecte el equipo a un tomacorriente situado en un circuito distinto al cual está enlazado el receptor.
•Solicite asistencia al distribuidor o a un técnico experimentado en radio o aparatos de TV.

NOTASNOTES

KlipXtreme®is a registered trademark. All rights reserved. The Bluetooth®logo is a registered trademark
owned by Bluetooth SIG, Inc. SD™ and microSDTM logos are trademarks owned by SD-3C, LLC. Other
trademarks and trade names are those of their respective owners. Any mention of such is only intended
for identification purposes, and is not to be construed as a claim to any rights pertaining to, sponsorship by,
or affiliation with, those brands. Made in China.
KlipXtreme®es marca registrada. Todos los derechos reservados. El logograma Bluetooth®es propiedad
de Bluetooth SIG. Inc. SD™ y microSD™ son marcas registradas de SD-3C, LLC. Todas las demás marcas
y nombres comerciales son propiedad de sus respectivos dueños. Cualquier mención de los mismos es
por motivo de identificación solamente y por ende, no constituye reclamo alguno a ningún derecho
perteneciente a, patrocinado por, ni afiliación con cualquiera de estas marcas. Fabricado en China.
www.klipXtreme.com
Table of contents
Languages:
Other Klip Xtreme Portable Speakers manuals