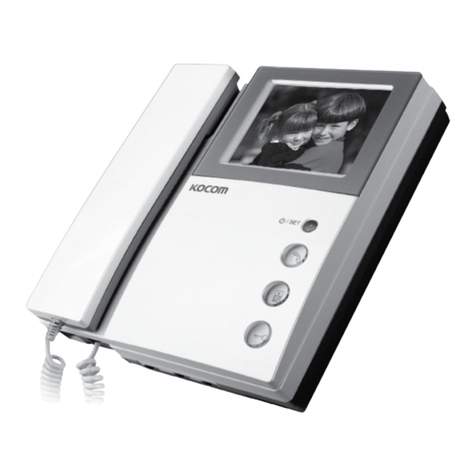
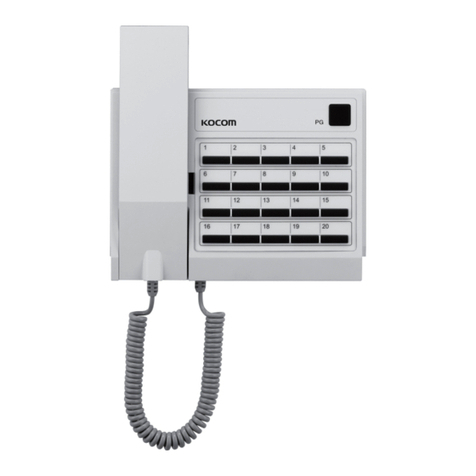
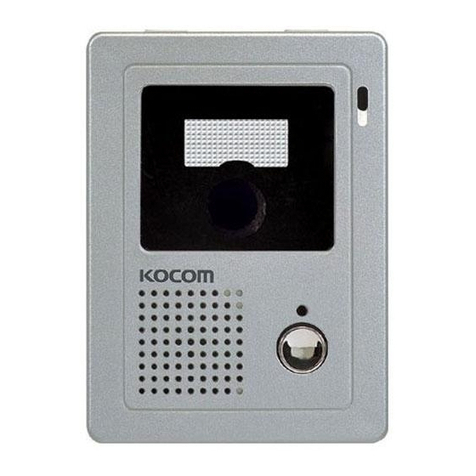
KOCOM KVM-524RG Manual

Thank you very much
for purchasing KOCOM
video doorphone.
please read this manual
thoroughly to ensure
correct usage, before
operating
Monitor
KVM-524RG
4-wires In
polarity
or
Camera
KC-D20
PRODUCT
MODEL
DATE PURCHASED
WARRANTY PERIOD
AGENCY ADDRESS
KOCOM Warranties the original p rchaser of this prod ct
as follows.
1) This product is produc d und r strict quality control and insp ction proc dur s.
2) If this product br aks down during prop r us as a r sult of product d f ct, KOCOM
will r pair it within on y ar from dat of purchas fr of charg .
3) Th following cas s will b subj ct to charg , v n during warranty p riod:
a. Br akdown during transport, or through car l ss tr atm nt, by consum r.
b. Br akdown caus by unauthoriz d r pair, or syst m modification.
c. Br akdown caus d by natural disast r or pow r disord r.
Warranty
Warranty Card
KVM-524RG 04.08
To receive after-sales service, have the following
ready when yo contact o r branches
1. Nam of th product
2. Mod l numb r of th product
3. Th ar a of probl m
4. Phon numb r and addr ss at which you can b contact d.
VIDEO DOORPHONE
KVM-524RG Op rating Installation Manual
Clear & Bright Pict re at Low Light
CCIR/EIA: Imag s R cordabl
4Flat Monitor / 4 Wir d In Polarity
Easy Installation
Wid vi w angl
AC 110V or 220V (50Hz / 60Hz) Transform r typ
Door r l as function
Additional 1 Monitor + 1 Cam ra + 2 Doorphon availabl
I
This manual is bas d on th dat as shown in th right and sp cifications
ar subj ct to chang without notic for quality improv m nt.
"CAUTION: IT HAS POSSIBILITY TO HAPPEN
INOPERABLE, AS THIS PRODUCT
EXPOSED TO ELECTRON WAVE"
PLAY
AUTO
TIMES
REC
REC
Option
Cam ra
KC-B61

Do not throw us d-up batt ry into fir plac s, which may caus fir and xplosion.
Cautions for installation
Th r l vant law oblig s us rs to hav a qualifi d l ctrician carry out wiring work for pow r supply. Work by disqualifi d
p rsons may caus fir and l ctric shock.
Wiring work for communication cabl s n ds t chniqu s and xp ri nc s. For this typ of wiring work, pl as consult to your
local sal s ag nt.
According to th standard for l ctric work and oth r r l vant r gulations, install communication cabl s at th plac away
from pow r cabl s. Th failur to install cabl s s parat ly may caus fir , l ctric shock and communication troubl s.
Do not install th product on rolling tabl or sloping plac .
Dropping or falling may caus damag on your product.
In installation, avoid th plac xpos d to tr mor or shocks, which may caus damag s on your product.
Ev n if your product is wat rproof, do not install it slant d plac of wat r l akag , which may caus a short circuit.
For th product of wall-mounting typ with fixing p gs, k p it saf ly.
Fixing p gs may caus injury of us r.
Install th product of wall-mounting typ car fully not to drop from th wall. Dropping du to arthquak or tr mors may
caus injury of us r.
Wh n installing th product on th wall, consid r th thickn ss and mat rial of th wall.
Dropping in us may caus injury of us r.
Cautions for Us
Do not put h avy thing on th product. Dropping or falling du to h avy things on it may caus injury of us r.
Cautions for R pairs and Maint nanc
Cl an th dust insid th product r gularly. Failur to cl an th dust for long tim may caus fir . For insp ction and cl aning
of th insid of product, pl as contact your local sal s ag nt.
Wh n putting your hands into th insid of quipm nt, b sur that plug is alr ady d tach d form an outl t or circuit-br ak r is
turn d off.
B car ful not to xpos th product to b nz n , thinn r or hot wat r.
Do not xpos d t rg nt dir ctly to th product in a way of spaying, tc.
Moving quipm nt, b sur that th plug is d tach d from an outl t.
For quipm nt whos cabl s ar conn ct d to t rminals, pl as contact your local sal s ag nt or qualifi d l ctrician.
Wh n r placing old fus with n w on , do not dir ctly touch it with bar hands.
Us insulat d tools or contact A/S c nt r.
Cautions
�
�
�
�
�
�
�
�
�
�
�
�
�
�
�
�
�
�
Warnings for disposal
�R ad this cautions car fully and k p it within asy r ach of you.
�For right installation, r ad this cautions thoroughly. Pl as install th product according to its sp cifications.
�This Cautions for Saf ty may includ it ms that ar not contain d in sp cifications of th product that consum r
purchas s.
�R ading this cautions, us th product in a right mann r. For furth r information, pl as contact our A/S c nt r.
About Symbol
A vari ty of symbols ar us d in this Cautions for Saf ty and your products to guid you to us products in a right
and saf mann r and to pr v nt possibl risks for us rs and oth r p rsons and damag s to th ir prop rty. Th m aning
of ach symbol is as follows. Aft r fully awar of m aning of ach symbol, r ad th following cautions.
This symbol m ans that wrong handling or ignoranc of matt rs that this symbol indicat s
may caus s rious injury or v n d ath of us r.
This symbol m ans that wrong handling or ignoranc of matt rs that this symbol indicat s
may caus s rious injury or prop rty damag of us r.
This symbol m ans th matt r that us r should not do at nay v nt.
This symbol m ans that us r should follow th instructions.
Symbols on Drawing
This symbol m ans that cont nts (high voltag , l ctric shock, warnings, tc.) to which us r
should pay att ntion ar includ d.
This symbols m ans that a c rtain action is not p rmitt d. Sp cific points not p rmitt d ar
d pict d around this symbol (for xampl , in th l ft drawing, disass mbly is not p rmitt d.).
This symbol m ans instructions or is us d to forc us r to do a c rtain action. Sp cific
instructions ar d pict d on th drawing
(for xampl , th l ft drawing instructs us r to d tach pow r plug from an outl t).
Cautions for Saf ty
Warnings
Cautions
For saf us , pl as stick to th following cautions.
Warnings

�This product is only for hom . Do not th product for industrial or military us .
�Do not handl th quipm nt with w t hand, which may caus l ctric shock.
�Do not plac w t or m tallic mat rials on quipm nt. Wat r l akag or intrusion of m tallic mat rials may caus fir and
l ctric shock.
�Do not block th v ntilating op ning of quipm nt or put ali n substanc s into it, which may caus fir and l ctric shock.
�Do not us batt ry that is not d signat d or mix n w batt ry with old on s. Ins rt batt ri s to fit th ir polarity. Explosion or
l akag of batt ry may caus fir and injury of us r.
�Wh n visitor's imag or voic is not display d on scr n or not sound d from sp ak r, pl as ch ck his/h r id ntity b for
op ning th door and contact our A/S c nt r.
�Do not us quipm nt wh n lighting is xp ct d or strok s. It may caus fir and l ctric shock.
�Do not op n r ar cov r, cabin t and cov r of quipm nt. It may caus l ctric shock.
�Do not modify pow r cabl or pull it with xc ssiv str ngth, which may caus fir and l ctric shock.
�Do not modify quipm nt. It may caus fir and l ctric shock.
�Call signal may caus damag on us r's h aring ability.
Cautions for Abnormality
�Wh n pow r cabl is brok n ( xposur of cor or short-circuit), do not fail to r plac brok n cabl with n w on . Failur to
r plac brok n pow r cabl may caus fir and l ctric shock.
�Wh n d t cting any abnormaliti s in quipm nt (communication is not availabl , imag s do not b display d on scr n, calling
is not availabl , or abnormal sound is h ard), imm diat ly d tach plug from an outl t, or turn off circuit br ak r or d tach
batt ri s from quipm nt (in cas that quipm nt has no plug) b for r qu sting r pairs to sal s ag nt or A/S c nt r. K ping
conn ction to pow r supply may caus fir and l ctric shock.
�Wh n ali n substanc s go into quipm nt, imm diat ly d tach plug from an outl t, or turn off circuit br ak r or d tach batt ri s
from quipm nt (in cas that quipm nt has no plug) b for r qu sting r pair to sal s ag nt or A/S c nt r.
�In th cas of smok or sm ll of unknown origin from quipm nt, k ping us it may caus fir and l ctric shock. D tach
plug from an outl t, or turn off circuit br ak r or d tach batt ri s from quipm nt (in cas that quipm nt has no plug) and b
sur to ch ck no mor smok or sm ll from quipm nt b for r qu sting r pair to sal s ag nt or A/S c nt r. Sinc p rsonal
r pairing work by us r may s rious accid nts. In any cas , do not r pair quipm nt with your own hand.
�Wh n dropping quipm nt or br aking its cabin t, d tach plug from an outl t, or turn off circuit br ak r or d tach batt ri s
from quipm nt (in cas that quipm nt has no plug) b for r qu sting r pair to sal s ag nt or A/S c nt r. K ping us
quipm nt may caus fir and l ctric shock.
�Avoid dir ct xposur to sunlight and stor quipm nt at th plac fr from dust and high t mp ratur as you can. High
t mp ratur of quipm nt may caus fir and l ctric shock.
Warnings Warnings
Cautions for Us
�Do not install th product at bathroom or at th plac n ar a washing machin , or at oth r humid plac s. It may caus fir or
l ctric shock.
�Do not install th product at th plac n ar a dr ss r, humidifi r or h at r. Also avoid th plac xpos d to spark, h at or
humidity. All of th m may caus fir and l ctric shock.
�Do not install th product at th plac xpos d to dust, m tals and harmful gas such as hydrog n sulfid gas, all of which
may caus fir and l ctric shock.
�Do not install th product at th plac xpos d to wat r and ch micals. This may caus fir and l ctric shock.
�Do not scratch, br ak or arbitrarily proc ss pow r cabl , which may caus fir and l ctric shock. Putting a h avy thing on a
cabl , h ating it or pulling it may caus impairm nt on it.
�Do not plac pow r cabl at th plac n ar h ating quipm nt. It may caus damag of cabl 's clothing mat rial, which
r sult in fir ad l ctric shock. Wh n d taching plug from an outl t, do not pull pow r cabl .
�Damag s on pow r cabl may caus fir and l ctric shock. Wh n d taching plug from an outl t, pl as hold th plug
tightly.
�Do not d tach plug from an outl t with w t hand. I may caus l ctric shock.
�Wh n using th xisting wiring, b sur of th suitability of it to th product and install th product. Failur to this caution
may caus fir .
�Wh n moving quipm nt, b sur that plug is d tach d from an outl t and communication cabl is disconn ct d. Damag
on cabl s may caus fir .
�Voltag oth r than pr scrib d rat d voltag is not p rmitt d, which caus fir and l ctric shock.
�Do not us pow r t rminal of product's main body in oth r quipm nt than pr scrib d on s. It may caus fir and short-
circuit.
�In wiring work, us th d signat d wiring mat rials.
Wiring work using oth r mat rials than d signat d on s may caus fir .
�Th quipm nt without wat rproof marking shall not b install d at th plac wat r l aks. It may caus l ctric shock and
short circuit.
�Wh n working, b sur that pow r is disconn ct d. Failur to disconn ct pow r may caus l ctric shock.
�B sur that th pow r cabl is conn ct d and arths according to d signat d m thod. Failur to conn ction and arth may
caus fir .
�Do not conn ct pow r to oth r t rminals than d signat d on s.
�It may caus fir and l ctric shock.
�Wh n building a syst m with th product, do not conn ct th product oth r quipm nt than d signat d on . It may caus
fir .
�Wh n installing A/C switch, do work aft r r moving th substanc that may caus short circuit or l ctric shock.
�B for installing or providing A/S s rvic , b sur that th pow r is disconn ct d.
Cautions for Us

Vid o Phon
- In ass mbling th product, b car ful that wall-mounting p gs should not contact with wirings.
- In conn ction of cabl s, strip its insulation off as much as n c ssary (Exc ssiv stripping off its insulation may caus short circuit).
- B car ful that signal cabl s should not b wir d with A/C wiring (it may caus poor display quality).
- Do not drop hands t (its damag or short-circuit du to drop may mak communication impossibl ).
- Wh n conn cting wir s to t rminals, us standard scr wdriv r (oth rwis , scr ws may loos n, which will r sult in disconn ction of wiring).
- Do not cl an CRT scr n with w t tow l or cloth. Wh n wat r p n trat s into th product, it may caus short-circuit.
Do not fail to cl an it with dry tow l or soft cloth.
- Do not install cam ra at th plac wh r wat r p n trat s or l aks. P n tration or l akag of wat r may caus l ctric shock or short circuit.
4-Lin R lat d Products
- In wiring work, b car ful that wirings should k p away from th wall-mounting p gs or oth r furnitur at r gular int rval. Contact of wiring with
wall-mounting p gs, tc. may caus short-circuit, l ctric shock and fir (it is appli d to all products with wall-mounting p gs).
- Us th pr scrib d standard wirings. Non-standardiz d wirings may giv adv rs ff cts on op ration of product
(it is appli d to both vid o phon and CCTV).
Saf ty Instructions, Warnings, and Cautions of Each Syst m
- This quipm nt is l ctronically pr cision quipm nt, so do not arbitrarily disass mbl it.
- In installation of th product, do not fail to follow th sp cifications (sp cifications off r d by KOCOM).
- Do not touch th product with ali n mat rials (for xampl , stick r, magn t, op n r, m tal chopstick, tc.)
or ins rt th m into th product (it may caus r duction of th product's durability and harmful r sults to us r as w ll).
- In th rainy s ason, wat r is lik ly to p n trat into th product along th wiring. Thus, U-typ finishing is r comm nd d
as a d sirabl m thod of nd part finishing.

Specifications
MONITOR
(KVM-524RG)
CAMERA
(KC-D20)
Power so rce
Power cons mption
Ass rance temperat re
Scanning freq ency
Lens
Min. Ill mination
Dimension
Ill mination
Angle of pict re
Color of KC-D20
DC12V1V(pow r from Monitor)
Max: 2.5W
-10~50
Horizontal: 15.734KHz,15.625KHz
V rtical: 50Hz (CCIR)/60Hz (EIA)
F:2.0, f=3.0mm
0.1Lux (LED ON)
96(W)127(H)32(D)mm
Infra-r d LED
Diagonal 120690(KC-D20)
Black or Silv r
Power so rce
Power cons mption
Ambient temperat re
Bra n t be
Comm nication system
Call signal so nd
O tp t Impedance
Wiring
Max Wiring Distance
Dimension
AC 110V - 120V ~ (50Hz / 60Hz) or
AC 220V - 230V ~ (50Hz / 60Hz)
Max: 19W, Stand by : 4W
0~+50
4 inch Flat Tub (B/W)
Dupl x hands t conv rsation
El ctric chim & b p sound
Pictur : 75ohm, Voic : 600ohm
4 Wir d in Polarity (VCC / GND/VOICE / PICTURE )
0.65 Singl Cabl /50m, 5C-2V Coaxial Cabl /100m
210(W)222(H)53(D)mm
PLAY
AUTO
TIMES
REC
REC
Preca tions for Operation
PLAY
AUTO
TIMES
REC
REC
B
E
N
Z
E
N
E
T
H
I
N
N
E
R
PLAY
AUTO
TIMES
REC
REC
PLAY
AUTO
TIMES
REC
REC
PLAY
AUTO
TIMES
REC
REC
PLAY
AUTO
TIMES
REC
REC
PLAY
AUTO
TIMES
REC
REC
K p away from humidifi r and
stov . High t mp ratur and
humidity can caus br akdown.
Wh n cl aning, n v r us w t
hands, volatil b nz n or paint
thinn r.
K p pictur cl ar by cl aning
cam ra window fr qu ntly with
soft cloths.
As this d vic consists of
l ctronic pr cision
compon nts, and high voltag
is g n rat d int rnally, do not
att mpt to disass mbl .
Do not drop monitor or door
cam ra, and avoid strong
impact.
K p away from d vic s
g n rating strong magn tic fi ld
(TV, Sp ak r, tc.) (Pictur can
b disturb d or blurr d and
br akdown can r sult)
Installation Preca tions
Monitor and cam ra must b install d away from dir ct
light and count r light.
Cam ra must b install d at a plac fr from rain.
Standard h ight of monitor must b 1,450mm~1,500mm
from ground, c nt r d around brawn tub .
Cam ra should b install d on th wall in which c m nt
is compl t ly dry.
If install d during wint r s ason at t mp ratur b low
-5, cond nsation might b g n rat d insid monitor and
cam ra du to t mp ratur diff r nc b tw n indoors
and outdoors. To pr v nt br akdown du to such
cond nsation, conn ction should b mad in 2 hours or
mor aft r installation.
Do not install monitor and cam ra in locations subj ct to
dir ct h ating as harmful gas s may subs qu ntly b
mitt d in significant amounts.
Stopping up pip as abov minimiz s
t mp ratur diff r nc b tw n indoors
and outdoors, and also liminat s
moistur and cond nsation on
door cam ra window.
Stop up P.V.C. pip using
adiabatic substanc s, to
pr v nt air circulation
Component
Monitor Acc ssori s
Scr ws for
fixing
4 x 30mm
KDP-602G Conn ctor Wir for
Ext ntion
4 x 150mm (5264-04TYPE)
Wall hang r pan l
Cam ra Acc ssori s
Monitor & Cam ra
Main body
support r
Scr w for fixing cam ra
main body support r
4 x 10mm
Scr ws for fixing cam ra
4 x 16mm
finishing rubb r
Wall hang r pan l is
pack d in th Monitor

Button
Door op ns wh n this
button is pr ss d.
Availabl only for
th door quipp d
with door op n r.
Button
To confirm visitor
without holding
th hands t
Button
To call and commu-
nicat with oth r
monitor or doorphon
PLAY
AUTO
TIMES
REC
REC
KVM-524RG Monitor
Name of each part
Hands t
To communicat with
door cam ra.
Manual/Auto r cording
Lamp
Pow r Lamp
To ch ck pow r
ON/OFF status
4 inch scr n
To id ntify visitor
Brightn ss Control
Knob
To control brightn ss
of monitor scr n
Contrast Control Knob
To control contrast of
monitor scr n.
Call Signal
Volum Control Knob
To control calling
signal volum .
Tim mod Button
To s l ct th month,
tim .. tc.
Tim s t Button
To s t up th
month, tim .. tc
Mamual R c. Button
Can r cord visitor
on purpos
Auto-R c. Button
To r cord all visitors
imag automatically
wh n you abs nt
Play Button
Can confirm r cording
imag s in ord r
KC-D20 Metal Pinhole Camera & KC-B61 Camera
C-Mic
To communicat
with Monitor
C-Mic
To communicat
with Monitor
Pow r Lamp
To ch ck pow r
ON/OFF status
Sp ak r
Wh n visitor calls,
th voic from monitor
com s out of th sp ak r.
Sp ak r
Wh n visitor calls, th
voic from monitor com s
out of th sp ak r.
Call Button
By pr ssing th button, th
r lat d hous will b call d.
Cam ra L ns
Cl ar pictur quality r aliz d
by adopting 1/3" CCD
PLAY
AUTO
TIMES
REC
REC
PLAY
AUTO
TIMES
REC
REC
Basic Installation m thod of Monitor
Wh n syst m is attach d to 1 r ctangular switch box
Standard height monitor
Wall hang r
pan l for
fixing Monitor
Scr w
Wall
Wall hang r pan l
for fixing Monitor
1 R ctangular
switch box
Standard h ight of monitor is rang d 1,450 ~ 1,500
from bottom to th c nt r of monitor scr n.
For installation, avoid th plac s wh r th r is any
xc ssiv humidity,magn tic forc , dang rous
ch micals, dir ct ray of sun, and any plac s n ar a
h at r which can caus br ak down.
Monitor Installation
(unit:mm)
Scr w
Bottom of
1 R ctangular
switch box
C nt r of monitor
KC-D20 S rface-mo nting Door Camera Installation
Aft r attach th body support r with 2 scr ws,
put th Door Cam ra into th groov s of body support r,
and th n fix it with 2 scr ws and stick th finishing mat rials.
Straight Ah ad Installation
Standard Height of Door Camera
Standard h ight of th door cam ra is 1,400mm 1,450mm from th bottom of on cam ra to th floor.
In cas that th h ight of Door cam ra xc ds th rang of min. 1,250mm1,550mm, it is impossibl to control
th scr n pictur with only th l ns angl , and th r for , b car ful of th h ight of cam ra installation.
(unit:mm)
Door camera Installation
Bottom bas of
On hall Box
Surfac mount
Flush mount

Identifying and talking to visitors
3.Aft r communication r plac hands t. How v r, if conv rsation continu mor than
3minut s, monitor scr n is turn d off automatically. And if you want to communicat
mor tim , pr ss button again.
PLAY
AUTO
TIMES
REC
REC
PLAY
AUTO
TIMES
REC
REC
PLAY
AUTO
TIMES
REC
REC
2-1 Hold hands t and id ntify visitor.
Th n, communicat with visitor. And,unl ss you r plac hands t within 3minut s, th
monitor scr n is turn d off automatically.
2-2 Wh n th hands t is h ld on and th call is mad from th cam ra, pr ss button
on th monitor. th n communicat with visitor.
2-3 Whil communicating with cam ra, if th int rnal call is mad from th xt nd d
monitor or doorphon , th b p signal sounds in 5 s c. and disconn ct d with th cam ra
automatically Th n you can communicat with xt nd d monitor or doorphon aft r
pr ssing button on th monitor.
1.Call signal rings from th monitor, whil scr n is
turn d on and visitor is app ar d automatically.
Wh n visitor pr ss s th call
button of door cam ra.
How to operate (Instr ction for operating)
Time Setting
1. Turn on th monitor’s scr n as pushing cam ra1 or cam ra 2 button
2. Pr ss “Tim Mod ” (for 2 s conds), th n app ars “Tim Mod ” at th c nt r of monitor’s scr n
and “Minut ” is on th blink.
3. Chang th numb r as pushing “Tim s t”button & S l ct want d numb r with “Tim Mod ”
button. As lik abov m thod, s t tim & dat continuously (minut s -> tim -> dat -> month ->y ar).
4.‘REC’ button :Down-Count , “ Tim s t” button:Up -Count
Man al Record & A to Record
Play Recorded Image
1. Man al Record : Pl as choos monitor imag as pushing“Cam ra 1” or ‘Cam ra 2’ button.
And th n th imag will b r cord d wh n you push ‘REC’ button.
2. A to Record : If you push ‘AUTO-REC’ button, th gr n LED lamp will turn on and th
imag s will b r cord d with blinking r d color LED automatically wh n push cam ra’s call button.
(Auto-r cording. is not availabl within 30 s conds aft r r cord d)
If you push ‘Play’ button , you can find on cut imag with tim in ord r from th lat st imag s.
It’s not availabl with auto r -play for all imag s by on touch.
In th cas of full r cord d imag s, it will b r mov d from th old st imag in ord r.
Opening front door a tomatically
Aft r communication with visitor, pr ss door k y button. Th n, th door is op n d automatically.
REC
TIMES
AUTO
REC
PLAY
1. For this purpos , automatic AC doorlock should b first
install d on th door and th n conn ct d with vid o doorphon
2. Aft r communication with visitor, pr ss button,
and th door is automatically op n d
Checking o t door side - Don’t need to hold handset
Identifying visitors
1. If pr ss button on th monitor, scr n is turn d on
automatically. And, you can ch ck out door sid .
2. Aft r ch cking, scr n is turn d off as pr ssing button again.
3. Aft r int rnal call is mad , th monitoring is not availall for 60 s c.
4. Monitoring wh n 2 cam ras ar conn ct d.
-Using hans t
If th hands t is pick d up, pr ss button shortly in ord r to
chang th cam ra.
-Without using hands t
Cam ra 1s l ction : pr ss button shortly
Cam ra 2s l ction : pr ss button a littl long r, till scr n is on.
1. If pr ss call button on th door cam ra, th scr n is turn d
on automatically. And, you can ch ck out door sid .
2. At this tim , you can asily id ntify visitors without lifting
hands t. ( Aft r 60s c., Monitor scr n is turn d off
automatically)
Opening door a tomatically (Regardless of handset stat s)
Internal call and intercom f nction
PLAY
AUTO
TIMES
REC
REC
PLAY
AUTO
TIMES
REC
REC
PLAY
AUTO
TIMES
REC
REC
PLAY
AUTO
TIMES
REC
REC
PLAY
AUTO
TIMES
REC
REC
PLAY
AUTO
TIMES
REC
REC
PLAY
AUTO
TIMES
REC
REC
Wh n additional monitor and door phon ar conn ct d to th monitor.
as doorphon has no s curity function, th conv rsation b tw n 2 monitors
can b h ard from th xt nd d doorphon without notic .
Ca tion
Hold on hands t and pr ss button on th monitor.
Th n th call signal sounds from th xt nd d monitor or doorphon .
And if it is answ r d from th xt nd d monitor or doorphon you can
communicat .
In cas th hands t of th xt nd d monitor is h ld on, and button
on th xt nd d monitor is pr ss d, you can communicat .
During int rnal communication, if th call is mad from th cam ra, th b p signal sounds in a s c. and th
call signal from th cam ra sounds.
At sam tim th monitor is disconn ct d automatically with xt nd d monitor or doorphon
Th n if you pr ss button on th monitor, you can talk with visitor
AC or DC
Video Doorphone Wiring Diagram 1 Video Doorphone Wiring Diagram 2
Caution for wiring
Availabl vid o doorphon wiring with TIV O.65mm is l ss than 50m in l ngth.
Conn cting wiring b tw n monitor and door cam ra should not b install d
n ar oth r l ctrical cabl , nor b horizontal.
(In such cas , cl ar pictur can not b xp ct d du to int rruption by l ctrical nois )
Transmission 4-wir d Wiring
TIV0.5: Max. 20m
Cabl Distanc TIV0.6: Max. 30m
TIV0.65: Max. 50m
Coaxial cabl : Max. 100m
In cas , 2 cam ra ar us d, t rminal GND(Y) of ach cam ra should b conn ct d
to th t rminal Y1 of th first monitor.
For th dott d lin in TIV 1.6 must b us d
For th dott d lin in TIV 0.65must b us d. (Max. cabl distanc 50m)
Transmission 4-wir d Wiring
TIV0.5: Max. 20m
Cabl Distanc TIV0.6: Max. 30m
TIV0.65: Max. 50m
Coaxial cabl : Max. 100m
For th dott d lin in TIV 1.6 must b us d
For th dott d lin in TIV 0.65must b us d.
(Max. cabl distanc 50m)
In cas of UPT cabl wiring, pl as r f r to th wiring and this wiring is r comm nd d.
pl as avoid wiring R(audio)and W(vid o) in a twist d cabl .
Table of contents
Other KOCOM Intercom System manuals

KOCOM
KOCOM KIP-605PG Instruction Manual

KOCOM
KOCOM KVM-524GS Manual

KOCOM
KOCOM KIP-501PM Instruction Manual

KOCOM
KOCOM KLP-100 Instruction Manual

KOCOM
KOCOM KLP-420 series User manual

KOCOM
KOCOM KOCKCVS701IP2W User manual

KOCOM
KOCOM DS-4M User manual

KOCOM
KOCOM KLP-420 series Assembly instructions

KOCOM
KOCOM KCV-D801R Manual

KOCOM
KOCOM KDP-601A Instruction Manual

KOCOM
KOCOM KCV-340 Manual

KOCOM
KOCOM KC-MC35 User manual

KOCOM
KOCOM KDP-601A User manual

KOCOM
KOCOM KIP-612ML Instruction Manual

KOCOM
KOCOM KDP-602A Instruction Manual

KOCOM
KOCOM KDP-602GD User manual

KOCOM
KOCOM KIP-304 User manual

KOCOM
KOCOM KCV-A374SD User manual

KOCOM
KOCOM KIP-620ML User manual

KOCOM
KOCOM KDP-501A Instruction Manual