manuals.online logo
Brands
  1. Home
  2. •
  3. Brands
  4. •
  5. Kodak
  6. •
  7. Printer
  8. •
  9. Kodak Diconix 150 Parallel User manual

Kodak Diconix 150 Parallel User manual

OSE Kodak - Diconix 150 Parallel/150 Serial
Print method . . . . . . . . . . . . . 12-pin drop on demand plain paper
thermal inkjet, AC or battery powered
Print speed . . . . . . . . . . . . . . 150 cps draft, 50 cps NLQ
Print width. . . . . . . . . . . . . . . 7.1 inches (177 mm)
Resolution . . . . . . . . . . . . . . . 96 x 80 draft, 96 x 160 NLQ
Fonts . . . . . . . . . . . . . . . . . . . 152 character ASCII italics, bold,
enlarged, proportional, condensed;
50 coded graphics characters; 33
International character sets
Paper handling . . . . . . . . . . . Single sheet, fan-fold, and pin-feed
continuous forms; 8 1/2 inch wide
paper
Interfaces. . . . . . . . . . . . . . . . CENTRONICS parallel - Diconix 150
Parallel; RS-232C serial - Diconix 150
Serial
Emulations . . . . . . . . . . . . . . Epson and IBM Proprinter (with some
exceptions)
Print head life . . . . . . . . . . . . 500 pages of text
Control Panel
Power light - Red indicates power on. Flashing indicates batteries are
low.
Paper Empty light - Red indicates out of paper. Flashing indicates an
error condition.
On Line light - Green indicates online condition.
On Line key - Toggles the printer between online andoffline.Also will
recover some error conditions.
Line Feed key - Offline, press once to move forward one line. Hold to
continue advance. Hold in conjunction with Form Feed key to
reverse paper movement. Online, press to select draft print mode.
Online, press in conjunction with Form Feed key to select script font
(parallel printer), or condensed font (serial printer). Hold the Line
Feed key while turning on printer power for envelope printing mode.
Form Feed key - Offline, press to advance to top-of-form. Online,
press to select NLQ print mode.
Power switch - Slide to the right to apply power to the printer, left for
off.
Self-test
With paper installed, hold Form Feed key, while turning on printer
power. Press On Line key to pause self-test, press On Line key
again to resume test. Turn the printer power off to terminate the test.
Printer Configuration
The printer may be configured for print mode, using the control panel
keys.
Line Feed key
1. Online, press to select draft print mode.
2. Online, press in conjunction with Form Feed key to select script
font (parallel printer), or condensed font (serial printer).
3. Hold the Line Feed key while turning on printer power for
envelope printing mode.
Form Feed key - Online, press to select NLQ print mode.
DIP Switches
The configuration DIP switches are located under the top cover on
the back side of the carriage opening.
Switch Function OFF ON
SW1 CR CR only * CR + LF
SW2 LF CR + LF * LF only
SW3 Perf skip No skip * 1 inch skip
SW4 Page length 11 inch * 12 inch
SW5 Font Draft * NLQ
SW6 Emulation Epson * IBM
SW10 Not used
Character Set Selection
Country SW7 SW8 SW9
USA * OFF OFF OFF
England ON ON OFF
Sweden ON OFF ON
Italy OFF ON ON
France ON OFF OFF
Germany OFF ON OFF
Denmark OFF OFF ON
Spain ON ON ON
* Indicates default setting
KO-2
Kodak - Diconix 150 Parallel/150 Serial OSE
Serial Printer DIP Switch Settings
The Serial Printer DIP switches are located under the top cover on
the right side of the carriage opening.
Baud Rate Selection
Baud Rate Stop bit SW1 SW2 SW3
9600 * 1 OFF OFF OFF
4800 1 OFF OFF ON
2400 1 OFF ON OFF
1200 1 OFF ON ON
600 1 ON OFF OFF
300 1 ON OFF ON
300 2 ON ON OFF
110 2 ON ON ON
Data Bits
Switch Function OFF ON
SW4 Data bits 7 bits 8 bits
Parity
Parity SW5 SW6
No Parity * OFF OFF
Even Parity OFF ON
Odd Parity ON OFF
Data Protocol
Protocol SW7 SW8
RDY/BSY * OFF OFF
XON/XOFF OFF ON
ETX/ACK ON OFF
Handshake Disable
Handshake SW9 SW10 SW11
Carrier Detect (CD) ON OFF OFF
Clear to Send (CTS) OFF ON OFF
Data Set Ready (DSR) OFF OFF ON
*Indicates default settings
Error Codes
Power light flashing - Indicates batteries are low.
Paper Empty light flashing - Indicates paper empty or print head
carriage obstruction. Check paper. Clear any print head obstruction.
On Line light flashing - Indicates serial interface error.
Critical Adjustments
Head Installation
1. Turn printer power off. Disconnect the AC adapter if it is attached
to the printer.
2. Open the printer top cover. The print head will be parked at the left
side of the carriage travel.
3. Remove and replace the absorbent pad inserted in the print head
park absorber clip.
4. Drop the print head latch lever to allow removal of the old print
head.
5. Insert the new head and raise the latch to secure the print head in
place.
Battery Installation
1. Turn printer power off. Disconnect the AC adapter if it is attached
to the printer.
2. Open the printer top cover. Move the bail arm away from the
platen.
3. Rotate the platen until the battery compartment is aligned between
rear cover and paper guide.
4. Open the battery cover and replace old batteries with five "C" size,
nickel cadmium, rechargeable batteries. Refer to the diagram in the
battery compartment for polarity placement.
Common Problems and Fixes
Carriage moves, but printer does not print
1. Check print head installation.
2. Lock carriage latch.
3. Clean carriage connection.
4. Replace print head cartridge.
Poor print quality - Same as above.
Print head leaves blot of ink - Install new blotter pad.
Misc. erratic performance - Check AC adapter and AC adapter
connection.
Recharging batteries:
1. Power light flashes when batteries are low. Two pages may be
printed after the Power light begins to flash.
2. With power off, connect AC adapter. Turn on power while pressing
On Line, Line Feed and Form Feed keys. Continue to hold the
keys until the Paper Empty light and On Line light flash.
3. Complete recharging takes approximately ten hours. Printing may
interrupt the charging process by pressing the On Line key.
Re-enter the charge mode by repeating step 2.
4. When all lights are not blinking and the Power light is on, charging
process is complete.
Note: Recharging will not resume automatically if power is
interrupted during charging process.
Field Replaceable Units
There are no field replaceable units.
Note Be sure to print a menu/configuration list before
swapping the printer.
IBM/TSS Internal use only
© Copyright International Business Machines Corporation August 1995.
All rights reserved.
Printer IBM P/N IBM machine type
Diconix 150 Parallel 11F9442 1514-D01
Diconix 150 Serial 31F0242 1514-D02
Tech Support 800-877-7763
This manual suits for next models

1

Other Kodak Printer manuals

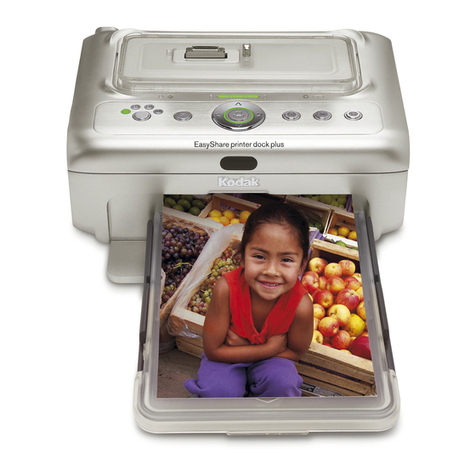
Kodak EasyShare 300 User manual

Kodak

Kodak EasyShare 300 User manual

Kodak Versamark DS5600 Series Manual

Kodak

Kodak Versamark DS5600 Series Manual

Kodak dryview 8300 User manual

Kodak

Kodak dryview 8300 User manual

Kodak Photo Printer 6850 Specification sheet

Kodak

Kodak Photo Printer 6850 Specification sheet

Kodak Magnus VLF Q2400 User manual

Kodak

Kodak Magnus VLF Q2400 User manual

Kodak 8800 User manual

Kodak

Kodak 8800 User manual

Kodak verite 55 plus Specification sheet

Kodak

Kodak verite 55 plus Specification sheet

Kodak 305 User manual

Kodak

Kodak 305 User manual

Kodak Photo Printer 6850 User manual

Kodak

Kodak Photo Printer 6850 User manual

Kodak 8670 PS Configuration guide

Kodak

Kodak 8670 PS Configuration guide

Kodak 605 User manual

Kodak

Kodak 605 User manual

Kodak Versamark DS9100 Guide

Kodak

Kodak Versamark DS9100 Guide

Kodak XLS 8400 PS User manual

Kodak

Kodak XLS 8400 PS User manual

Kodak VERITE 64 series Service manual

Kodak

Kodak VERITE 64 series Service manual

Kodak 8670 PS Manual

Kodak

Kodak 8670 PS Manual

Kodak verite 50 eco User manual

Kodak

Kodak verite 50 eco User manual

Kodak verite 55 plus Service manual

Kodak

Kodak verite 55 plus Service manual

Kodak LED II PRINTER 20R - OPERATOR'S GUIDE Manual

Kodak

Kodak LED II PRINTER 20R - OPERATOR'S GUIDE Manual

Kodak Versamark DS9100 Guide

Kodak

Kodak Versamark DS9100 Guide

Kodak DryView 6800 Setup guide

Kodak

Kodak DryView 6800 Setup guide

Kodak 8660 - COLOR CONNECTOR GUIDE User manual

Kodak

Kodak 8660 - COLOR CONNECTOR GUIDE User manual

Kodak JF253UC Operating and maintenance instructions

Kodak

Kodak JF253UC Operating and maintenance instructions

Kodak D4600 User manual

Kodak

Kodak D4600 User manual

Kodak Color Ease PS Printer User manual

Kodak

Kodak Color Ease PS Printer User manual

Popular Printer manuals by other brands

Oki T400 user guide

Oki

Oki T400 user guide

Canon PIXMA PRO-1 Series Getting started

Canon

Canon PIXMA PRO-1 Series Getting started

Epson M1120 user guide

Epson

Epson M1120 user guide

TransAct POSJET 1500 Spare parts

TransAct

TransAct POSJET 1500 Spare parts

Azon DTS quick start guide

Azon

Azon DTS quick start guide

Canon MF275dw Setup guide

Canon

Canon MF275dw Setup guide

Canon iP6700D - PIXMA Color Inkjet Printer Specifications

Canon

Canon iP6700D - PIXMA Color Inkjet Printer Specifications

Epson Expression Photo XP-750 Basic guide

Epson

Epson Expression Photo XP-750 Basic guide

Tektronix Phaser 780 Color supplementary guide

Tektronix

Tektronix Phaser 780 Color supplementary guide

Citizen CBM-262 Type II Command reference guide

Citizen

Citizen CBM-262 Type II Command reference guide

Godex EZ-4206 user manual

Godex

Godex EZ-4206 user manual

IBM RS/6000 44P Series 270 user guide

IBM

IBM RS/6000 44P Series 270 user guide

Xerox Phaser 6200N specification

Xerox

Xerox Phaser 6200N specification

Samsung ML-2165W Remanufacturing instructions

Samsung

Samsung ML-2165W Remanufacturing instructions

Canon PIXMA MX340 Series Simplified service manual

Canon

Canon PIXMA MX340 Series Simplified service manual

MIMAKI JV3 Series Operation manual

MIMAKI

MIMAKI JV3 Series Operation manual

Digital Graphic Printer UP-D898MD Before using

Digital Graphic Printer

Digital Graphic Printer UP-D898MD Before using

Fujitsu DL3300 user manual

Fujitsu

Fujitsu DL3300 user manual

manuals.online logo
manuals.online logoBrands
  • About & Mission
  • Contact us
  • Privacy Policy
  • Terms and Conditions

Copyright 2025 Manuals.Online. All Rights Reserved.