Clock Adjust ent
Make sure your GMT setting matches your location (default is GMT+10). From within menu 6 in
the settings menu, adjust the values to suit whatever time zone you are in locally.
HUD adjustment
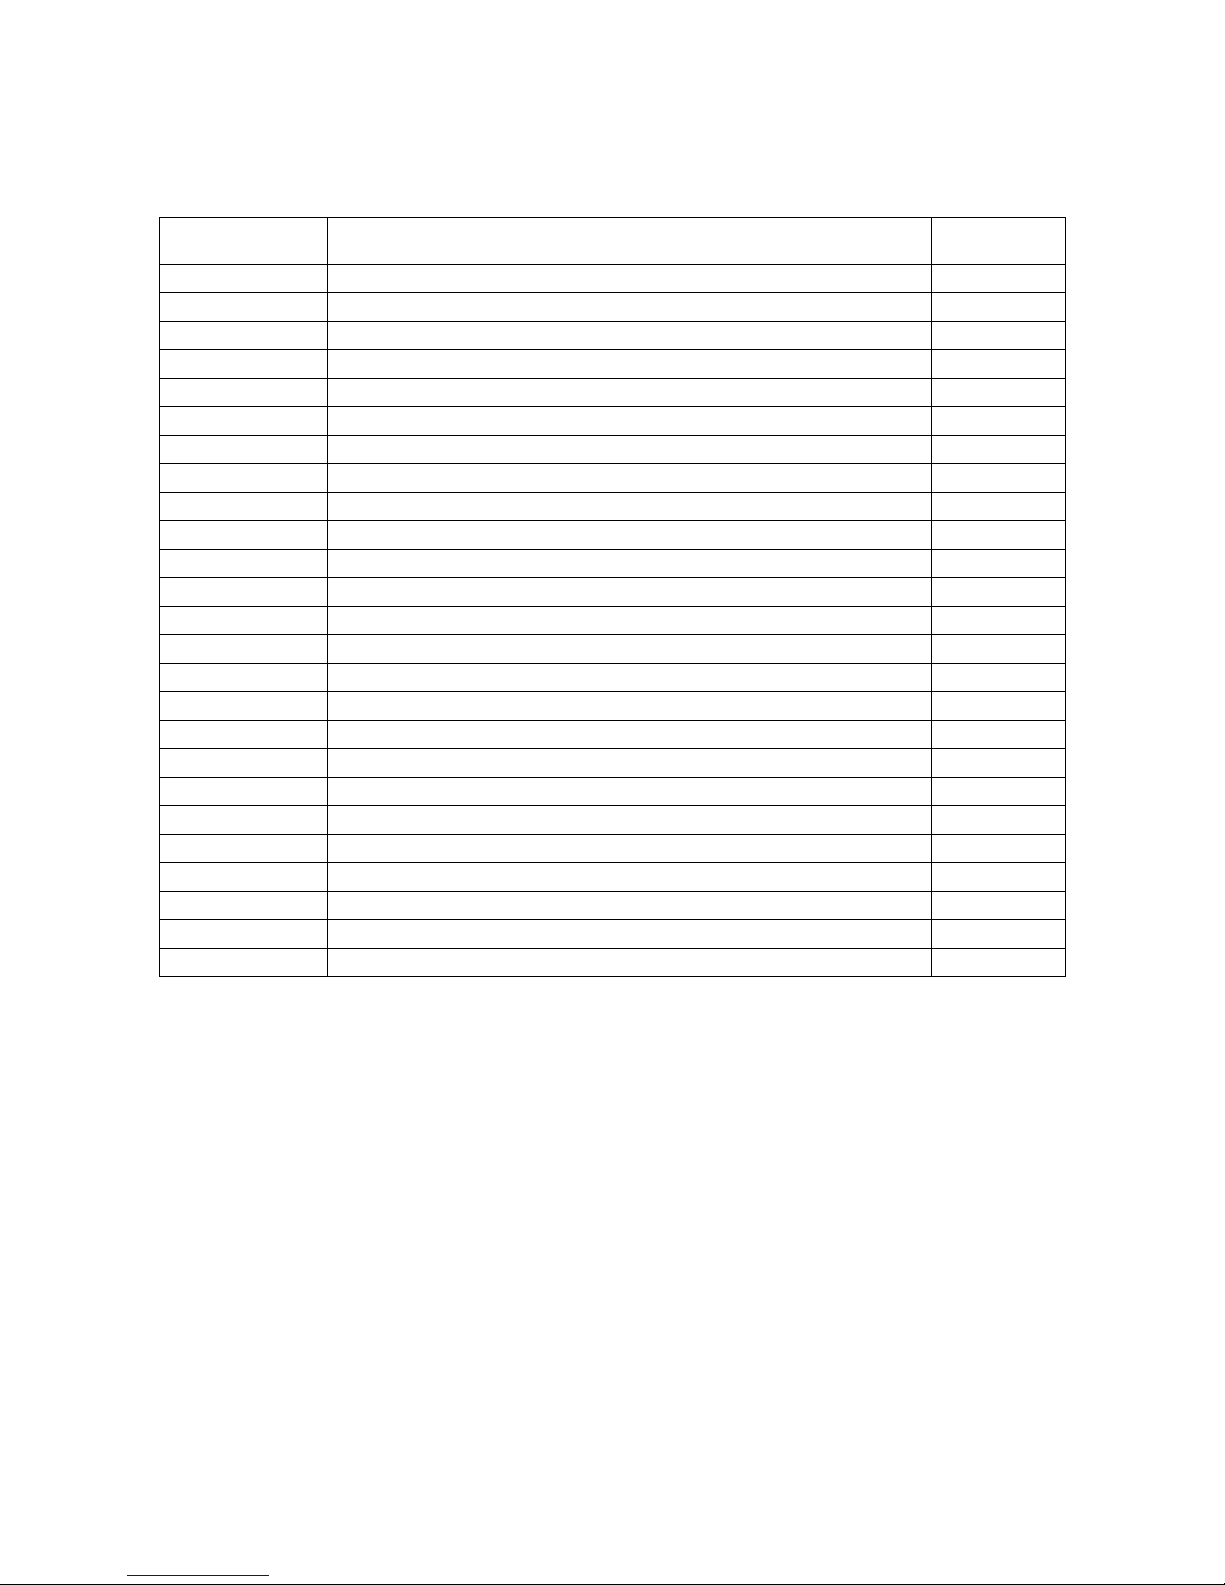
Code
Region GMT
0 United Kingdom, Iceland, Ireland, Portugal UTC
1 Norway, Sweden, Denmark, Poland, Germany, France, Netherlands, Spain, Italy GMT+1
2 Finland, Russia, Ukraine, Romania, Turkey, Israel, Egypt, South frica GMT+2
3 Saudi rabia, Bahrain, Kenya, Iran,Belarus GMT+3
4 Mauritius, United rab Emirates, fghanistan, Seychelles GMT+4
5 Pakistan, Turkmenistan, Sri Lanka, India,Nepal GMT+5
6 Bangladesh, Kazakhstan, Bhutan GMT+6
7 Vietnam, Laos, Cambodia, Thailand, Indonesia GMT+7
8 China, Malaysia, Singapore, Philippines, Hong Kong, Taiwan, Macau GMT+8
9 Japan,Korea GMT+9
10 ustralia, Guam GMT+10
11 Solomon Islands, Vanuatu GMT+11
12 New Zealand, Fiji GMT+12
-1 zores, Cape Verde GMT-1
-2 Mid- tlantic GMT-2
-3 Brazil, rgentina, Uruguay,Chile GMT-3
-4 Venezuela, Bolivia, Paraguay GMT-4
-5 Canada, Panama, Cuba, New York GMT-5
-6 Mexico GMT-6
-7 Salt Lake City GMT-7
-8 California, San Francisco GMT-8
-9 East laska GMT-9
-10 Hawaii GMT-10
-11 Samoa, Midway GMT-11
-12 Eniwetok Island GMT-12
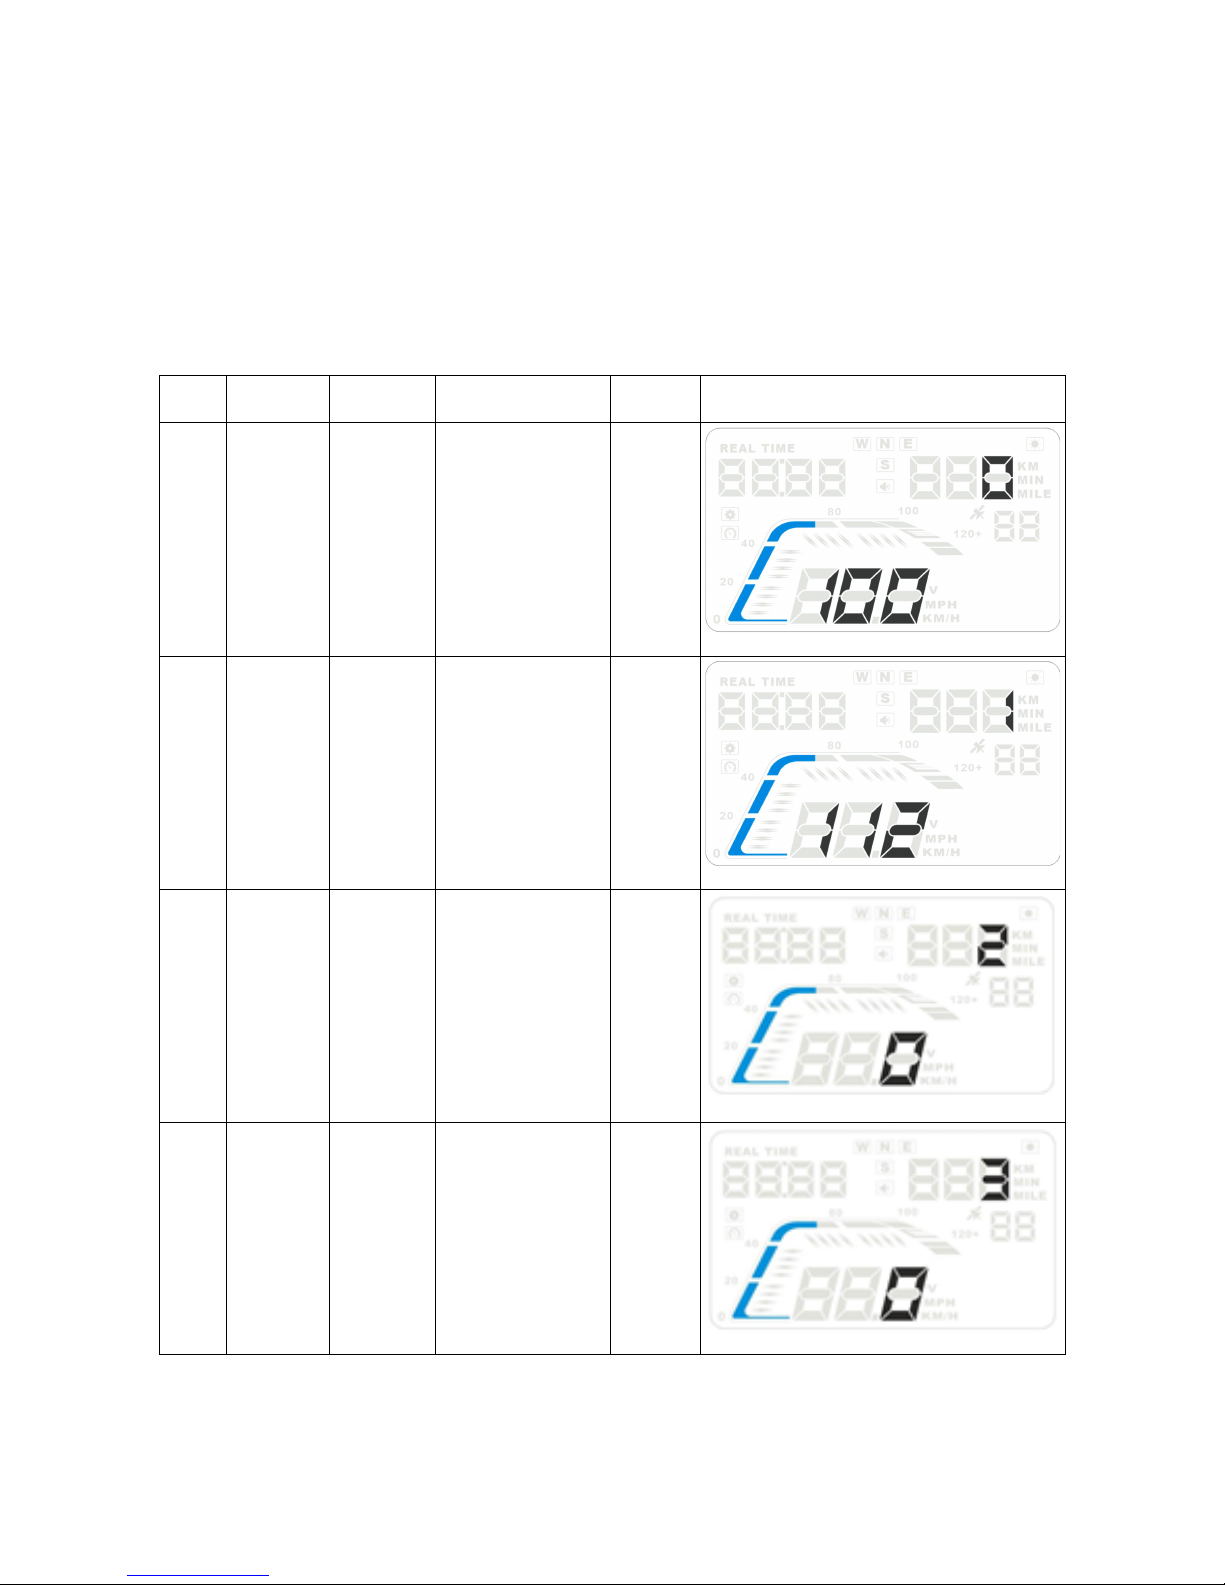
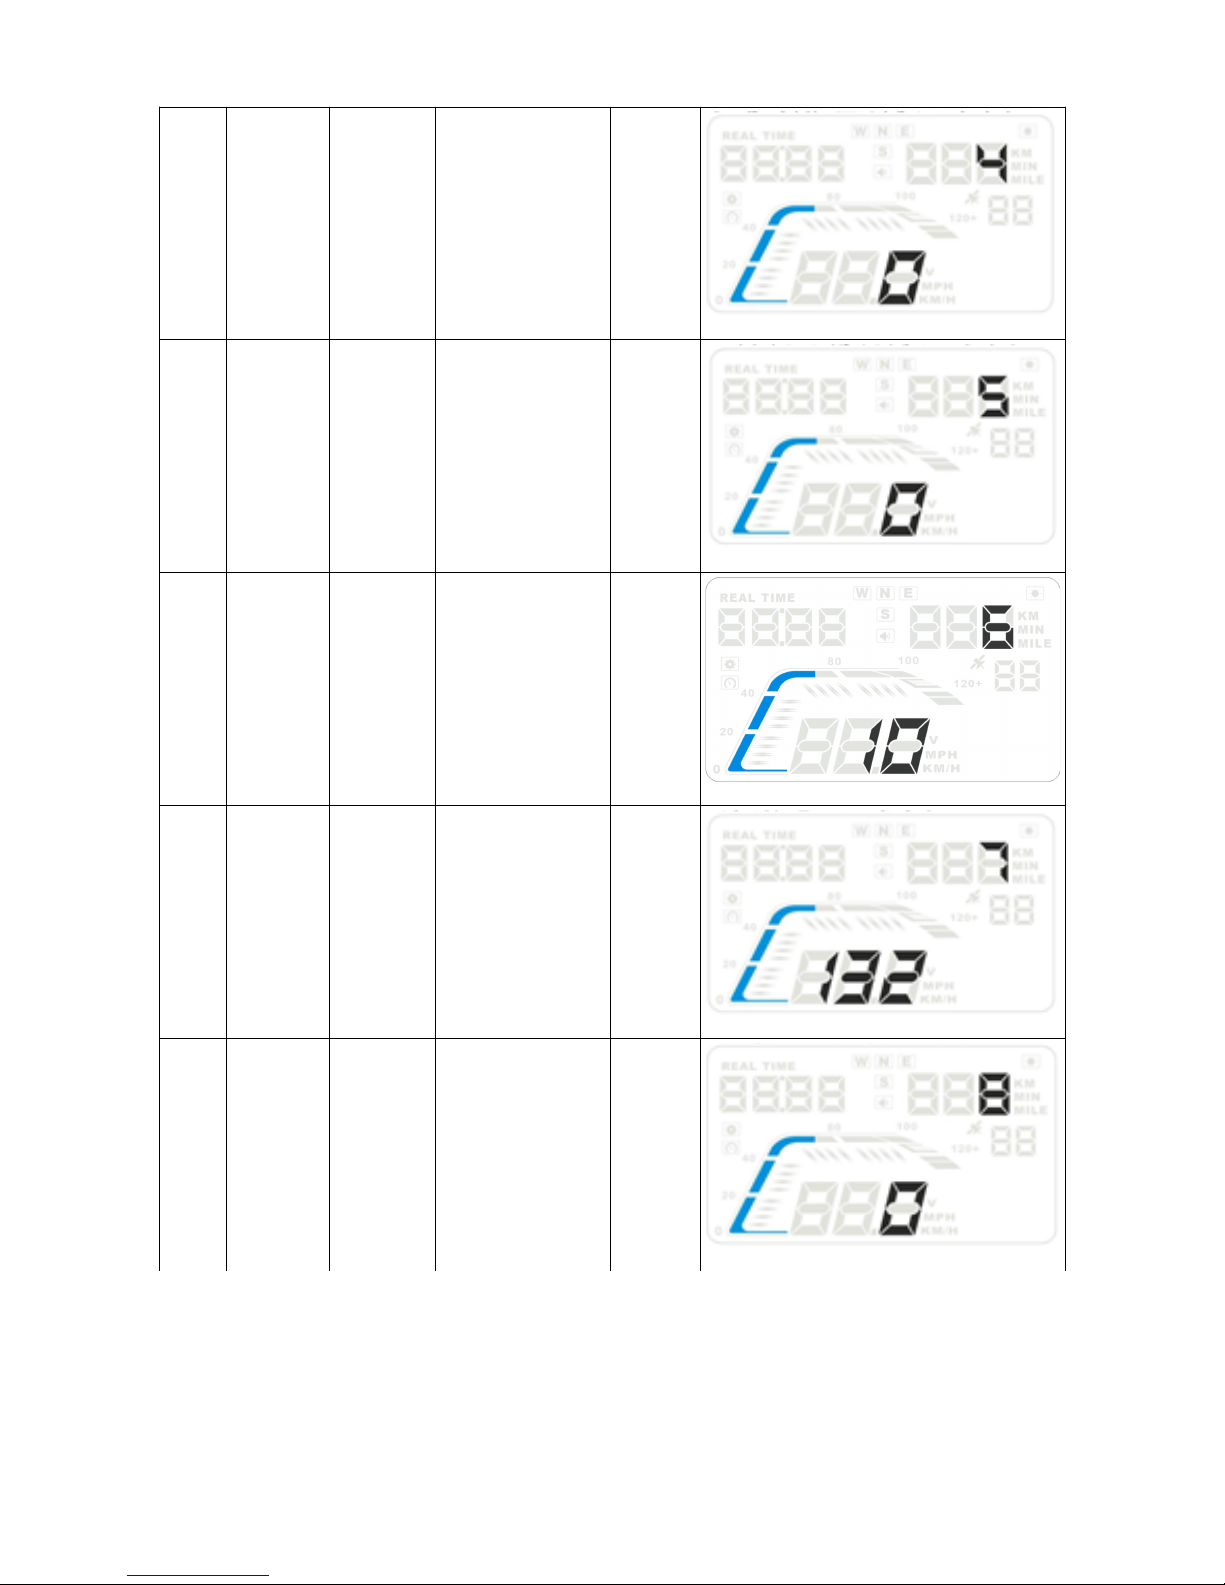
Restore to Factory Settings
When the HUD is powered on, press and hold the button for 5 seconds to enter the menu
settings, then press it until you get to menu item 8. Pull the button down to option 1, then hold
the button for 5 seconds to save and exit back to the display interface.
6