Kogan KAMN24FG6LA User manual

24" FHD GAMING MONITOR
1920 x 1080, 165Hz
KAMN24FG6LA

2
Safety & Warnings 3
Components 4
Overview 5
Stand Assembly 6
VESA Mount 8
Connectivity 9
Operation 11
Cleaning & Care 17
Specifications 17
Notes 19

3
Ensure to read all instructions and warnings in this user guide prior to first use. Retain this
user for future reference.
•Do not position the monitor on unstable surfaces. If the monitor falls, it may lead to
damage and injuries to people around its vicinity.
•Do not place the monitor near heat sources (for example, heaters, stoves, fireplaces).
•Do not use the monitor in areas lacking adequate ventilation.
•Do not open the back panel of the monitor as it contains a high-voltage current even
when unplugged.
•Do not place heavy objects on the monitor, its power cord, or any other connected
cable.
•The back of this monitor is designed with ventilation holes. Do not cover or block them
as this may cause overheating and damage.
•Do not insert or spray anything into the vents of this monitor.
•Unplug the monitor if it will not be used for an extended period.
•Ensure the monitor is unplugged before cleaning.
•Do not use cleaning alcohol, ammonia-based liquids, or other harsh cleaners when
cleaning the monitor.
The terms HDMI and HDMI High-Definition Multimedia Interface,
and the HDMI Logo are trademarks or registered trademarks of
HDMI Licensing Administrator, Inc. in the United States, and other
countries.
SAFETY & WARNINGS

4
AMonitor (x1)
BStand stem (x1)
CStand base (x1)
D
Screw (x7)
E
Mount adapter (x1)
F
DisplayPort cable (x1)
GPower adapter (x1)
HUser guide (x1)
COMPONENTS

5
Ports
1 Up button
2 Power button
3 Left button
4 Down button
5 Right button
6 HDMI port
7 DisplayPort port
8 Audio output
9 Power port
OVERVIEW

6
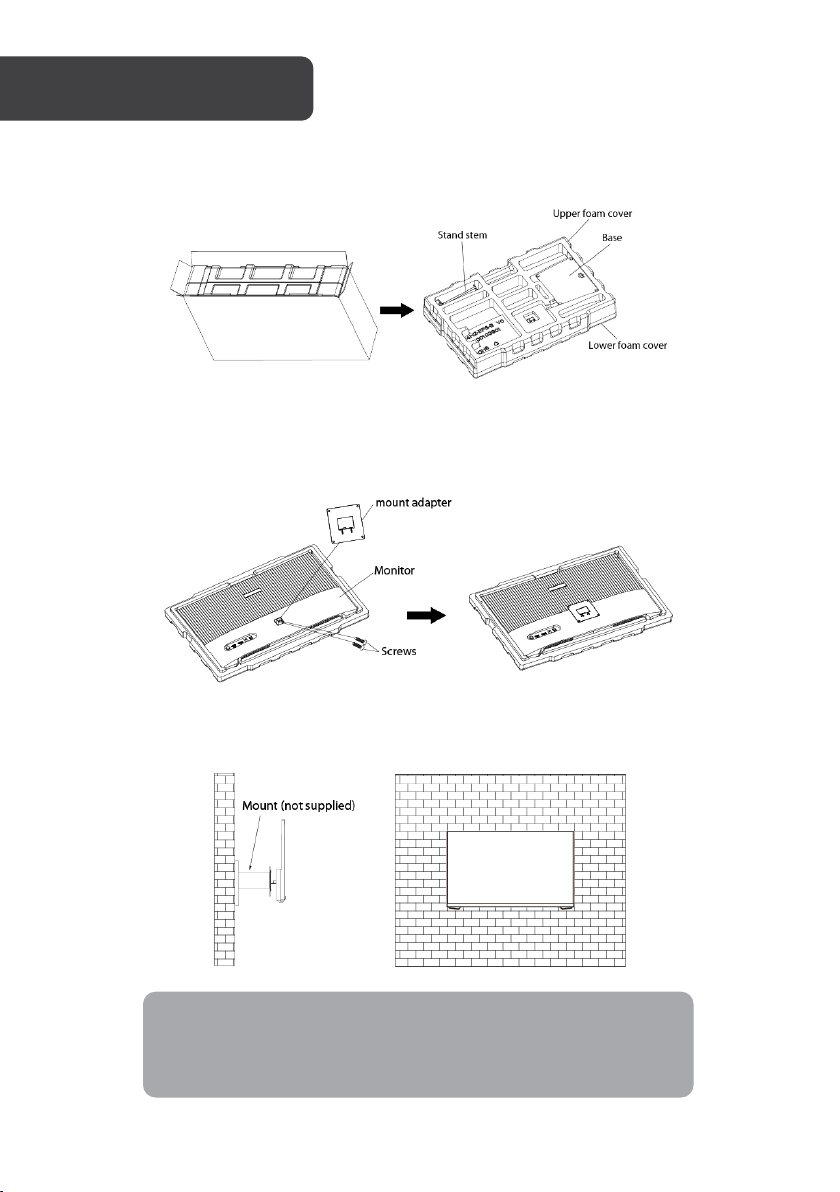
1. Open the package and remove the foam to take out the stand stem (B) and stand
base (C). Place the components (B, C) on a flat surface. Ensure all components are
present before disposing of any packaging.
2.Carefully remove the monitor (A) and place it into the lower foam cover.
3.Use a screwdriver (not supplied) to install the stand stem (B) onto the back of the
monitor (A) with two screws (D).
STAND ASSEMBLY

7
4.Align the stand base (C) with the bottom of the stand stem (B). Use a screwdriver to
secure the stand base (C) with two screws (D).
5.Use both hands to place the monitor (A) upright.
Notes:
•There are x7 screws provided in this package – x4 are required if using the stand,
x2 are required if using a VESA mount, x1 is a spare.
•If you would like to switch from using the stand to using a VESA mount to hold
the monitor in the future, there are sufficient spare screws to use.
8
1. Open the package and remove the foam to take out the stand stem (B) and stand
base (C). Place the components (B, C) on a flat surface.
2.Carefully remove the monitor (A) and place it into the lower foam cover. Take out the
mount adapter (E) and using a screwdriver, secure the mount adapter (E) to the back
of the monitor (A) with two screws (D).
3.The monitor is now ready for mounting. Assemble the mount as detailed by the
instructions provided.
VESA MOUNT
Notes:
•The mounting hole distance for this monitor is 75 x 75mm.
•VESA mount and mounting accessories are not included.

9
Power adapter
Connect one end of the power adapter into the power port on the monitor, then connect the
other end into a power socket.
HDMI
For the monitor to receive HDMI signals from the computer, plug one end of an HDMI cable
(not included) into the HDMI port on the monitor. Connect the other end into a computer’s
HDMI output.
CONNECTIVITY
HDMI OUTPUT
10
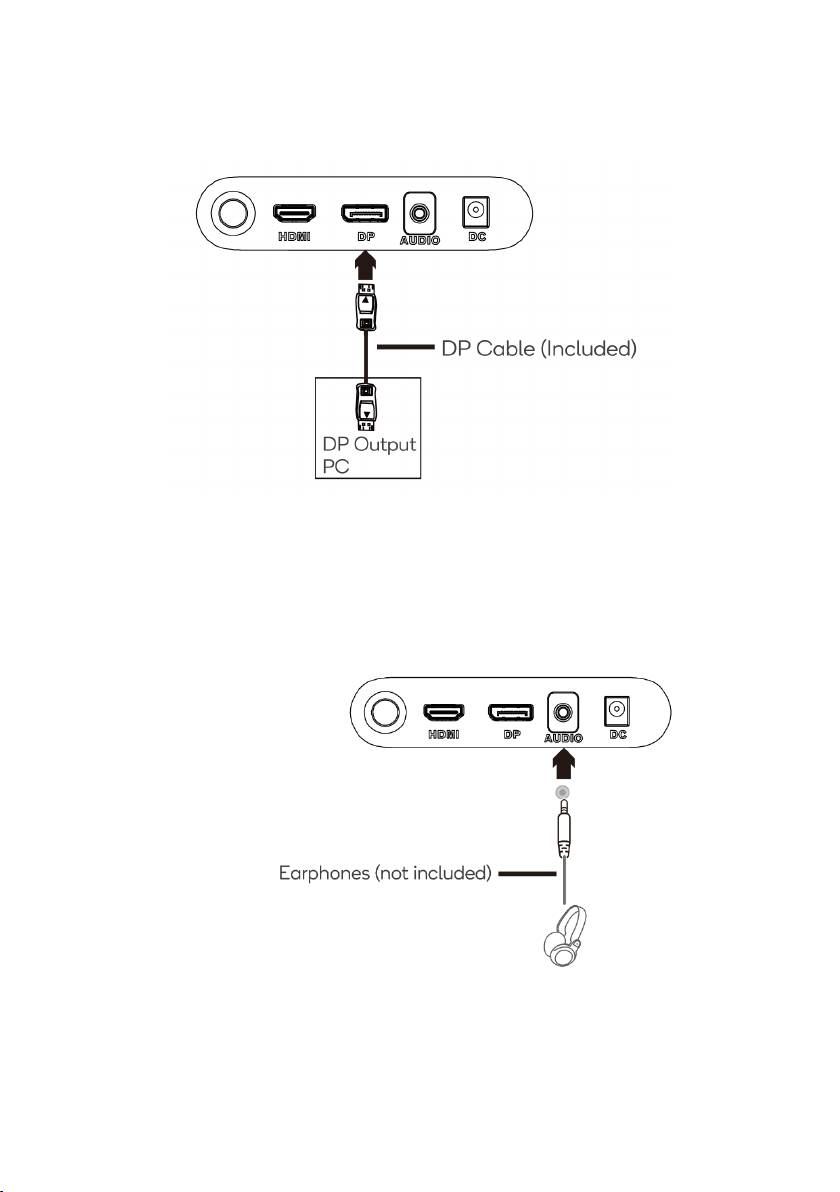
DisplayPort
For the monitor to receive DisplayPort signals from the computer, connect one end of the
DisplayPort cable into the DisplayPort port on the monitor. Connect the other end into the
DisplayPort output on the computer.
Earphones
Connect earphones (not included) into the audio output port on the monitor.
If your earphones are connected to the monitor and there are other audio devices plugged
into the computer, the audio devices will produce no sound.
Table of contents
Other Kogan Monitor manuals

Kogan
Kogan KAMN15TFULA User manual

Kogan
Kogan KAMN40XQUCLA User manual

Kogan
Kogan KAMN22FNSA User manual

Kogan
Kogan KAMN27RQ1LA User manual

Kogan
Kogan KAMN34RQUCJA User manual

Kogan
Kogan KAMN27UHFTA User manual

Kogan
Kogan KAMN24FG6QA User manual

Kogan
Kogan FreeSync KAMN24FLSB User manual

Kogan
Kogan KAMN32F16LC User manual

Kogan
Kogan KAMN21F7VA User manual

Kogan
Kogan KALED28UHDA User manual

Kogan
Kogan KALED27MONSC User manual

Kogan
Kogan KAMN27LSC User manual

Kogan
Kogan KALED24MONCA User manual

Kogan
Kogan KAMN44UWCLA User manual

Kogan
Kogan KAMN34F1QULA User manual

Kogan
Kogan KAMN34FXQULB User manual

Kogan
Kogan KAMN28UHFSB User manual

Kogan
Kogan KAMN32RQ1LA User manual

Kogan
Kogan KALED27MONC User manual


