manuals.online logo
Brands
  1. Home
  2. •
  3. Brands
  4. •
  5. Kohler
  6. •
  7. Control Unit
  8. •
  9. Kohler 880A User manual

Kohler 880A User manual

This manual suits for next models

3

Other Kohler Control Unit manuals

Kohler K-19537P User manual

Kohler

Kohler K-19537P User manual

Kohler K-10673 Operating manual

Kohler

Kohler K-10673 Operating manual

Kohler 5-10EKD User manual

Kohler

Kohler 5-10EKD User manual

Kohler K-400 User manual

Kohler

Kohler K-400 User manual
Kohler K-308 User manual

Kohler

Kohler K-308 User manual

Kohler K-304 Assembly instructions

Kohler

Kohler K-304 Assembly instructions

Kohler K-528 User manual

Kohler

Kohler K-528 User manual

Kohler TAUT 73193T-4CD User manual

Kohler

Kohler TAUT 73193T-4CD User manual

Kohler K-402 Assembly instructions

Kohler

Kohler K-402 Assembly instructions

Kohler BEAM K-77691K-G User manual

Kohler

Kohler BEAM K-77691K-G User manual

Kohler K-10956 Operating manual

Kohler

Kohler K-10956 Operating manual

Kohler 1216612 User manual

Kohler

Kohler 1216612 User manual
Kohler K-682 User manual

Kohler

Kohler K-682 User manual

Kohler K-10675 User manual

Kohler

Kohler K-10675 User manual

Kohler K-407 User manual

Kohler

Kohler K-407 User manual

Kohler rada VZ1 10 User manual

Kohler

Kohler rada VZ1 10 User manual

Kohler 28138T User manual

Kohler

Kohler 28138T User manual

Kohler K-T10669 Assembly instructions

Kohler

Kohler K-T10669 Assembly instructions

Kohler DTV+ Assembly instructions

Kohler

Kohler DTV+ Assembly instructions

Kohler K-10675 Operating manual

Kohler

Kohler K-10675 Operating manual

Kohler K-687 Assembly instructions

Kohler

Kohler K-687 Assembly instructions

Kohler K-528 User manual

Kohler

Kohler K-528 User manual

Kohler K-5557 Assembly instructions

Kohler

Kohler K-5557 Assembly instructions

Kohler K-2975 User manual

Kohler

Kohler K-2975 User manual

Popular Control Unit manuals by other brands

Seitz 14A80 user manual

Seitz

Seitz 14A80 user manual

Wilo RS485 Installation and operating instructions

Wilo

Wilo RS485 Installation and operating instructions

Becker CentralControl CC41 Commissioning Instruction

Becker

Becker CentralControl CC41 Commissioning Instruction

SICK CDB650 operating instructions

SICK

SICK CDB650 operating instructions

Panduit NetKey NKP5E88M Series installation instructions

Panduit

Panduit NetKey NKP5E88M Series installation instructions

MX Options Concentric Petite Fitting instructions

MX

MX Options Concentric Petite Fitting instructions

Clean Water Systems Fleck 2510 Installation & start?up guide

Clean Water Systems

Clean Water Systems Fleck 2510 Installation & start?up guide

Fairchild FSB44104A user guide

Fairchild

Fairchild FSB44104A user guide

LEGRAND Wattstopper LMIN-104 installation instructions

LEGRAND

LEGRAND Wattstopper LMIN-104 installation instructions

PMK ATT10BNCS instruction manual

PMK

PMK ATT10BNCS instruction manual

Tektronix TDS3FFT user manual

Tektronix

Tektronix TDS3FFT user manual

Woodward easYgen Technical manual

Woodward

Woodward easYgen Technical manual

Balluff BNI EIP-502-105-R015 user guide

Balluff

Balluff BNI EIP-502-105-R015 user guide

NXP Semiconductors TWR-LS1021A Getting started

NXP Semiconductors

NXP Semiconductors TWR-LS1021A Getting started

Advantech PCM-3117 Startup manual

Advantech

Advantech PCM-3117 Startup manual

Danfoss MCO 101 manual

Danfoss

Danfoss MCO 101 manual

Moons' Lin Engineering R701P user manual

Moons'

Moons' Lin Engineering R701P user manual

Aventics RV1 operating instructions

Aventics

Aventics RV1 operating instructions

manuals.online logo
manuals.online logoBrands
  • About & Mission
  • Contact us
  • Privacy Policy
  • Terms and Conditions

Copyright 2025 Manuals.Online. All Rights Reserved.

BEFORE YOU BEGIN
1071635-AN2-C 1
880A 98309A 40MM RECESSED SHOWER ONLY VALVE
882A 98310A 40MM RECESSED BATH/SHOWER VALVE
HANDLE OPERATION
INSTALLATION INSTRUCTIONS 40mm Recessed Bath/Shower Valve
For 882A & 98310A, lift diverter, turn clockwise until it stops for shower, turn counter-clockwise until it stops
for bath spout.
ROUGH-IN DIMENSIONS
All information is based on the latest product information available at the time of publication. Kohler Co.
reserves the right to make changes in product characteristics, packaging, or availability at any time without
notice.
Please leave these instructions for the consumer. They contain important information.
NOTES:
1. The dimension from the finished wall to the centerline of the valve decided by the trim selection.
2. Flush the water supply pipes throughly to remove debris.
3. Observe all local plumbing and building codes.
4. Shut off the main water supply.
5. Do not remove the plaster guard from the valve body until instructed to.
6. Check for leaks befor covering the pipes, repairs as needed.
7. Inlet & outlet threads of valve are Rc1/2".
8. Maximum working pressure: 800Kpa.
9. All installations should comply with the relevant requirements of AS/NZS 3500.
10. Sku 98309A and 98310A include a kit for unequal pressure systems. The kit is to be installed per the kits
installation instructions. These Skus are for use in New Zealand Only.
11. Please ensure only apply water pressure test on the product, and empty the air in pipe and faucet
thoroughly before the test. Please ensure test pressure below 0.8MPa (8 bar) and test duration within 30
minutes.
(26)
Decided by trim selection
65
1220 to the ground
(for shower faucet)
370 to up side of bath fringe
(for bath & shower faucet)
Centerline of valve
160
88
Rc 1/2"
Rc 1/2"
Rc 1/2"
160
88
Rc 1/2"
Rc 1/2"
Rc 1/2" (26)
1220
Centerline of valve
Decided by trim selection Ground
880A 98309A 882A 98310A
Rc 1/2" Rc 1/2"
1071635-AN2-C 2
1071635-AN2-C 3
INSTALLATION
CLEANING INSTRUCTIONS
All Finishes: Clean the finish with mild soap and warm water. Wipe entire surface completely dry with clean
soft cloth. Many cleaners may contain chemicals, such as ammonia, chlorine, toilet cleaner etc. which could
adversely affect the finish and are not recommended for cleaning.
Do not use abrasive cleaners or solvents on Kohler faucets and fittings.
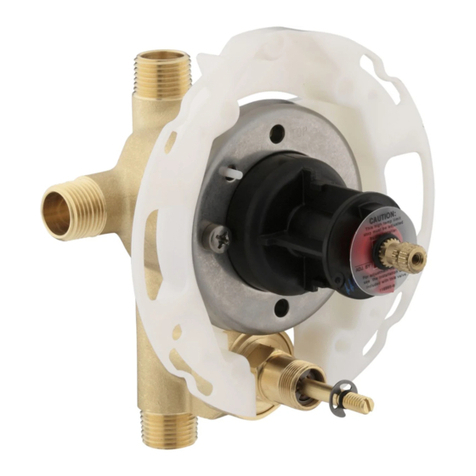
Determine where the valve body(1) will be located on the wall. Be
sure the arrow mark on the valve body is facing upward, the mark "hot
water connection" is on the left.
As Fig.1 shown. The Min. and Max. dimensions between the
centerline of the valve and the outside of the finished wall are decided
by trim selection. The size of finished wall hole extends from the size
of body should be less than 5mm.
Note: Ensure the centerline of valve is perpendicular to the wall, the
up plane of guard is level.
Connect Rc1/2" hot and cold supplies, showerhead and bath pipings
to valve body as Fig.2 shown. Connect hot supply to the end on the
left. For 880, do not connect the bath spout pipe. Supply enough tape
or sealant.
Install temporary nipples for showerhead and bath spout. During
installation, keep valve guard on valve body.
If the pipings are not strong enough to support the valve, cut off the
spacers(2) as needed and secure the valve body on the wall or frame.
**Color code must be specified when ordering
SERVICE PARTS 40mm Recessed Bath/Shower Valve
5
131
5
5
573
Min
Max
Handspray or bath spout
Showerhead
(Hot)
(Cold)
2
1
Fig.1
Fig.2
880A 98309A 40MM RECESSED SHOWER ONLY VALVE
882A 98310A 40MM RECESSED BATH/SHOWER VALVE
3006991
Valve
3006930
Nut
1089477**
Diverter
(Only for 882A & 98310A)
3007020
Spacer
3006906
Screw
1161279
Green Insert
1182266
Blue Insert
1193259
Check Valve Adaptor
1192780
Optiflow Shower Valve Kit
(Only for 98309A & 98310A)