1045050-X2-C 2
ติดตั้งกอกนํ้า
1045050-X2-C 3
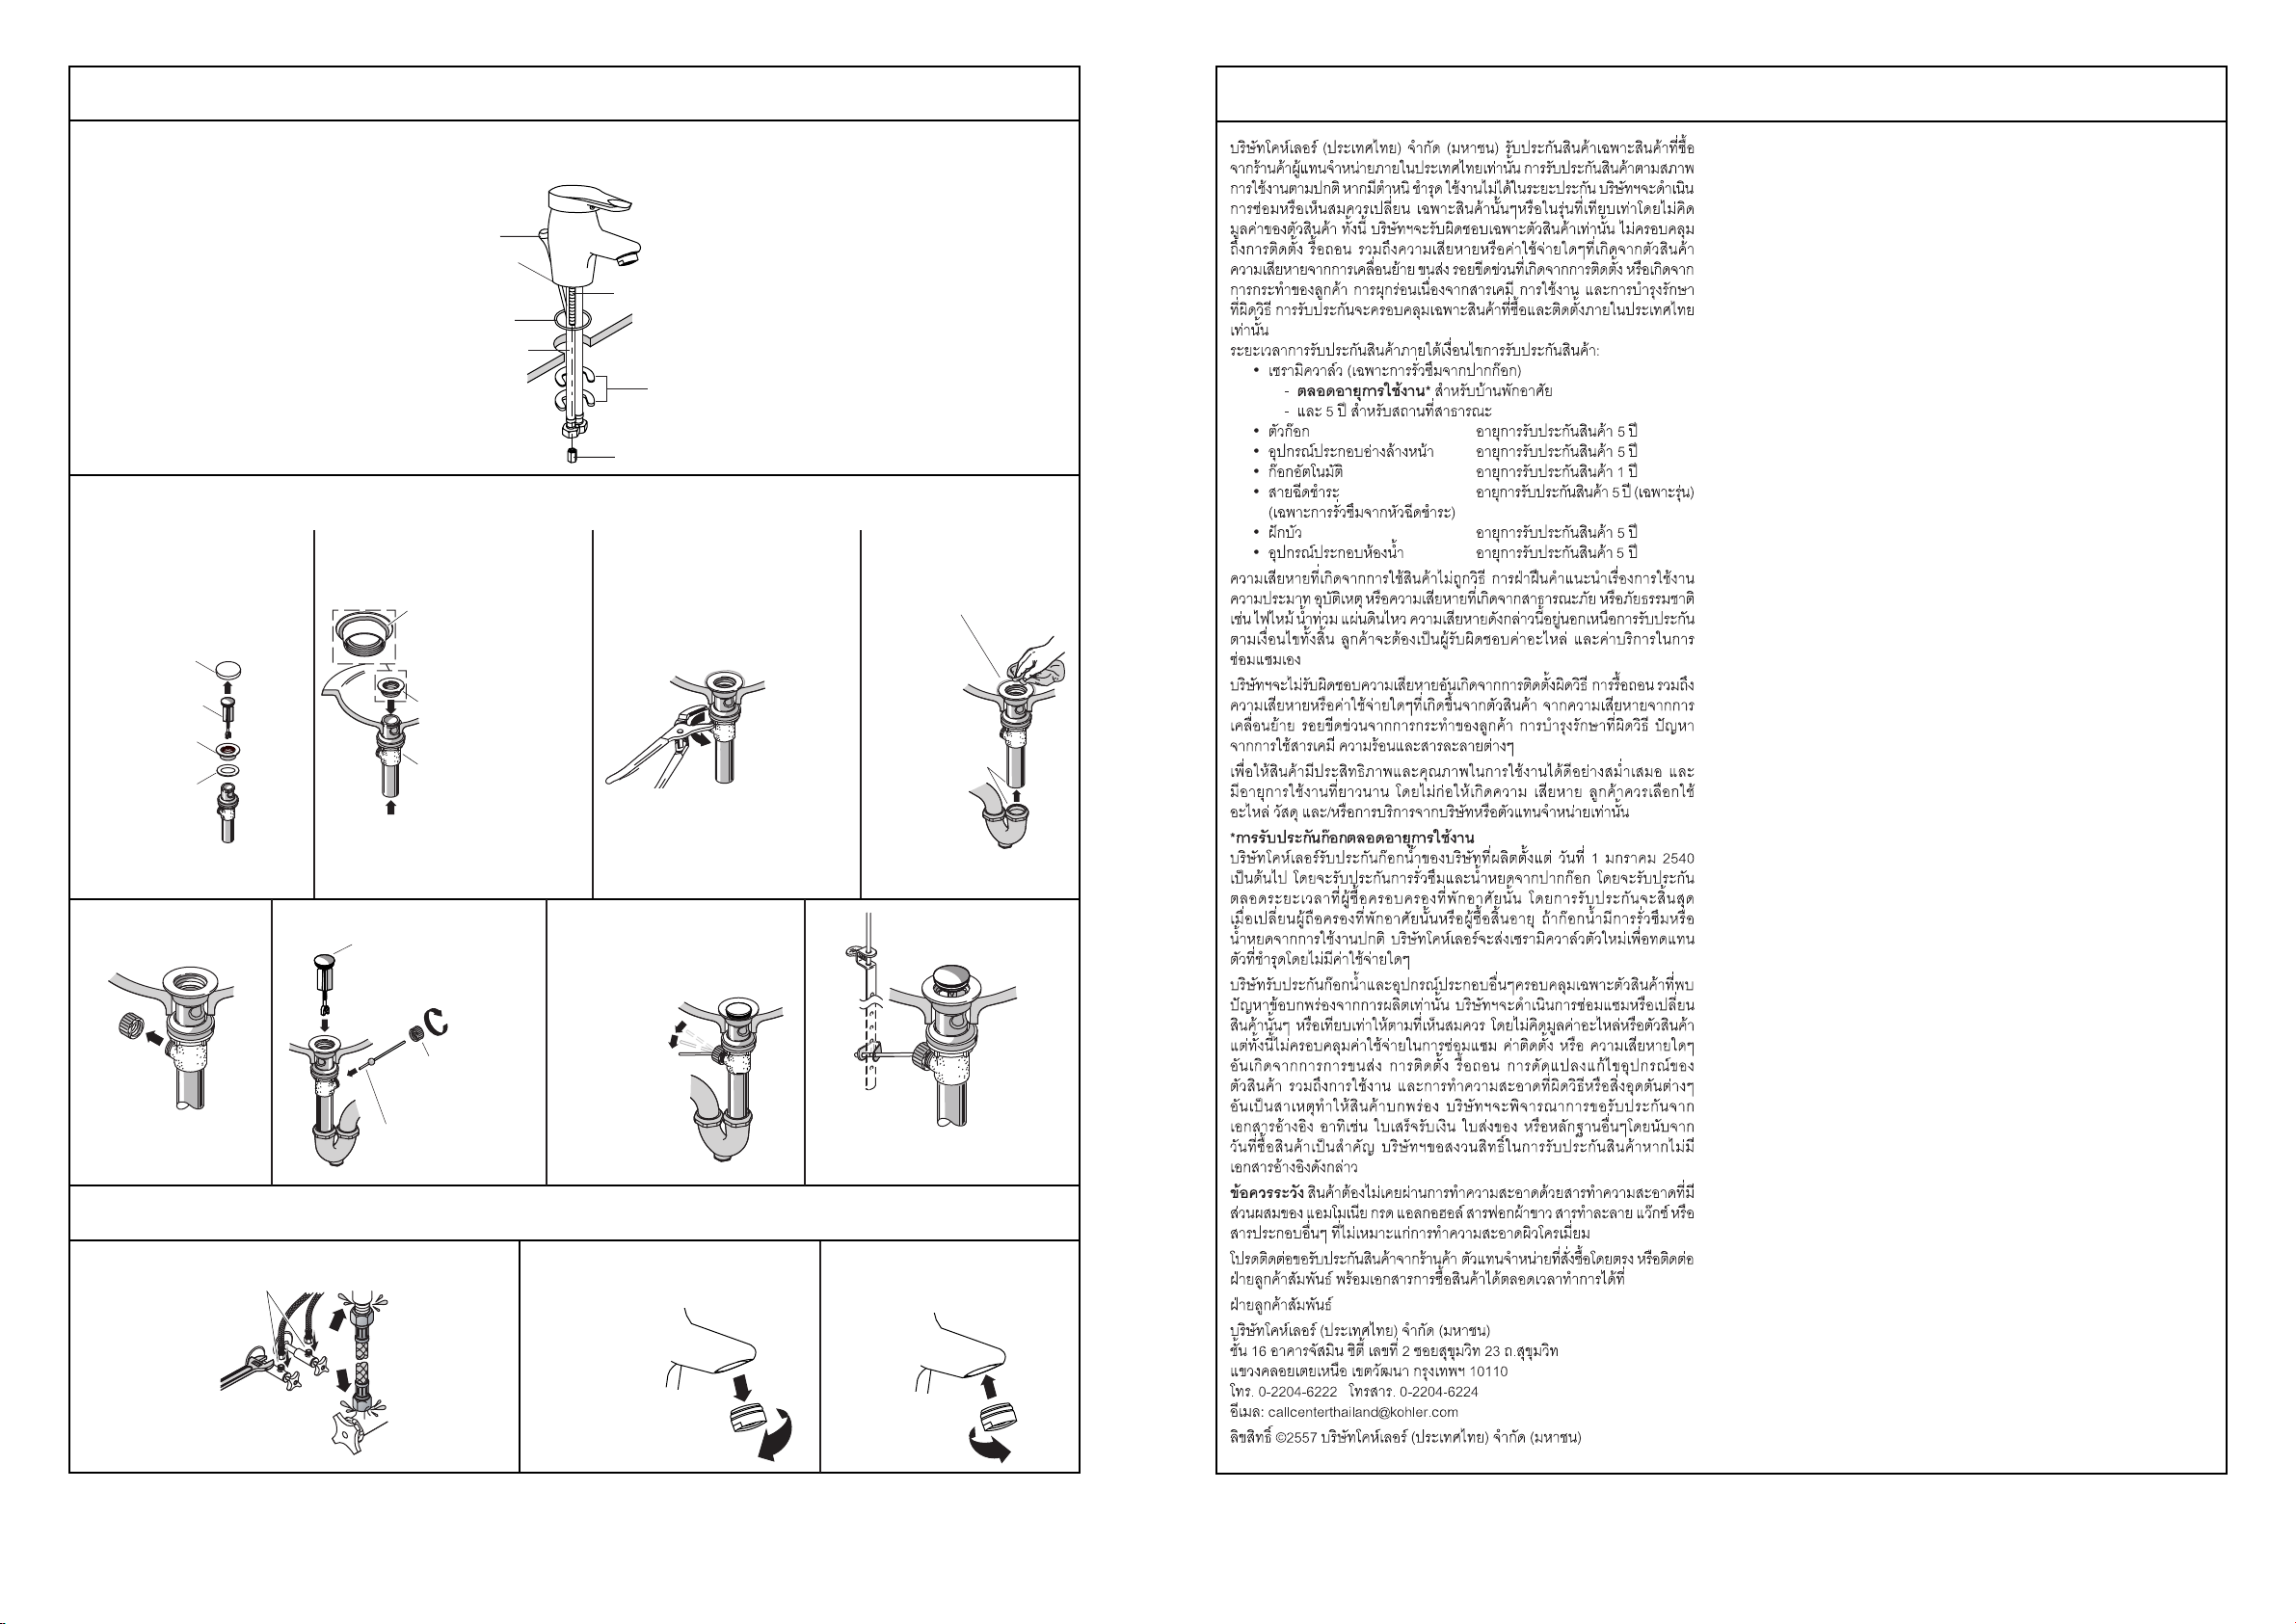
การติดตั้ง INSTALLATION
ติดตั้งสะดืออาง/How To Install The Pop-up Drain
Cap
Stopper
Flange
Washer
2
a Apply sealant to
flange.
c Attach flange.
b Insert the
assembly.
3 a Rotate drain body so lift
rod hole faces back of
fixture.
b Hold drain body in
place and tighten the nut.
4 a Remove excess
sealant.
b Connect the
trap.
1 Disassemble stopper,
cap and the flange.
5 Remove rod nut.
8
b Tighten thumbscrew.
a Connect using clip.
ทดสอบการติดตั้ง/
INSTALLATION CHECKOUT
1 a Connect and tighten the supply hoses.
Hot
Cold
b Check for leaks.
2 a Remove aerator.
b Flush lines.
3 Reinstall aerator.
5
1
2
6
7
4
3
b Insert rod.
7
Push and down
to open drain.
c Tighten
rod nut.
6a Insert stopper.
How To Install The Faucet
Install the mounting stud(2) into the faucet
body base(3). Insert lift rod(5) into hole at
rear of body assembly. Slide o-ring(4) into
groove on body assembly. Insert the flexible
supply hoses(1) into the hole from under the
lavatory and install the flexible supply hoses
into the faucet holes. Tighten it by hand.
From underside of lavatory, place bracket(6)
and nut(7) onto mounting stud(2). Position
faucet so that lift rod(5) is toward the back.
Tighten nut to secure faucet to lavatory.
การรับประกันสินคา LIMITED WARRANTY
Kohler (Thailand) Public Company Limited warrants to the original
products, which are purchased from authorized distributors and dealers
within Kingdom of Thailand only, to be free of defects in material and
workmanship.
Within the below mentioned periods from the date of purchase,
Kohler(Thailand) Public Company Limited will at its election, repair,
replace or make appropriate adjustment where company’s inspection
disclose any such defect occurring in normal usage and maintenance
but is not responsible for labor charges, removal charges, installation,
or other incidental or consequential costs. In no event shall the liability of
Kohler(Thailand) Public Company Limited exceed the purchase price
of the product. This warranty applies only to Kohler Faucets installed in
Thailand.
• Ceramic Valve(leak/drip)
- Lifetime Limited Warranty* for residential use
- and Five (5) Years for commercial use
• Finish Five(5) Years
• Fitting Five(5) Years
• Automatic faucet One(1) Year
• Hygiene spray(leak/drip Five(5) Years for selected models
from hygiene spray body) only
• Shower Five(5) Years
• Bathroom accessories Five(5) Years
This limited warranty DOES NOT COVER the defect or damage caused
by accident, natural disasters such as fire, flood, or earthquake, misuse
or abuse of products. Improper care andcleaning will avoid the warranty.
Consumers are responsible for the cost of service parts and service
fee for such cases.
To ensure continuous product quality and performance, as well as
product durability and lifetime, without any damage to the product,
consumers should purchase and use only genuine service parts and
after-sales services from Kohler (Thailand) Public Company Limited or
company’s authorized service centers, distributors, or dealers only.
*KOHLER® Faucet Lifetime Limited Warranty
Kohler (Thailand) warrants its faucets manufactured after January 1,
1997, to be leak and drip free during normal residential use for as long as the
original consumer purchaser owns his or her home. If the faucet should
leak or drip during normal use, Kohler (Thailand) will, free of charge;
replace
the new cartridge necessary to put the faucet in good working
condition.
Kohler (Thailand) also warrants all other aspects of the faucet or
accessories (“Faucet”)**to be free of defects in material and workmanship
during normal residential use for as long as the original consumer
purchaser owns his or her home. If a defect is found in normal residential
use, Kohler (Thailand) will, at its election, repair, provide a replacement
part or product, or make appropriate adjustment. Damage to a product
caused by accident, misuse, or abuse is not covered by this warranty.
Improper care and cleaning will also void the warranty.
Proof of purchase (original sales receipt) must be provided to
Kohler(Thailand) with all warranty claims. Kohler (Thailand) is not respon-
sible for labor charges, installation, or other incidental or consequential
costs. In no event shall the liability of Kohler (Thailand) exceed the
purchase price of the Faucet.
Important: Never use cleaners containing abrasive cleansers, ammonia,
bleach, acids, waxes, alcohol, solvents or other products not recom-
mended for chrome. This will void the warranty.
To obtain warranty service, please contact your dealers or contact the
KOHLER (Thailand) Call Center, together with proof of purchase at;
Call Center
KOHLER (Thailand) Public Company Limited
16th Floor, Jasmine City Building
2 Soi Sukhumvit 23, Sukhumvit Road,
Wattana, Bangkok 10110
Tel: 02204-6222 Fax: 0-2204-6224
COPYRIGHT ©2014 BY KOHLER (THAILAND) PUBLIC COMPANY
LIMITED


