9
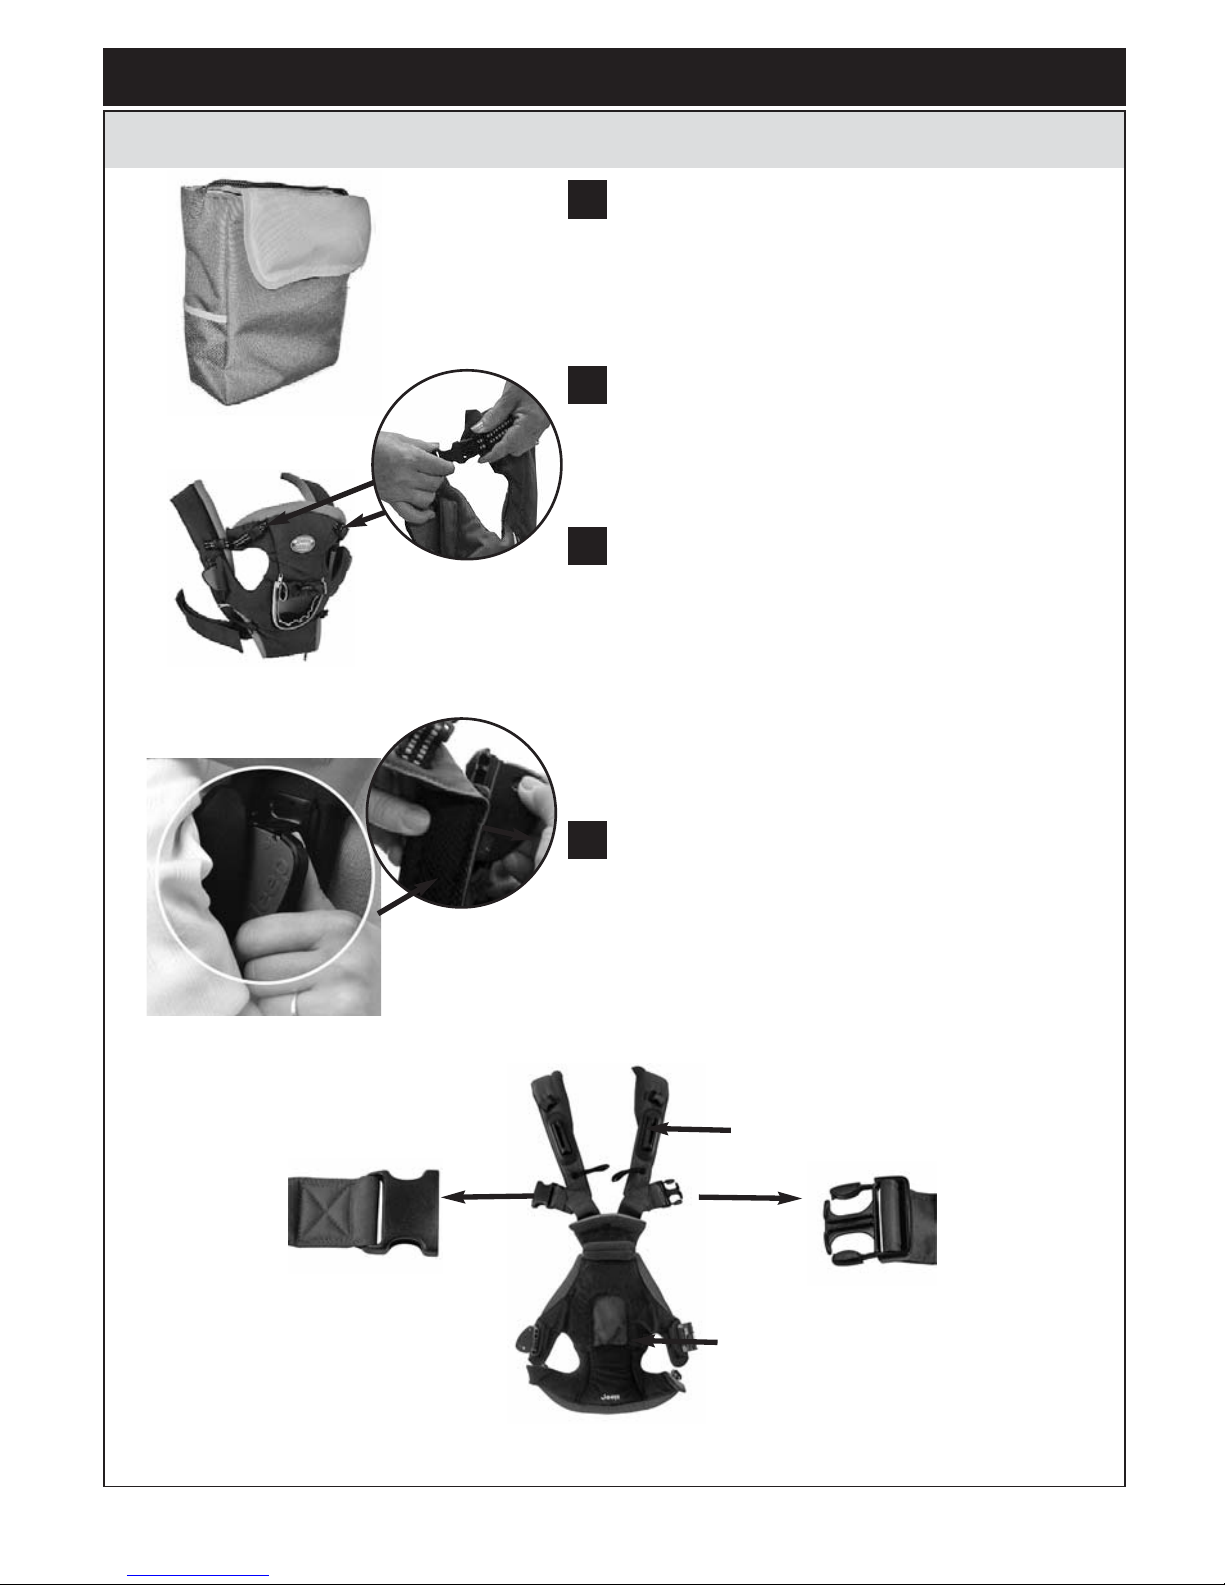
To Secure an Infant into Baby Carrier
Facing the Parent
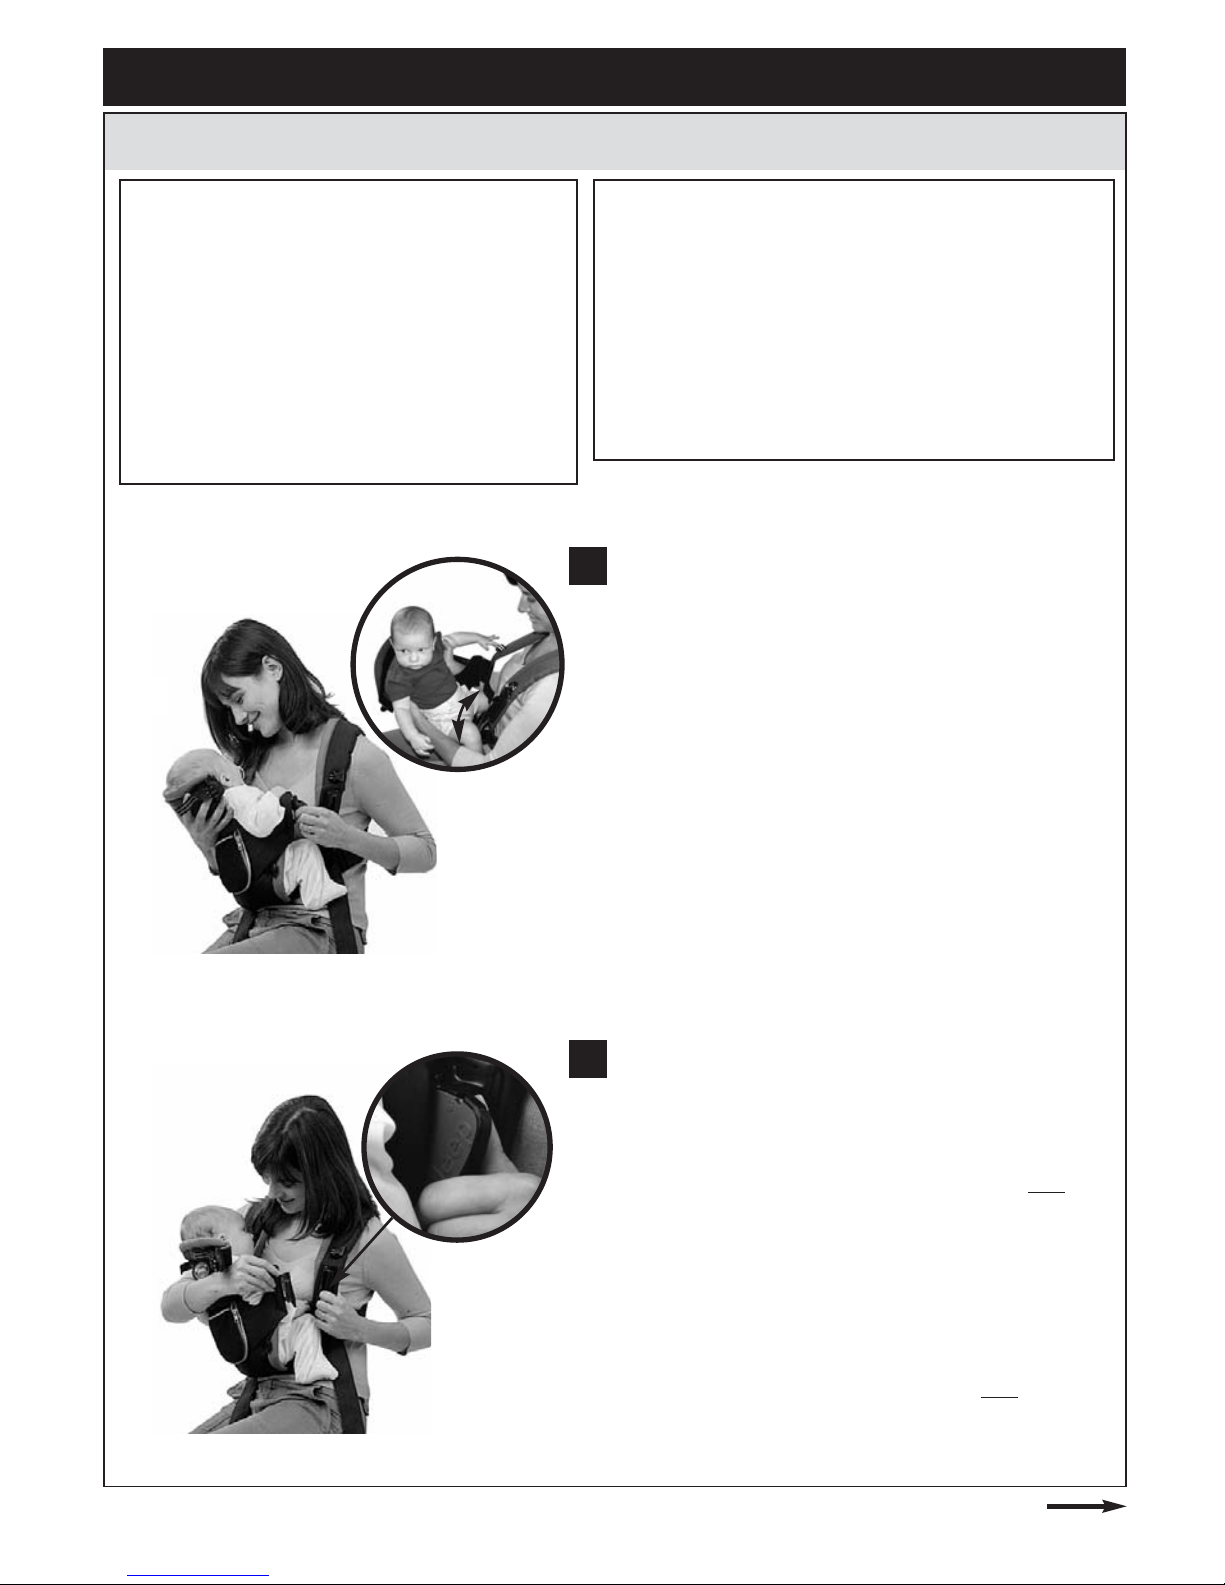
While seated and supporting the infant’s head, slide
your infant facing toward you into the Carrier on the
open side.
IMPORTANT: Hold on to your infant until the Carrier
is fully attached. Make sure your infant’s legs are
straddling the seat evenly and their arm is through
the arm hole.
Mientras esté sentado y sujetando la cabeza del bebé,
deslice a su infante mirando hacia usted en el lado
abierto del transportador.
IMPORTANTE: sujete a su infante hasta que el
transportador esté totalmente unido. Asegúrese de
que las piernas de su infante están a ambos lados
del asiento por igual y que el brazo pasa a través
de la abertura para el brazo.
To avoid the possibility of your infant being pinched,
make sure infant’s skin, fingers and all other body
parts are far away from all buckles and latches
when being secured. Lift infant up slightly and slide
other
Secure Fit®Locking Latch
into receiver until
you hear a click and see lock indicator turn Red.
Para evitar la posibilidad de que su infante resulte pel-
lizcado, asegúrese de que la piel del infante, dedos y
todas las partes del cuerpo están lejos de todas las
hebillas y pasadores cuando estén aseguradas. Eleve
al infante ligeramente y deslice otro
pasador de cierre
Secure Fit®
en el receptor hasta que escuche un clic y
vea que el indicador de cierre se vuelve rojo.
1
2
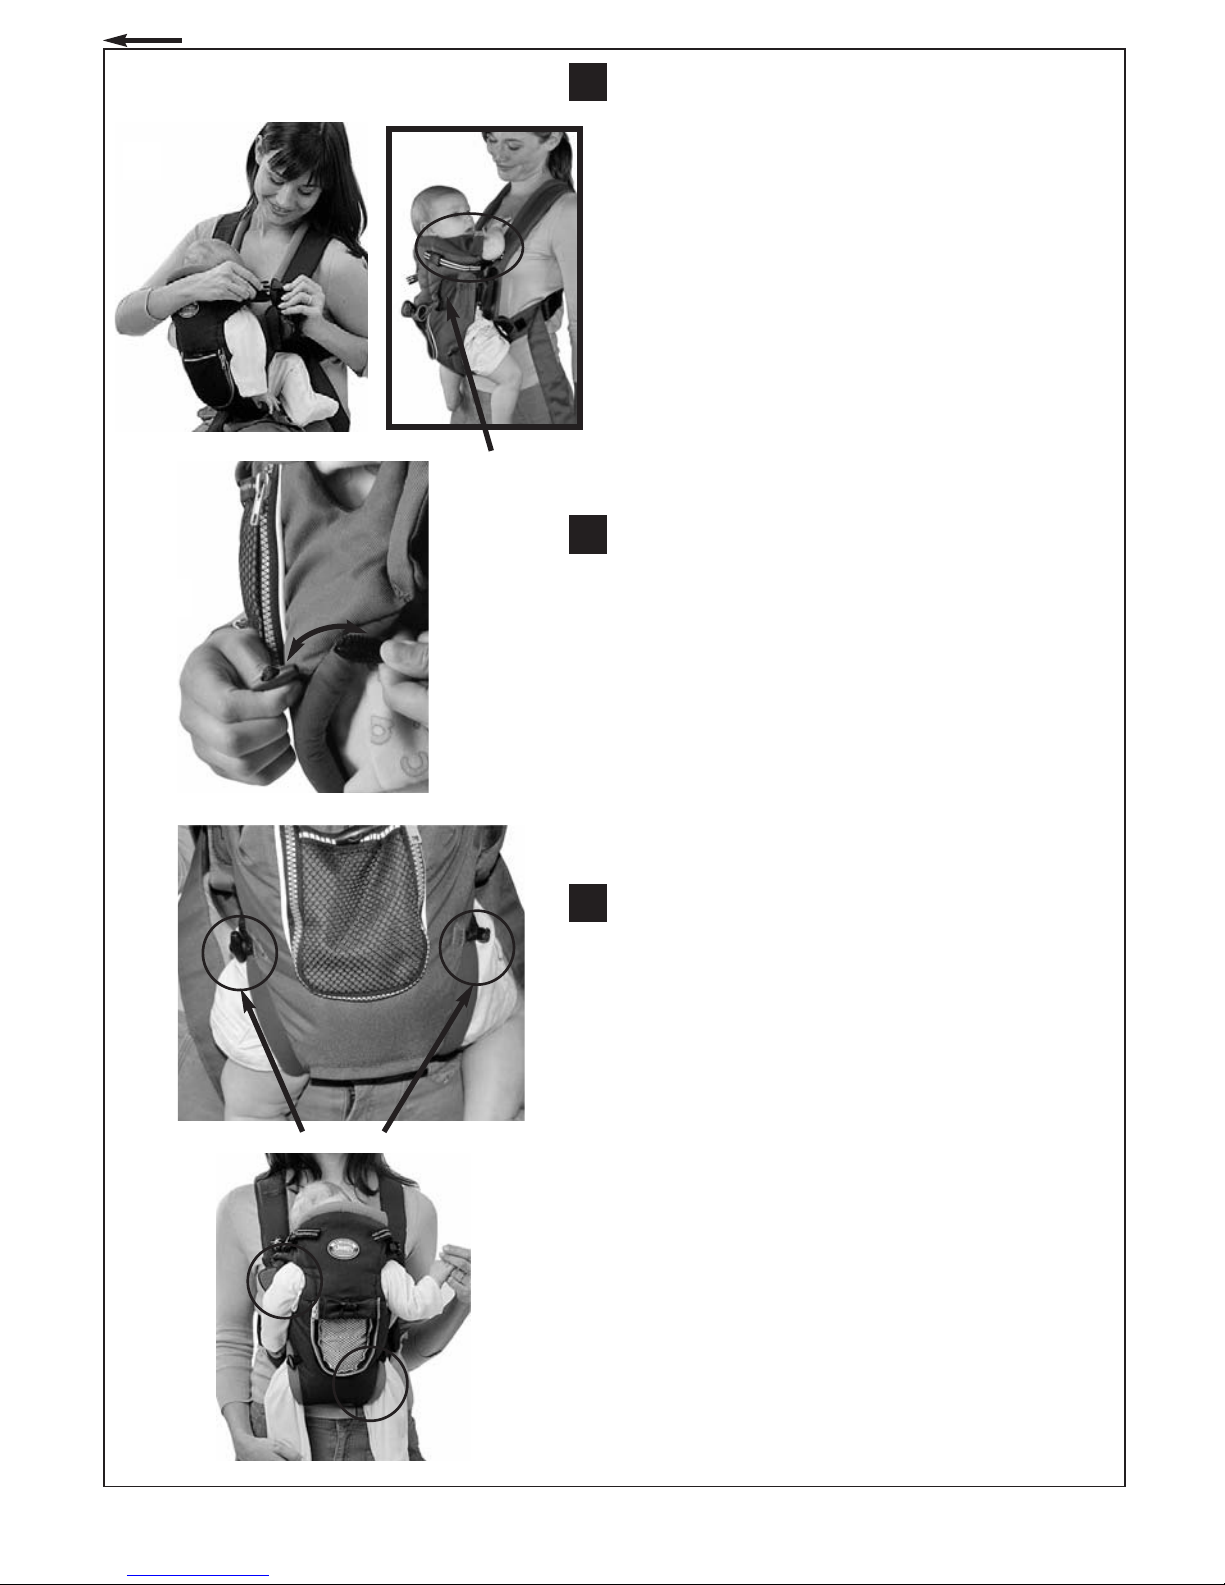
WARNING
This Carrier can accomodate children by hav-
ing them either face toward or away from par-
ent. Until an infant can hold up their head and
shoulders unassisted, the infant must face
toward the parent.
TO AVOID SUFFOCATION: ALWAYS make sure
that your child’s nose and mouth are clear and
unobstructed by the Carrier or your clothing.
ADVERTENCIA
Este transportador puede acomodar a niños mirando
hacia el padre o hacia el lado opuesto. Hasta que un
infante pueda mantener su cabeza y sus hombros
parados sin ayuda, el bebé debe mirar hacia el padre.
PARA EVITAR LA ASFIXIA: Asegúrese SIEMPRE de
que la nariz y la boca de su hijo no están obstruídas
por el transportador o por su ropa.
Continued on next page
Continuación en la página siguiente
1
2
HOW TO PROPERLY USE YOUR NEW BABY CARRIER / CÓMO UTILIZAR DE FORMA ADECUADA SU NUEVO TRANSPORTADOR DE BEBÉ
Para asegurar un infante al transportador de
bebés mirando al padre