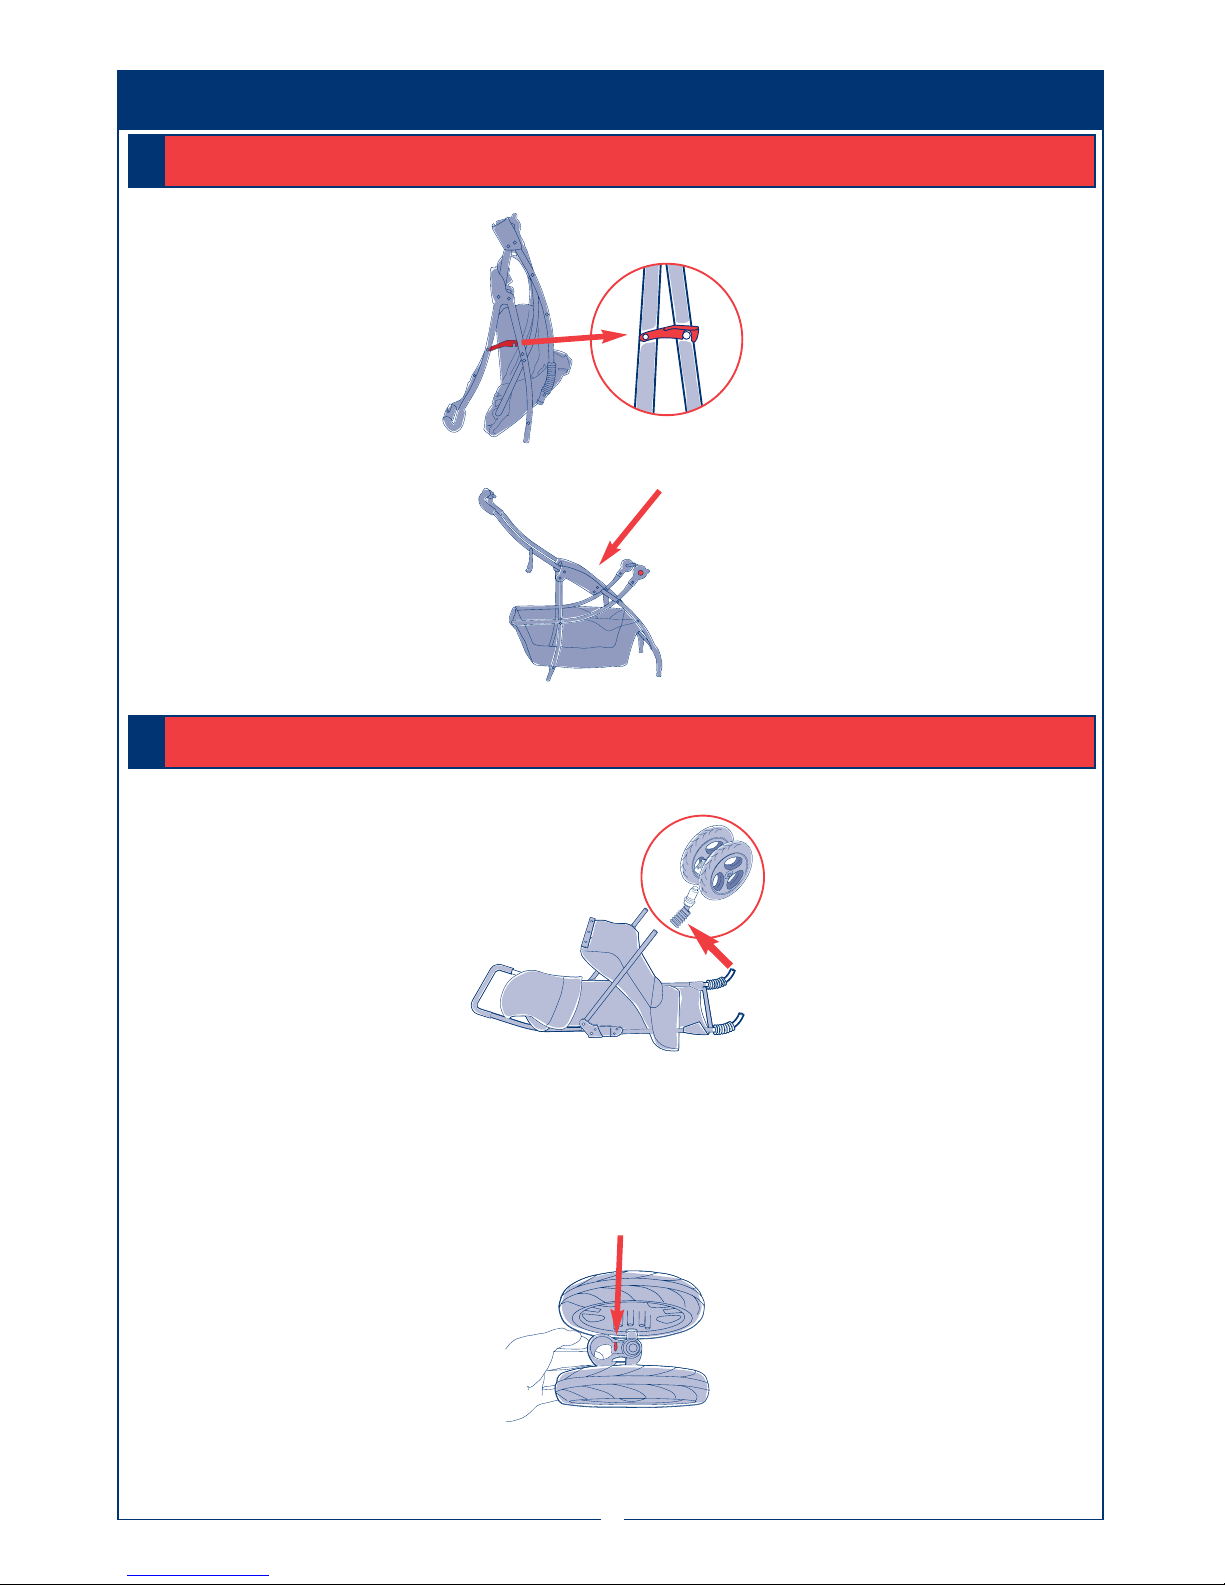
3
4
5
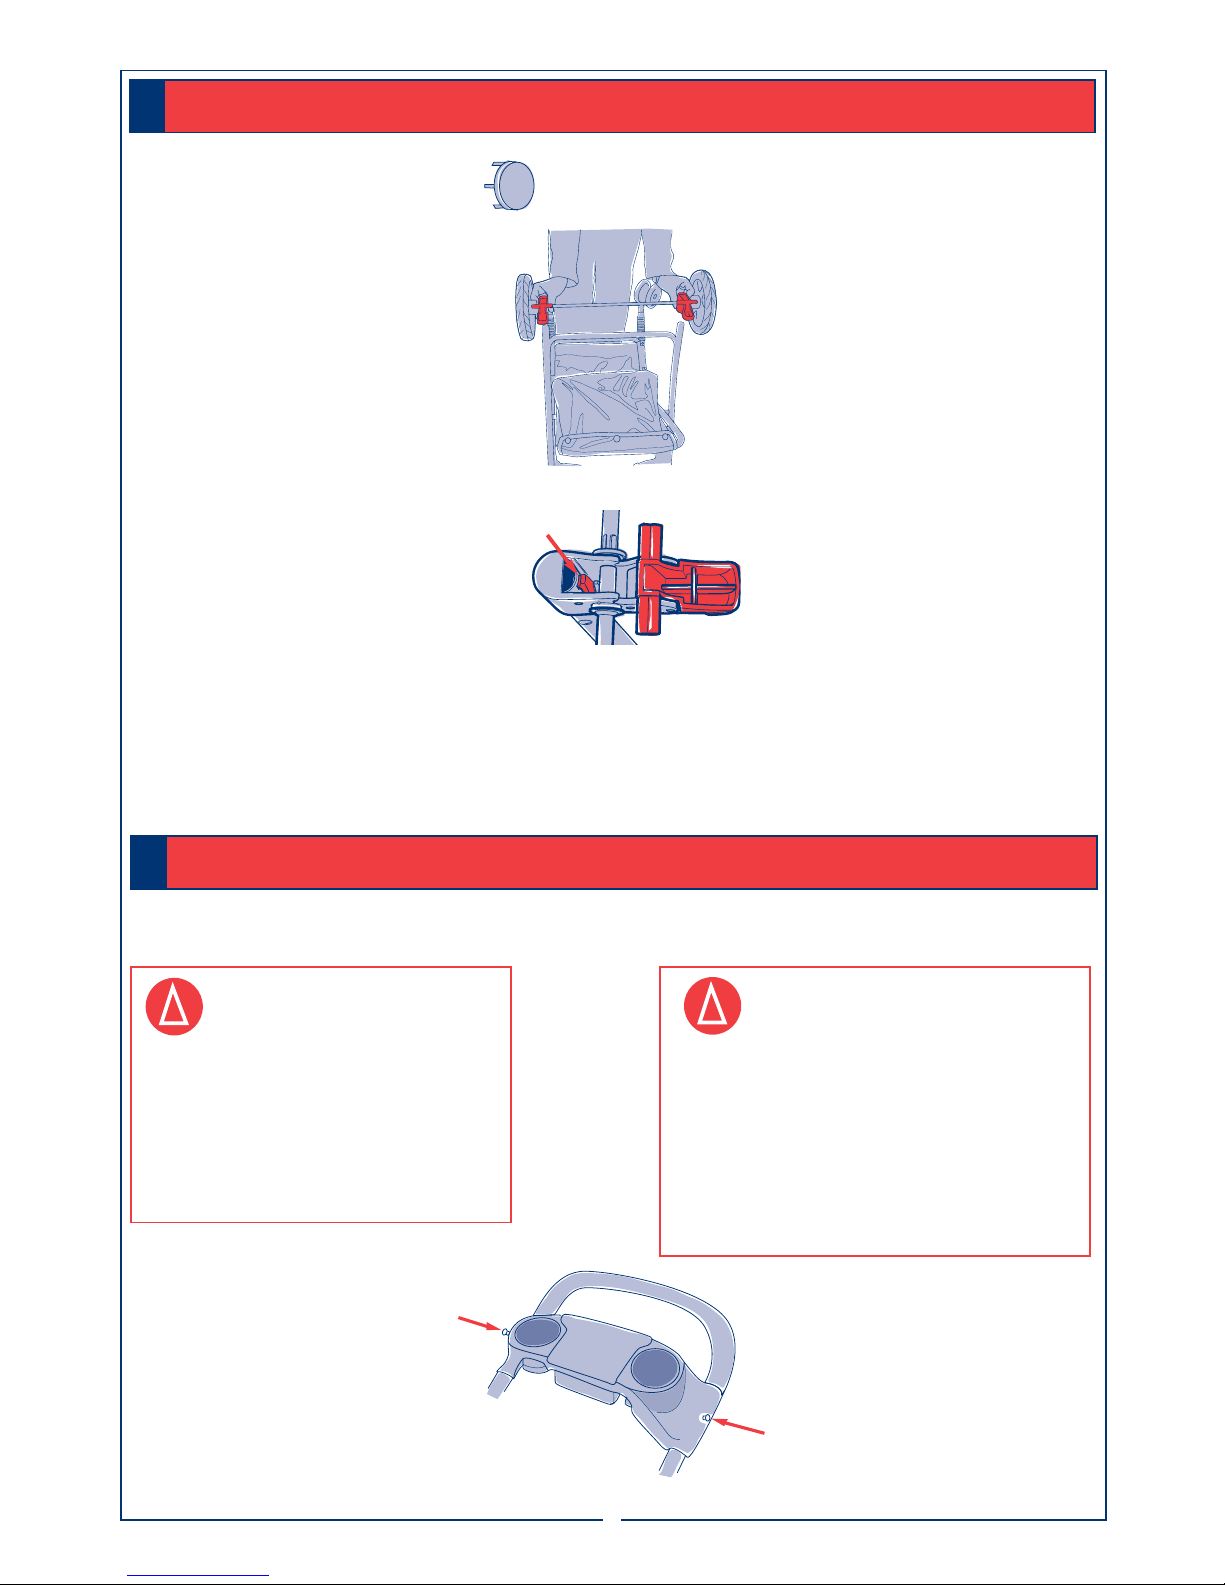
Adjustment Bar
Barra de Ajuste
Stationary Bar
Barra Estacionaria
Shopping Cart Lever
Palanca para el carro de mercaderías
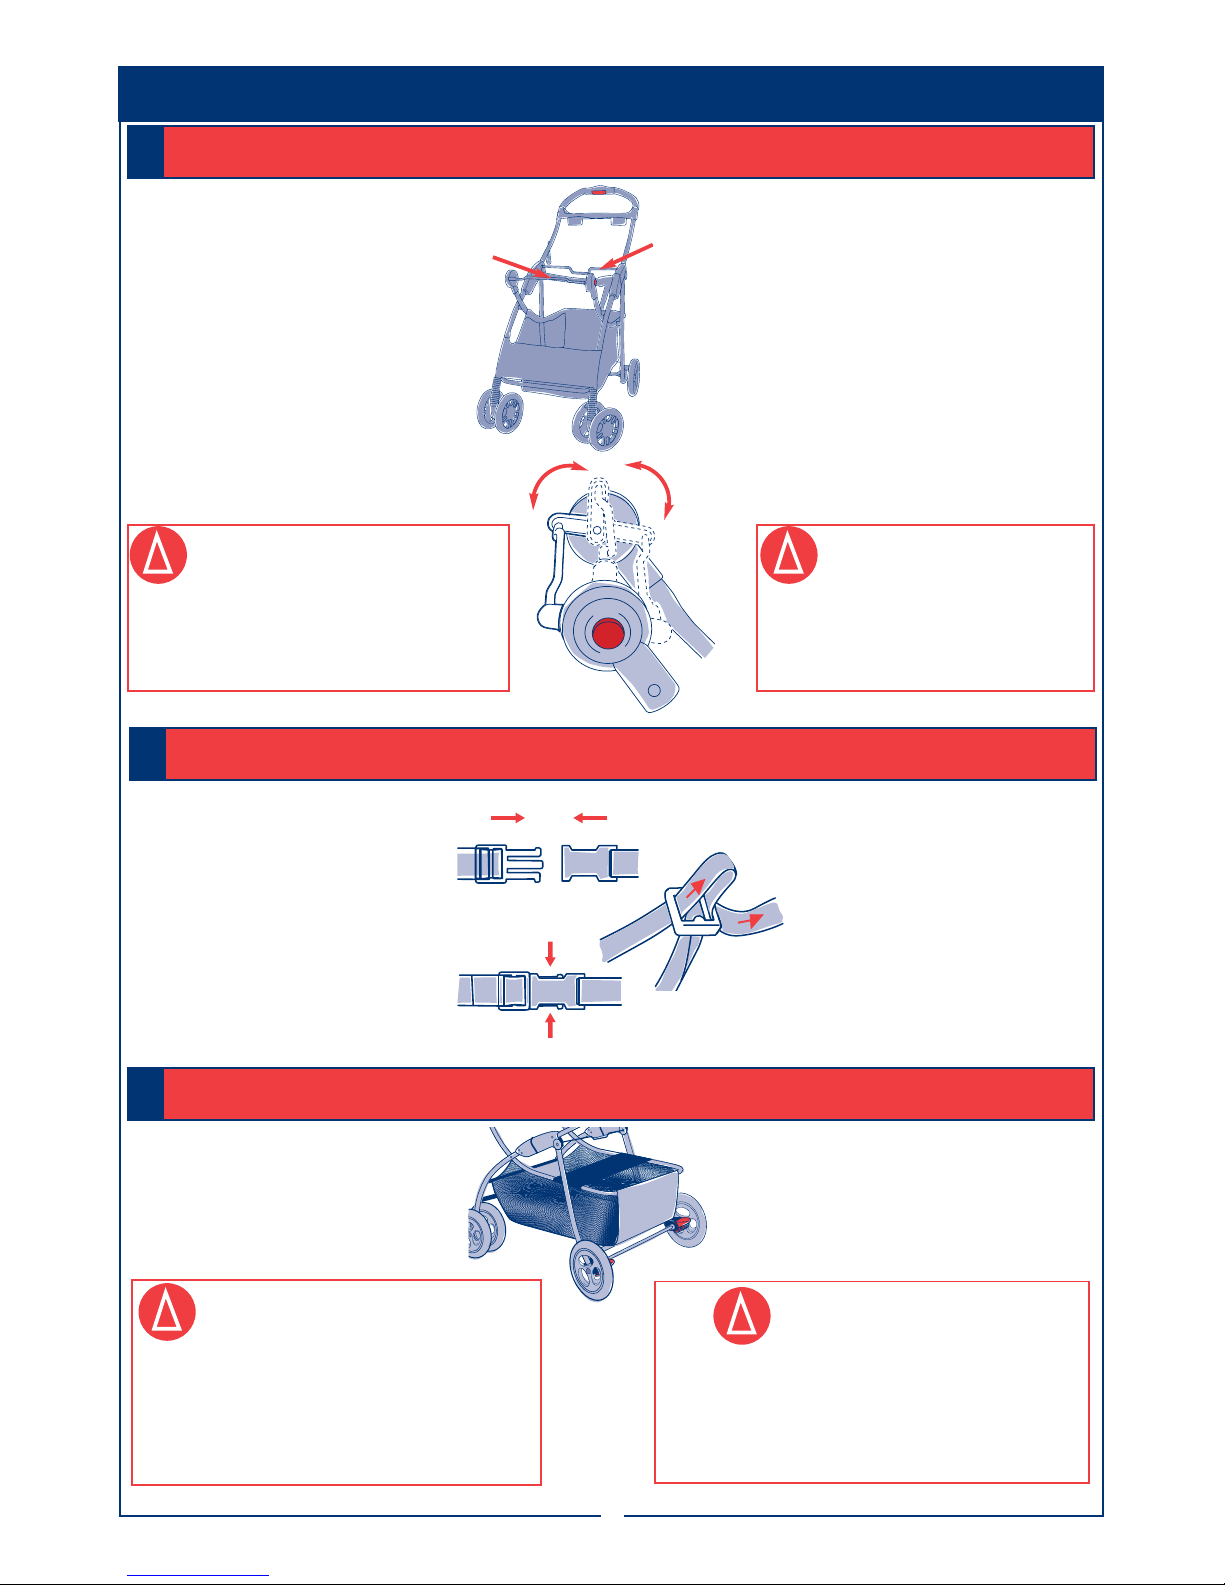
Restraint Straps
Cinta de Seguridad
B
fig.A
fig. B
fig. C
TO ATTACH YOUR BRITAX®HANDLE WITH
CARE®OR BABY SAFE™INFANT CAR SEAT
5
TO ATTACH YOUR CENTURY®565/580/590 SERIES,ASSURA,
AVANTA, SMART FIT & VANTəSERIES INFANT CAR SEAT:
PARA INSTALAR SU CENTURY
®
565/580/590 SERIES, ASSURA,
AVANTA SERIES, SMART FIT Y VANTÉ
™
SERIES ASIENTO INFANTIL:
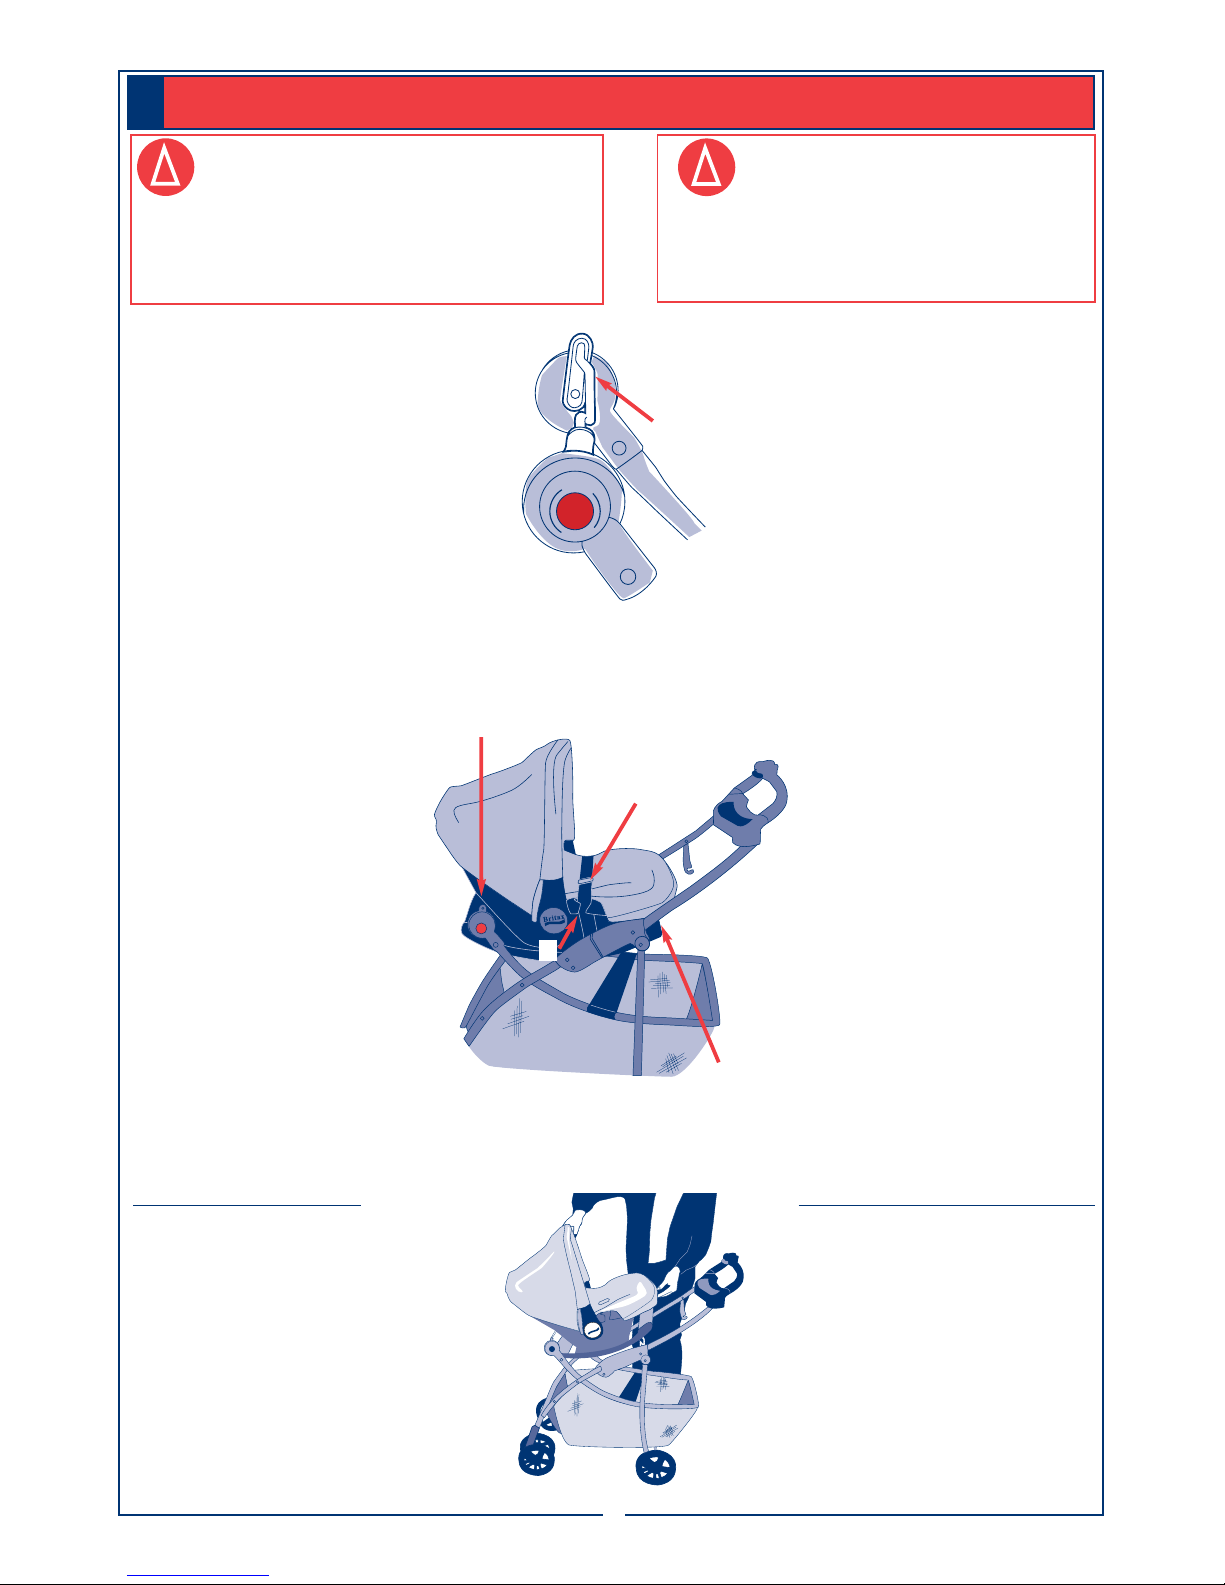
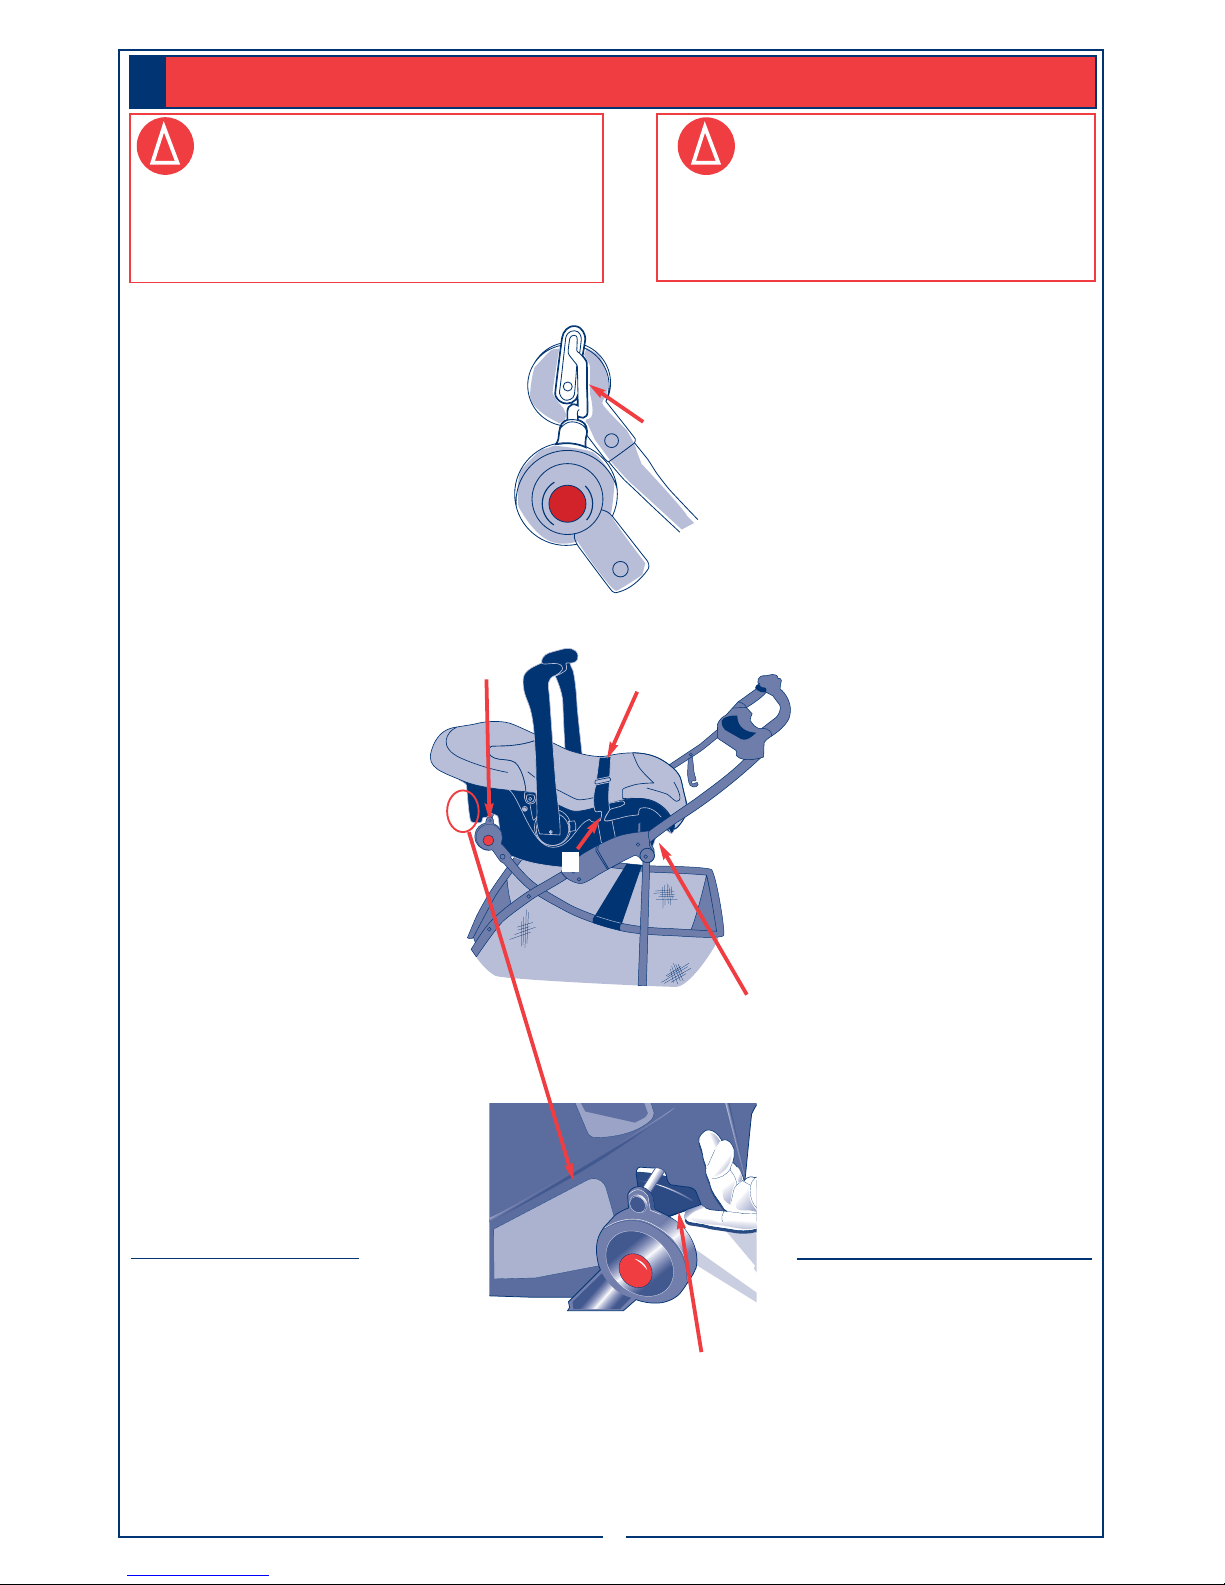
Step 1. Adjust Adjustment Bar to
position “B” by pushing both red
buttons and rotating bar until it
clicks into place (Figure A).
Step 2. With one hand, grasp the
Infant Car Seat handle (in its upright,
carrying position).
•With your other hand, grasp Infant
Car Seat near baby’s feet. Gently
position the Infant Car Seat above
Carrier so the baby faces the handle.
Step 3.Place rear portion of the
Infant Car Seat on top of
Adjustment Bar as shown (Figure B).
NOTE: Your Infant Car Seat
shopping cart lever must be secured
to the Adjustment Bar.
Step 4. Gently place front
portion of Infant Car Seat onto
stationary bar (Figure B).
Step 5. Secure Car Seat to Carrier
by feeding Restraint Straps through
Infant Car Seat belt slots and buckle.
Tighten Restraint Straps (Figure B).
Step 6. Make sure Infant Car Seat
is secure. Test Infant Car Seat
installation by moving it in all
directions to ensure a tight fit to
Carrier.
NOTE: Your Infant Car Seat may
have a level indicator. It is not
necessary for use with this carrier
and the indicator may fall outside the
recommended area. The level
indicator is for use while the Infant
Car Seat is in an automobile.
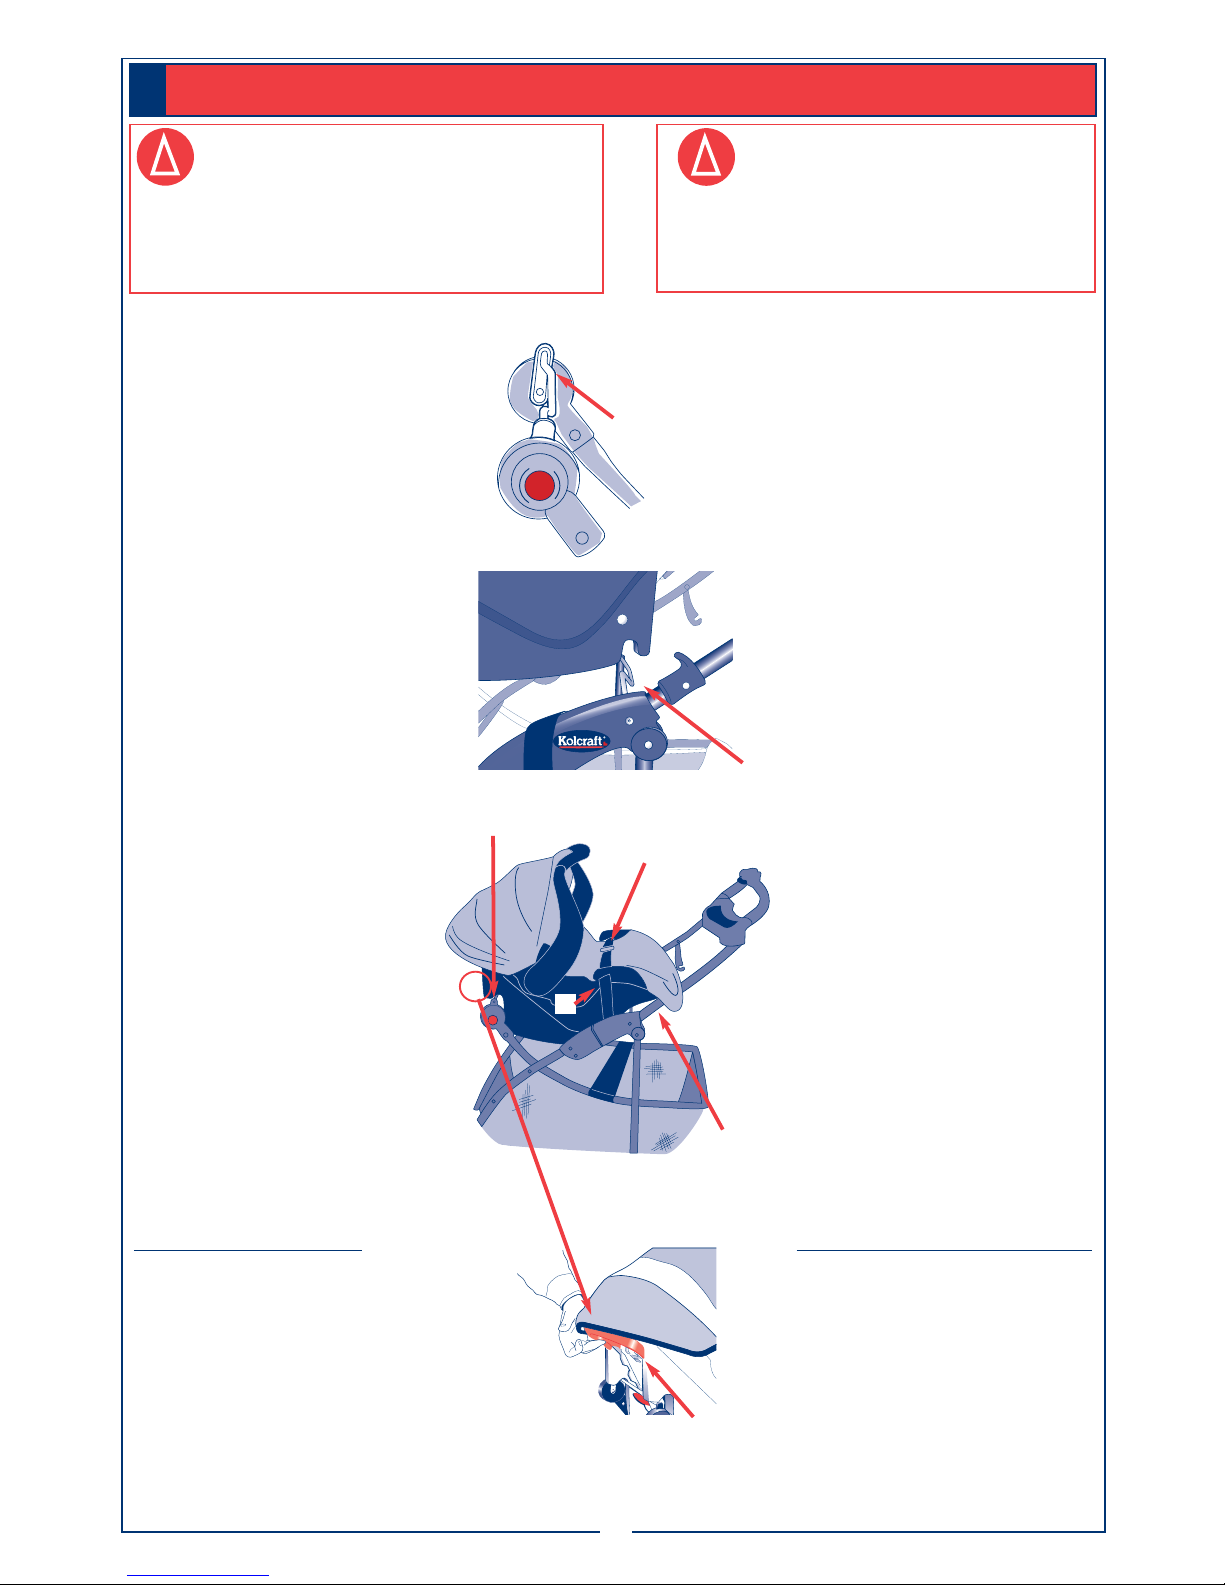
Removing Car Seat
Step 7. Unbuckle Restraint Straps
and remove them from Car Seat belt
slots.
Step 8. With one hand grasp the
Infant Car Seat handle (in its upright,
carrying position).
•With your other hand, press back
shopping cart lever on Adjustment Bar.
Pull up on the front portion of Infant
Car Seat and remove (Figure C).
Paso 1. Ajuste la barra de ajuste a
la posición “B” empujando ambos
botones rojos y girando la barra
(Figura A).
Paso 2. Con una mano agarre el
mango del asiento infantil (en su
posición vertical de acarreo).
•Con la otra mano, agarre el asiento
infantil cerca de los pies. Ponga el
asiento cuidadosamente sobre el
porta asiento con la cara del niño
hacia el mango.
Paso 3. Coloque la parte
posterior del Asiento Infantil encima
de la Barra de Ajuste, como lo
muestra el dibujo (Figura B).
NOTA: La palanca del carro para
mercado del asiento de bebé, debe
estar asegurada a la barra de ajuste.
Paso 4. Ponga con cuidado la parte
delantera del asiento con la barra fija
(Figura B).
Paso 5. Asegure el asiento al
porta asiento pasando las cintas de
seguridad por la hebilla y el broche
del cinturón de seguridad del carro.
Aprietelas (Figura B).
Paso 6. Asegúrese de que el
asiento de bebé para el auto esté bien
sujetado. Pruebe la instalación en para
asegurar que el asiento esté fijo al
porta asiento en todas direcciones.
NOTA: Puede que el asiento de
bebé para el auto tenga un indicador
de nivel. No es necesario usarlo con
esta el asiento portatil y el indicador
puede quedar fuera de la zona
recomendada. El indicador de nivel es
para usar mientras el asiento de bebé
para el auto esté en un automóvil.
Para sacar el asiento infantil
Paso 7. Desabroche las cintas de
seguridad y sáquelas de las hebillas del
cinturón.
Paso 8. Con una mano agarre el
mango del asiento infantil (en su
posición vertical de acarreo).
•Con la otra mano, agarre el asiento
infantil cerca de los pies. Jale con
cuidado por la parte delantera del
asiento y levantelo (Figura C).
When using this product, to avoid serious injury
from falling or sliding out, infant must always be
secured in the Infant Car Seat with the Car Seat
harness. Refer to Infant Car Seat Instructions for
proper adjustment.
Al usar este producto, evite daños serios causados
por caídas o al deslizarse del asiento. El niño debe
estar asegurado en el asiento. Use siempre el
cinturón. Consulte las instrucciones del asiento
de bebé para auto para ajustario adecuadamente.
¡ADVERTENCIA!
!WARNING! !
Adjustment Bar
Barra de Ajuste