manuals.online logo
Brands
  1. Home
  2. •
  3. Brands
  4. •
  5. Koolatron
  6. •
  7. Lawn And Garden Equipment
  8. •
  9. Koolatron PROTECTOR MK06 User manual

Koolatron PROTECTOR MK06 User manual

K06
OWNER’S ANUAL
ANUEL D’UTILISATION
PROTECTOR™
WARRANTY / GARANTIE
This KOOLATRON product is warranted to the retail customer
for 90 days from date of retail purchase, against defects in
material and workmanship.
WHAT IS COVERED
• Replacement parts and labour.
• Transportation charges to customer for the repaired
product.
WHAT IS NOT COVERED
• Damage caused by abuse, accident, misuse, or neglect.
• Transportation of the unit or component from the customer
to Koolatron.
IMPLIED WARRANTIES
Any implied warranties, including the implied warranty of
merchantability are also limited to the duration of 90 days
from the date of retail purchase.
WARRANTY REGISTRATION
Register on-line at www.koolatron.com AND keep the
original, dated, sales receipt with this manual.
WARRANTY AND SERVICE PROCEDURE
If you have a problem with your MO QUITO TRAP, or require
replacement parts, please telephone the following number
for assistance:
North Americ 1-800-265-8456
Koolatron has Master ervice Centres at these locations:
Kool tron U.S.A.
4330 Commerce Dr., Batavia, NY 14020-4102 U. .A.
Kool tron C n d
27 Catharine Ave., Brantford, ON N3T 1X5 Canada
A Koolatron Master ervice Centre must perform all
warranty work.
Cet appareil KOOLATRON est garanti à l'acheteur au détail
pendant 90 jours à compter de sa date d'achat contre tous
défauts de pièces et de fabrication.
CE QUE COUVRE LA GARANTIE
• Pièces de rechange et main d'œuvre.
• Frais d'expédition du produit réparé de Koolatron à
l'adresse du client.
CE QUE LA GARANTIE NE COUVRE PAS
• Tous dégâts causés par un abus, un accident, une
mauvaise utilisation ou une négligence.
• Frais d'expédition de l'appareil ou de la pièce du client à
Koolatron.
GARANTIES IMPLICITES
Toutes garanties implicites, y compris celle de qualité
marchande, se limitent également à 90 jours à compter de la
date d'achat.
ENREGISTREMENT DE LA GARANTIE
Inscrivez-vous en ligne à www.koolatron.com et conservez
le reçu de caisse daté d'origine avec ce manuel.
PRISE EN CHARGE DE LA GARANTIE ET PROCÉDURES DE
RÉPARATION
i vous avez un problème avec votre PIÈGE À MOU TIQUE
ou si vous avez besoin de pièces de rechange, veuillez
téléphoner au numéro suivant pour assistance :
Amérique du Nord 1-800-265-8456
Koolatron dispose de centres principaux de réparations à ces
adresses :
Kool tron U.S.A.
4330 Commerce Dr., Batavia, NY 14020-4102 U. .A.
Kool tron C n d
27 Catharine Ave., Brantford, ON N3T 1X5 Canada
Les réparations sous garantie doivent être effectuées par un
centre principal de réparations Koolatron.
www.koola ron.com
©2009 Koola ron, Inc. All righ s reserved. Tous droi s réservés.
All specification are subject to change without notice. Toutes spécifications sont sujettes à changement sans préavis.
Made in China / Fabriqué en Chine 11/2009-v1H1S 094
DOME TIC
REG NO. 29474 P.C.P. ACT
READ THE LABEL AND ATTACHED BOOKLET BEFORE U ING
KEEP OUT OF REACH OF CHILDREN
DOME TIQUE
NO D’ENREGI TREMENT 29474
LOI UR LE PRODUIT ANTIPARA ITAIRE
LIRE L'ÉTIQUETTE ET LE LIVRET AVANT L'UTILI ATION
GARDER HOR DE LA PORTÉE DE ENFANT
1 - français
Lire avant de déballer et de faire fonctionner le piège à mousti ues de BiteShield™
Le piège à mousti ues doit être alimenté par 120 V C.A.
POUR VOTRE SÉCURITÉ :
Ne pas utiliser ou stocker de l’essence ou d’autres vapeurs ou liquides inflammables à proximité
du piège à moustiques ou de tout autre appareil du même type.
DÉTAILS DU PRODUIT
1. Couper et ouvrir l’emballage en aluminium à l’aide de ciseaux.
Voir illustration A.
2. Retirer la cartouche d’octenol de l’emballage en aluminium.
3. Fixer le crochet en « S » à la cartouche d’octenol.
Voir illustration B.
4. Fixer l’autre côté du crochet en « S » au piège à moustiques.
5. Bien se laver les mains.
DIRECTIVES POUR LEURRE À OUSTIQUES À L’OCTENOL
Alimentation électrique
Entrée : 120 V C.A., 60 Hz
Sortie : 12 V C.C. à 1000 mA
1. Crochet-S – pour suspendre
2. Plaque reflective (intérieur)
3. Tube de lumière UV (longueur d’onde
352nm) et couverture – la couche de TiO2
achève le principe de photocatalyse.
4. Filtre
5. Entrée du conduit d’air
6. Ventilateur – entraîne et piège les insectes
7. Sac de capture – s’enlève et se nettoie
facilement
8. Base
9. Octenol – 1 cartouche fournie
1
2
3
4
5
6
7
8
9
S.V.P., voir l’emballage pour les directives et avertissements.
Pour commander d’autres cartouches à l’octenol,
S.V.P., consultez votre détaillant près de chez vous ou visitez notre
site Web www.koolatron.com
Read before unpacking and operating the BiteShield Mos uito Trap™.
The Mos uito Trap re uires 120V AC.
FOR YOUR SAFETY:
Do not store or use gasoline or any other flammable vapors and liquids in the vicinity of the
osquito Trap or any other appliance.
PRODUCT DETAILS POWER SUPPLY
Input: 120V AC 60Hz
Output: 12V DC @ 1000mA
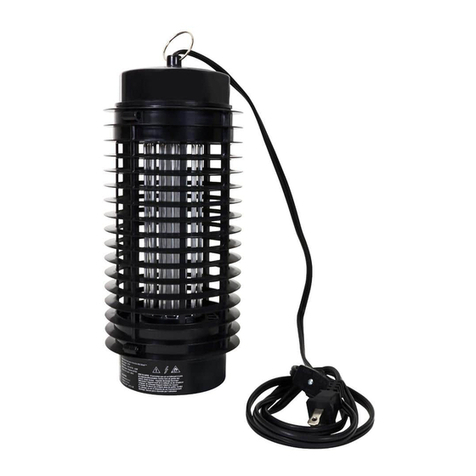
1. S-hook - for hanging
2. reflecting plate (inside)
3. UV light tube (352nm wavelength) &
cover - TiO2coated achieves
photocatalyst principle
4. filter screen
5. air inlet chute
6. fan - pulls in and traps the insects
7. catch bag - removes and cleans easily
8. base
9. Octenol - 1 cartridge included
1
2
3
4
5
6
7
8
9
1. Cut Foil Pack Open using Scissors. see Illustration A
2. Remove Octenol Cartridge from Foil Pack.
3. Connect “S” Hook to Octenol Cartridge as. see Illustration B
4. Connect Other Side of “S” Hook to Mosquito Trap.
5. Wash Hands Thoroughly.
A
B
A
B
INSTRUCTIONS FOR OCTENOL OSQUITO ATTRACTANT
1 - english
Please see package for Cautions and Instructions.
To order more Octenol Cartridges please visit a retailer
near you or visit us online
www.koolatron.com
PRECAUTIONS
KEEP OUT OF REACH OF CHILDREN! Fatal or po sonous f swallowed. May rr tate sk n. Avo d contact w th sk n.
Causes eye rr tat on. DO NOT get n eyes. TOXICOLOGICAL INFORMATION - Treat symptomat cally.
PRÉCAUTIONS
GARDER HORS DE LA PORTÉE DES ENFANTS. Mortel ou tox que s’ l est ngéré. Peut rr ter la peau. Év ter tout
contact avec la peau. Irr te les yeux. NE PAS s’en mettre dans les yeux.
RENSEIGNEMENTS TOXICOLOGIQUES - Tra ter selon les symptômes.
ASSE BLY
The BiteShield™ MK06 Protector Mosquito Trap comes fully assembled and ready for use. If you are using an
Octenal attractant cartridge simply hang it from the lip of the unit under the lid using the “S”-hook provided.
OPERATION
Carefully place the trap in the location you have selected following the "WHERE TO PLACE THE MOSQUITO
TRAP" and all of the "SAFETY" guidelines. Proceed as follows
1. Plug in the power supply cord to an approved outdoor use extension cord or directly into 120V AC Outlet, as
per the safety instructions and plug the other end into the Mosquito trap.
2. Locate the ON/OFF button on the top. Turn the unit on.
WHERE TO PLACE THE OSQUITO TRAP
Many species of mosquito have an adult life span that lasts about two weeks. About 3000 species of mosquito
have been identified world-wide, with approximately 170 species found in the United States. Both male and
female mosquitoes feed on plant nectar, but only the female requires a blood meal. The blood meal is needed for
each batch of eggs the female lays, typically she feeds once every 3-4 days. A blood meal usually lasts about 90
seconds if the mosquito is notdisturbed and can equal about 1-1/2 times the female mosquitoes’ body weight! A
single female can lay thousands of eggs during her life span.
The female mosquito is attracted by scent, temperature, shape, color, movement, and for some species, even
sound. The female mosquito is most active between 50˚F and 95˚F in calm or light breeze conditions. Mosquitoes
tend to travel up-wind when seeking a blood meal. The placement of the Mosquito Trap will greatly affect the suc-
cess of the unit capturing mosquitoes. The largest number of mosquitoes will be captured by positioning the
Mosquito Trap as follows
Outdoors: Find the normal down-wind direction from the area you want to gather in mosquitoes (towards where
mosquitoes are living, i.e. trees, bushes, water). Place the Mosquito Trap in the downwind area at the edge or
slightly beyond, of the patio, deck, or other area where you want to gather in mosquitoes. Be sure to place the
Mosquito Trap out of direct sunlight. Do not place the Mosquito Trap under a bright light. Maximum height of 6
feet. The idea is to keep mosquitoes away from you when outside. So, do not place it where you are gathered.
Place it where they live and reproduce.
Indoors: The MosquitoTrap can be used indoors when mosquitoes are a problem there. Place the unit on a sta-
ble surface in the room or area where mosquitoes are most likely to enter. Leave interior doors open to allow the
mosquitoes to find the trap. Do not place unit on electric appliances such as a television. Look for air movement
within the house to find ideal locations for the trap. Just like outdoors, mosquitoes will tend to travel upwind
indoors, following air currents in their search for a meal! Do not place the Mosquito Trap under a light. With care-
ful placement, mosquitoes will encounter the Mosquito Trap and be captured before coming into contact with you
and your family. Place the Mosquito Trap on a stable surface where children and pets cannot come into contact
with or bump the unit.
2 - english 2 - français
ASSE BLAGE
Le piège à moustiques BiteShield™ MK06 Protector vient entièrement assemblé et prêt à utiliser. Si vous
employez la cartouche d'Octenal simplement le suspendre du trou du dessus ou du bas.
FONCTIONNE ENT
Placer soigneusement le piège à l’endroit choisi en suivant les directives « CHOIX DE L’EMPLACEMENT DU piège
à moustiques » et toutes les directives de « SECURITÉ ». Procéder comme suit
1. Brancher le cordon électrique à une rallonge extérieure approuvée ou directement à un prise secteur de 120 V
c.a., comme décrit dans le mode d’emploi, et brancher l’autre extrémité du cordon au piège à moustiques.
2. Localiser le bouton Marche/Arrêt sur le dessus. Mettre l’appareil en marche.
CHOIX DE L’E PLACE ENT DU PIÈGE À OUSTIQUES
De nombreuses espèces de moustiques ont une durée de vie adulte d’environ deux semaines. Environ 3000
espèces de moustiques ont été identifiées dans le monde entier, dont près de 170 espèces aux États-unis. Les
moustiques mâles et femelles se nourrissent de nectar de plantes, mais seule la femelle est hématophage. Elle
fait un repas sanguin chaque fois qu’elle pond ; elle s’alimente donc généralement une fois tous les 3 à 4 jours.
Son repas dure généralement 90 secondes, si elle n’est pas dérangée, et la quantité de sang ingérée peut attein-
dre environ 1-1/2 fois et demie son poids. Une femelle peut pondre des milliers d’oeufs au cours de sa vie.
Elle est attirée par diverses odeurs, la chaleur, les formes, les couleurs, les mouvements et chez certaines
espèces, par les sons. Elle est la plus active lorsque la température se situe entre 10° C et 35° C et que l’air est
relativement calme. Les moustiques ont tendance à voler contre le vent lorsqu’ils chassent leur nourriture.
L’emplacement du piège à moustiques a donc une influence primordiale sur son efficacité à capturer les
moustiques. Pour attraper un maximum de moustiques, le piège à moustiques doit être placé comme suit
À l’extérieur : Identifier de quelle direction vient le vent dans la zone à protéger des moustiques (la zone où ils
vivent, c’est-à-dire les arbres, buissons, plans d’eau). Placer le piège à moustiques en aval du vent, au bord ou
légèrement au-delà du patio, de la terrasse ou de toute autre zone à protéger des moustiques. S’assurer que le
piège à moustiques n’est pas placé en plein soleil. Ne pas placer le piège à moustiques sous une lumière vive. La
hauteur ne doit pas dépasser 1,8 m. Le but est d’éloigner les moustiques des personnes se trouvant à l’extérieur.
Il ne faut donc pas installer le piège là où elles se réunissent. Placer l’appareil près de l’endroit où les moustiques
vivent et se reproduisent.
À l’intérieur : Le piège à moustiques peut être utilisé à l’intérieur en cas de besoin. Placer l’appareil sur une sur-
face stable dans la pièce ou l’endroit où semble entrer la majorité des moustiques. Laisser les portes intérieures
ouvertes pour que les moustiques puissent trouver le piège. Ne pas placer le piège sur un appareil électrique, par
exemple un téléviseur. Localiser les courants d’air à l’intérieur de la maison pour trouver l’emplacement idéal du
piège. Tout comme à l’extérieur, les moustiques auront tendance à voler contre le vent lorsqu’ils chassent
leur nourriture. Ne pas placer le piège à moustiques sous une lampe. Si l’appareil est placé correctement, les
moustiques iront droit au piège à moustique, sans jamais plus vous importuner. Placer le piège à moustiques sur
une surface stable, difficilement accessible aux enfants et aux animaux domestiques.
AINTENANCE & CLEANING
1. Check the capture bag on a regular basis depending on how many mosquitoes are being trapped. Start by
checking the trap once a week and adjust according to the catch. Use only clean water to rinse the bag, do not
use any chemical or soap as the fragrance may keep repel mosquitoes from the trap.
Mosquito Fact About 800 dead mosquitoes equals 15ml (1 tablespoon)! 28g (1 ounce) equals over 65,000 dead
mosquitoes!
2. CAUTION: Do not obstruct the flow of ventilation air around the Mosquito Trap. (Example Placing on padded
surface.)
3. Clean the Mosquito Trap outside surface with a mild detergent on a damp cloth. Rinse with clean water only.
NOTE: Always remember to unplug the unit and remove the attractant cartridge before cleaning. Do not spray
with or immerse in water. Do not use a dripping wet cloth!
SAFETY
1. Avoid placing the Mosquito Trap in direct sunlight
2. Dispose of all used attractant in a trash receptacle. Do not store the Mosquito Trap near insect repellents or
other chemicals. Unopened attractant should be stored in a cool, dry place.
3. The connection between the Mosquito Trap and any extension cord used must be kept dry and off the ground.
4. Disconnect the Mosquito Trap from the power supply when not in use, before adding attractant
cartridges, before cleaning, before servicing, or for storage.
5. The Mosquito Trap should be stored indoors when not in use and kept away from children.
6. To avoid electric shock, DO NOT clean the Mosquito Trap with spraying water or by immersion in water or
other liquid.
7. All repairs to the Mosquito Trap must be performed only by qualified service personnel.
8. Read and follow all instructions prior to use of the Mosquito Trap.
9. Young children should be carefully supervised when they are in the area of the Mosquito Trap.
10. Clothing or other flammable materials should not be hung from or placed on the Mosquito Trap.
11. Any guard or other protective device removed for servicing the Mosquito Trap must be replaced prior to
operating.
12. Keep the area around the Mosquito Trap clear and free from combustible materials, gasoline, and other
flammable vapors and liquids.
13. Do not handle the Mosquito Trap when using insect repellents.
NOTE Do not place osquito Trap on unstable surfaces or areas where trap may tip over, or on electrical
appliances.
NOTICE TO USER
This pest control product is to be used only in accordance with the directions on the label. It is an offence under
the Pest Control Products Act to use this product in a way that is inconsistent with the directions on the label. The
user assumes the risk to persons or property that arises from any such use of this product.
3 - english 3 - français
ENTRETIEN ET NETTOYAGE
1. Vérifier régulièrement le sac de capture, selon la quantité de moustiques piégés. Commencer par vérifier le
godet une fois par semaine. N’utiliser que de l’eau propre pour rincer le sac. Ne pas utiliser un produit chimique
ou du savon, car leur parfum risque d’éloigner les moustiques.
Information sur les moustiques 15 ml (une cuillère à soupe) peut contenir l’équivalent d’environ 800 moustiques
morts ! 28g (1 ounce) correspond à environ 65 000 moustiques morts.!
2. ATTENTION Ne pas boucher les orifices de ventilation autour du piège à moustiques, par exemple en le
plaçant sur une surface rembourrée.
3. Nettoyer la surface extérieure du piège à moustiques à l’aide d’un détergent doux et d’un chiffon humide.
Pour rincer, n’utiliser que de l’eau propre. RE ARQUE : Ne pas oublier de débrancher l’appareil et d’enlever la
cartouche d’appât avant de procéder au nettoyage. Ne pas arroser l’appareil, ni l’immerger dans l’eau. Essorer
tout chiffon avant de l’utiliser sur l’appareil !
SÉCURITÉ
1. Ne pas placer le piège à moustiques en plein soleil.
2. Jeter l’appât usagé dans une poubelle. Ne pas ranger le piège à moustiques près de produits anti-insectes ou
d’autres produits chimiques. La recharge d’appât non ouverte doit être conservée dans un endroit sec.
3. La connexion entre le piège à moustiques et toute rallonge doit est maintenue au sec et au-dessus du sol.
4. Débrancher le piège à moustiques de la prise d’alimentation lorsqu’il n’est pas utilisé, avant d’ajouter des
cartouches d’appât, avant le nettoyage, avant l’entretien ou avant l’entréposage.
5. Quand il n’est pas utilisé, le piège à moustiques doit être rangé à l’intérieur, hors de la portée des enfants.
6. Pour éviter tout choc électrique, NE PAS nettoyer le piège à moustiques en l’arrosant ou en l’immergeant dans
de l’eau ou un autre liquide.
7. Le piège à moustiques doit être réparé uniquement par des techniciens de service agrées.
8. Lire est suivre toutes les instructions avant d’utiliser le piège à moustiques.
9. Surveiller attentivement les jeunes enfants quand ils se trouvent à proximité du piège à moustiques.
10. Ne pas pendre ou poser des vêtements ou d’autres tissus inflammables sur le piège à moustiques.
11. Si une protection a été enlevée pendant l’entretien du piège à moustiques, la remettre en place avant de
réutiliser l’appareil.
12. La zone autour du piège à moustiques doit être dégagée et ne contenir aucun matière combustible,
carburant et autres vapeurs ou liquides inflammables.
13. Ne pas manipuler le piège à moustiques en présence de produits anti-insectes.
RE ARQUE Ne pas placer le piège à moustiques sur une surface instable ou à un endroit où il risque de
basculer, ni sur des appareils électriques.
AVIS À L’UTILISATEUR
Ce produit antiparasitaire est pour l’utilisation seulement selon les directives de ce guide. L’utilisation de ce
produit contre les directives du guide est une infraction sous la loi des produits antiparasitaires. L’utilisateur est
responsable des risques aux personnes et propriétés en se servant de ce produit.

This manual suits for next models

1

Other Koolatron Lawn And Garden Equipment manuals

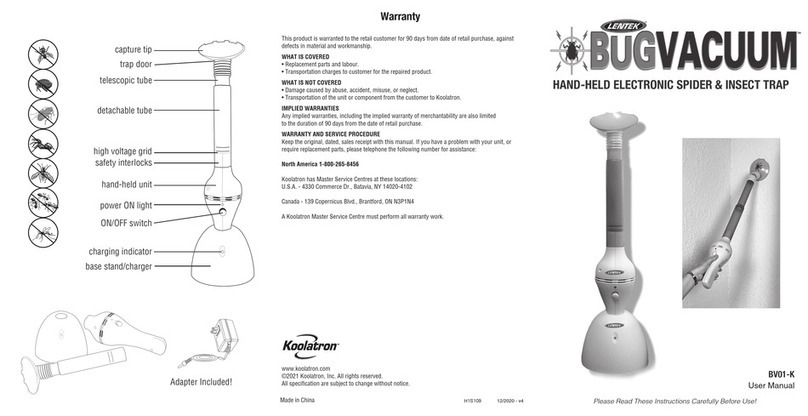
Koolatron LENTEK Bug Vacuum BV01-K User manual

Koolatron

Koolatron LENTEK Bug Vacuum BV01-K User manual

Koolatron Bite Shield MK05 User manual

Koolatron

Koolatron Bite Shield MK05 User manual

Koolatron KoolScapes RBB-55 User manual

Koolatron

Koolatron KoolScapes RBB-55 User manual

Koolatron MK12 User manual

Koolatron

Koolatron MK12 User manual

Koolatron MK12 User manual

Koolatron

Koolatron MK12 User manual

Koolatron MK12 User manual

Koolatron

Koolatron MK12 User manual

Koolatron MK14 User manual

Koolatron

Koolatron MK14 User manual

Koolatron KoolScapes RBB-55 User manual

Koolatron

Koolatron KoolScapes RBB-55 User manual

Koolatron Lentek PestContro PC51 Manual

Koolatron

Koolatron Lentek PestContro PC51 Manual

Koolatron Lentek Pest Patrol User manual

Koolatron

Koolatron Lentek Pest Patrol User manual

Koolatron PestContro PR3L Manual

Koolatron

Koolatron PestContro PR3L Manual

Koolatron KoolScapes WTCB-50 User manual

Koolatron

Koolatron KoolScapes WTCB-50 User manual

Koolatron Lentek YardControl+ YC12 Manual

Koolatron

Koolatron Lentek YardControl+ YC12 Manual

Koolatron KoolScapes KSPK-400G-SL User manual

Koolatron

Koolatron KoolScapes KSPK-400G-SL User manual

Koolatron Eco-Trap FT06 Manual

Koolatron

Koolatron Eco-Trap FT06 Manual

Koolatron Bite Shield MK-85 User manual

Koolatron

Koolatron Bite Shield MK-85 User manual

Koolatron MK12 User manual

Koolatron

Koolatron MK12 User manual

Koolatron Lentek BARK FREE Manual

Koolatron

Koolatron Lentek BARK FREE Manual

Koolatron Bite Shield MKSEFK User manual

Koolatron

Koolatron Bite Shield MKSEFK User manual

Koolatron BITE SHIELD User manual

Koolatron

Koolatron BITE SHIELD User manual

Koolatron KoolScapes RBBP-50 User manual

Koolatron

Koolatron KoolScapes RBBP-50 User manual

Koolatron Bite Shield MK05 User manual

Koolatron

Koolatron Bite Shield MK05 User manual

Koolatron Lentek PestContro Deluxe User manual

Koolatron

Koolatron Lentek PestContro Deluxe User manual

Popular Lawn And Garden Equipment manuals by other brands

SCH F48M operating instructions

SCH

SCH F48M operating instructions

Bosch AHS 400 - 24T operating instructions

Bosch

Bosch AHS 400 - 24T operating instructions

Clam POLAR KIT-9625 instructions

Clam

Clam POLAR KIT-9625 instructions

Ivation IVAHG7POD user guide

Ivation

Ivation IVAHG7POD user guide

Mountfield Powersilent 2600 Translation of original instruction manual

Mountfield

Mountfield Powersilent 2600 Translation of original instruction manual

Stiga SV 415 E Operator's manual

Stiga

Stiga SV 415 E Operator's manual

Gronomics MRGB-2L 48-48 Assembly instruction

Gronomics

Gronomics MRGB-2L 48-48 Assembly instruction

Grouw! 18023 instruction manual

Grouw!

Grouw! 18023 instruction manual

Stihl MH 610 instruction manual

Stihl

Stihl MH 610 instruction manual

Jaxpety HG61H0712-12 user manual

Jaxpety

Jaxpety HG61H0712-12 user manual

Billy Goat AET60 owner's manual

Billy Goat

Billy Goat AET60 owner's manual

BCS 650 owner's manual

BCS

BCS 650 owner's manual

Stiga 110 Combi Pro Specifications

Stiga

Stiga 110 Combi Pro Specifications

New England Arbors Rosewood Arbor Assembly guide

New England Arbors

New England Arbors Rosewood Arbor Assembly guide

GROLAB SOILBOT installation manual

GROLAB

GROLAB SOILBOT installation manual

XU1 XPPHP-018 operating instructions

XU1

XU1 XPPHP-018 operating instructions

Garland ROLL&COMB KEEPER 20V 141 instruction manual

Garland

Garland ROLL&COMB KEEPER 20V 141 instruction manual

Olympic Paints Marathon manual

Olympic Paints

Olympic Paints Marathon manual

manuals.online logo
manuals.online logoBrands
  • About & Mission
  • Contact us
  • Privacy Policy
  • Terms and Conditions

Copyright 2025 Manuals.Online. All Rights Reserved.