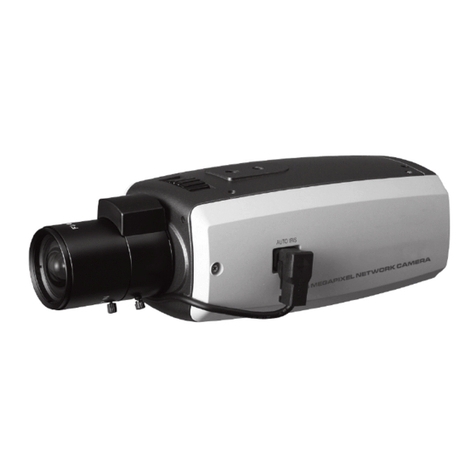
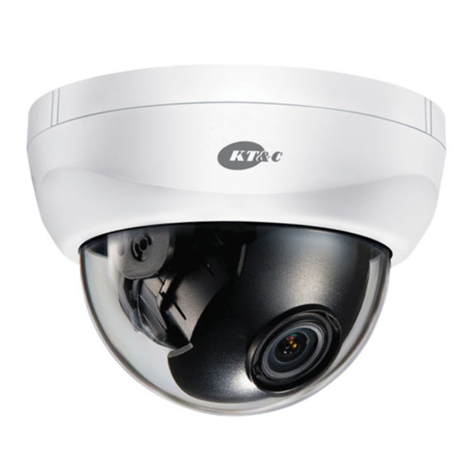
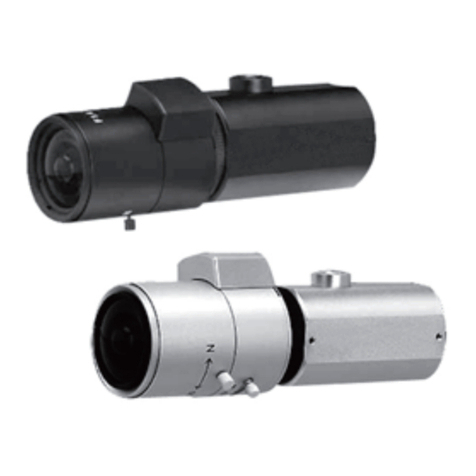
KT&C KTC-ABN6302 Installation manual

FULL AHD
Box Camera
OPERATION MANUAL
Thank you for choosing our high quality camera. Before attempting
to connect operate this unit,please read and follow these instructions.
M266-ABN6302-001

2
CONTENTS
NOTICES
FOR YOUR SAFETY
FEATURES
COMPONENTS
OVERVIEW AND FUNCTION
INSTALLATION
CONNECTION
DIMENSIONS
SPECIFICATIONS
OSD MENU STRUCTURE
AHD (UP THE COAX)
1.
2.
3.
4.
5.
6.
7.
8.
9.
10.
11.
These servicing instructions are for use by qualied service personnel only.
To reduce the risk of electric shock do not perform any servicing other than
that contained in the operating instructions unless you are qualied to do so.
Use Class 2 Power Supply Only
CAUTION

3
1. NOTICES
1. A regulated DC12V 500mA power supply is recommended for use with this
camera to ensure the best picture quality and stable operation.
An unregulated power supply may cause damage to the camera.
Using an unregulated power supply will void the product warranty.
If your monitor is switched to high impedance, then please adjust accordingly.
2. Do not attempt to disassemble the camera to access internal components.
Refer servicing to your dealer.
3. Never face the camera towards the sun or any bright or reective light, which
may cause smear on the picture and possible damage to the image sensor.
4. Do not remove the serial sticker for the warranty service.
This device complies with Part 15 of FCC regulations.
Operation is subject to the following two conditions;
1. This device may not cause harmful interference.
2. This device may receive interference that can cause affect the opration of this
equipment.
Note -
This equipment has been tested and found to comply with the limits for a Class A
digital device, pursuant to part 15 of the FCC Rules. These limits are designed to
provide reasonable protection against harmful interference when the equipment is
operated in a commercial environment. This equipment generates, uses, and can
radiate radio frequency energy and, if not installed and used in accordance with
the instruction manual, may cause harmful interference to radio communications.
Operation of this equipment in a residential area is likely to cause harmful
interference in which case the user will be required to correct the interference at
his own expense.
Caution -
Alteration or modications carried out without appropriate authorization may
invalidate the user's right to operate the equipment.

4
1. NOTICES
Correct Disposal of This Product
(Waste Electrical & Electronic Equipment)
(Applicable in the European Union and other European countries with
separate collection systems)
This marking shown on the product or its literature indicates that it should
not be disposed with other household wastes at the end of its working life. To
prevent possible harm to the environment or human health from uncontrolled
waste disposal, please separate this from other types of wastes and recycle it
responsibly to promote the sustainable reuse of material resources.
Household users should contact either the retailer where they purchased this
product or their local government oce for details of where and how to safely
recycle the item.
Business users should contact their supplier and check the terms and
conditions of the purchase contract.
This product should not be mixed with other commercial wastes for disposal.
CAUTION
RISK OF ELECTRIC SHOCK.
DO NOT OPEN
CAUTION : TO REDUCE THE RISK OF ELECTRIC
SHOCK, DO NOT REMOVE COVER(OR BACK).
NO USER SERVICABLE PARTS INSIDE.
REFER SERVICING TO QUALIFED SERVICE
PERSONNEL.
This symbol is intended to alert the user to the presence of uninsulated
"dangerous voltage" within the product's enclosure that may be of
sucient mangnitude to constitute a risk of electric shock to persons.
This symbol is intended to alert the user to the presence of important
operating and maintenance(servicing) instruction in the literature
accompanying the appliance.

5
2. FOR YOUR SAFETY
1) All warnings and instructions in this manual should be followed.
2) Save this manual for future reference.
3) Heed all warnings.
4) Follow all instructions.
5) Do not use this apparatus near water.
6) Clean only with a dry cloth.
7) Do not block any ventilation openings. Install in accordance with the
manufacturer’s instructions.
8) Do not install near any heat sources such as radiators, heat registers,
stoves, or other apparatus (including ampliers) that produce heat.
9) To help prevent electric shock, plug the equipment and peripheral power cables
into properly polarized or grounded electrical outlets. These cables are
equipped with the wide blade or the third prong to ensure proper grounding.
Do not use adapter plugs or remove the grounding prong from a cable. If the
provided plug does not t your outlet, consult an electrician.
10) Ensure that nothing rests on your equipment’s cables and that the cables are
not located where they can be stepped on, tripped over, or pinched.
11) Only use attachments or accessories as specied.
12) Only use the equipment with the cart, stand, tripod, bracket,
or table that is specied by the manufacturer or sold with the
apparatus. When a cart is used, use caution to prevent the cart
from tipping over and to avoid injury.
13) Do not connect or disconnect during lightning storms due to risk of electric
shock.
14) If any of the following conditions occur, unplug the equipment from the
electrical outlet and replace the part or contact your trained service provider:
• The power cable, extension cable, or plug is damaged.
• An object has fallen into the equipment.
• The equipment has been exposed to water.
• The equipment has been dropped or damaged.
• The equipment does not operate correctly when you follow the operating
instructions.
6
3. FEATURES
• High resolution
SONY 1/2.8" 2.1MP Progressive Color CMOS Image Sensor, 1080p(1920x1080)@30fps
• Support various digital video output
1080p@30fps / 1080p@25fps / 720p@30fps / 720p@25fps
• AHD(Analog HD) Output
AHD is suitable for long reach transmission over single coaxial cable.
Transmission Distance: 300 m (Color)
Max. Transmission Distance: 500 m
• OSD menu for setup and configuration.
• Provides True Day/Night capability with motorized IR cut filter.
• Power source: 12VDC / 24VAC/12VDC.
• UTC (Up the coax.) via AHD coaxial cable.

7
4. COMPONENTS
DSP COLOR CAMERA
C-MOUNT ADAPTOR RING
OPERATION MANUAL

8
5. OVERVIEW AND FUNCTION
• FRONT TRIPOD MOUNTING HOLE(1/4"-20 UNC)
C-MOUNT ADAPTOR RING
LENS MOUNT COVER
CS-MOUNT ADAPTOR RING
LOCKING SCREW(2EA)
AUTO IRIS JACK
TRIPOD MOUNTING HOLE(1/4"-20 UNC)
• BACK
①MENU BUTTON
②UP BUTTON
③DOWN BUTTON
④LEFT BUTTON
⑤RIGHT BUTTON
⑥POWER LED
(The LED turns on when power is supplied)
⑦AHD OUTPUT JACK
⑧POWER TERMINAL
(Used to connect an DC12V power source)
(Options: AC24V / DC12V)
AC24V / DC12V
MENU/SET
POWER
DC12V/AC24V
AHD AHD

9
6. INSTALLATION
4. Replace the auto iris lens connection plug cover and take off the
Sensor protection cap. Then, attach the auto iris lens to the camera by
screwing it in clockwise.
5. Insert the connection plug that is connected to the auto iris lens cable
into the auto iris lens connector, located on the side of the camera.
C-mount lens : 10 mm or less
CS-mount lens : 5 mm or less
* NOTE
Use only lenses within the specifications shown below.
Otherwise, lenses may damage the camera or abnormal
fixing may result.

10
6. INSTALLATION
Installation of C-Mount Lenses
Installation of CS-Mount Lens
10
CS-MOUNT ADAPTOR RING
C-MOUNT ADAPTOR RING
CS-MOUNT ADAPTOR RING

11
7. CONNECTION
• MONITOR CONNECTION
- 12VDC
- 24VAC/12VDC
AHD DVR
AHD DVR
AHD
24VAC/12VDC REGULATED
POWER SUPPLY
AHD OUTPUT
AHD
12VDC REGULATED
POWER SUPPLY
AHD OUTPUT
AHD
AHD
AHD OUTPUT
CVBS OUT (Service Video)
AHD OUTPUT
CVBS OUT (Service Video)

12
8. DIMENSIONS
Unit(mm)
58
58
110.4
109
1/4"-20 UNC

13
9. SPECIFICATIONS
Imaging Device
1/2.8" Progressive Scan Sony CMOS
Effective Pixels
1984(H) x 1105(V)
Unit cell size
2.8um (H) x 2.8um (V)
Video Output Mode
AHD : 1080P 30fps(25fps) / 720p@30fps(25fps)
TV Out : CVBS NTSC/PAL
Transmission Distance
AHD : Color 300m@RG59 , BW 500m@RG59
Minimum Illumination
0.5 Lux (F1.6, ICR Off, DSS Off)
Shutter speed Auto / Manual selectable
1/30(25), 1/60(50), FLK, 1/240(200), 1/480(400), 1/1000, 1/2000, 1/5000,
1/10000, 1/50000, X2, X4, X6, X8, X10, X15, X20, X25, X30
Day/Night
True D/N with ICR Mechanism
BLC OFF/ BLC/ HSBLC
AGC 0 ~ 15
2/ 3DNR OFF / LOW / MIDDLE / HIGH
Digital WDR
OFF/ ON(LEVEL)/ AUTO
SENS-UP OFF/ AUTO(X2, X4, X6, X8, X10, X15, X20, X25, X30)
Privacy Masking 4 Zones
Motion Detection 4 Zones
White Balance AWB/ATW/ PUSH LOCK/ INDOOR/ OUTDOOR/ MANUAL
Lens C/CS Mount Lens
OSD Tact Switch, Coaxial communication(PELCO-C)
Language English, Korean, Japanese, Chinese, Russian, French, Spanish, Italian,
Portuguese, Dutch, German, Polish, Turkish, Hebrew, Arabic
ETC FLIP(H/V/HV), Defog, FREEZE, SHARPNESS, LSC
Power Source
12VDC / Dual (24VAC/12VDC)
Power
Consumption
DC
12VDC (±10%) Max. 130 mA
Dual 24VAC (±10%) Max. 2.8 W, 12VDC (±10%) Max. 190 mA
Operating Temperature -10°C ~ 50°C (14°F ~ 122°F)
Storage Temperature -20°C ~ 60°C (-4°F ~ 140°F)
Dimension (mm) 58 x 58 x 110.4
Weight Approx. 220 g
*Specications and designs are subject to change for improving the functionality of this
product without notice.

14
10. OSD MENU STRUCTURE
• Menu structure
Main 1st Sub Menu 2nd Sub Menu Value
LENS DC MODE INDOOR/ OUTDOOR(MIN SHU,
MAX SHU)
IRIS SPEED 0~15
EXPOSURE
SHUTTER
AUTO, 1/30(25), 1/60(50), FLK,
1/240(200), 1/480(400), 1/1000,
1/2000, 1/5000, 1/10000,
1/50000, X2, X4, X6, X8, X10, X15,
X20, X25, X30
AGC 0 ~ 15
SENS-UP OFF/ AUTO(X2, X4, X6, X8, X10,
X15, X20, X25, X30)
BRIGHTNESS 1~ 100
D-WDR OFF/ ON(LEVEL)/ AUTO
DEFOG OFF/ AUTO(POS/SIZE,
GRADATION, DEFAULT)
BACKLIGHT
OFF
BLC
LEVEL LOW/ MIDDLE/ HIGH
AREA POSITION, SIZE
DEFAULT
HSBLC
SELECT
AREA1/ AREA2/ AREA3/ AREA4
DISPLAY OFF/ ON(POSITION, SIZE)
BLACK MASK OFF/ ON
LEVEL 0~100
MODE
ALL DAY/ NIGHT(AGC LEVEL)
DEFAULT
WHITE
BALANCE
AWB
ATW
AWC(PUSH)
INDOOR
OUTDOOR
MANUAL BLUE 0~100
RED 0~100
DAY&NIGHT
AUTO
D→N(AGC)
0~255
D→N(DELAY)
0~ 60sec, 1sec/step
N→D(AGC) 0~255
N→D(DELAY) 0~ 60sec, 1sec/step
COLOR
B/W BURST OFF/ ON
IR SMART
OFF/ ON
EXT
D→N(DELAY)
1 ~ 60sec, 1sec/step
N→D(DELAY) 1 ~ 60sec, 1sec/step
NR 2DNR OFF/ LOW/ MIDDLE/ HIGH
3DNR OFF/ LOW/ MIDDLE/ HIGH

15
10. OSD MENU STRUCTURE
Main 1st Sub Menu 2nd Sub Menu Value
SPECIAL
CAM TITLE OFF
ON 0~9, A~Z, Special Character
D-EFFECT
FREEZE OFF/ ON
MIRROR OFF/MIRROR/ V-FLIP/ ROTATE
NEG. IMAGE OFF/ ON
MOTION
SELECT AREA1/ AREA2/ AREA3/ AREA4
DISPLAY OFF/ ON(POSITION, SIZE)
SENSITIVITY 0~100
COLOR WHITE/ RED/ GREEN/ BLUE
TRANS 0.00/ 0.25/ 0.75/ 1.0
ALARM VIEW TYPE/ OSD VIEW/ ALARM
OUT/ TIME
DEFAULT
PRIVACY
SELECT AREA1/ AREA2/ AREA3/ AREA4
DISPLAY OFF/ MOSAIC/ INV/ COLOR
COLOR WHITE/ BLACK/ RED/ BLUE/
YELLOW/ GREEN/ CYAN/ USER
TRANS 0.25/ 0.50/ 0.75/ 1.0
DEFAULT
LANGUAGE
ENG/ CHN/ CHN(S)/ GER/ FRA/
ITA/ SPA/ POL/ RUS/ POR/
NED/ TUR/ KOR/ JPN/ HEB/
ARB
DEFECT
LIVE DPC OFF/ ON(AGC LEVEL / LEVEL)
WHITE DPC POS/SIZE, START, DPC
VIEW,LEVEL, AGC, SENS-UP
BLACK DPC POS/SIZE, START, DPC
VIEW,LEVEL
RS485
CAM ID 0~255
ID DISPLAY OFF/ ON
BAUDRATE 2400/ 4800/ 9600/ 19200/
38400
ADJUST
SHARPNESS
LEVEL 0~10
START AGC 0~255
END AGC 0~255
MONITOR LCD GAMMA/ BLUE GAIN/ RED GAIN
CRT BLUE GAIN/ RED GAIN
LSC OFF/ ON
VIDEO.OUT NTSC/ PAL
OUTPUT_SIZE 1080P
720P
EXIT SAVE&END/ RESET/ NOT SAVE
* VIDEO output & VIDEO_EXT signal
Press Left key more than 5sec. : 960H
Press Right key more than 5sec. : AHD (default mode)
* HD Resolution
Press up key more then 5 sec : 720p 1080p (Default mode)
* Signal Format
Press Down key more than 5 sec : NTSC PAL (The initial value is set at Default.)
* Changing the ADJUST / VIDEO OUT from the default settings may cause the VIDEO BLACKOUT. (In
case of setting "Adjust/VIDEO OUT" mode in the menu, it may cause "VIDEO Black out" in DVR. For the
settlement, the "VIDEO OUT" setting should be set compatible with the camera. * Reset of camera will
make initial value as factory reset.)
* DAY&NIGHT / EXT function is NOT operable.
* SPECIAL / RS485 NOT operable.
* SPECIAL / MOTION / ALARM / ALARM OUT, TIME function is NOT operable.

16
11. AHD UTC (UP THE COAX)
The UTC function supports OSD control via AHD coaxial cable.
Important)
* When low quality coaxial cable is used, it may not be possible to control OSD menu.
This manual suits for next models
1
Table of contents
Other KT&C Security Camera manuals

KT&C
KT&C KPC HDD122 User manual

KT&C
KT&C KPC-N850 User manual

KT&C
KT&C KPC-HDN720M User manual

KT&C
KT&C KPC-N551 User manual

KT&C
KT&C M173-LD(N)Di45-001 User manual

KT&C
KT&C KPC-SPDN120HD User manual

KT&C
KT&C KNC-SPDNi120HD User manual

KT&C
KT&C KPC-VDN101 User manual

KT&C
KT&C HDX131M User manual

KT&C
KT&C 120-E230-001 User manual

KT&C
KT&C DN302U User manual

KT&C
KT&C KNC-p3DR3IR User guide

KT&C
KT&C KPC-HDB230 User manual

KT&C
KT&C KPC-N700 User manual

KT&C
KT&C KPC-N551NU10 User manual

KT&C
KT&C KPC-E700 User manual

KT&C
KT&C KPT-SPDN231NH User manual

KT&C
KT&C KPC-HZA302M User manual

KT&C
KT&C KEZ-c2BR28V12XIR User guide

KT&C
KT&C KNC-p3 Series User manual