manuals.online logo
Brands
  1. Home
  2. •
  3. Brands
  4. •
  5. Kulzer
  6. •
  7. Dental Equipment
  8. •
  9. Kulzer Dima User manual

Kulzer Dima User manual

Instructions for Use – dima Print Denture Base
Instructions for use
66077152 R 6/18
Print Denture Base
Distributed by:
Kulzer, LLC
4315 South Lafayette Blvd.
South Bend, IN 46614
www.KulzerUS.com
Caution: Federal law restricts this device to sale
by or on the order of a dental professional.
1. Introduction
The following instructions for use are for dental technicians, dentists and oral surgeons who use dima Print Denture Base for
final dentures and partials and is intended exclusively for professional dental work. This instruction for use also provides infor-
mation about safety and environmental aspects. A safety data sheet is available on www.kulzerUS.com/downloads. In case more
information is needed regarding the processing of dima Print Denture Base material, contact Kulzer Technical Service at 800-
431-1785. Also see information at the end of this document. dima Print Denture Base material is a light-curable resin indicated
for manufacturing and repairing of 3D printing full and partial temporary removable dentures and baseplates. dima Print Denture
Base material is a Class II medical device material. dima Print Denture Base material shall be used in combination with cara
Print 4.0.
2. Intended use
dima Print Denture Base is a light-curable resin indicated for fabrication and repair of full and partial removable dentures and
baseplates. The material is an alternative to traditional heat-curable and auto polymerizing resins. Fabrication of dental
prosthetics with dima Print Denture Base requires a computer-aided design and manufacturing (CAD/CAM) system that includes
the following components: digital denture base files, based on a digital scan of an impression, digital light projection printer
(cara Print 4.0) and curing light equipment (HiLite Power 3D).
3. Special manufacturing requirements
3.1 Digital denture file;
a. STL format file
b. Digital design
c. File size: less than 100mb (each file)
1. Introduction
2. Intended use
3. Special manufacturing requirements
4. Contraindications
5. Hazards and precautions
6. Storage conditions, expiry date and transport
7. Procedure to print denture base
8. Cleaning
9. Procedures to fabricate a denture using printed denture base
10. post-curing
11. Finishing
12. Repair of denture and baseplates
13. Plastic and packaging waste
14. Instructions for cleaning and disinfecting
15. Delivery units
3.2. Digital light projection printer – cara Print 4.0
3.2.1 Hardware
a. Polymerization technology: Digital light projection (HD DLP @ 405 nm)
b. Building area: 103 x 58 x 130 mm
    c.Resolution(X&Y-axes):53.6μm
    d.Layerthickness(Z-axisresolution):30–150μm(variesbyindication&speedvs.resolutionneeds)
    e.Averagebuildspeed:50mm/hour(@50μm);Min./Max.buildspeed:15–120mm/hour
f. Average duration of 1 print cycle: < 1 hour
g. Connectivity: WiFi, Ethernet or USB
h. Input format: Open STL
I. CAD software compatibility: All CAD programs using open STL
j. CAM software: cara Print 4.0 CAM, included with purchase
k. Printer dimensions: 267 x 420 x 593 mm
l. Printer weight: 21 kg
3.2.2 Features of operation software
Recommended software: cara Print 4.0 CAM performed by the cara printer manufactured by Kulzer
a. STL file import
b. Place and rotate file on the build plate for proper positioning
c. Add supports via manual function or auto function
3.2.3 Printing parameters
a. Layer thickness: 50 micron or 100 micron
b. Optimal orientation: 90 degree tilted orientation
c. Support point size: 0.4 – 1.0 mm
d. Support density: 0.7 – 1.5
3.2.4 Environmental conditions
a. Temperature: 18 – 30°C
b. Relative humidity: 30 – 90%
3.2.5 Cleaning kit inclusive of a rinse bath, flush cutter, paper towel, squeeze bottle for isopropyl alcohol and scraper
3.2.6 Recommended printer
a. cara Print 4.0
3.3. Recommended curing light equipment (post curing units)
3.3.1 UV curing light equipment – post processing [HiLite Power 3D]
a. Main voltage: 100/115/230 V (via voltage selector switch)
b. Rated frequency: 50 – 60 Hz
c. Flash lamp power: 300 W
d. Fuse protection: T6,3A
e. Power consumption: 360 VA
f. Dimensions (H x D x W): app. 225 x 330 x 220 mm
g. Weight: app. 9.5 kg
h. Protection rating: Class I
I. Power-on time: 80%
j. Curing time: 20 mins.
3.3.2 Accessories
a. USP grade glycerin
b. Transparent glass container and plate
4. Contraindications
dima Print Denture Base must not be used for any other purpose than dental removable or fixed dentures. Any deviation from this
instruction for use may have a negative effect on the chemical and physical quality of dima Print Denture Base.
Caution: In case of an allergic reaction, please contact a physician. dima Print Denture Base contains Acrylic Oligomer and
Acrylic Monomer that may cause allergic reactions in predisposed persons.
5. Hazards & precautions
Inhalation:
Avoid inhalation. High vapor concentration can cause headache and irritation of respiratory system. In case of exposure to a
high concentration of vapor or mist, remove person to fresh air. Give oxygen or artificial respiration as required.
66075564 Dima Denture Base IFU EngOnly_0618-Final.indd 1 6/29/2018 11:50:11 AM
Skin contact:
dima Print Denture Base contains polymerizable monomers which may cause skin irritation (allergic contact dermatitis) or other
allergic reactions in susceptible persons. If in contact with skin, wash thoroughly with soap and water. If skin sensitization
occurs, discontinue use. If dermatitis or other symptoms persist, seek medical assistance.
Eye contact:
Direct contact with eyes may cause possible corneal damage. Immediately flush eyes with plenty of clean water for at least 20
minutes and consult a physician.
Ingestion:
Contact your regional poison control center immediately.
Protection:
Wear protection when handling dima Print Denture Base liquid. Protective glasses and nitrile gloves are advised. Information
about the handling of the product can be found in the safety data sheet, which is available on www.kulzerUS.com/downloads.
Precautions:
When washing the printed denture bases with solvent or grinding the denture bases, it should be done in a properly ventilated
environment with proper protective masks and gloves.
Adverse reactions:
Direct contact with the uncured resin may induce skin sensitization in susceptible individuals.
Proper ventilation and personal protective equipment should be used when grinding denture base resins as the particulate
generated during grinding may cause respiratory, skin and eye irritation.
6. Storage conditions, expiry date, and transport
Store product in the original packaging at room temperature, in a dry and dark area, preferably not exceeding 15-25°C (60-
77°F). Close the packaging after each use. The expiry date of the product is mentioned on the product label. In case of
exceeding the expiry date, the product is no longer guaranteed to meet specifications and should not be used. Do not expose
to UV-light and moisture.
7. Procedure to print denture base
7.1. Printing preparation
a. Select the dima Print Denture Base liquid. (It is recommended to use a different resin tank for different shades)
b. Before using dima Print Denture Base, make sure to shake the product in the original packaging for approximately 5
minutes. Color deviations and print failures may occur when shaken insufficiently.
c. Open the 3D printer cover and fill the resin tank of the printer with fresh dima Print Denture Base up to the middle of
maximum fill line for two arches. (When filling the resin into the resin tank, use of gloves and a mask is recommended)
d. Close the printer cover.
7.2. Printing (for more information review current cara Print 4.0 printer IFU)
a. Load the denture model file in printer operation software, recommended by the printer manufacturer.
b. Use the software tool to rotate the STL file to find the optimal position.
c. Use auto-orientation or manual orientation to find its optimal position for printing. The recommended orientation is a
tilted orientation such as space diagonal from a 90°angle. If auto-orientation is not satisfied, rotate to make optimal
position. (For more information, please review the cara Print 4.0 application guide and CAM guide)
d. Generate supports on the file.
e. Slice the file.
f. Send the file to the printer via Ethernet, WiFi, or manually via a USB stick.
g. Make sure that the environmental conditions are as clean as possible. Dirty reservoirs or machines can cause
deformation and therefore failure of the printed objects.
h. Locate the file on the printer and start printer.
8. Cleaning
a. Detach the printed denture base from the build platform.
b. Place the platform on a cloth or paper towel with the built job facing upwards. The printed jobs can be removed from the
platform using the plastic scraper or spatula included with the cara Print 4.0 accessory kit.
c. Rinse the printed jobs twice with isopropanol (at least 71% alcohol) to remove any excess material. Use an ultrasonic
bath and make sure to properly dry the appliance after each bath cycle. Rinse the first time for three minutes, second
time for 2 minutes. The second rinse must be with clean isopropanol. Rinsing with alcohol solution should not exceed
longer than 5 minutes, as this may cause defects in the printed denture.
d. After cleaning make sure the printed denture is dry and free of solvent residues. Remove support structures.
9. Procedures to fabricate a denture using printed denture base
Bonding the printed teeth to the printed denture base. Attention: Use dima Teeth to fabricate a denture with dima Print Denture
Base. Attention: Do not post-cure base or teeth prior to bonding step. Prepare, before post-cured, the printed teeth and printed
denture base with socket shapes to receive printed teeth (tooth sockets).
Place the dima teeth into the corresponding tooth sockets on the printed denture base and check teeth fitting.
Apply the small amount of light curable adhesive into the tooth sockets and bond teeth by exposing into UV light until the teeth
set in position. Recommend to use dima Denture Base for bonding. If necessary, apply small amount of dima Denture Base for
bonding using an applicator to smooth the edges of the denture base and cure it.
10. Post-curing
a. Cure the final denture by sinking into the glycerin container (glycerin temperature should be greater than 60oC) for at
least 20 min under recommended Post-Curing Unit. For half of the post-curing time tissue side up and for another half of
the time tissue side down.
b. Place the printed denture into the HiLite Power 3D for final polymerization. The final properties and the final color depend
on the post curing process. Post-curing is a UV-light treatment that ensures dima Print materials obtain full polymer
conversion. Through this the residual monomer content is reduced to a minimum and the highest mechanical properties
are achieved. This procedure is a necessary step to produce a biocompatible denture. We strongly advise use of the Kulzer
HiLite Power 3D device.
The specifications of the dima Print Denture Base are determined on the basis of test plates, produced on our cara Print
4.0 with the corresponding settings registered in the software. The print job is post-cured with the HiLite Power 3D for 10
minutes on each side, for a total of 20 minutes. Please notice that the light sources and the printing machine need routine
maintenance following the device instructions.
11. Finishing
Remove remaining support structures and finish polishing if necessary, using conventional methods. Differences in color
nuance may occur due to production in batches of the raw material and product or inadequate shaking of the original packaging
before use or insufficient post-curing.
12. Repair of denture and baseplates
Note: This process is only applied to temporary repair cases. It is recommended to remake the whole denture using an original
design file.
Prepare a cast made of a putty using a broken denture. Prepare the fracture area by grinding to open more and roughing the
outer side of fracture area.
Prime the roughened surfaces of the repair area with dima Denture Base. Place the broken denture on the cast.
Apply the dima Denture Base resin to cover the roughed and fracture areas and cure the areas by exposing light curing machine
until the resin is solidified. Place the denture on the cast in the post-curing machine for 30 min. Carefully remove the denture
from the cast and cure the tissue side for 30 min. Grind, polish and finish.
13. Plastic and packaging waste
The dima Print Denture Base in its polymerized form is not harmful for the environment. Residual waste material in its liquid
state should be disposed of in accordance to the safety data sheet.
14. Instructions for cleaning and disinfecting
Polymerized dima Print Denture Base printing material should be cleaned with non-chemical products. If disinfecting is
required before intended use, an ethanol solution can be used. Follow instructions for disinfection that accompanies the
solution from the solution manufacturer. Do not use a dishwasher or thermal disinfector.
15. Delivery units
The dima Print Denture Base is available in the following packaging size: 1000 grams.
Material Total time (min.) Post-Curing Device Procedure
dima Print Denture Base 20 (2 x 10) HiLite power 3D Turnobjectsafter10minutes
dima print Denture Teeth 20 (2 x 10) HiLite power 3D Turnobjectsafter10minutes
66075564 Dima Denture Base IFU EngOnly_0618-Final.indd 2 6/29/2018 11:50:11 AM

Other Kulzer Dental Equipment manuals

Kulzer Diamond Burs User manual

Kulzer

Kulzer Diamond Burs User manual

Kulzer PALA Palamat elite User manual

Kulzer

Kulzer PALA Palamat elite User manual

Kulzer Cara Scan 4.0 User manual

Kulzer

Kulzer Cara Scan 4.0 User manual

Kulzer Signum HiLite pre 2 User manual

Kulzer

Kulzer Signum HiLite pre 2 User manual

Kulzer HiLite power 3D User manual

Kulzer

Kulzer HiLite power 3D User manual

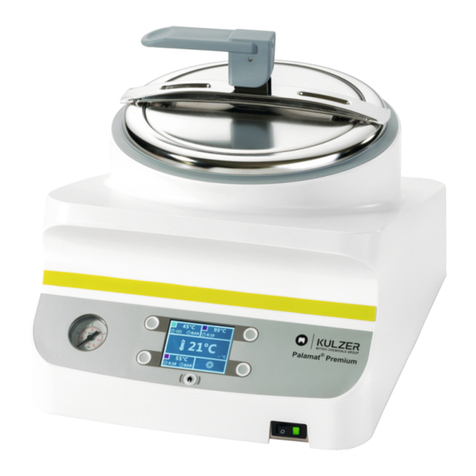
Kulzer PALA Palamat Premium User manual

Kulzer

Kulzer PALA Palamat Premium User manual

Kulzer Ivory ReLeaf User manual

Kulzer

Kulzer Ivory ReLeaf User manual

Kulzer GLUMA User manual

Kulzer

Kulzer GLUMA User manual

Kulzer Translux 2Wave User manual

Kulzer

Kulzer Translux 2Wave User manual

Kulzer Venus Diamond User manual

Kulzer

Kulzer Venus Diamond User manual

Kulzer Cara Scan 4.0 User manual

Kulzer

Kulzer Cara Scan 4.0 User manual

Popular Dental Equipment manuals by other brands

Sirona HELIODENT DS installation instructions

Sirona

Sirona HELIODENT DS installation instructions

KERR ENDODONTICS elements 8:1 Instructions for use

KERR ENDODONTICS

KERR ENDODONTICS elements 8:1 Instructions for use

Bien Air Lubricare 2 HIM-2 Instructions for use

Bien Air

Bien Air Lubricare 2 HIM-2 Instructions for use

Dentsply Sirona Ceram.x Spectra ST Directions for use

Dentsply Sirona

Dentsply Sirona Ceram.x Spectra ST Directions for use

Ivoclar Vivadent Stratos  300 operating instructions

Ivoclar Vivadent

Ivoclar Vivadent Stratos 300 operating instructions

Sendoline S5 user manual

Sendoline

Sendoline S5 user manual

Dentsply Sirona Nupro Freedom Directions for use

Dentsply Sirona

Dentsply Sirona Nupro Freedom Directions for use

Coltene CanalPro Jeni Processing instructions

Coltene

Coltene CanalPro Jeni Processing instructions

Olsen Logic Operation guide

Olsen

Olsen Logic Operation guide

Aseptico ADU-04ST Operation and maintenance instruction manual

Aseptico

Aseptico ADU-04ST Operation and maintenance instruction manual

Durr Dental VistaPano S operating instructions

Durr Dental

Durr Dental VistaPano S operating instructions

Tecno-gaz Europa B EVO Instructions for use

Tecno-gaz

Tecno-gaz Europa B EVO Instructions for use

Vatech PaX-500 user manual

Vatech

Vatech PaX-500 user manual

NSK Ti-Max Z Series Operation manual

NSK

NSK Ti-Max Z Series Operation manual

Vatech PaX-Primo user manual

Vatech

Vatech PaX-Primo user manual

VHF Z4 Original operating instructions

VHF

VHF Z4 Original operating instructions

Aseptico AEU-25 Operation and maintenance instruction manual

Aseptico

Aseptico AEU-25 Operation and maintenance instruction manual

Faro ALYA Installation and user manual

Faro

Faro ALYA Installation and user manual

manuals.online logo
manuals.online logoBrands
  • About & Mission
  • Contact us
  • Privacy Policy
  • Terms and Conditions

Copyright 2025 Manuals.Online. All Rights Reserved.