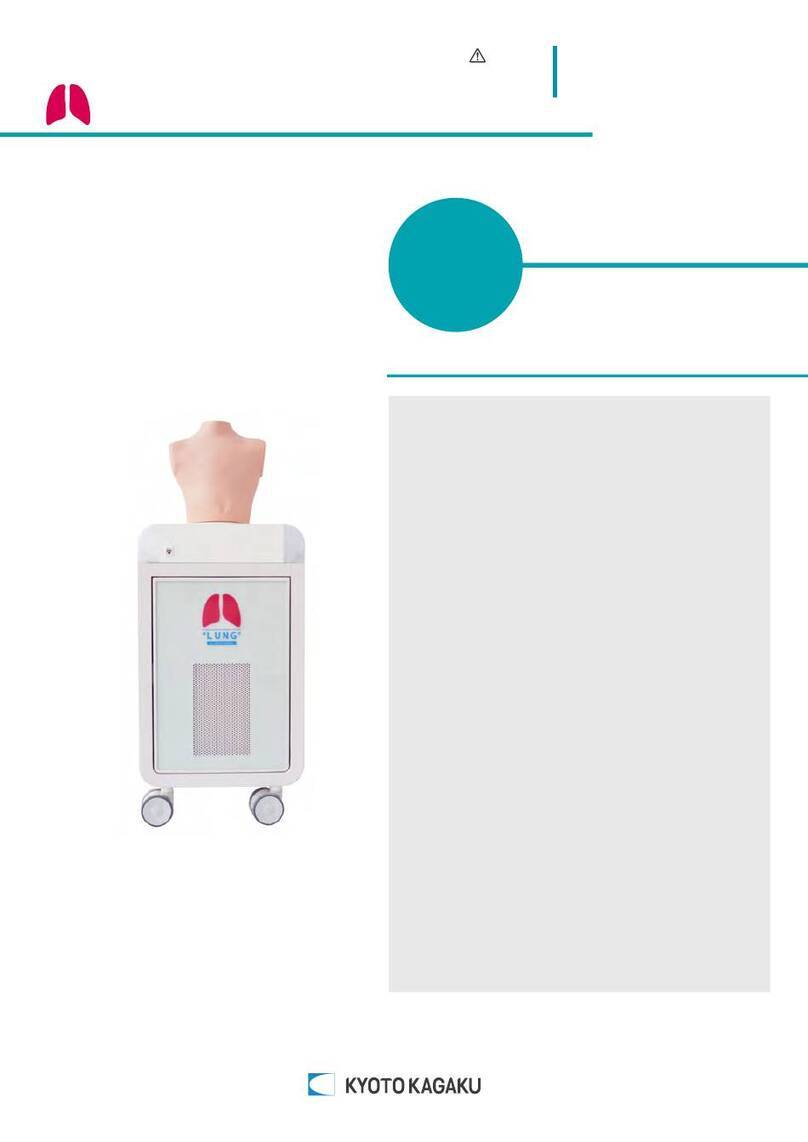
Kyoto Kagaku M99 User manual

Instruction
manual
Arterial Puncture Wrist Dark tone Arterial Puncture Wrist Light tone
M99
ArterialPunctureWrist
Production supervision
Dr. Hiroshi Koyama,
Medical Director, General Internal Medicine National
Hospital Organization Kyoto Medical Center
https://youtu.be/5TVn4bw3Kkw
Movie Site
English Site

Arterial Puncture Wrist
M99
● Introduction
Manufacturer’s Note
●
●
●
DOs and DON’Ts
After Training
●
●
Training
Trouble shooting
Instruction manual
P.3
P.4
P.5
P.1
P.2
P.13
P.10
P.6
P.7
Do not mark on the model and other components
with pen nor leave printed materials contacted
on surface.
Ink marks on the models cannot be removed.
Caution
Contents
P.8-P.9
P.10
P.11-P.12
P.12
Training
Before You Start
Safety precautions
Set Includes
Parts name and functions
Preparation
Preparation of simulated blood
Connection of the circulation pump
Setting up the wrist model and puncture unit
Discharge the simulated blood
Disassembly of the hand-wrist model
and puncture unit
Cleaning

1
Arterial pulsation is palpable.
Realistic resistance of tissue and artery wall felt with the injection needle.
Radial arterial line placement can be simulated.
No puncture trace remains on the injection site.
One-touch, leak-free connections.
Easy clean up.
Features
Manufacturer s note
’
Introduction Manufacturer s note
’
DOs and DON’Ts
Radial artery puncture is a common approach for blood collection and arterial line placement.
This innovative simulator is designed to provide training in arterial puncture with true-to-life feeling.
Any use not in accordance with the enclosed instructions is strongly discouraged.

Introduction Manufacturer s note
’
DOs and DON’Ts
2
DOs and DONʼTs
DOs DONʼTs
●
When the electric parts get warm or produce
smoke, immediately turn off the power and
unplug from the power source
For safety reasons, always maintain an appropriate space
around the circulation pump while running the system so as to
allow the operator to unplug the power supplyin case of
system malfunction.
Risk of fire. Contact your distributor or the manufacturer for
repair.
●Handle with care
The materials for the models are special compositions of soft
resin.
Please handle them with utmost care at all times.
The manikin skin may be cleaned with a wet cloth,
if necessary, using mildly soapy water or diluted detergent.
●Storage
Store the simulator at room temperature, away from heat,
moisture and direct sunlight.
Storage under the temperature above 50 degrees C may
reduce the performance quality of the simulator.
Storage in a dark, cool space will help prevent the skin color
from fading.
●Operate the system under the designated
circumstances
Power input: AC100V~240V plus or minus 10%, 50Hz/60Hz
Temperature range: between 0 degrees C and 40 degrees C
(no congelation)
Relative humidity; between 0% to 80% (no condensation)
*Connecting to power source outside of the designated range
may lead to fire.
●Safe disposition
To avoid short circuit, do not run the simulator set above a
power receptacle.
●
Handle the power plug and cord observing
following precautions
1. Clean the head of the plug periodically.
2. Plug in the plug to the outlet firmly to the end.
3. Always hold the plug when unplugging. Do not pull the cable.
4. Do not force to bend, twist the cable and avoid scratching
or cutting on it.
Failing to follow the above precautions can result in damage in
the plug and the cable, constituting risk of fire or shock.
●Do not disassemble or open electric or
precision components
Do not open up or disassemble the housing for electric parts
or precision components.
Refrain from opening up any lids, caps or covers for such
areas, and never run the system while any of such covers are
open.
*Never disassemblethe electric components, power plug and
cable as it may create a risk of fire, shock or injury. Contact
your distributor or the manufacturer for repair.
●Never wipe the product and components
with thinner or organic solvent
●Ink marks on the soft surface wonʼt be
removable
Donʼtmarkontheproductandcomponentswithpenor
leaveanyprintedmaterialsincontactwiththeirsurface.
●Do not drop or give shocks
Theelectriccomponentsareprecisioninstruments. Strong
shocksorcontinuousvibrationmaycausebreakagesofits
internalstructure.
●Do not run the system continuously over 2
hours
Takeatleast30minutesshutdown,turningoffthepower,
every2hours.
●Do not wet the electric components
Donotpourorspillwaterorliquiddetergentoverthe
electriccomponents,powercableandpowerplug. Running
thesystemwhiletheelectriccomponentsarewetmay
createashockhazardorariskoffire.
●
Do not handle the power plug with wet hands
Riskofshock.
●No fire
Donotputtheproductclosetofire.Itmayleadtodiscolor-
ationordeformationoftheproductaswellasshortcircuit,
creatingariskoffire.
The color of the tube or soft resin parts may change over time, but this has no effect on simulator's functionality.
3
The signs below represent uses that may be dangerous or harmful.
This sign represents dangerous use that may lead to re hazards or electrocution.
These signs below represent strongly recommended uses for safety.
The safety rules below focus on the safety of the user; please read carefully before using the product.
Warning
Warning
Caution This sign represents harmful use toward the simulator or its parts that may lead to
permanent damage or disguration.
A circle with a cross represents actions that are strongly discouraged. This sign
asks users not to attempt taking the simulator apart.
This sign represents rules that we strongly encourage users to follow.
When the manikin or the control box becomes
hot or begins to smoke, immediately unplug
the power cord.
Remove any dust that has accumulated on the
power plug and insert the plug completely into
the power socket.
Do not handle the power cord with wet hands.
This is to avoid electrocution.
Use the designated power supply.
Misuse may lead to damages and re
hazards.
When unplugging the power cord, hold by the
plug and pull.
Do not bend, twist or damage the power cord.
This is to avoid to re hazards and electro
cution.
Keep the manikin, its machinery and power
cord away from water or detergent.
Keep flammable materials away from the
product.
Such materials can lead to re hazards and
damages to the simulator.
Unplug the power cord when the simulator is
not in use.
This is a major re hazard. Please contact
your local distributor or Kyoto Kagaku
CO., LTD for repairs.
This will prevent electrocution or re
hazards that may cause burns and
damages.
Dust and incomplete connection can lead
to a major re hazard.
Wet system can lead to re hazards and/or
electrocution.
Unplugging by holding the cord may lead
to damages to the cord itself, re hazards
or electrocution.
This could lead to re hazards, electrocution
and injuries. Please contact your local
distributor or Kyoto Kagaku CO.,LTD for repairs.
Do not attempt to take apart or remodel the
product.
Safety precautions
Before You Start

4
a.
b.
h.
i.
j.
k.
c.
d.
e.
f.
g.
11351-01011351-010-D 11351-030 11351-040 11388-400
①
②
③
④
⑤
Puncture unit
Hand-wrist model
Simulator base
Circulation pump
Jar
Syring(50mL)
Tube
(Irrigation: black ring)
Tube
(Drainage: red ring)
Vinyl sheet
Replacementparts
Partsname
Skin covers One set (each one of outer and inner skin)
A set of four
11351-010/010-D
11351-030
11351-040
11388-400
A set of four
A set of 10
Silicon tape
Artery tube
Simulated blood (Swab type)
Quantity Productcode
Skin (outer)
Skin (inner)
Artery tube
silicon tape
Radius base
2
2
4
1
1
1
1
1
1
1
BeforeYouStart Setincludes
SetIncludes
Before you start, ensure that you have all components listed below.
and not a product defect.
Note: The needle holes on the brand new artery tubes are intentionally made to control pressure,
ACadapterand
power cable
Instruction manual
Simulated blood
(Swab type)
aa
bb
h
e
ff
ff
gg
dd
cc
ii
kk
jj
kk
1
1
1
1
2
10
ff
b
d
l.
c

5
Parts name and functions
Power switch
Tube socket (OUT)
Tube socket (IN)
Suction tube
Tube socket (In)
Puncture unit
Hand-wrist model
Tube socket (Out)
Adjustment knob
(pulse strength)
Jar
Jar holder
Discharge tube
Drain tube
Environmental conditions: 0 degrees C. - 40 degrees C
Relative humidity: Less than 80 per cent (no condensation)
Working environment: Indoor
Avoid exposure to the elements
Altitude: 2000 meters above sea-level
Recommended operation environment for the circulation pump
Installation category: Ⅱ(2)
Pollution degree: Ⅱ(2)
Supply voltage: AC 100V-240V~1.45A 47 - 63Hz
Before You Start
AC adapter and power cable

1
6
Connection of the circulation pump
Preparation of simulated blood
drain tube
Take care not to drop simuleted blood on clothes as simuleted blood stains can be
very difficult to remove.
3. Insert the suction/discharge tubes into the simulated
blood. Make sure the tips of the both tubes are properly
placed undersurface of the fluid.
The tip of the drain tube is to be above the surface.
1.Pour 1000mL of water into the plastic beaker. Put the simulated blood (swab type) into the
beaker and stir the water sufficiently to prepare the simulated blood.
drain tube
Attention
Preparation
Please note: We recommend performing preparation and training on the included vinyl sheet.
2. Place the jar on the jar holder at the back side of the
simulator base.
※ The plastic beaker in this picture
is not included.

2
7
1. Connect the simulator base and circulation pump with tubes.
【Disconnection of the tubes 】
Connection of the circulation pump
Hold the metal sleeve on the tube socket and push it toward
the pump/simulator base wall to unlock the connection.
Hold this part.
Insert the ends of the tube to the tube sockets on the circulation pump and simulator base so that the
sockets marked with same color sign are properly connected.
Pump
Base
In (black) Out (red)
Out (black) In (red)
tubes
Push
Circulation pumpSimulator base
Push the tube toward the wall
until click sound heard.
Push the tube toward the wall
until click sound heard.
Push the tube toward the wall
until click sound heard.
Push the tube toward the wall
until click sound heard.
Push
Preparation of simulated blood
Caution
Do not disconnect the tubes while the simulator is running. Before disconnecting the tubes, make
sure
to discharge all fluid from the pump and tubes, and switch the power off. Do not pull the
tube by holding the vinyl tube. Otherwise, the tube may detach from the connector.
Preparation
Jack for AC Adapter
AC Adapter Power Cable Connect power cable to AC Adapter.
1. Connect the circulation pump and AC Adapter.
Insert the plug of the AC Adapter
into the jack until the cable clicks
into place.

3
8
①Set the silicon tape on the radius base.
Setting up the wrist model and
puncture unit
Setting up the wrist model and puncture unit
②Set the artery tube
The silicon tape is replaceable.
Silicon tape
Knot
Radius
base
1. Insert one end of the silicon tape to one of the slits on
the radius base edge so that the tape is anchored by
the knot.
2. Pulling the silicon tape, place it in the gutter on the
base and x it by inserting the other end into the slit
on the opposite side. Make sure not to twist the tape.
3. Put the radius base with the silicon tape to the
simulator base, noting that the tape and notch on
the simulator base are aligned.
1. Connect the white connecter at the end of artery tube
to the white socket on the simulator base.
2. Lock each connection by turning the socket clockwise
until it clicks.
If the lock is incomplete, the tube may come o
and simulated blood may leak.
Preparation
Attention
Attention
Note: The needle holes on the brand new artery tubes are
intentionally made to control pressure, and not a product
defect.
To be
aligned

Setting up the wrist model and
puncture unit
Preparation
③Set the skin cover
3.
Place the tube in the gutter on the radius base, connect
the other end of the tube to the black socket and lock it
by turning clockwise until it clicks.
If the lock is incomplete, the tube may come o
and simulated blood may leak.
1.
Cover the radius base with the inner skin cover, noting the
direction so that the artery tube is inserted in the slits on
the walls of the skin cover.
2. Likewise, cover the puncture area with the outer skin
cover. Make sure the all edges of the skin cover are
placed inside of the walls of the puncture unit holder.
Attention
Make sure that the artery tube is properly
placed in the slits on the skin cover
without being attened.
Attention
④Set up the hand-wrist model
Put the hand-wrist model on the simulator base.
Be careful not to catch the artery tube in between.
9
3Setting up the wrist model and puncture unit

1
10
1
1. Connect the power plug to a power supply.
2. Turn the knob counter-clockwise until it stops to release the pressure to
the tube. Then switch on the circulation pump and run for a few minutes
to let the simulated blood fill the tubing.
Training Training
Training
1.
Discharge the simulated blood from the system.
Discharge the simulated blood
After training
Excessive force may cause the knob to break. Please handle it with care.
Be careful so that the end of the tube is always inside the jar wall.
suction tube
3. Strength of the pulses can be adjusted by turning the
adjustment knob on the simulator base.
To make the pulse stronger, turn the knob clockwise.
4. If the strength of the pulse does not increase with the knob adjustments, replace the artery tube
with a new tube. Do not turn the knob with excessive force.
Lift the suction tube so that the end of the tube comes
above the fluid surface and run the circulation pump
until all the fluid in the tubes has drained out into the
jar.
2.
Replace the jar of the simulated blood with a jar of clear water. Put the tips of suction
and discharge tubes into the water and run the circulation pump until the inside of the tubes are
cleaned.
3. Discharge the water from the simulator following the procedure of discharging simulated blood.
4.
When the hand-wrist model is stained,quickly wipe it off with cloth or wash the model with water.
Caution
Caution
strongweak

2
11
Disassemble the hand-wrist model
and puncture unit
Disassemble the hand-wrist model and puncture unit
①Take o the hand-wrist model
③Disconnect the artery tube
LiftLift
1. Holding the puncture unit with one hand, lift the
back of the hand-wrist model and remove from the
simulator base.
②Remove the skin covers
1.
Remove the outer and inner skin covers one by one.
Be careful not to pull them strongly, since excessive
force may lead to tear(s).
1. Unlock each connector by turning it counter-
clockwise until it clicks and pull it straight o.
Do not pull the artery tube or any parts with force. Otherwise it may cause breakage
in the simulator.
After training
Caution
④Turn the adjustment knob counter clockwise to
release the pressure from the tubings.

2
12
3Cleaning
①The skin covers
④Take o the radius base
1. Take o the radius base from the simulator base.
Do not use any organic solvent or alcohol on any parts of the simulator.
When the simulator gets heavily stained, use soap or neutral detergent.
1. Wipe off the simulated blood inside of the skin covers with a soft cloth.
②The simulator base
1. Wipe off the simulated blood on the simulator base, especially around
the puncture unit holder, with a piece soft cloth.
③
Outside of the circulation pump
1.
Wipe the surface of the circulation pump with a damp
cloth.
④Inside of the circulation pump
1. Periodical cleaning of the inside of the pump
is recommended. This process is to be done before
disassembling the unit.
1) Stop the circulation pump.
2) Disconnect the tube connector marked 'OUT' (red) on the simulator base.
3)
Fill the syringe with clear water and connect the syringe tip to the free end of the
tube.
4)
Inject the water to the tube until the injected water flow into the jar. (approx. 20cc.)
5)
Connect the tube back to the simulator base and discharge water by following
the instruction on page 10.
Disassemble the hand-wrist
model and puncture unit
Cleaning
Disassemble the hand-wrist model and puncture unit
After training
Caution
Sliding the cover of AC adapter, pull it out.
Cover
4 AC Adapter

13
What to Do
Possible Reason
Trouble
Power switch is turned o.
Power does not come to the outlet.
Connect to the power source.
Switch it on.
Check the breaker, etc.
Connection of the tubes is wrong.
The artery tube is worn out.
Air is collected in the circulation pump.
Replace it with a new artery tube.(see page 6,7,8,9,11)
Replace it with a new tube.(see page 6,7,8,9,11)
None of above is the case.
Skin covers are not set properly.
Adjust it by turning the adjustment knob clockwise.
(see page 10)
The artery tube and/or skin covers are
worn out.
Set the cover again following the instruction manual.
(see page 9)
The pulse pressure is too strong.
Replace it/them by new one(s).
Syringe is worn or the needle is clogged.
The pulse pressure is too weak.
Replace them with new syringe and needle.
The pulse pressure is too strong (too tight).
Loosen the adjustment knob by turning it counter-clockwise.
Tube sockets are not properly locked. Check the sockets and lock them.(see page 6,7,8,9)
Quick check-up before calling the customer service
Use the table if you have problems using the system. Look in this section for a description of the problem
to nd a possible solution.
The system cannot be
powered on.
(Circulation pump does not
run)
Circulation pump runs but
simulated blood does not
ow.
Flash-back of the simulated
blood is not seen.
The simulated blood heavily
leaks from around the
puncture unit.
Bubbles appear in the
simulated blood in the tubes.
Power plug is not properly connected to
the power source.
Reset the connection following the instruction
manual.(see page 7)
Air is collected in the circulation pump.
The pump is sucking the bubbles coming
from
the discharge tube.
Stop the circulation pump and push in water by
syringe .(see page 12)
Adjust it by turning the adjustment knob
counter-clockwise.
Make a little distance between the ends of suction
and discharge tubes.
Discharge the air by tilting the pump as shown by
the illustration.
Make the pulse pressure weak (turn the knob
counter-clockwise), and run the pump until the
bubbles come o. Then return the pulse pressure
to an appropriate strength.
Simulated blood leaks from
the simulator base or pump.
Trouble
shooting
The tip of the suction / discharge tube is
out of the simulated blood.
Put in the tips of the both tubes to the simulated
blood.(see page 10)
Air accumulation is occurred in the tube(s).
Turning the knob counter-clockwise fully , pulse
pressure comes weak. Run the pump in this condition
until air accumulation is ejected.(see page 10)

Do not mark on the model and other components with pen or leave printed
materials contacted on their surface.
Ink marks on the models will be irremovable.
Caution
2022.02
・For inquiries and service, please contact your distributor or KYOTO KAGAKU CO., LTD.
Table of contents
Other Kyoto Kagaku Educational Equipment manuals

Kyoto Kagaku
Kyoto Kagaku EAR II User manual

Kyoto Kagaku
Kyoto Kagaku AbdoAbby User manual

Kyoto Kagaku
Kyoto Kagaku MW35 User manual

Kyoto Kagaku
Kyoto Kagaku MW57 User manual

Kyoto Kagaku
Kyoto Kagaku M82A User manual

Kyoto Kagaku
Kyoto Kagaku Strap-on Venipuncture Trainer 2 User manual

Kyoto Kagaku
Kyoto Kagaku PBU-POSE User manual
Popular Educational Equipment manuals by other brands

Nasco Healthcare
Nasco Healthcare Life/form LF03608 instruction manual

Enabling Devices
Enabling Devices Laugh & Learn Puppy user guide

Touchboards
Touchboards Royal iRover Standard Assembly guide

GSC
GSC 4-30101 Instructions for use

Gaumard
Gaumard S401.100 user guide

Reality Works
Reality Works Muscular Figure Natural Size quick start guide