BACK
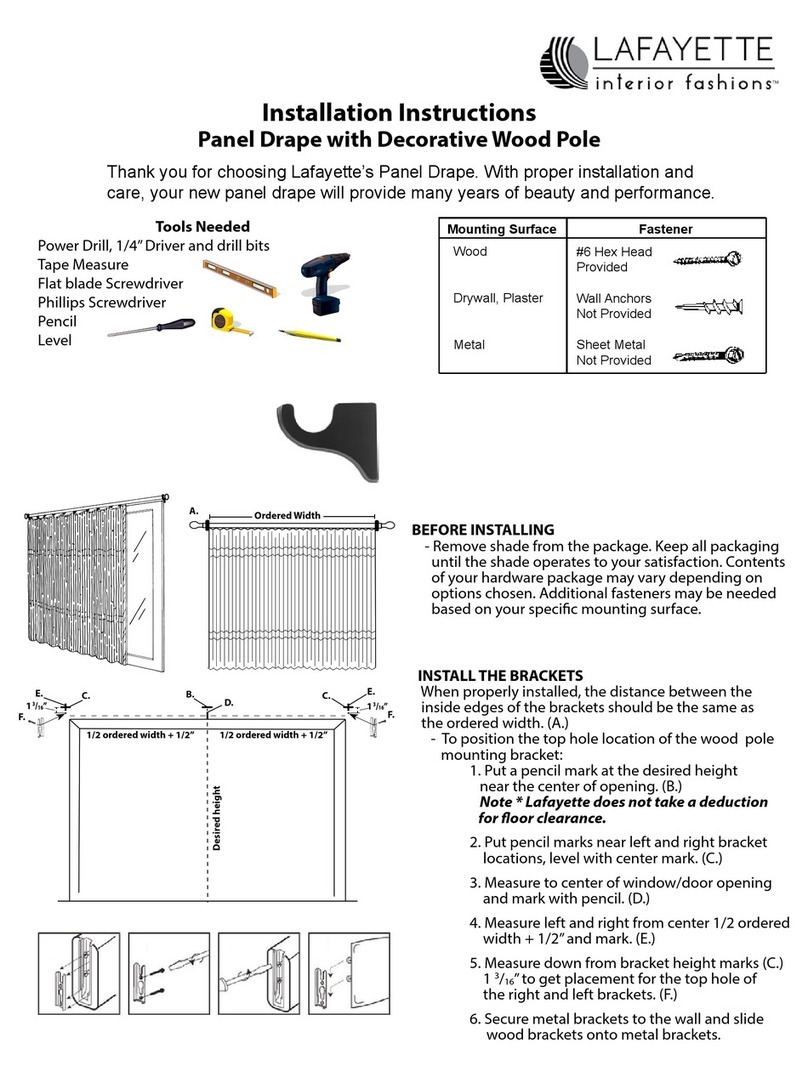
Installation Instructions
Transitional Shades
11/2” 27/16”
15/16” INSTALL THE BRACKETS
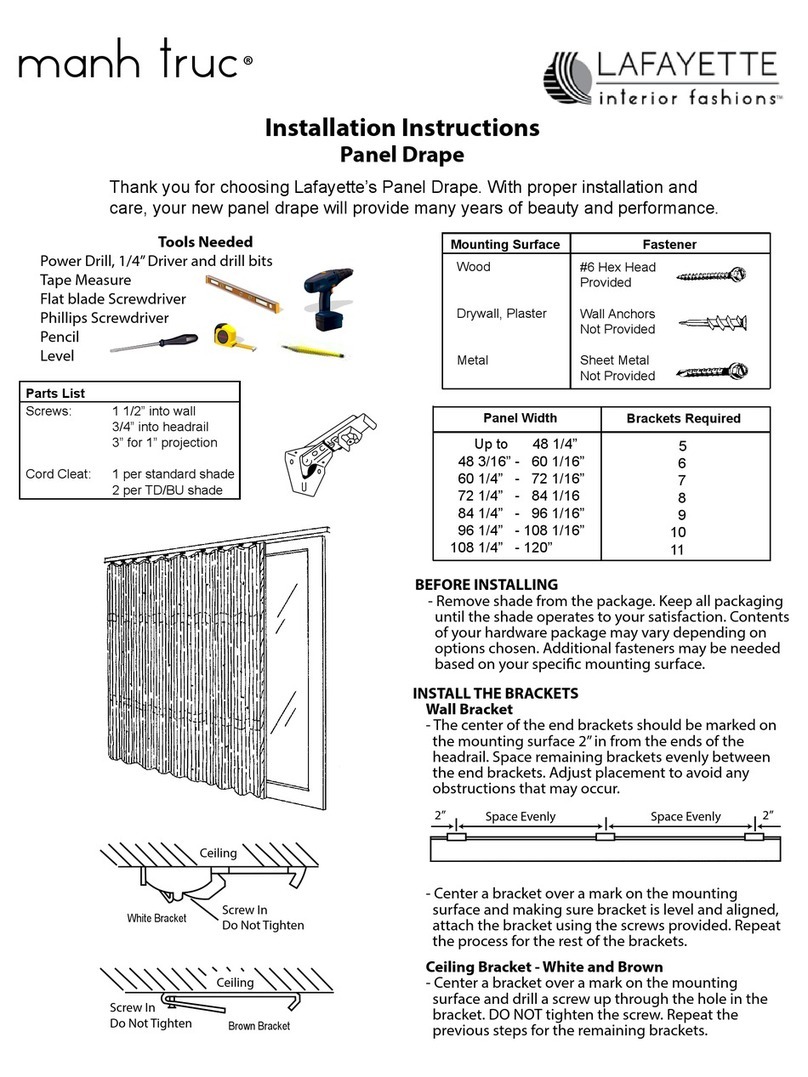
Inside Mount
Measure 2” in from each end of the
headrail and mark the bracket
location on the mounting surface.
Space additional brackets evenly
between the end brackets.
Use two screws (and appropriate
fasteners if needed) to attach each
installation bracket to the top sill of
the window.
Small Cassette Bracket
Large Cassette Bracket
Board Mounted Bracket
2 3/4” Projection Bracket
OR
3 5/8” Projection Bracket
Optional Spacer Bracket
INSTALL THE BRACKETS
Outside Mount
Measure 2” in from each end of the
headrail and mark the bracket
location on the mounting surface.
Space additional brackets evenly
between the end brackets.
Use two screws (and appropriate
fasteners if needed) to attach each
installation bracket to the top sill of
the window. The tops of the brackets
must be level and aligned at the same
height. If an extension bracket is being
used, attach the installation bracket
after the extension bracket is installed.
For board mounted, mount rst
bracket by putting a screw into the
slotted hole of the bracket. Repeat
process on the other side. If center
support is needed, evenly space it
between the left and right bracket.
Once level, tighten the screw and
place an additional screw in the
round hole of the bracket.
Large Cassette
Small Cassette
Large Cassette
Board Mounted
Small Cassette
Step 1
INSTALL THE SHADE
Inside Mount
> Small Cassette
Hold the shade and tilt the top front of the headrail 45o
toward the window.
Insert the anodized spring-loaded plate on the front of
the bracket into the front groove on the top of the
headrail, push the back of the headrail up, and pull
forward until it stops. Pull down on headrail to ensure
shade is secure.
> Large Cassette
End caps are not attached to Large Cassette to avoid
damage in shipping. Attach end caps before installing the
shade.
Hold the shade and tilt the top front of the headrail 45o
toward the room.
Insert the bottom back of the headrail into the prongs
on the bottom of the bracket, and tilt the headrail up,
pushing back, until the prongs on the front of the bracket
snap into the headrail.
> Board Mounted
Measure 2” in from the ends of the headrail
and mark the screw location on the mounting
surface. Space additional screws evenly between
the screws. Starting in front of the shade at each
end, alternate screws in front and behind shade.
Pre-drill the headrail vertically with a 3/16” drill
bit before securing with screws. Snap shade into
brackets already attached to board.
INSTALL THE SHADE
Outside Mount
> Small Cassette
Hold the shade and tilt the top front of the headrail 45o
toward the window.
Insert the anodized spring-loaded plate on the front of
the bracket into the front groove on the top of the
headrail, push the back of the headrail up, and pull
forward until it stops. Pull down on headrail to ensure
shade is secure.
> Large Cassette
Hold the shade and tilt the headrail 45otoward the
room. Insert the groove on the bottom backside of the
headrail into the prongs on the bottom back of the
bracket.
Push the top of the headrail up until it snaps into the
front of the bracket.
> Board Mounted
Place 3/4”screw up from the bottom
to the front of the shade, and into
the slotted part of the bracket for
board mounted Allure. Snap shade
into brackets already attached to
board.
Step 2
(Alternating)
Board Mounted
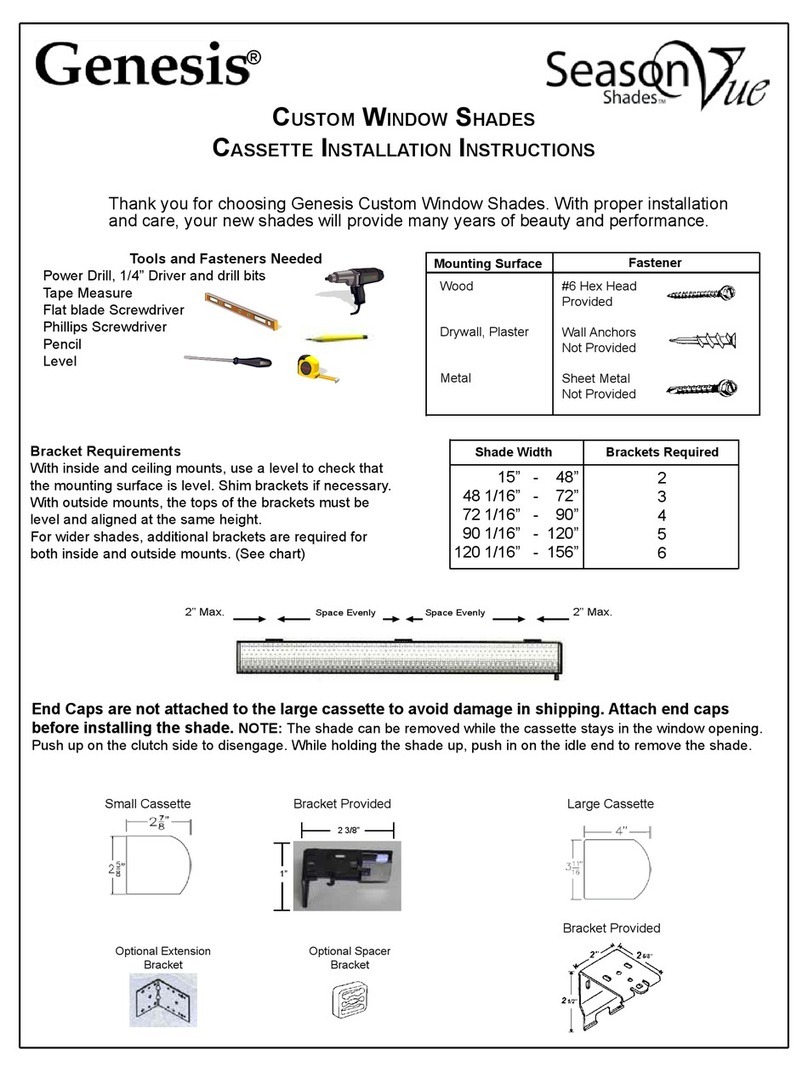
15” - 48”
48 1/16” - 72”
72 1/16” - 90”
90 1/16” - 120”
120 1/16” - 156”
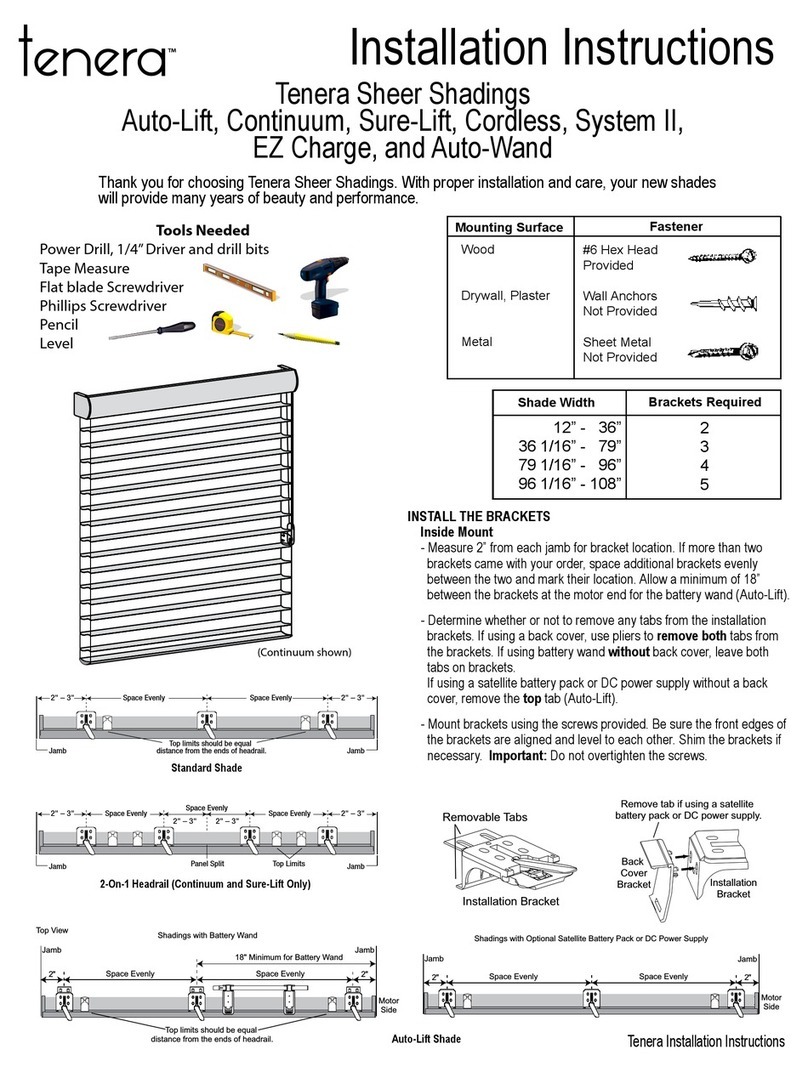
Shade Width Brackets
Required
2
3
4
5
6
2-On-1 Headrail
If using 2-On-1
headrail option,
a center bracket
is required at
center gap.
