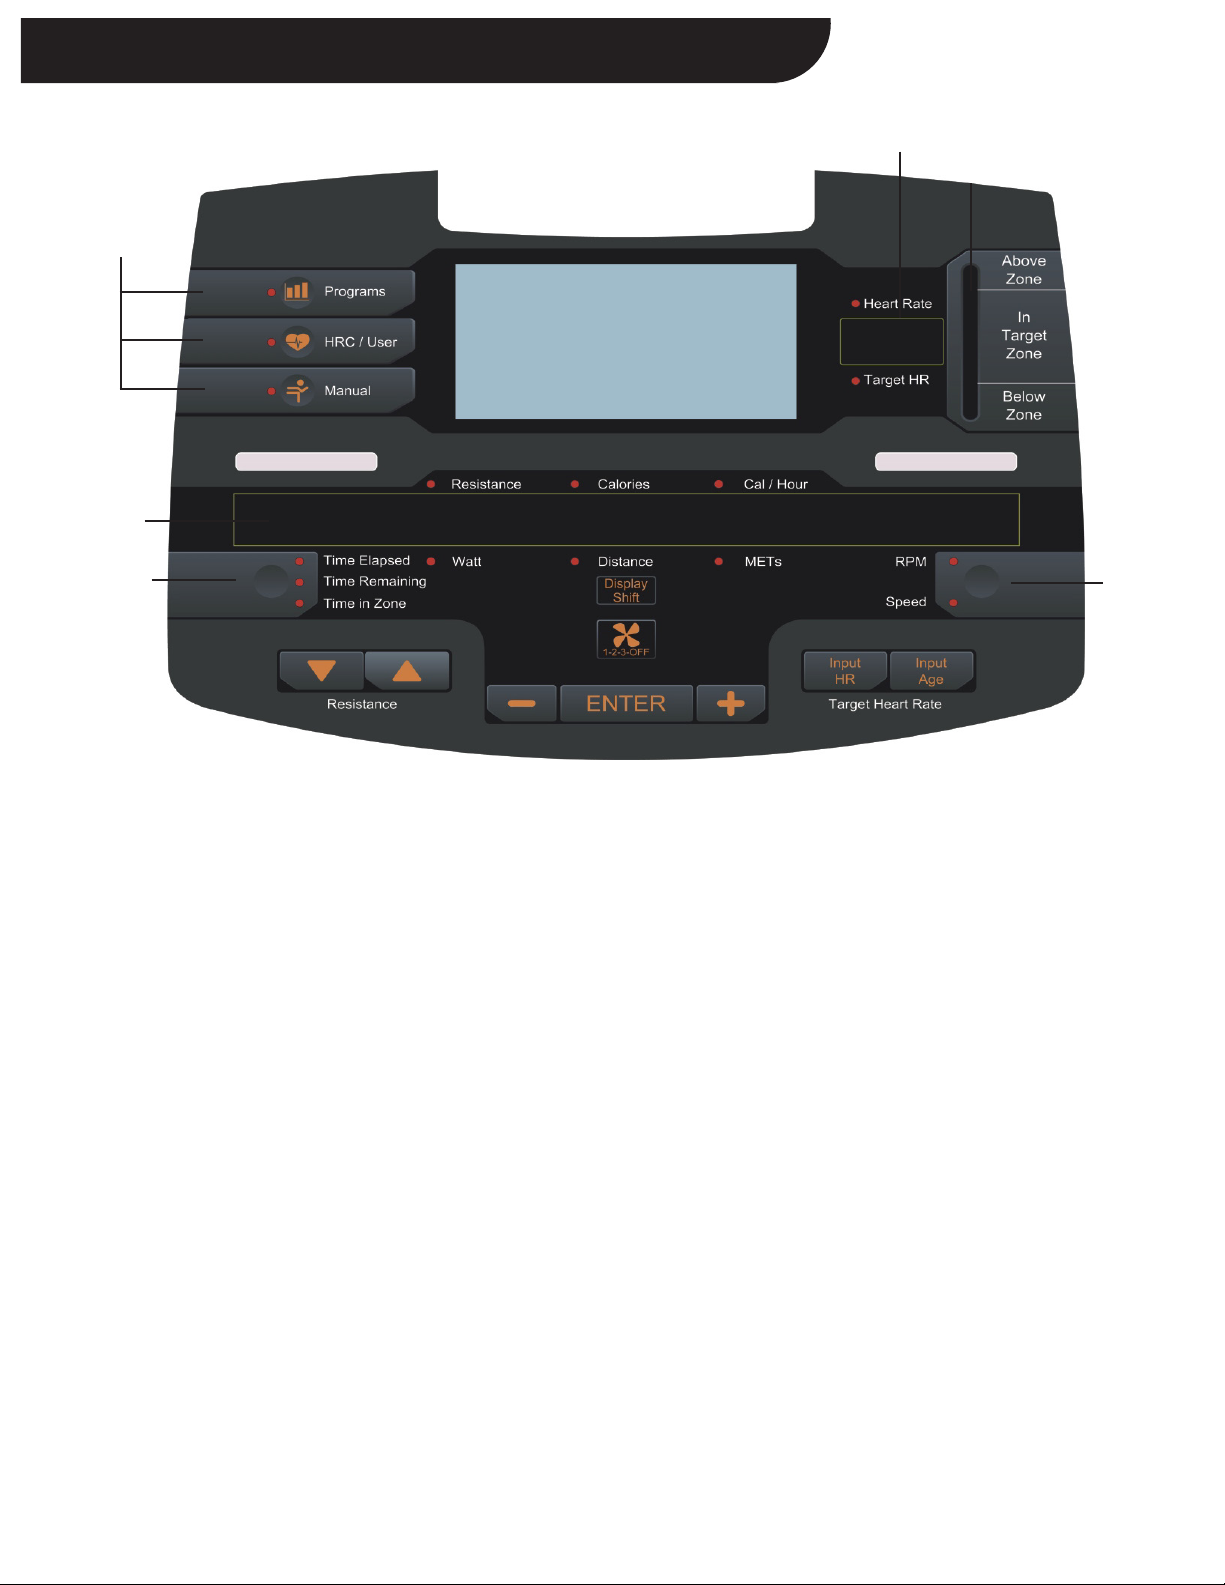
FAN CONTROL
This product comes equipped with a personal fan located at the top of the console (fan
is not shown in the image on page 4). The fan has one button control (located below the
Display Shift button on the console) with the image of a four-bladed fan. The fan has 3
speeds, which increases each time the button is pressed and defaults to OFF at start up.
7
Console Functions and Features
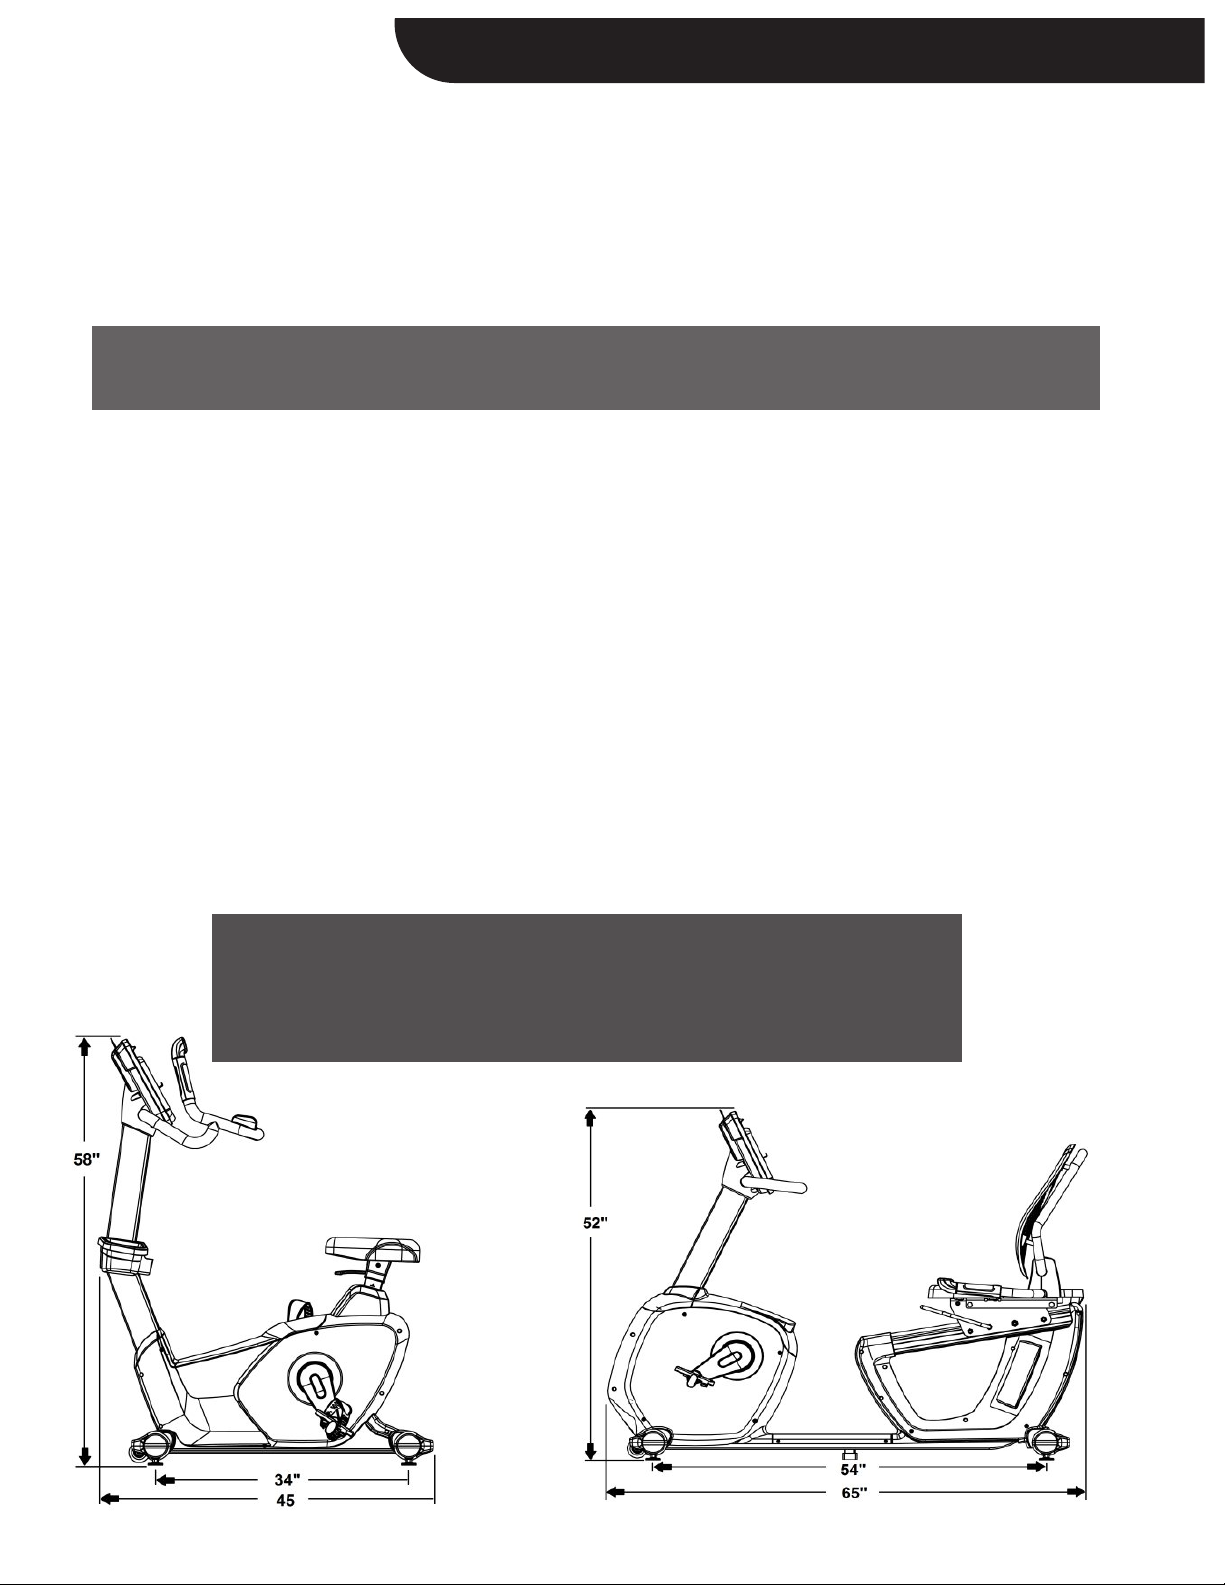
SEAT ADJUSTMENT
Both the Recumbent and Upright bikes feature seat adjustments, located underneath the seat, to accomodate
users of all heights. On the Recumbent model, pull up on the adjustment handle and the seat will slide forward
and backward along an incline path. The seat will remain level for maximum comfort. On the upright model, pull
up on the adjustment handle and you can move the seat up and down.
CAUTION: Make sure the seat is secure before beginning your workout. To avoid injury, it is recommended that
you are not sitting on the seat while you are making adjustments.
MODE SELECTION
You can choose from three available modes offering a variety of different workouts and resistence levels. Your
current mode is always indicated by the lit LED next to one of the 3 mode buttons on the upper left.
PROGRAMS
There are 8 available programs accessible by pressing the PROGRAMS
button:
- 3 Specific Goal Programs
Time; Distance; Calories
- 5 Built-In Programs
Fat Burn; Interval; Hills; Mountain; Road
You can repeatedly press PROGRAMS to scroll through available
programs. The program preview will appear in the Dot Matrix display. Once
you see your desired program press ENTER to begin Program Set-up.
(See pages 9 - 11 for details)
HRC / USER MODE
There are 7 available programs accessible by pressing the HRC/USER
button:
- 2 Built-In Heart Rate Control Programs
Heart Rate Control; Interval Heart Rate
- 5 User Programs (100% Fully Customizable)
You can repeatedly press HRC/USER to scroll through available programs.
The program preview will appear in the Dot Matrix display. Once you see
your desired program press ENTER to begin Program Set-up.
(See page 14 for details)
MANUAL MODE
You retain full control of all available features on the console. All
accumulating statistics count up and have no limit. Manual Mode is the
default mode at start up. At the completion of every program you will return
to Manual Mode. (See page 8 for details)