manuals.online logo
Brands
  1. Home
  2. •
  3. Brands
  4. •
  5. Landscape Forms
  6. •
  7. Indoor Furnishing
  8. •
  9. Landscape Forms GO User manual

Landscape Forms GO User manual

PROCEDURE FOR INSTALLATION:
1. Prepare proper concrete slab as required. See Fig. 2 and Fig. 3 for conduit spacing
requirements.
Note: DO NOT DRAG unit across concrete or other rough surfaces. This could damage the finish.
Units are heavy! Dining height table weighs 345lbs, Standing height table weighs 385lbs and
Standing height with canopy weighs 755lbs. Proper lifting equipment is required. Unit ships fully
assembled, except for side access panels.
UNCRATE PRODUCT:
1. Leave product in shipping crate and deliver close to installation site.
2. When ready to move product into position to start installation, carefully uncrate the product
by removing the screws –marked on the crate with bright colored paint. See Fig. 1.
For SURFACE MOUNT: leave footpads installed.
1. Set unit in position.
2. If unit needs to be leveled, use additional foot pad material as shim, covering as much surface
area as possible to keep unit stable.
3. Measure inside spacing as noted in Fig. 3. Adjust unit as necessary to achieve noted spacing.
Mark hole locations, see Fig. 2.
4. Move unit to gain access to hole locations.
5. Drill holes according to Fig. 4. Clear holes of all debris using compressed air and wire brush.
6. Fill holes with epoxy as directed by epoxy manufacturer.
7. Install concrete grip anchors so top of anchor is flush or just below grade.
8. Move unit in position.
9. Install threaded rods, washers and nuts as shown in Fig. 4. Do not tighten fully until epoxy has
cured.
10. Make wiring connections, if necessary.
11. For units that are wired/solar: install screw and star washer with grounding pigtail to side
access panel before installing panel, see Fig. 7 and Fig. 8.
12. Install side access panel. Align pins in panel with the notches along the sides of the frame.
Push panel in and then slide down to secure, see Fig. 9.
13. Install cover plate: Clean area shown in Fig. 10A. Snap 3M primer ampule and apply primer
liberally in area outlined in Fig. 10A. Allow to dry completely, approx. 5 min at room temp.
Remove red membrane from both sections of VHB tape on cover plate. Visually align the plate
in opening and press cover plate in place, see Fig. 10B. Apply pressure to both ends for
approximately 15 seconds.
ASSEMBLE WITH CARE! Pangard IIPolyester Powdercoat is a strong, long-lasting finish. To protect this finish
during assembly, place unwrapped powdercoated parts on packaging foam or other non-marring surface. Do
not place or slide powdercoated parts on concrete or other hard or textured surface –this will damage the finish
causing rust to occur. Use touch-up paint on any gouges in the finish caused by assembly tools.
Tools Required:
•Safety glasses
•Hammer drill with Ø5/8” masonry bit
•3/4” wrench
•Flat blade screwdriver
•Phillips screwdriver
•Non-marring pry bar
•Wiring connectors
•Epoxy anchoring system
•Compressed air and wire brush for clearing anchor holes
•Conduit as required by local code for Fig. 3 connection.
Installation Guide
GO Outdoor Table www.landscapeforms.com Ph: 800.521.2546
Date: September 26, 2019
Page 1 of 6
Standing height table
Standing height table,
With canopy Standing height table,
With canopy, solar
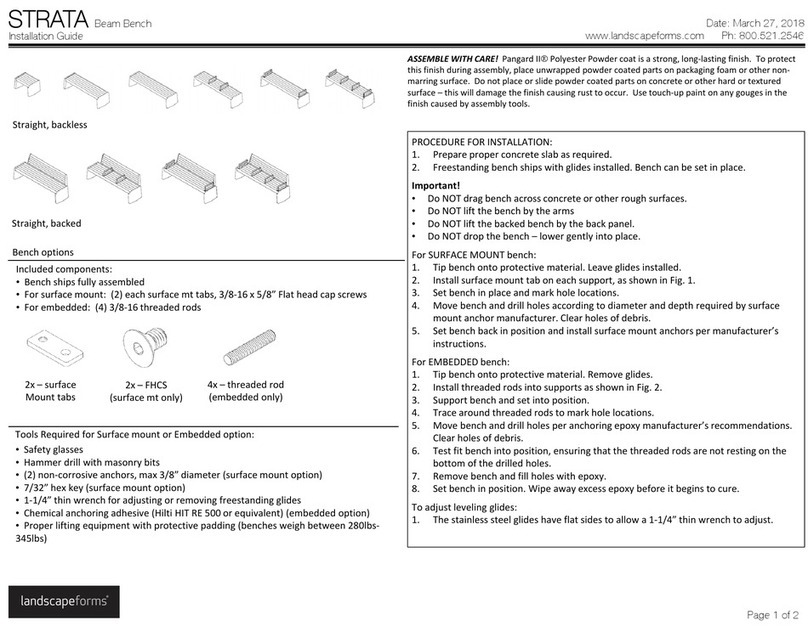
Included components:
Dining height table
1X –Hardware pack of grounding components, if unit is wired/solar
2x -Side access
panel
2x -Cover plate
2x -Foot pad 4x -Concrete
grip anchor,
½-13
4x –
threaded
rod, ½-13 x
3-1/2”
4x –hex nut,
½-13
4x –washer,
½”
1x –3M
primer 94
Installation Guide www.landscapeforms.com Ph: 800.521.2546
Page 2 of 6
Fig. 2 –Conduit access location and size
CENTER TO CENTER
ANCHOR HOLE
LOCATIONS
GO Outdoor Table
Fig. 3 –Inside leg spacing Fig. 4 –Conduit and anchor hole size
3/4” (1.06” O.D.)
CONDUIT X2 MAX
THREADED ROD
CONCRETE ANCHOR
HEX NUT
WASHER BOTTOM PLATE
FOOT PAD
CONDUIT HT
Fig. 1 –Crated unit
SCREW
LOCATIONS
Date: September 26, 2019
Installation Guide www.landscapeforms.com Ph: 800.521.2546
Page 3 of 6
Fig. 6 –Make wiring connections
LINE-IN WIRING
Fig.9–Install power
panel cover
1
2
Fig. 10B –Install
top cover plate
Fig. 5 –Make wiring connections
CONDUIT PROVIDED BY INSTALLER
GO Outdoor Table
Fig. 8 –Attach grounding pigtail to panel cover
GROUNDING
PIGTAIL
GROUNDING
SCREW
PIGTAIL
STAR
WASHER
PANEL TRACK
Fig. 7 –Connect pigtail to panel cover
Date: September 26, 2019
Fig. 10A –Make wiring connections
APPLY 3M
PRIMER IN
TWO
LOCATIONS
Installation Guide www.landscapeforms.com Ph: 800.521.2546
Page 4 of 6
GO Outdoor Table
CONNECTION BOX, SINGLE PORT CONNECTION BOX, DUAL PORT CONNECTION BOX, TRIPLE PORT
PROCEDURE FOR WIRING GO OUTDOOR TABLE:
The GO Outdoor table with power garages or lighting ships prewired from the factory.
WIRING CONNECTIONS: Note: hard-wired table must be connected to a 120v/20A max branch circuit with a GFCI breaker.
1. Remove cover of connection box.
2. Install conduit between conduit stub and connection box per local code. See Fig. 5. Connection box has Ø3/4” hole for conduit.
3. Make wiring connections, see Fig. 6.
4. Reattach connection box cover.
The following schematics are to be used to connect the unit to line voltage. It is the responsibility of the installer to make sure that all connections
are made in accordance with the NEC and local building codes. Connection hardware not included.
Date: September 26, 2019
Installation Guide www.landscapeforms.com Ph: 800.521.2546
Page 5 of 6
GO Outdoor Table
LINE VOLTAGE, GARAGE
LINE VOLTAGE, LIGHTING
SOLAR, USB GARAGE
SOLAR, LIGHTING
Date: September 26, 2019
Installation Guide www.landscapeforms.com Ph: 800.521.2546
Page 6 of 6
GO Outdoor Table
SOLAR, BATTERY TRAY
PROCEDURE FOR MAKING SOLAR CONNECTIONS:
The GO Outdoor table with power garages or lighting ships
prewired from the factory.
1. Install fuse(s) on positive battery lead to charge controller.
Fuses for power garages are also shipped uninstalled.
2. Connect wiring harnesses to make solar panel power
connection
Green “charging” light should illuminate on charge controller
INSTALL
FUSE (S)
FUSES ARE SHIPPED
UNINSTALLED
IN PACKAGE
MAKE
CONNECTION
AFTER
INSTALLING
FUSE
CHARGING LIGHT
INDICATOR
SOLAR, BATTERY PANEL AND FUSE LOCATION
Date: September 26, 2019

Other Landscape Forms Indoor Furnishing manuals

Landscape Forms Mingle User manual

Landscape Forms

Landscape Forms Mingle User manual

Landscape Forms Carousel User manual

Landscape Forms

Landscape Forms Carousel User manual

Landscape Forms Strata Beam Bench User manual

Landscape Forms

Landscape Forms Strata Beam Bench User manual

Landscape Forms DQ207-01 User manual

Landscape Forms

Landscape Forms DQ207-01 User manual

Landscape Forms Connect 2.0 User manual

Landscape Forms

Landscape Forms Connect 2.0 User manual

Landscape Forms Carousel User manual

Landscape Forms

Landscape Forms Carousel User manual

Landscape Forms Carousel User manual

Landscape Forms

Landscape Forms Carousel User manual

Popular Indoor Furnishing manuals by other brands

IKEA BESTA SHELF UNIT 47X50" instructions

IKEA

IKEA BESTA SHELF UNIT 47X50" instructions

uhuru BROAD COMMUNAL TABLE Assembly instructions

uhuru

uhuru BROAD COMMUNAL TABLE Assembly instructions

Argos Washington 425/8425 Assembly instructions

Argos

Argos Washington 425/8425 Assembly instructions

JWA HARDING 74704 Assembly instruction

JWA

JWA HARDING 74704 Assembly instruction

UMAGE AUDACIOUS highboard user guide

UMAGE

UMAGE AUDACIOUS highboard user guide

Safavieh Furniture FOX4220 quick start guide

Safavieh Furniture

Safavieh Furniture FOX4220 quick start guide

Golden MAXICOMFORT EZ Sleeper PR-761 owner's manual

Golden

Golden MAXICOMFORT EZ Sleeper PR-761 owner's manual

Office Star Products BP-BNTV47-WF13 Assembly instructions

Office Star Products

Office Star Products BP-BNTV47-WF13 Assembly instructions

Urban Barn Laurel Bed Lit Laurel Assembly instructions

Urban Barn

Urban Barn Laurel Bed Lit Laurel Assembly instructions

Sauder Manhattan Gate 429251 manual

Sauder

Sauder Manhattan Gate 429251 manual

CALICO DESIGNS ALCOVE DESK 51252 Assembly instructions

CALICO DESIGNS

CALICO DESIGNS ALCOVE DESK 51252 Assembly instructions

John Lewis OXFORD 83501 instructions

John Lewis

John Lewis OXFORD 83501 instructions

Woodard Uptown WI-300-T Assembly instructions

Woodard

Woodard Uptown WI-300-T Assembly instructions

OSP Home Furnishings SIERRA SRA08 Assembly instructions

OSP Home Furnishings

OSP Home Furnishings SIERRA SRA08 Assembly instructions

HULALA HOME OFM0163 quick start guide

HULALA HOME

HULALA HOME OFM0163 quick start guide

LIVIQUE Hedy 6716237 Assembly instructions

LIVIQUE

LIVIQUE Hedy 6716237 Assembly instructions

IKEA ALVE DRAW UNIT 17X14X47" ANTI instructions

IKEA

IKEA ALVE DRAW UNIT 17X14X47" ANTI instructions

Next ELLA ELLA 684319 Assembly instructions

Next

Next ELLA ELLA 684319 Assembly instructions

manuals.online logo
manuals.online logoBrands
  • About & Mission
  • Contact us
  • Privacy Policy
  • Terms and Conditions

Copyright 2025 Manuals.Online. All Rights Reserved.