Laser 4938 User manual

www.lasertools.co.uk
Brake Flaring Tool Set | Hydraulic
Flares pipe sizes 4.75mm (3/16") | 5mm | 6mm
4938
This tool utilises a patented design to quickly produce high quality SAE and DIN flares on
or off the vehicle. The 4938 can produce flares on Cupro-Nickel and steel pipe as well as
coated steel piping.
The 4938 is designed to flare
4.75mm (3/16"), 5mm and 6mm
pipes by using the correct size
die and punch set supplied.
Distributed by The Tool Connection Ltd
Kineton Road, Southam, Warwickshire CV47 0DR
T+44 (0) 1926 815000 F+44 (0) 1926 815888
Contents
A. 1 x pair 4.75mm (3/16") Dies
B. 1 x pair 5mm Dies
C. 1 x pair 6mm Dies
D. 1 x “Operation 1” 4.75 (3/16") | 5mm punch (SAE)
E. 1 x “Operation 1” 6mm punch (SAE)
F. 1 x “Operation 2” 4.75 (3/16") | 5mm punch (SAE)
G. 1 x DIN 4.75/5mm punch
H. 1 x DIN 6mm punch
I. 1 x Yoke unit with handle
J. 1 x Hydraulic Ram
K. 1 x Mechanical Force Screw
A B C
D E F G H
J
K
I
Consult the chart and the diagrams above and select the die specified to produce the required flare
on the diameter of brake pipe specified.
SAE CONVEX FLARE DIN CONVEX FLARESAE DOUBLE FLARE
SAE CONVEX (SINGLE) FLARE
Tube Diameter Punch Die Set
4.75mm (3/16") OP1 4.75/5 4.75 SAE END
5.0mm OP1 4.75/5 5.0 SAE END
6.0mm OP1 6.0 6.0 SAE END
SAE CONCAVED (DOUBLE) FLARE
Tube Diameter Punch Die Set
4.75mm (3/16") OP1 4.75/5 4.75 SAE
5.0mm OP1 4.75/5 5.0 SAE
6.0mm OP1 6.0 6.0 SAE
DIN CONVEX FLARE
Tube Diameter Punch Die Set
4.75mm (3/16") DIN 4.75/5.0 4.75 DIN END
5.0mm DIN 4.75/5.0 5.0 DIN END
6.0mm DIN 6 6.0 DIN END
1. The end of the pipe to be flared must be cut square and the outside edge free from burrs.
2. The outside edge of the pipe should be chamfered by 45°
3. Internal bore of the pipe should be de-burred
4. If the pipe is plastic covered or coated in any way only remove the first 3mm maximum of
covering.
N.B. Do not use a file or abrasive materials to do this as the resultant damage will significantly weaken
the flare
5. After flaring remove all debris from inside the pipe.
N.B. To ensure a good flare is made every time ensure dies and punches are clean, dry and free from
oil contamination on assembly.
Instructions for Preparation of Use
Instructions for Preparation of Use
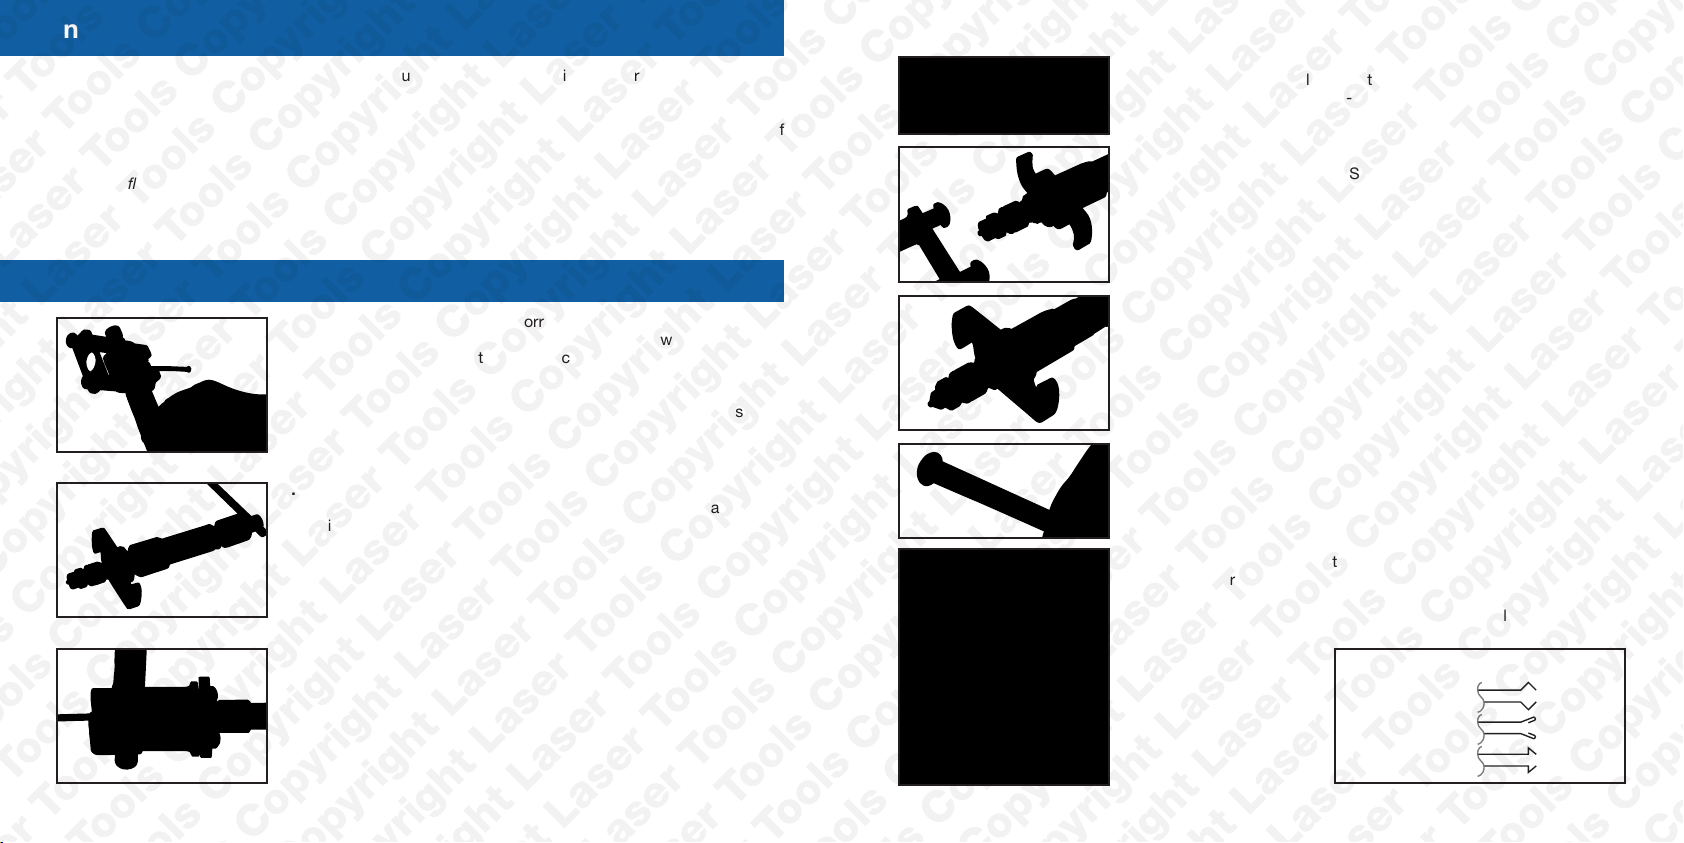
1. Identify and assemble the correct dies for the flare and pipe size
required. Assemble the dies and pipe as shown with the pipe
end flush with top of the dies block,
Note: The dies are marked on their inner faces with SAE at one end
and DIN at the other, ensure the dies are assembled with the
ends matching. Remember the end of the pipe should be square
and free from burs.
2. Select the required punch and fit into quick fit adaptor on the
ram. Fit the “S” shaped “Quick Adaptor” onto the ram and screw
it half way up the rams thread as shown.
3. Insert the punch/ram combination into the yoke and turn the “S
Quick Adaptor” so it locates on to the yoke and screw the ram
body fully in to the “S Quick Adaptor” ensuring the punch end
aligns with and enters the end of the pipe.
4. Turn the Hydraulic T handle in a clockwise direction until the
rubber seal makes light contact with the seal cover as shown.
Do not overtighten the O-ring.
5. Wind the T bar fully back (anticlockwise) and separate the ram
from the yoke using the “S Quick Adaptor”.
6. If an Operation 2 is required, remove the existing OP1 punch by
pulling back on the Ram end sleeve. Now fit OP2 punch and re-
assemble the tool.
7. Wind the T bar clockwise again to form the reverse cone flare.
8. Where space is limited the 4938 kit is provided with a mechanical
force screw (K) that can be used with an appropriate ratchet
wrench.
(Keep the force screw thread lubricated with oil).
SAE
Single Flare = = OP1
Double Flare = = OP2
DIN =
Other Laser Power Tools manuals


