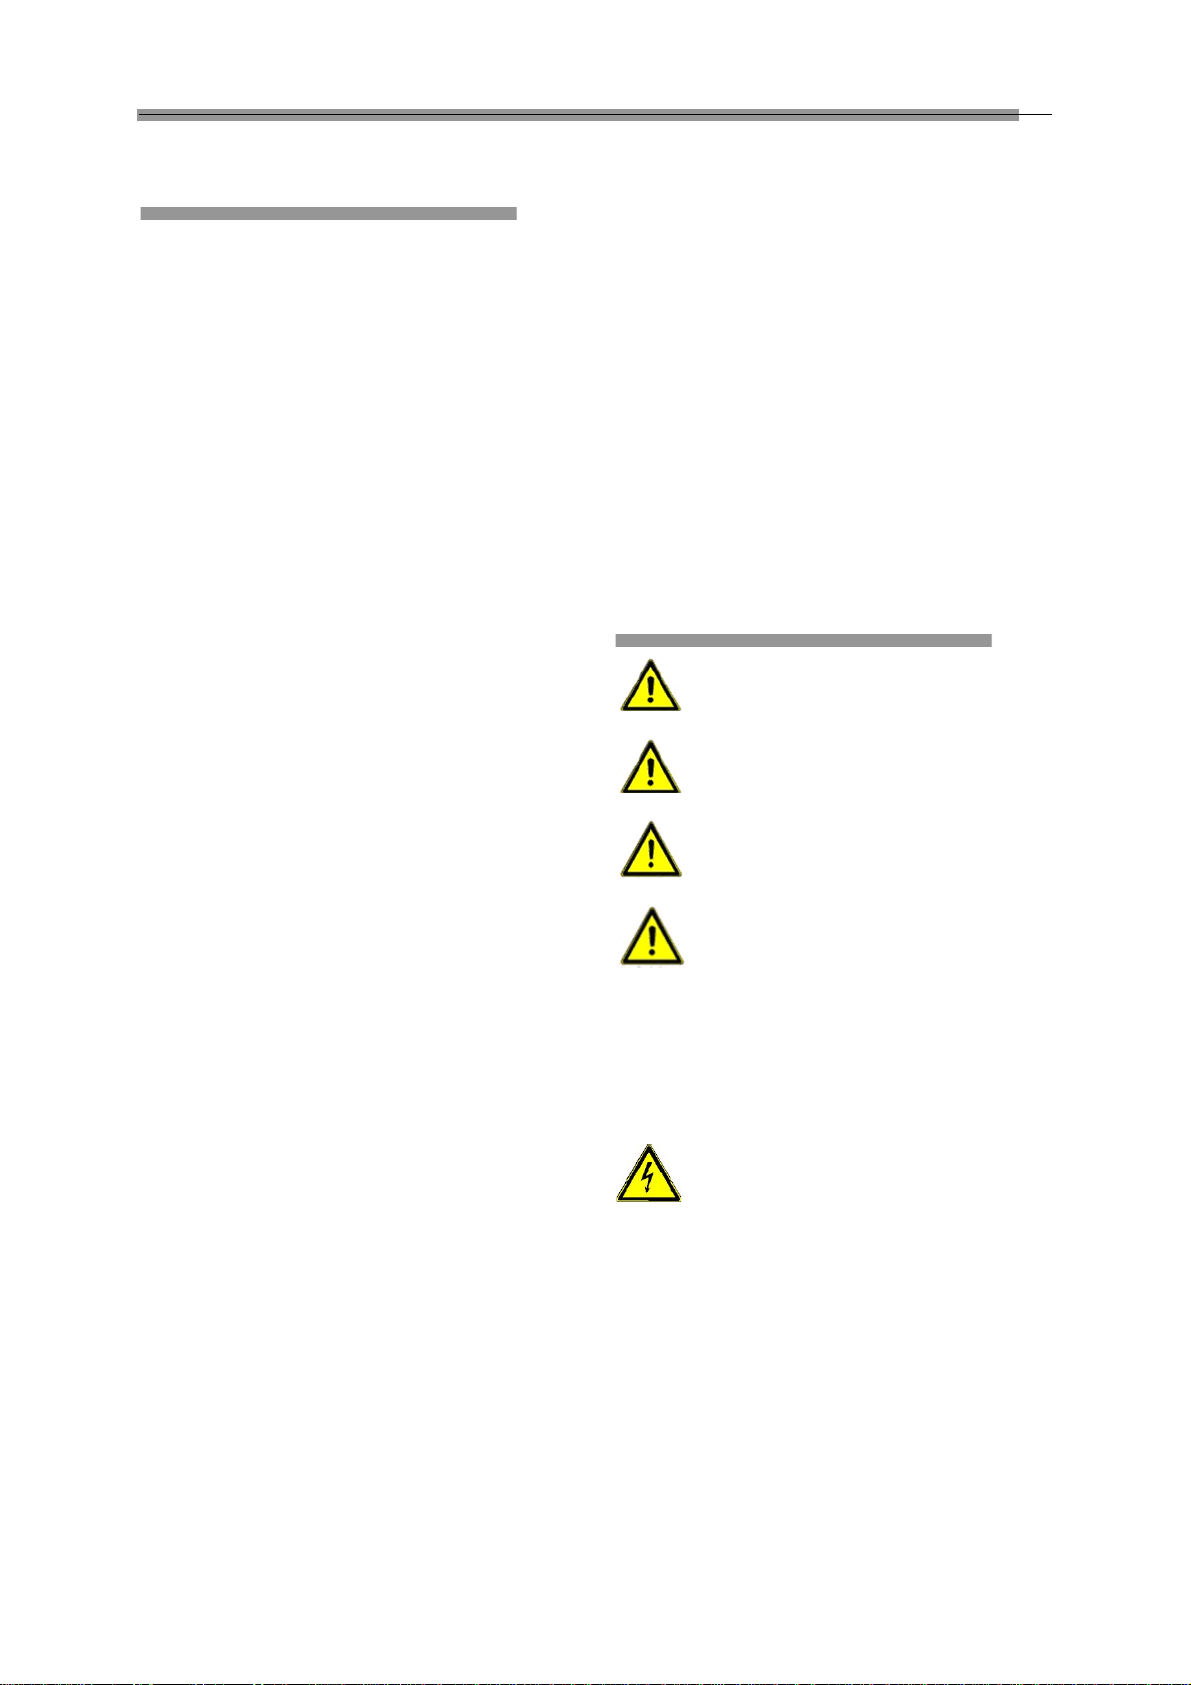
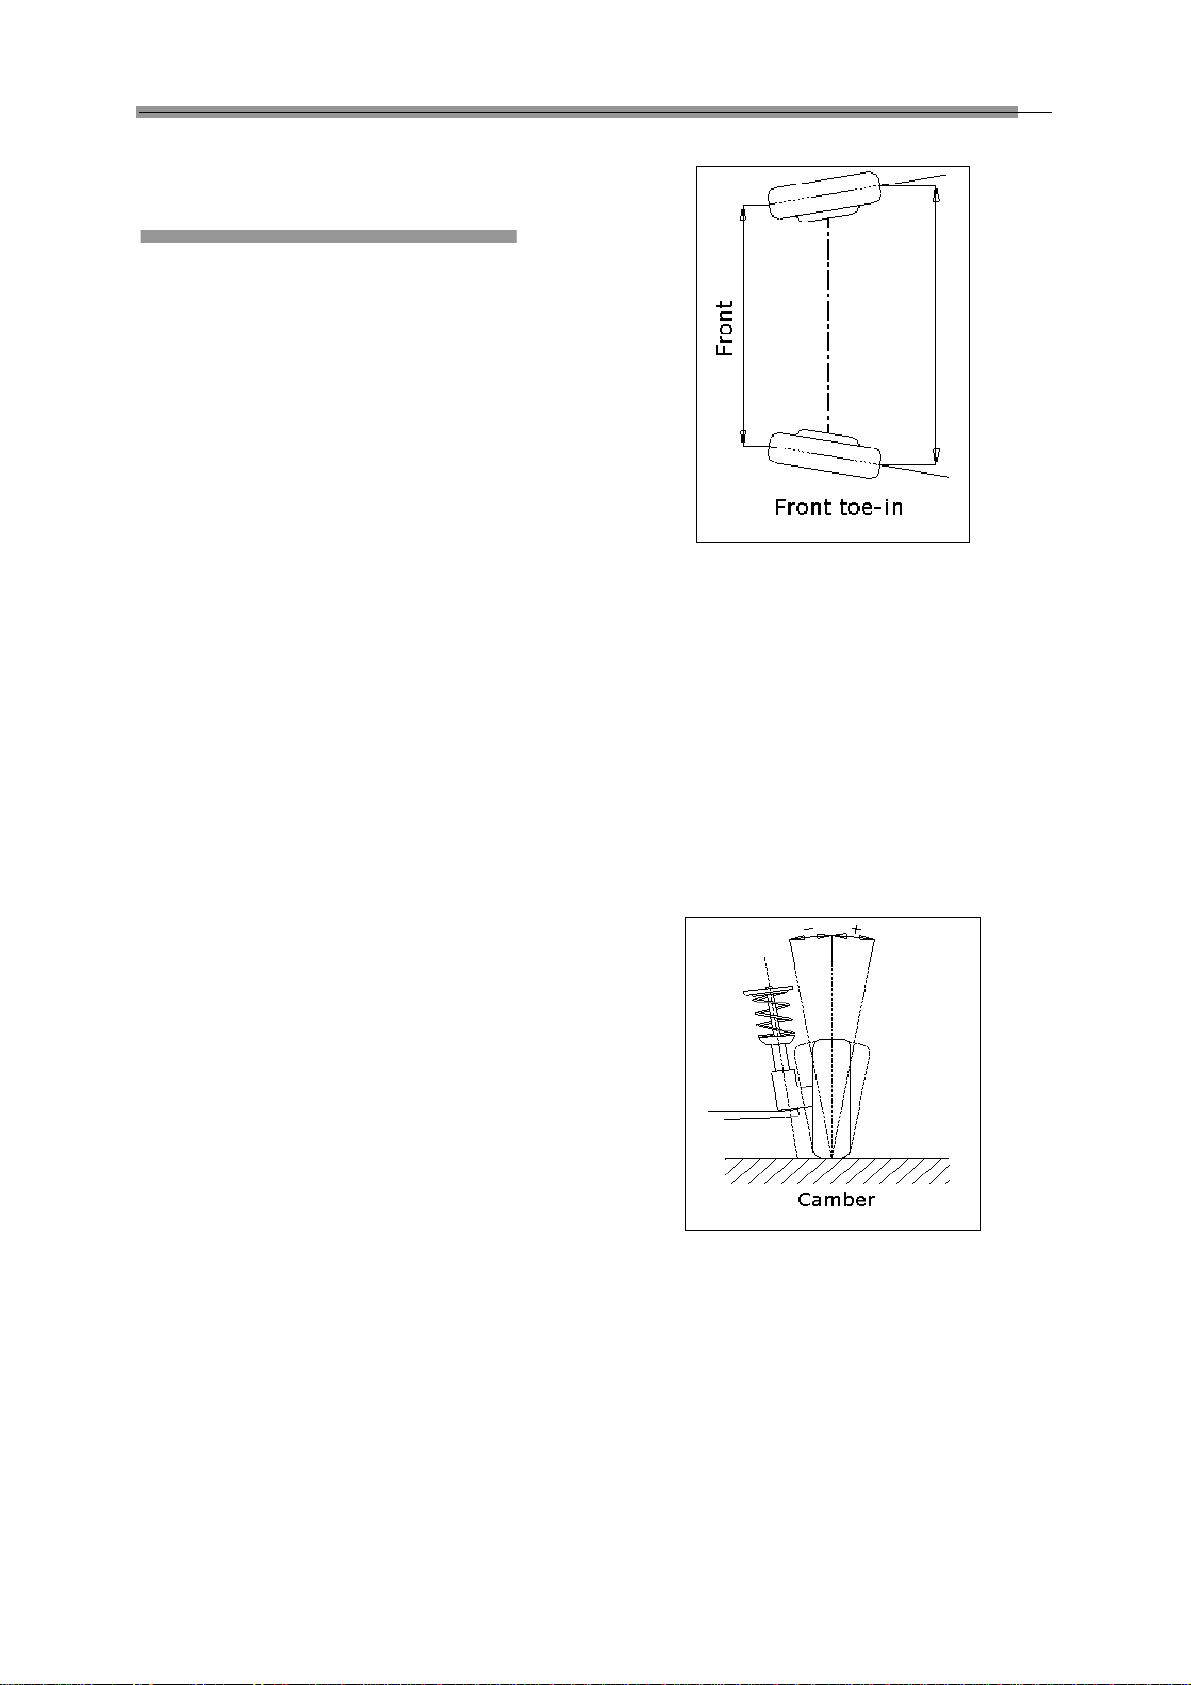
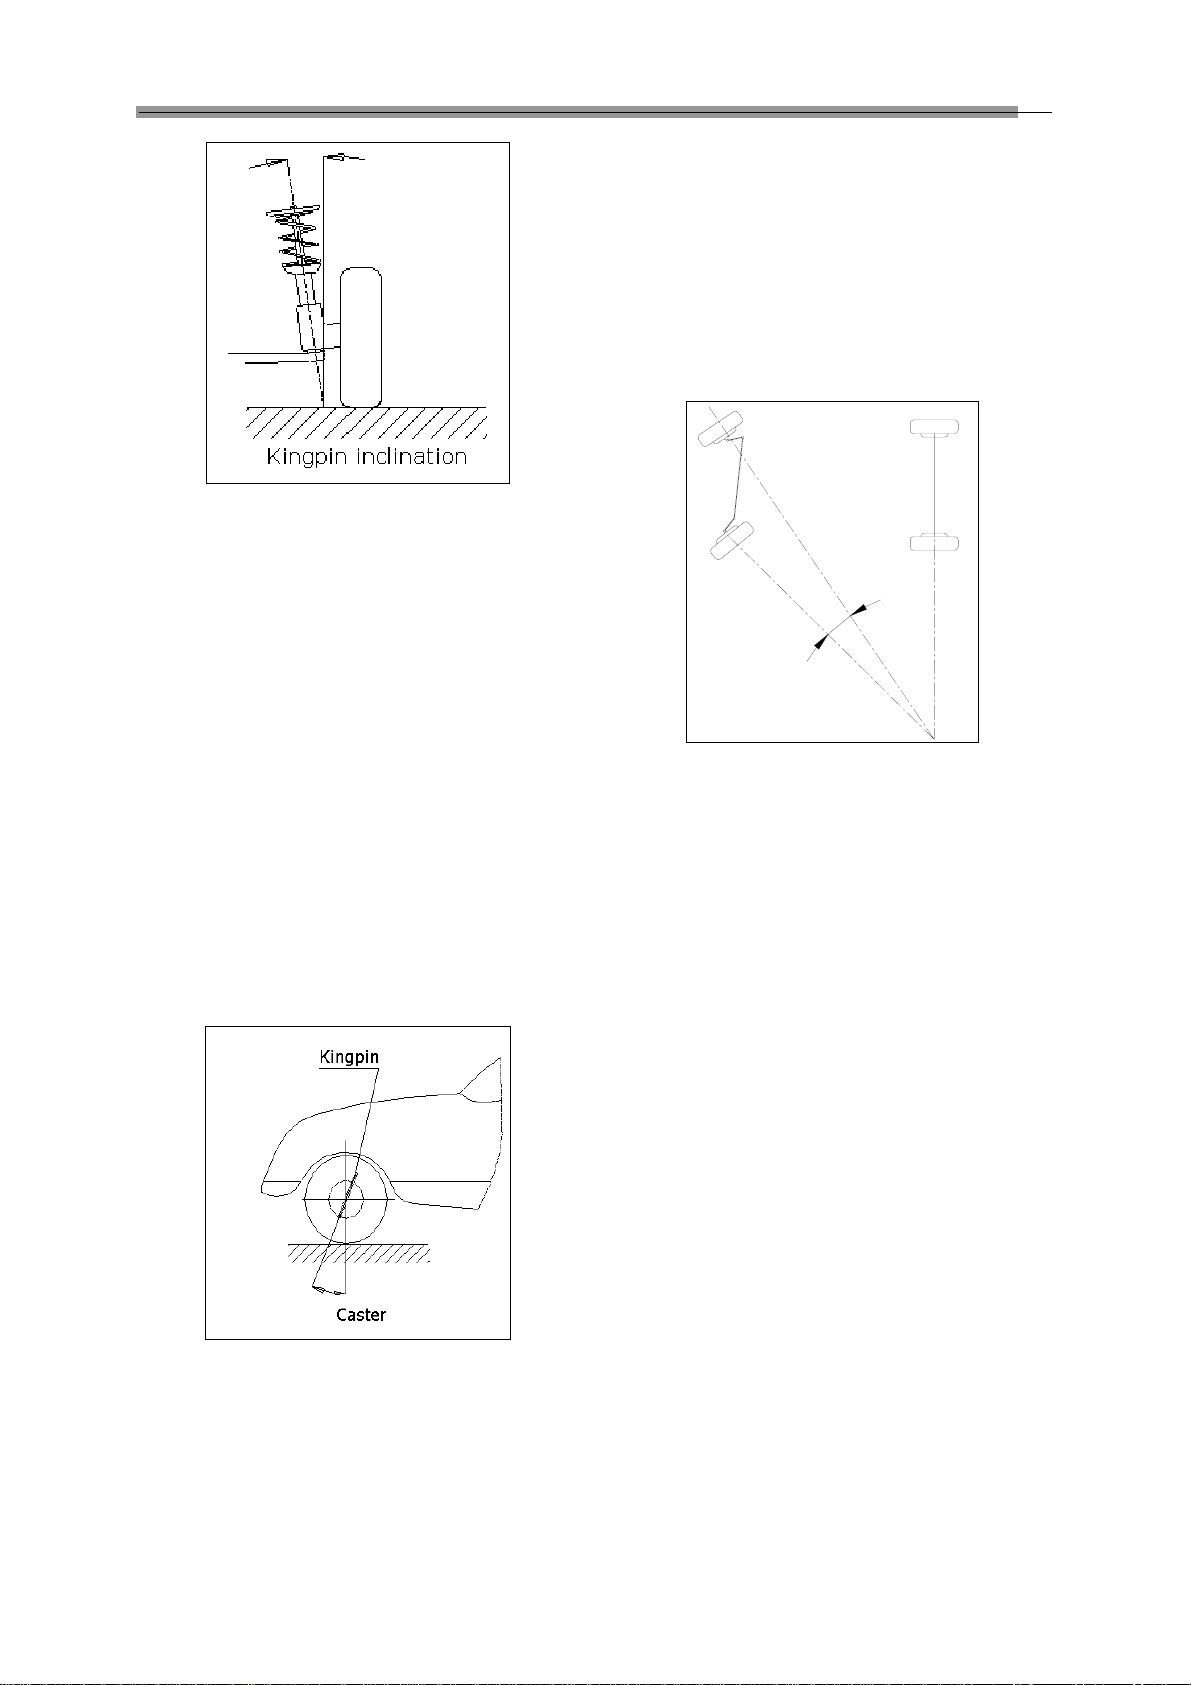
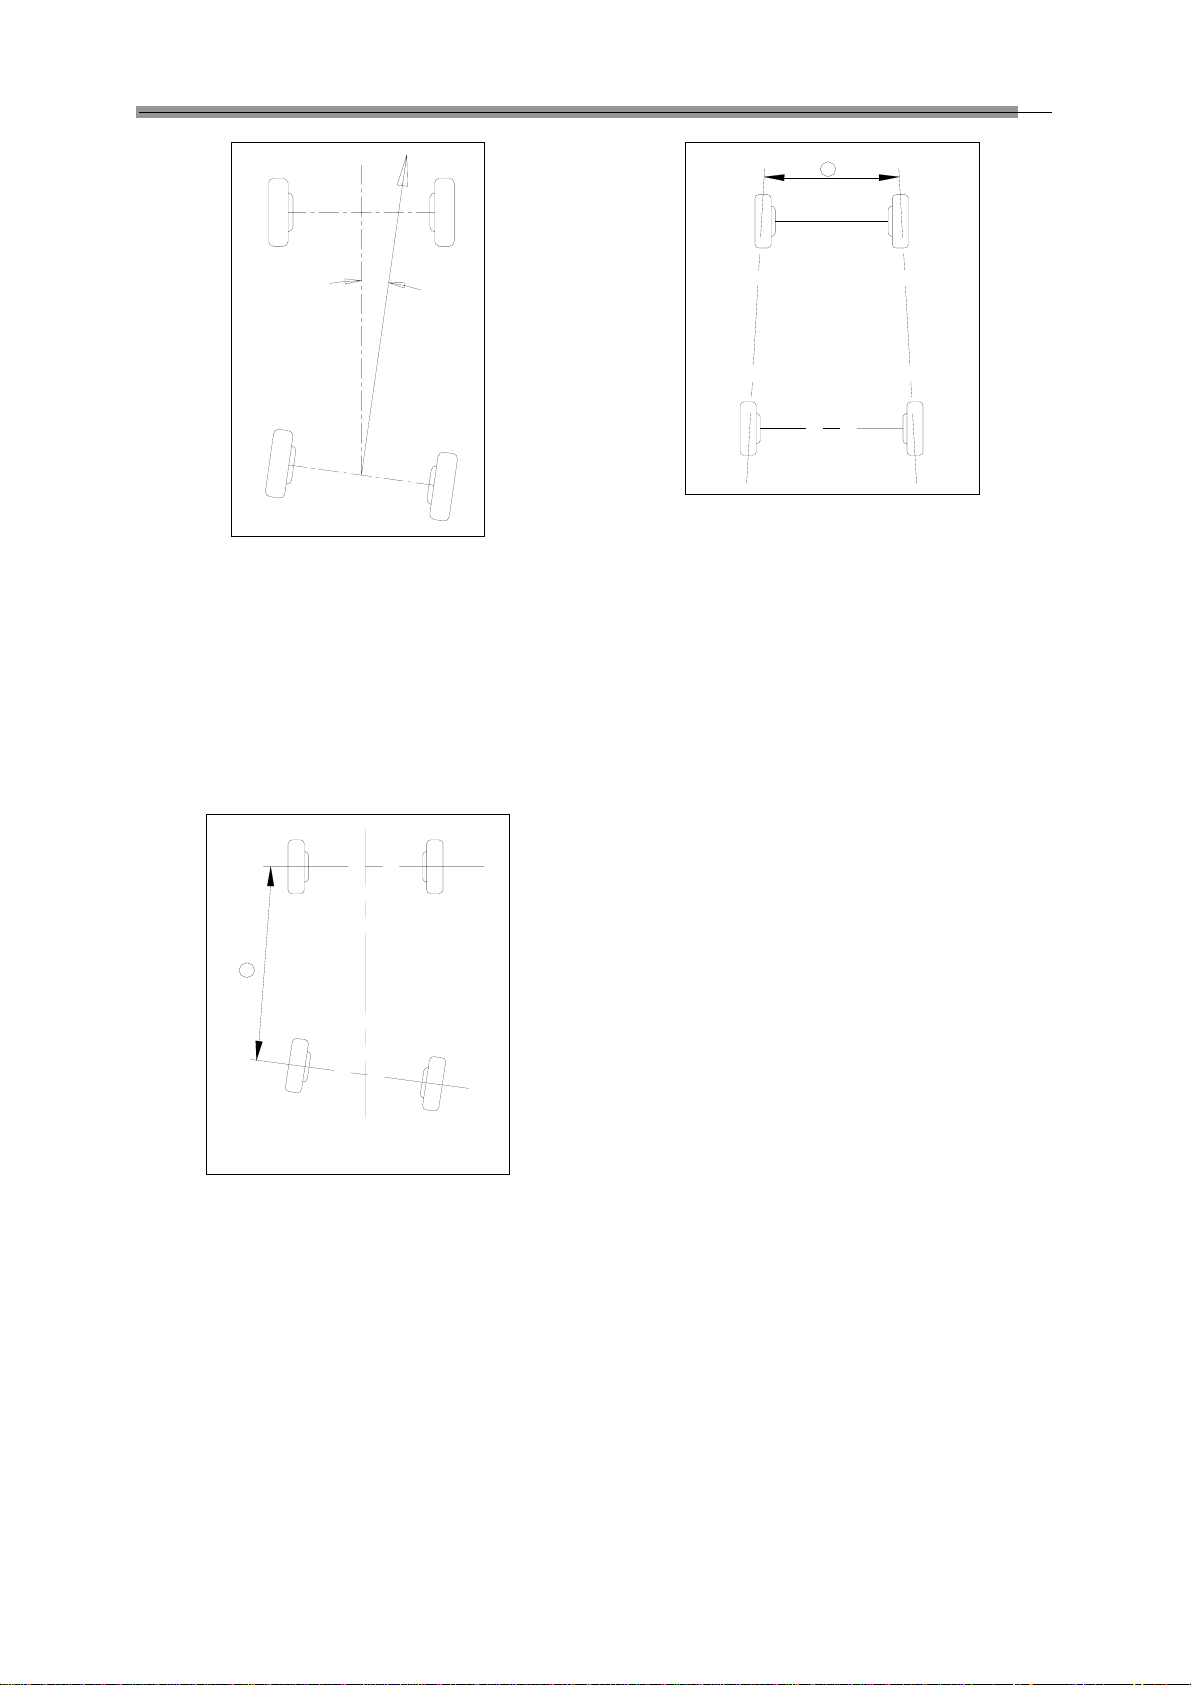
LAUNCH KWA-300 3D Wheel Aligner
ii
Precautions
zPlease read the User’s Manual and the Installation
and Parts Manual carefully before operating
KWA-300 3D.
zOnly the qualified technician can operate the
WheelAligner.
zThe operator must have knowledge of computer
application and basic theory of wheel alignment.
zThe power voltage of KWA-300 3D is
AC220V±10% 50±1Hz /AC110V±10% 60±1Hz(It
can be customized according to the requirements
of customer). The 3-terminal socket must be used,
and the earth terminal must be well grounded. If
the power voltage is not stable, please purchase
and useAC voltage stabilizer.
zBefore installing 3D wheel aligner, the lift should be
installed at first according to the requirements.
Regularly check the lift for fastening and leveling,
ensuring the test accuracy and personnel safety;
Take away the roadblocks around the lift to prevent
influencing operation.
zDon’t place KWA-300 3D on a vibrated objector an
oblique surface.Avoid direct sunlight and moisture.
zTurn off the power after operation. Check all bolts
and parts after maintenance, and tighten the
slackened bolts and parts in turn for safety.
zSince computer visual technology is used in
recognizing the targets mounted on the wheels
through the camera with high resolution, it is
necessary to keep KWA-300 3D away from the
outside infrared rays (e.g. sun-lights) from directly
lighting to the targets and reflecting to the cameras.
It is also necessary to avoid blocking the light way
from the targets to the cameras for a long time
during the instrument is working.
zThe targets of KWA-300 3D wheel aligner are the
key components for testing. Do not damage their
structures when using and storing. Keep the
surface of target clean. Please use the soft cloth
dipped with an appropriate amount of the neutral
detergent or the absolute alcohol to wipe the
surface of target lightly if there are some smuts on
it.
zThe wires inside the cabinet and the camera posts
are connected compactly. Don’t move them after
first installation.
zThe precision position calibration has been
performed for the cameras after first installation,
the user can not move or wobble the camera post
during or after using it.
zWithout approval of the supplier, please do not
disassemble the main unit and camera post in
order to avoid damaging the components,
influencing the test accuracy and increasing the
costs and difficulties of maintenance and repair.
For the damage caused by unauthorized
disassembling will not be covered by the Warranty.
zThe fastening method should be selected correctly
and flexibly according to the actual conditions of
the rim, the turning force should be equal when
fastening, after fastening, please check the wheel
clamp again.
zThe force should be equal when using each knob,
please don’t fasten it too tight in order to avoid
damaging the locking mechanism or other parts.
zAfter using, please cut off all power supplytimely.
zThe cameras of KWA-300 3D wheel aligner are the
key optical components for testing. Do not impact
them when using, keep the surface of the camera
lens clean. Please use the lens paper to wipe the
surface of the camera lens lightly if there are some
smuts on it.
General Safety
Instructions
Safety equipment may not be removed and/or
disabled.
Any work on the electrical installation may only
be performed by electricians.
The wheel alignment system may not be
operated in explosion-pronesurroundings.
The operator must provide appropriate fire
protection measures at the measuring platform. In
particular, any flammable or self-combusting items (such
as cloths soaked in solvents or oil) and fluids, or foreign
items and other ignition sources, should not be stored in
the tool trolley.
Warning symbol tags used:
Legend: Pull the power plug before
opening the housing!
Obligation by the operator to be
considerate and avoid negligent acts:
The equipment was designed and constructed with
consideration to required harmonized standards, as well
as additional technical specifications. It therefore
corresponds with the current state of technology and
provides the maximum standard in safety during the
operation.
The machine safety, however, can only be implemented
during the operation, if all of the required steps have