manuals.online logo
Brands
  1. Home
  2. •
  3. Brands
  4. •
  5. Lawler
  6. •
  7. Control Unit
  8. •
  9. Lawler 410 Instruction Manual

Lawler 410 Instruction Manual

temperedwater.com
5330 East 25th St.
Indianapolis, IN 46218
Phone (317) 261-1212
Fax (317) 261-1208
INSTALLATION &
MAINTENANCE MANUAL
Design and specifications subject to change without notice.
Please refer to temperedwater.com to ensure most
current data sheet and other design solutions.
temperedwater.com/patents
M 410 C
ASSE 1070 Approved
ASSE Lead Free Certied
Certied to CSA B125.3
NOTICE! No mixing valve will work satisfactorily if improperly installed. We suggest, therefore, that you read
these instructions carefully before installing and follow directions as outlined. Handle the mixing valve with care.
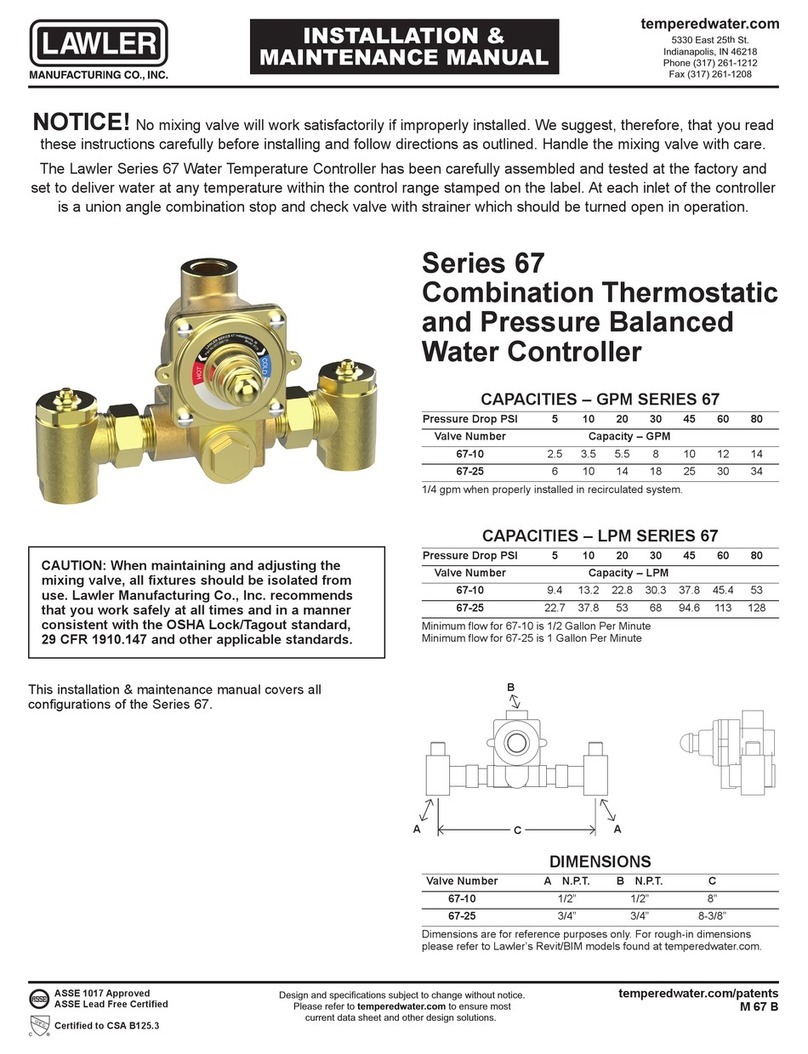
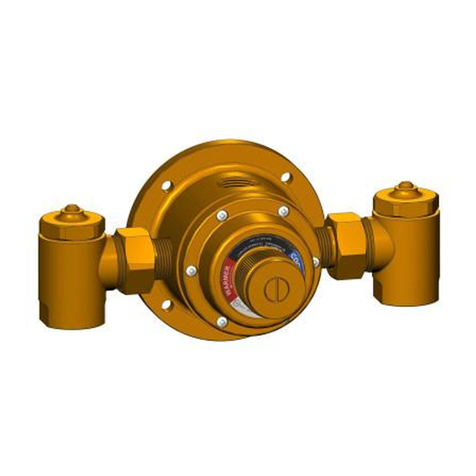
Model 410
Thermostatic Mixing Valve
CAPACITIES – MODEL 410
Pressure Drop PSI 5 10 20 30 45 60
Valve Number Capacity
410-GPM 5 8 12 15 20 24
410-LPM 19 30 45 56 75 91
1/4 gpm when properly installed in recirculated system.
The minimum ow of the Series 410 is 1 GPM.
72146_410-75_STD_DRW_NODIMS.pdf
B
CA
DIMENSIONS
Valve Number A B C
410 9-1/2” 4-1/2” 5-1/2”
Dimensions are for reference purposes only. For rough-in dimensions
please refer to Lawler’s Revit/BIM models found at temperedwater.com.
Inlets & outlet are 3/4” NPT.
CAUTION: When maintaining and adjusting the
mixing valve, all xtures should be isolated from
use. Lawler Manufacturing Co., Inc. recommends
that you work safely at all times and in a manner
consistent with the OSHA Lock/Tagout standard,
29 CFR 1910.147 and other applicable standards.
This installation & maintenance manual covers all
congurations of the Model 410.
Checking Mixing Valve
1. CHECKING COLD WATER SHUT-OFF. Shut off hot
supply keeping cold supply open. At rst, full volume of
cold water should pass through valve. The volume of
cold water should then be reduced to a very small ow.
Failure of this to occur would indicate:
a. Piston #15 is stuck in one position. Unit has to be
cleaned.
b. Valve spring #18 has lost its strength and must be
replaced.
c. Cold water is in excess of 80°F.
2. CHECKING HOT WATER SHUT-OFF. Open both the
hot and cold supplies to mixing valve. Water should ow
through valve at 115°F. If not, adjust valve as explained
under “TEMPERATURE ADJUSTMENT.”
Now shut off the cold water supply to the mixing valve.
A properly operating mixer will shut off the hot water
almost instantly with hot water temperature supplying
the mixing valve at least 15 degrees higher than
maximum setting.
Failure to do so would indicate:
a. Dirt between the hot seat #17 in liner #21 and
piston #15 prevents it from closing. Unit has to be
cleaned.
b. The piston #15 could be stuck so that it cannot
move because of scale or some other deposit in
water. Unit has to be cleaned.
c. The thermostat has lost its power and has to be
replaced with a new one.
Inspection and Cleaning Valve
Shut off hot and cold water supply to mixing valve. Remove
body screws #9. Take the cover #26 off valve body. The
thermostat, piston and liner can now be examined.
Checking the Thermostat
If cold seat #11 on thermostat is worn or deeply indented,
remove it and replace with a new one. If there is a question
as to the thermostat being good, hold thermostat under
cold water faucet and insert an eraser-capped pencil into
the center of thermostat. Make a reference mark where
pencil protrudes from the thermostat. Now place the entire
thermostat into hot water, approximately 140°F for about
one minute. Remove thermostat from water, examine the
reference mark on pencil again. At this temperature, it
should extend out from former position about 1/8”. If it does
not, a new thermostat should be installed.
CAUTION: Extreme care should be exercised when
placing thermostat in and out of hot water.
Mixing valve
Valve is carefully assembled and tested at the factory and
set to deliver water at any temperature between full cold
and 115°F. Failure of the cold water supply will cause the
hot water seat to close. The label on the valve cover is
marked “WARMER - COOLER,” so that the temperature set
screw can be set accordingly.
Stop and Check Valves
Each inlet of the mixing valve must have a screwdriver-
operated check valve. Both the cold and hot water stop
and check valves must be open at all times for proper
functioning of the valve.
The stop and check valves serve two purposes:
1. They prevent the hot or cold water from by-passing
through the mixing valve.
2. They provide convenient means to shut the supplies to
the mixer for cleaning or repairs.
Stop and checks are required whenever downstream shut
off devices are used.
Temperature Adjustment
The temperature of the hot water supplying the mixing
valve should be at least 20 degrees higher than maximum
required valve setting. Valves are normally set at factory
for 115°F maximum outlet temperature with 140°F inlet. If
readjustment is required, proceed as follows:
1. Remove outside acorn nut #2.
2. With narrow blade screwdriver, turn adjusting set screw
#5 clockwise to reduce the outlet temperature and
counterclockwise to increase outlet temperature. The
set screw should not be turned more than 1/2 turn at a
time without testing water temperature.
3. When temperature is correct, replace acorn nut.
Adjusting screw #5 may not be turned counter-clockwise
more than 1-1/2 turns.
CAUTION: It is not recommended to set maximum
outlet temperature above the applicable plumbing code.
Piping Instructions
Before installing the mixer, blow out all pipe lines to be sure
that no dirt, such as pipe chips, wicking or lead, can enter
the mixing valve. Valve inlets are marked hot and cold.
Piping must go to proper inlets.
Maintenance
The Lawler thermostatic mixer should be checked
periodically for proper operation and cleaning. See
“INSPECTION AND CLEANING VALVE.” To test mixing
valve for proper setting and operation—proceed as follows:
Checking Piston and Liner
Remove piston assembly #15 from valve. Check the piston
assembly and liner #21 for cleanliness and excessive wear.
Check hot disc #17 for wear. Replace all worn parts.
Liner #21 can be removed with a 1-5/8” socket wrench.
Before reassembling the valve, thoroughly ush out with
water.
Piston Sub-assembly, consisting of parts #’s 15, 17 and 18,
is factory pre-set with Liner #21, as a single unit.
Use only genuine factory parts for replacement of seat
washers; thickness will affect the operation of the mixing
valve.
When in Need of Information
When writing the factory or one of its representatives in
regard to a mixing valve, be sure to give the valve number
and serial number appearing on round label plate fastened
to the top of the valve.
Repair Kit
Valves can be completely rebuilt in a matter of minutes
without removal from the line by installing a repair kit.
WARNING: This product contains chemicals known
to the State of California to cause cancer and birth
defects or other reproductive harm.
(Installer: California law requires that this warning
be given to the consumer.)
For more information: www.oehha.org/prop65
Thermostatic Mixing Valve Cut-away
9
26
10
5
12
15
25
22
14
21
17
19
7
23
2
18
GUARANTEE
We guarantee the Lawler Mixing Valve to be free from defects in workmanship and material, and for
a period of one year from date of purchase, will replace any parts found by us to be defective. We will
not be held responsible, however, for any labor incidental to, or for any damages caused by defective
material. Each mixing valve is thoroughly inspected and tested under actual conditions at our factory.
Item Description Contains Part No.
A Piston/Liner Kit 18-B-D 79865-00
B O-Ring & Gasket Kit 7-10-14-22-23 79962-00
C Cover & Spindle Assembly 2-5-10-26 79271-01
D Piston & Liner Assembly 14-15-17-21 72014-05
E Thermostat Assembly 19-10 71036-21
Must specify capacity and nish of valve. Parts shown are for 15-20 GPM. All parts
shown are for Plain Bronze nish.
For complete repair kit, order universal kit 79851-00
Repair Kits and Assemblies
Repair Kits for Inlet Stop & Checks
NOTE:* Components are not included in repair kit.
Item Description
1 Adjustment Stem
2 O-ring
*3 Bonnet
4 Spring
5 O-ring
6 Disc Holder
7 O-ring
*8 Body
3/4” Stop & Check
Part No. 71182-14
Repair Kit 79982-00
3
4
6
8
7
5
2
1

This manual suits for next models

2

Other Lawler Control Unit manuals

Lawler 911E Instruction Manual

Lawler

Lawler 911E Instruction Manual

Lawler 61 Series Instruction Manual

Lawler

Lawler 61 Series Instruction Manual

Lawler 61 Series Instruction Manual

Lawler

Lawler 61 Series Instruction Manual

Lawler NEPTUNE EMX 075 Instruction Manual

Lawler

Lawler NEPTUNE EMX 075 Instruction Manual

Lawler 310 Instruction Manual

Lawler

Lawler 310 Instruction Manual

Lawler 911 E/F Series User manual

Lawler

Lawler 911 E/F Series User manual

Lawler 4000 Series Instruction Manual

Lawler

Lawler 4000 Series Instruction Manual

Lawler 911E Instruction Manual

Lawler

Lawler 911E Instruction Manual

Lawler 3000 Instruction Manual

Lawler

Lawler 3000 Instruction Manual

Lawler 911 Instruction Manual

Lawler

Lawler 911 Instruction Manual

Lawler 570 User manual

Lawler

Lawler 570 User manual

Lawler 803 Instruction Manual

Lawler

Lawler 803 Instruction Manual

Lawler 802 Instruction Manual

Lawler

Lawler 802 Instruction Manual

Lawler 67 Series Instruction Manual

Lawler

Lawler 67 Series Instruction Manual

Popular Control Unit manuals by other brands

eta G10.21A Technical Communication

eta

eta G10.21A Technical Communication

Danfoss ICLX 100 installation guide

Danfoss

Danfoss ICLX 100 installation guide

Lansdale LPBT Series Installation, maintenance & operating instructions

Lansdale

Lansdale LPBT Series Installation, maintenance & operating instructions

PI E-621.SR user manual

PI

PI E-621.SR user manual

Steamist Total Sense TSC-450 manual

Steamist

Steamist Total Sense TSC-450 manual

ExTox ET-8 Series instruction manual

ExTox

ExTox ET-8 Series instruction manual

HP DESKJET 1050 Installation and maintenance guide

HP

HP DESKJET 1050 Installation and maintenance guide

BENDIX R-12P PILOT RELAY VALVE manual

BENDIX

BENDIX R-12P PILOT RELAY VALVE manual

MVP Innovator Plus Component manual

MVP

MVP Innovator Plus Component manual

DIC SEPAREL PF Series instruction manual

DIC

DIC SEPAREL PF Series instruction manual

Quanser Q1-cRIO quick start guide

Quanser

Quanser Q1-cRIO quick start guide

Atmel SAM4 Series Application note

Atmel

Atmel SAM4 Series Application note

Emerson FISHER LR128 Series installation guide

Emerson

Emerson FISHER LR128 Series installation guide

pizzato CS FS-5 Series manual

pizzato

pizzato CS FS-5 Series manual

SEMIKRON SKiiP 4 Additional Explanation

SEMIKRON

SEMIKRON SKiiP 4 Additional Explanation

Aventics CL03 operating instructions

Aventics

Aventics CL03 operating instructions

Jetter JXM-IO-E31 user manual

Jetter

Jetter JXM-IO-E31 user manual

LEPARD TM.040.2 Installation and operation manual

LEPARD

LEPARD TM.040.2 Installation and operation manual

manuals.online logo
manuals.online logoBrands
  • About & Mission
  • Contact us
  • Privacy Policy
  • Terms and Conditions

Copyright 2025 Manuals.Online. All Rights Reserved.