manuals.online logo
Brands
  1. Home
  2. •
  3. Brands
  4. •
  5. LD Seating
  6. •
  7. Indoor Furnishing
  8. •
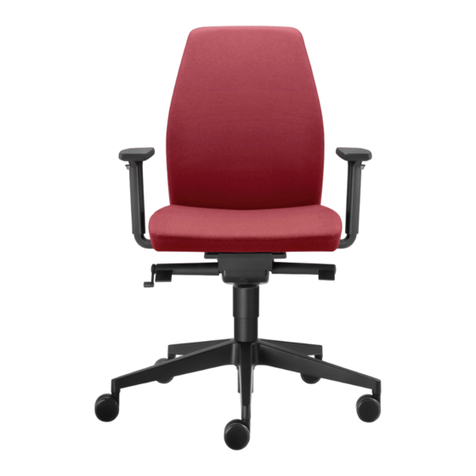
  9. LD Seating Storm User manual

LD Seating Storm User manual

NÁVOD K POUŽITÍ
OPERATING INSTRUCTIONS
BEDIENUNGSANLEITUNG
storm
storm
approximately 90°.
Adjust the right backrest height.
The greatest curving of the bac-
krest should be located at the area
where your lumbar spine is most curved
forward.
Set the proper armrest height. Upper
arms and forearms should form an angle of
approximately 90°, hands ought to rest com-
fortably on the desktop.
Set the appropriate backrest resistence
by adjusting the mechanism pressure accor-
ding to the user´s weight. The synchronous
mechanism supports dynamic sitting and
ensures continuous contact between your
back and the ergonomically shaped bac-
krest, thus significantly reducing the pressu-
re on intervertebral discs.
Sit dynamically. Learn to make use of
dynamic possibilities offered by your chair.
Learn to follow the mentioned instructions
subconsciously and to sit upright with the
S-shape of the spinal column.
Richtige Sitzhaltung und
der Gebrauch des Stuhls
Die richtige und dynamische Sitzhaltung hat
einen positiven Einfluss auf die Kreativität,
Produktivität, Motivation und Gesundheit.
Sie beugt einseitiger Belastung vor, aktiviert
und erhält nachhaltig die natürlichen Kör-
perprozesse. Auch bei einem hochwertigen
Stuhl ist es wichtig, diesen individuell auf
den jeweiligen Benutzer einzustellen. Hierzu
erhalten Sie folgende Tipps:
Nutzen Sie die gesamte Sitzfläche.
Die richtige Sitzhöhe: Stellen Sie hierzu
ihrer Füße flach auf den Boden. Der Winkel
zwischen Oberschenkel und Unterschenkel
soll etwa 90° betragen.
Die richtige Rückenlehneneinstellung:
Die Lordosenstütze sollte in die stärkste
Krümmung der Rückenlehne in Position ge-
bracht werden, um den Rücken optimal zu
unterstützen.
Die richtige Armlehnenhöhe: Die Unter-
und Oberarme sollten sich in einem Winkel
von etwa 90° befinden.
Der Gegendruck der Rückenlehne sollte
auf das Körpergewicht des Nutzers richtig
eingestellt werden. Die Synchronmechanik
unterstützt das dynamische Sitzen und ga-
rantiert durch den Kontakt des Rückens mit
der Rückenlehne eine wesentliche Entlastu-
ng der Bandscheibe.
Sitzen Sie dynamisch: Machen Sie Geb-
rauch vom bewegten Sitzen, das Ihnen die-
ser Stuhl bietet. Folgen und verinnerlichen
Sie sich die oben aufgeführten Regeln und
sitzen Sie aufrecht auf dem Stuhl. Ihre Wir-
belsäule wird es Ihnen danken.
Správné sezení
a používání židle
Správné a dynamické sezení má pozitivní
vliv na Kreativitu, Produktivitu, Motivaci
a Zdraví. Předchází jednostrannému zatí-
žení
a neustále aktivuje a zachovává
při-
-rozené procesy těla. I výborná židle může
poskytnout plný užitek pouze pokud je
správně nastavena a používána.
Používejte celou hloubku sedací plochy
Nastavte správnou výšku sezení. Celá
plocha chodidel musí lehce spočívat
na podlaze, stehna a lýtka by měla přibliž-
ně
svírat úhel 90°.
Nastavte správnou výšku područek.
Paže a předloktí by měly přibližně svírat
úhel
90°, ruce by měly pohodlně ležet na
desce
pracovního stolu.
Nastavte vhodný a příjemný odpor
opěradla nastavením síly přítlaku mecha-
nismu dle váhy uživatele. Synchronní me-
chanismus podporuje dynamické sezení
a poskytuje neustály kontakt zad s ergono-
micky tvarovaným opěradlem a tím význam-
ně
snižuje tlak na meziobratlové
ploténky.
Seďte dynamicky. Osvojte si
a využívejte dynamické možnosti
své židle. Naučte se podvědomě dodržovat
zde uvedené základní body a udržovat
vzpřímenou páteř ve tvaru písmene S.
Correct seating posture
and using a chair
Correct and dynamic seating posture has a
positive influence on creativity, productivity,
motivation and health. It prevents one-
sided burdening and constantly activates
and maintains natural body processes. Ho-
wever, even with a high-quality chair, in
order to ensure the most efficient use it is
necessary to adjust and use the chair
appropriately.
Use the entire length of seating surface.
Set the right seat height. Place the entire
soles of your feet or shoes flat on the floor.
Thighs and calves should form an angle of
CZ/
GB/
DE/
LD SEATING
Einstellung
des Sitzes
Höherstellen des Sitzes:
1. Entlasten Sie den Sitz.
2. Ziehen Sie den rechten Hebel unter
dem Sitz nach oben (Der Sitz hebt
sich langsam).
3. Wenn die erforderliche Sitzhöhe
erreicht ist, lassen Sie den Hebel los.
Die Sitzposition ist jetzt arretiert.
Tieferstellen des Sitzes:
1. Belasten Sie den Sitz.
2. Ziehen Sie den rechten Hebel unter
dem Sitz nach oben (Der Sitz senkt
sich langsam).
3. Wenn die erforderliche Sitzhöhe
erreicht ist, lassen Sie den Hebel los.
Die Sitzposition ist jetzt arretiert.
Einstellung der Sitztiefe:
1. Drücken und halten Sie hierzu den
Knopf auf der linken unteren Seite des
storm
2. Pull the right lever upward
(seat height is lowered slowly)
3. When required seat height is
reached, release the lever. The
seat is locked in this position
Seat depth adjustment
1. Push out the lever on the left bottom
side of the seat to release the seat
slide mechanism
2. Adjust the seat depth by sliding
the seat forward or back
3. Release the lever to lock the seat
in the desired position
Seat tilt adjustment:*
1. Release pressure of the seat
2. Turn the two-way lever at the bottom
back of the seat (180°) to adjust the
seat tilt.
3. Lock the lever in the 1st or 2nd
position
* Only in models STOR M 555 and 547
Nastavení
sedáku
Zvýšení sedáku:
1. Odlehčete sedák
2. Pravou páčku pootočte nahoru (sedák
se pomalu vysouvá)
3. Zvolte vhodnou výšku a páčku uvolně-
te. Sedák se zajistí v této poloze
Snížení sedáku:
1. Zatižte sedák
2. Pravou páčku pootočte nahoru
(sedák se pomalu zasouvá)
3. Zvolte vhodnou výšku a páčku uvolně-
te. Sedák se zajistí v této poloze
Posuv sedáku:
1. Vysuňte páčku vespod levé strany
sedáku
2. Vysunutím páčky se odjistí
mechanismus posunu sedáku
3. Nastavte hloubku sedáku do zvolené
polohy posunutím vpřed nebo vzad
4. Uvolněním páčky se sedák zajistí
ve zvolené
poloze
Náklon sedáku:*
1. Odlehčete sedák
2. Otočte oboustrannou páčkou ve spodu
zadní části sedáku (180°), sedák mění
náklon.
3. Páčku zajistěte v 1. nebo 2. poloze
* Pouze u modelů STORM 555 a 547
Adjustment
of seat
To lift the seat:
1. Release the seat
2. Pull the right lever upward (seat height
is increased slowly)
3. When required seat height is reached,
release the lever. The seat is locked in
this position
To lower the seat:
1. Put weight on the seat
CZ/
GB/
DE/
Sitzes, um die Arretierung der Sitztiefe
zu lösen.
2. Stellen Sie durch Verschieben des
Sitzes nach vorne und hinten die
richtige Sitztiefe ein.
3. Lassen Sie den Knopf wieder los,
wenn Sie die gewünschte Position
erreicht haben.
Einstellung der Sitzneigung:*
1. Entlasten Sie den Sitz.
2. Drehen Sie den Hebel auf der hinteren
unteren Seite des Sitzes um 180° um
die Sitzneigung einzustellen.
3. Verriegeln Sie den Hebel in eine der
beiden Positionen.
* Nur bei den Modellen STORM 555
und STORM 547
LD SEATING
Einstellung
der Mechanik
Dynamisches Sitzen
Sitz und Rückenlehne auf
bewegtes Sitzen einstellen:
1. Entlasten Sie die Rückenlehne.
2. Ziehen Sie den Hebel links unterhalb
des Sitzes nach oben
3. Lehnen Sie Sich leicht gegen die
Rückenlehne.
4. Die Arretierung ist gelöst.
Arretierung der Rückenlehne in
der gewünschten Position:
1. Bringen Sie die Rückenlehne
in die gewünschte Position.
2. Ziehen Sie den Hebel links unterhalb
des Sitzes nach unten
3. Die Mechanik ist arretiert.
DE/
storm
Nastavení a ovládání
mechanismu židle
Dynamické sezení
Nastavení sedáku a opěráku židle
do synchronního pohybu
:
1. Uvolněte tlak na opěrák
2. Páčkou na levé straně pootočte
nahoru
3. Mírně se opřete o opěrák
4.
Mechanismus se uvede do synchronní
polohy
Fixace opěradla v požadované poloze
Jak nastavit opěrák do pevné
polohy:
1. Zvolte vhodný sklon opěráku
2. Páčkou na levé straně pootočte dolů
3. Opěrák se zajistí v této poloze
Adjustment
and control of chair
mechanism
Dynamic sitting
How to adjust backrest and seat
to a synchronous position:
1. Release pressure on the backrest
2.
Pull the lever underneath the seat
on the
left upward
3. Lean gently against the backrest.
4. Mechanism is set in synchronous
position
Fixing backrest in required
position
How to adjust backrest to a fixed
position:
1. Select desired tilt of the backrest.
2. Pull the lever underneath the seat on
the left downward
3. Seat is locked in this position
CZ/ GB/
storm
Jak nastavit tuhost
synchronního mechanismu
1. Vysuňte kličku regulátoru
2. Otáčením ve směru hodinových
ručiček se zvyšuje odpor synchronního
mechanismu. Otáčením proti směru
hodinových ručiček se snižuje odpor
synchronního mechanismu
3. Kličku regulátoru zasuňte zpět
4. Správně nastavený odpor opěráku by
měl dostatečně podpírat záda, ale
respektovat polohu sezení
Adjusting the tilt
pressure
of
mechanism
1. Pull the control lever
2. Turning the lever clockwise increases
the tilt pressure of the synchronous
mechanism. Turning the
lever
counter-clockwise decreases
the tilt
pressure of the synchronous
mechanism
CZ/
3. Push the control lever back
4. Properly adjusted backrest tilt
pressure will support the back
while respecting the seating
posture
Einstellung des Anlehn-
drucks der Mechanik
Die richtige Wahl des Anlehndrucks
unterstützt den Rücken in Verbindung
mit der richtigen Sitzhaltung.
1. Ziehen Sie die Kurbel auf der rechten
unteren Seite des Sitzes heraus.
2. Drehrichtungen:
- Im Uhrzeigersinn: Der Anlehndruck
wird stärker
- gegen den Uhrzeigersinn: Der
Anlehndruck wird schwächer
3. Schieben Sie die Kurbel wieder in die
Grundposition.
DE/
GB/
3. Lassen Sie den Knopf wieder los.
Die Armlehne rastet ein.
Breiteneinstellung:
1. Lösen Sie die Handschrauben
an der Unterseite der Armlehnen.
2. Stellen Sie die gewünschte Breite
der Armlehnen ein.
3. Ziehen Sie die Handschrauben
wieder an.
Tiefenseinstellung:
1. Bewegen Sie hierzu die Armauflage
nach vorne und hinten, um die
gewünschte Position einzustellen.
Einstellung des Winkels der
Armauflage:
1. Bringen Sie die Ellenbogenauflage
durch sanftes Schwenken in die
gewünschte Position
(max. +/-30°)
storm
Arm pad depth adjustment:
1. Move the arm pad (elbow
support) forward or backwards in
desired position by pushing softly
Arm pad rotation adjustment:
1. Turn the arm pad (elbow support)
softly in the desired position
(max. range +/- 30°)
Einstellung
der Armlehnen
Hinweise
Klären Sie vorerst ab, um welches Armleh-
nenmodell auf Ihrem Stuhl montiert ist. Je
nach Ausführung können die Armlehnen
folgende Einstellmöglichkeiten besitzen:
Höheneinstellung:
1. Drücken Sie auf den Knopf seitlich
an der Armlehne.
2. Bringen Sie die Armlehnen in
die gewünschte Position.
Nastavení
područek
Upozornění:
Před vlastním nastavení se ujistěte jakým
typem područek je židle vybavena.
Dle
typu područek, kterými je židle vybavena,
je možné provést nastavení:
Výšky područek:
1. Stiskněte tlačítko na boční straně
područky
2. Nastavte vhodnou výšku područky
3. Uvolněte tlačítko, područka je
automaticky zajištěna
Šířky područek:
1. Povolte fixační šrouby na spodu
područek
2. Nastavte vhodnou šířku područek
3. Fixační šrouby dotáhněte
Hloubky loketníků:
1. Mírným tlakem posuňte loketník
do požadované polohy
Natočení loketníků:
1. Mírným tlakem natočte loketník
do požadované polohy
(max. rozsah +/- 30°)
Adjustable
armrests setting
Notice:
Found out model of armrests the chair is
equipped before its setting. According
used armrests model, there can be adjusted:
Armrest height adjustment:
1. Push the button on side of the armrest
2. Set the armrest in desired height
3. Release the button, the armrest will be
locked automatically
Armrest width adjustment:
1. Release fixing screws at bottom of the
armrests
2. Set the desired width
3. Tighten the fixing screws
CZ/
GB/
DE/
storm
Der Gebrauch
des Stuhls
Der Bürodrehstuhl darf nur besti-
mmungsgemäß verwendet werden, unter
Beachtung der allgemeinen Sorgfaltsp-
flicht. Vermeiden Sie das Stoßen des
Stuhls z.B. gegen Möbel. Der unsach-
gemäße Gebrauch des Stuhls für andere
Zwecke (z.B. das Sitzen auf den Armleh-
nen) kann gefährlich sein und Unfälle ve-
rursachen.
Pflegeanleitung
Nutzen Sie einen Staubsauger um das Si-
tzpolster bei Bedarf zu säubern. Wenn es
notwendig ist, reinigen Sie das Polster mit
einem feuchten Tuch oder mit sanftem
Feinwaschmittel. Verwenden Sie zur Reini-
gung der Kunststoffteile ausschließlich mil-
de
Reinigungsmitteln (z.B. Seifenlösung),
keine aggressiven chemischen Mittel!
Užívání
židle
Tato židle smí být užívána pouze s odpoví-
dající pozorností a péčí ke svému účelu.
Dbejte, aby jednotlivé části židle nenará-
žely na nábytek. Mohlo by dojít k jejich
poškození. Užívání této židle k jiným účelům
(sezení na opěradle apod.) je velmi nebez-
pečné a může způsobit úraz.
Údržba a čištění
Pro běžné čištění a údržbu pravidelně vy-
sávejte potahové látky vysavačem. V pří-
padě potřeby čistěte šetrným čistícím
prostředkem. Čištění plastových částí pro-
vádějte pouze jemnými čistícími prostřed-
ky. Nepoužívejte agresivní chemické čističe
Servisní opravy
Opravy mechanismu a pístu musí být
vždy prováděny pouze autorizovanými
osobami.
Using
the chair
This chair must be used for its intended
purpose only, with appropriate care and
attention. Prevent individual parts from
hitting against furniture as that might
damage them. Using this chair for other
purposes (such as sitting on the armrest
etc.) is very dangerous and may cause an
accident.
Maintenance, cleaning
Routine cleaning and maintenance: use a
vacuum cleaner regularly in order to clean
upholstery. In case of necessity, use damped
cloths or a gentle detergent. Clean plastic
components with a mild detergent only, do
not use aggressive chemical detergents.
Service
Repairs and maintenance of mechanism
and piston must be performed by experts
only.
CZ/ GB/ DE/ DE/
Service
Die Reparatur und Wartung der Mechanik
und der Gasdruckfeder darf nur durch
Fachleute durchgeführt werden.
LD SEATING
2.
4.1. 3.
storm
Montáž
1. Vyjměte díly z krabice
2. Nasaďte kolečka na kříž
3. Postavte kříž kolečky na podlahu
a zasuňte píst do kříže
4. Nasaďte sedákový komplet na píst
Assembling
1. Take parts out of the box
2. Fix castors onto the base
3. Place the base on the floor with
castors down and insert piston
into the base
4. Fix the seat set onto the piston
Montage
1. Nehmen Sie alle Teile aus dem
Karton.
2. Stecken Sie die Rollen in das
Fußkreuz.
3. Stellen Sie das Fußkreuz mit den
Rollen auf den Boden und stecken Sie
die Gasdruckfeder in das Fußkreuz.
4. Stecken Sie den Sitz auf die
Gasdruckfeder.
CZ/
GB/

Other LD Seating Indoor Furnishing manuals

LD Seating soft User manual

LD Seating

LD Seating soft User manual

LD Seating BR-207 User manual

LD Seating

LD Seating BR-207 User manual

LD Seating Arcus SYAC mechanism User manual

LD Seating

LD Seating Arcus SYAC mechanism User manual

LD Seating Dateien User manual

LD Seating

LD Seating Dateien User manual

LD Seating Armonico User manual

LD Seating

LD Seating Armonico User manual

LD Seating Nido User manual

LD Seating

LD Seating Nido User manual

LD Seating active User manual

LD Seating

LD Seating active User manual

LD Seating Dateien User manual

LD Seating

LD Seating Dateien User manual

Popular Indoor Furnishing manuals by other brands

pakoworld GAYE 120-000042 Assembly manual

pakoworld

pakoworld GAYE 120-000042 Assembly manual

Kozyard London KD Assembly manual

Kozyard

Kozyard London KD Assembly manual

Twoey inside Reading Corner Seat 1 4050 Assembly instructions

Twoey inside

Twoey inside Reading Corner Seat 1 4050 Assembly instructions

Lomado 3186 Assembly instructions

Lomado

Lomado 3186 Assembly instructions

VISIONARY DESIGNS VK-1334 Setup instructions

VISIONARY DESIGNS

VISIONARY DESIGNS VK-1334 Setup instructions

Tech Craft MD73 Assembly instructions

Tech Craft

Tech Craft MD73 Assembly instructions

DREAMS San Diego TV Bedstead Assembly instruction

DREAMS

DREAMS San Diego TV Bedstead Assembly instruction

Aqua Creek Products SPA LIFT ULTRA manual

Aqua Creek Products

Aqua Creek Products SPA LIFT ULTRA manual

Costway HU10107 user manual

Costway

Costway HU10107 user manual

Vogue CE151 instruction manual

Vogue

Vogue CE151 instruction manual

Jysk NORDBY 705-187-1021 manual

Jysk

Jysk NORDBY 705-187-1021 manual

VERTUO 1012486 Assembly guide

VERTUO

VERTUO 1012486 Assembly guide

Twin-Star International Bell'O OD90012 Assembly instructions

Twin-Star International

Twin-Star International Bell'O OD90012 Assembly instructions

Dwell Notch wardrobe two door Assembly manual

Dwell

Dwell Notch wardrobe two door Assembly manual

Twoey 1100 Assembly instructions

Twoey

Twoey 1100 Assembly instructions

Desalto SKIN ALLUNGABILE Assembly instruction

Desalto

Desalto SKIN ALLUNGABILE Assembly instruction

Madison Park Emmett D600004676 Assembly instructions

Madison Park

Madison Park Emmett D600004676 Assembly instructions

Forte OZLS722X10 Assembling Instruction

Forte

Forte OZLS722X10 Assembling Instruction

manuals.online logo
manuals.online logoBrands
  • About & Mission
  • Contact us
  • Privacy Policy
  • Terms and Conditions

Copyright 2025 Manuals.Online. All Rights Reserved.