Reset 2 Switching programs deleted
Press together
Hold , and let free
Hold for 5 seconds, then let free
●LEXIC™
NT 29 17 54 02
RondoRex w21
12
Safety notes
• Installation of these products should only be undertaken by a qualified electrician.
• The operational and electrical safety is only guaranteed, if the product is installed using its proper accessories, in a position as specified in the
installation instructions (distribution panel, surface or wallbox (front of panel).
• Any interference with the product makes the guarantee void.
• If the time switch is mounted near equipment where heat produced raises the local ambient above 55°C. Then a space should be put between
the time switch and the equipment (e.g. 1⁄2space module code 044 40 or 1 space module code 044 41).
Function
The RondoRex w21 is a digitall 7 day time switch with a round segmented display for general rail mounting use. Up to 4 program
pictures per day can be set. A program picture incorporates both on and off time. The copying function enables program to be copied to other days.
Different programs can be set on each day. The minimum switching time is 1 minute. Program pictures are protected but can be overlaid by other
programs. Programs are displayed with a minimum segment size of 15 minutes. Time of day and weekday number are
digitally displayed.
Time switch Operating instructions
Technical data 036 84 036 85 036 86 94 41 78
Supply voltage: 230V~ 120V~ 24V~ 12V DC
Frequency: 50/60 Hz
Consumption: ca. 0,6W
Contact rating: 1 changeover contact 10A 250V~µ cos ϕ= 1
Parallel compensation: not allowed
accuracy: ±2,5s/d
Terminal capacity: single strand multi strand
1 to 4 mm20,5 to 2,5 mm2
Program pictures: 28
Battery reserve: 20h
Storage ambient: -10°C to +60°C
Working ambient: 0°C to +55°C
1. Starting
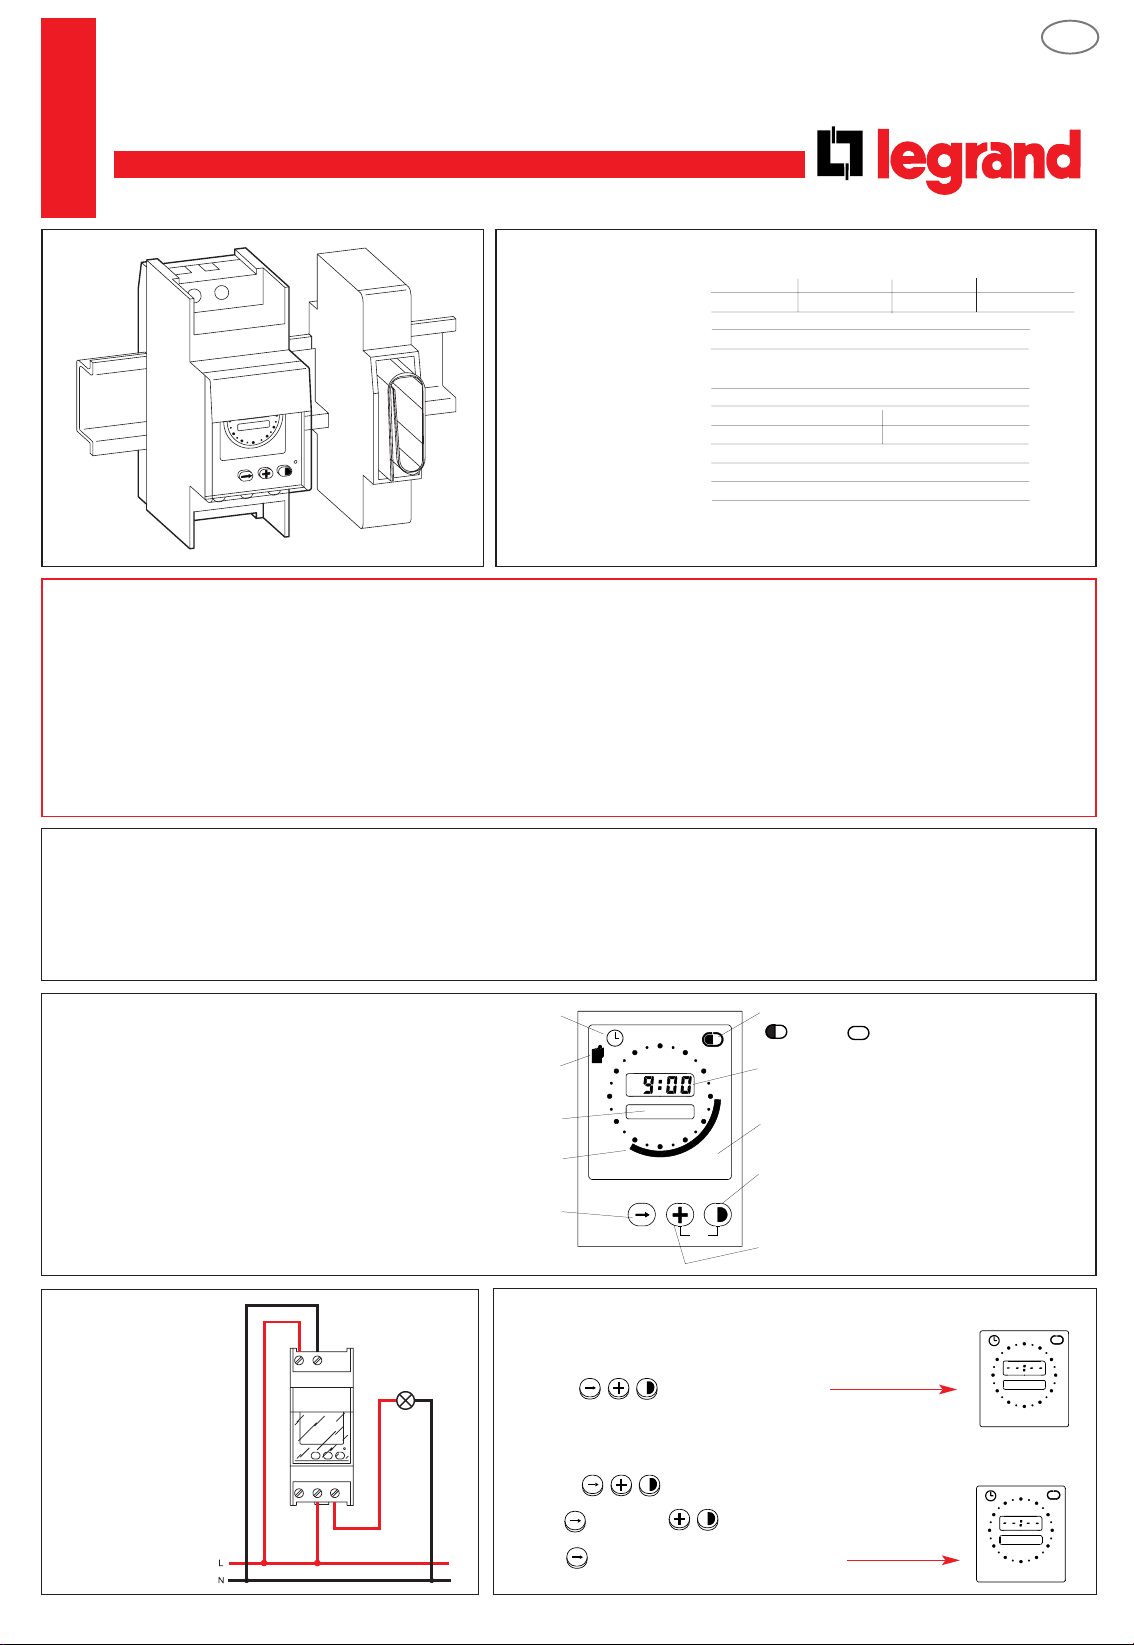
Presentation
Connection
Reset 1 Switching programs remain
Press together
Blinking clock symbol = set time of day
Constant clock symbol = Time switch running
Setting days, hours, minutes, on and off times
Accepting the on and off times,
manual switching
Real time, set on time or set off time
State of contact:
= On / = Off
Blinking hand symbol = continuous manual operating
Constant hand symbol = manual override
Symbol for program input or interrogation
Change from day to hour, minute, programming,
switching time, copying programs
Actual day of the week or program day
Segment display of the existing program
1 segment = 15 minutes, 4 programs per day max.
GB


