Safety notes
GLOW800 / Ref. 10 747 241 / Version 00 3
2 Safety notes
A Leica surgical microscope with GLOW800 is state-of-the-art
technology. Nevertheless, hazards can arise during operation.
Always follow the instructions in this user manual and in the
user manual of the Leica surgical microscope, and in particular
the safety notes.
Federal Law restricts this device to sale by or on the order of a
licensed medical practitioner.
2.1 Intended use
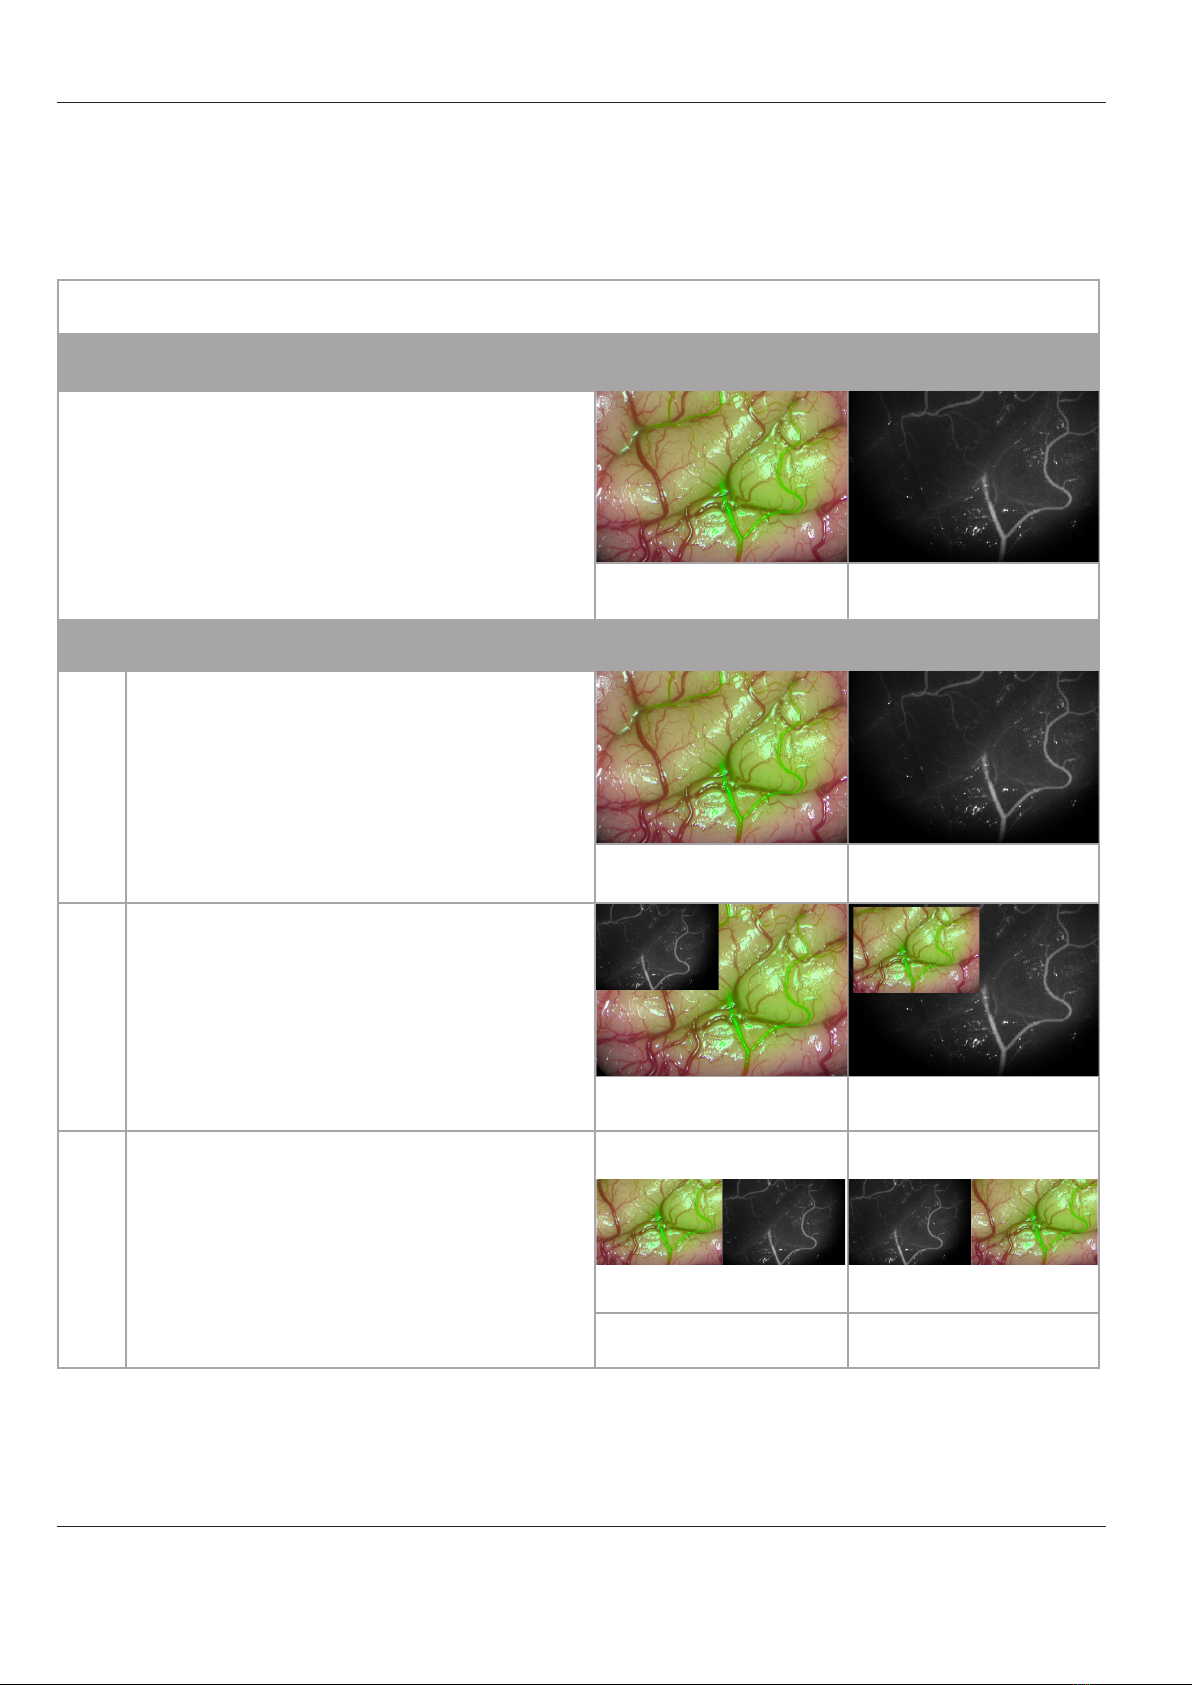
• The GLOW800 is a Leica surgical microscope accessory used in
viewing intra-operative blood flow in the cerebral vascular area
and bypass grafts during coronary artery bypass (CABG)
surgery, as well as blood flow during plastic and reconstructive
surgery.
Contraindication
• The medical contraindications applicable to the use of the
Leicasurgical microscope with GLOW800 in combination with a
fluorescence medium are those to be taken into account when
using suitable brand substances and state-of-the-art
examination techniques.
WARNING
Danger of injury to the eyes.
Do not use GLOW800 in ophthalmology.
2.2 Dangers of use
WARNING
Risk of infection due to insterile MFL800 test card.
Do not use the MFL800 test card in the sterile eld.
Use only in non-sterile environment.
WARNING
User selected with a programmed uorescence function.
Correct user is activated.
Preperational check is performed.
Microscope illumination lamp is within tolerances (see
user manual of the Leica surgical microscope).
WARNING
Risk of infection due to insterile MFL800 test card.
Check the microscope illumination in non-sterile
environment only.
WARNING
Danger of injury to the patient due to not approved
uorescence media.
Only use fluorescence media approved for the planned
application.
WARNING
Danger of injury to the patient due to excessive GLOW800
radiation.
Avoid extended and/or excessively frequent use of
GLOW800 radiation.
GLOW800 mode is disabled automatically no later than
after 180 seconds to prevent excessive exposure of the
patient to GLOW800 radiation.
2.3 Information for the person
responsible for the instrument
When using GLOW800 please ensure to have a Doppler
Ultrasound or similar in place, in case of none or insufficient
blood flow visualization out of the ICG/GLOW800 procedure is
given.
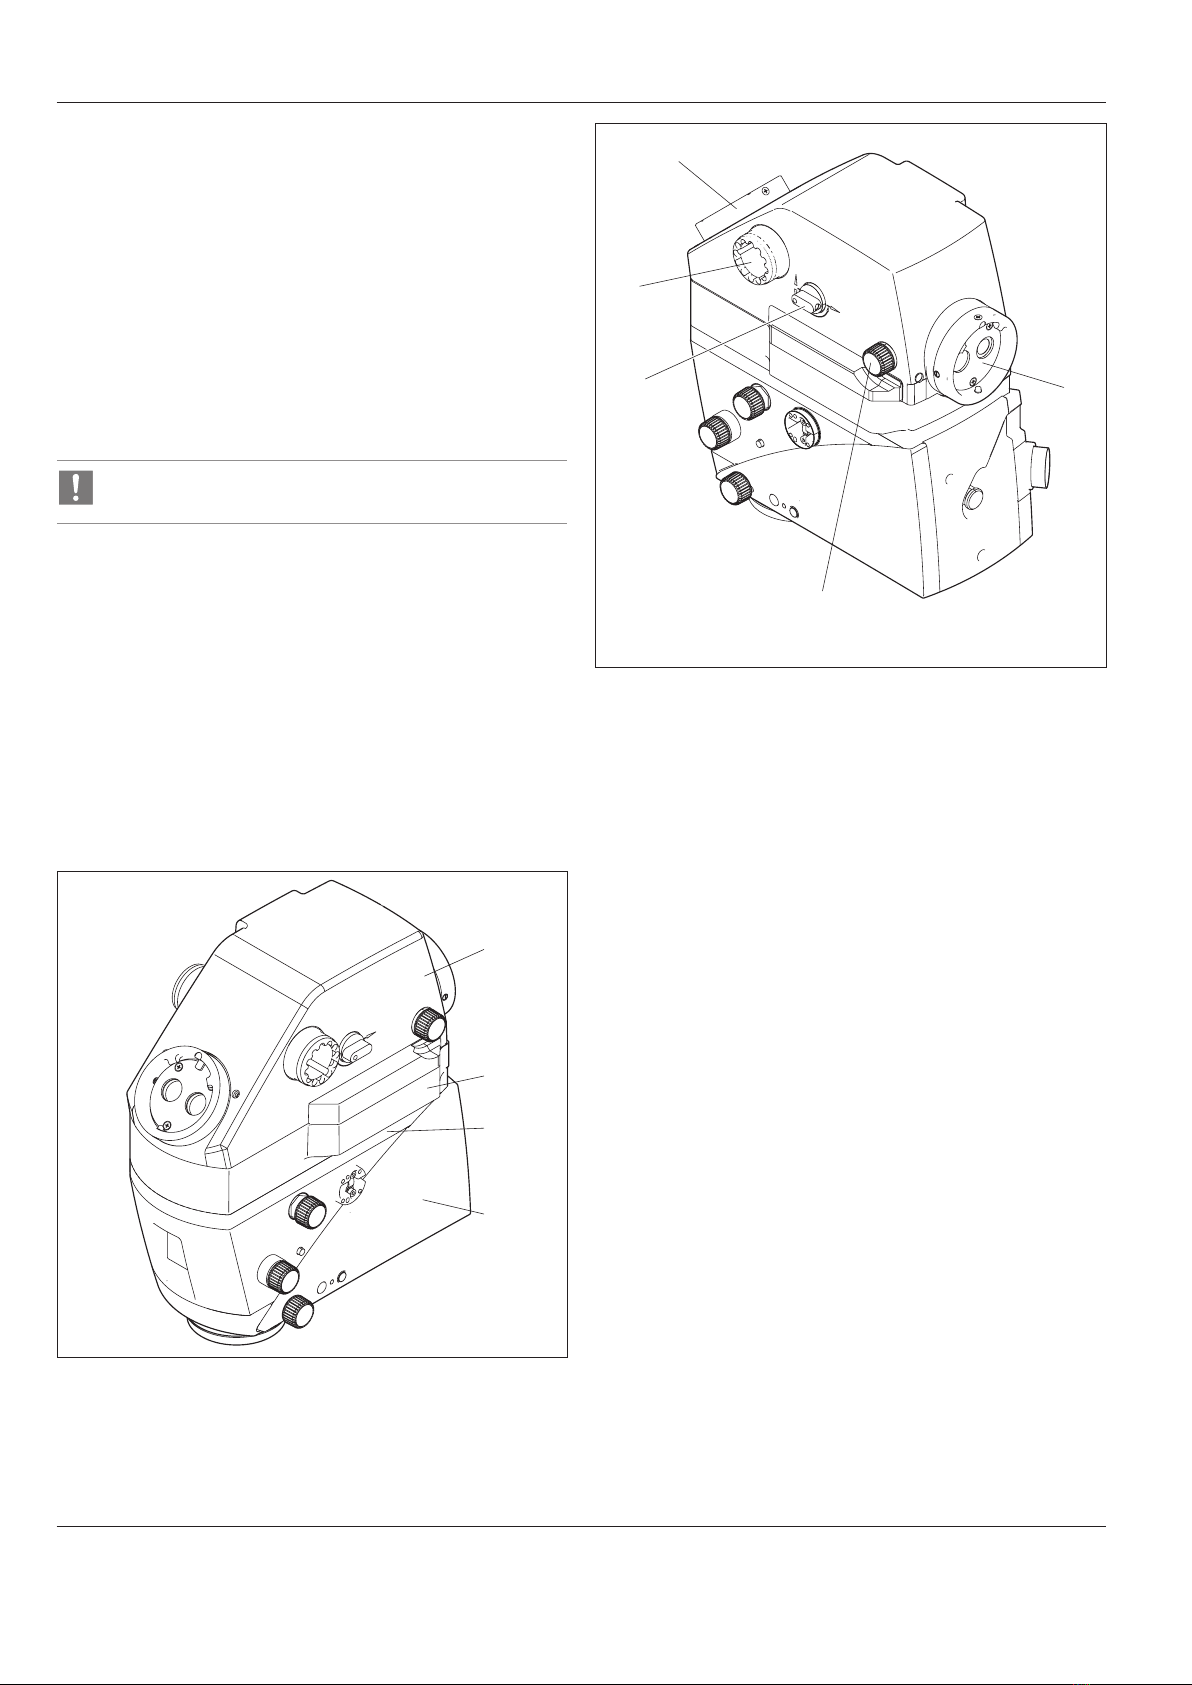
2.4 Signs and labels
Type label