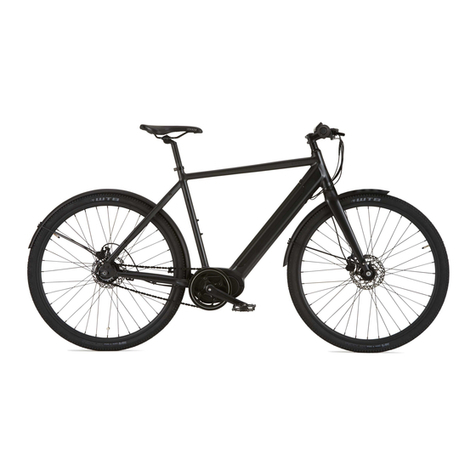
Lekker Amsterdam+ Quick guide

Amsterdam+
Assembly &
Maintenance
Guide

32 Amsterdam+Assembly & Maintenance Guide

5Assembly & Maintenance Guide Amsterdam+
Enjoy your
Amsterdam+
Dear LEKKER Customer, First and foremost – congratulations
on your brand new bicycle! We can’t wait for you to experience the
thrill and joy of riding your LEKKER bike, the Amsterdam way. But
before you do, we want to help you make sure your bike is in tip-top
condition, as well as provide you with some tips and tricks to keep it
that way.
This manual will outline all the tools and knowledge needed
to put the nishing touches on your bike, as well as how to use it
and useful guidance on maintenance and care. Feast your eyes on
what’s to come – we guarantee it’ll be worthwhile, even if you’re an
experienced rider.
Please read all the chapters, as we walk you through key
steps in ensuring your bike is ready and safe to ride.
Please make sure that you write down your frame number,
which is located below the bottom bracket. Also write down your
key numbers (battery key, lock key). This information can be useful
for insurance and in case of theft.
Note: We have to stress that this manual won’t teach you all the skills of a bicycle mechanic.
Even a manual the size of every Harry Potter book combined couldn’t detail every possible
combination, tricks and available components. For this reason, our manual is only applicable
to your new LEKKER bicycle and its assembly, alongside any important notes, warnings and
maintenance guides.
Australia & USA
Sydney
+61 3 4828 3202
sydneystore@lekkerbikes.com
134 Botany Rd Alexandria
NSW 2015, Australia
Melbourne
+61 3 4828 3202
info.au@lekkerbikes.com
23 Provost Street Nth. Melbour-
ne VIC 3051, Australia
Brisbane
+61 3 4160 6003
brisbanestore@lekkerbikes.com
2C 97 Sandgate Road Albion
4010 QLD, Australia
Warning
For safety purposes it is re-
commended that you have this
bicycle assembled by a skilled
bicycle mechanic.
Contact
Europe
Amsterdam
Tweede Kostverlorenkade 68
Amsterdam, The Netherlands
Berlin
Kollwitzstraße 47
10405 Berlin, Germany
*Check our website for contact info.
6Assembly & Maintenance Guide 7 Amsterdam+
Index
01.
Unpacking your bike and experience box
02.
Fitting the handlebars
03.
Fitting the pedals
04.
Battery setup
05.
Getting ready to ride
06.
Finishing touches
01.
Aligning the brakes
02.
Battery health
03.
Safety and warranty
p10
p12
p14
p16
p18
p20
p24
p26
p30
Assembly
Maintenance

98 Amsterdam+Assembly & Maintenance Guide
Assembly

1110 Amsterdam+Assembly & Maintenance Guide
We’ve created this manual to help you put the
nishing touches on your LEKKER bike. Run through
these quick steps and you’ll be exploring and
adventuring in no time.
So, without further ado, unbox your LEKKER bike and
feast your eyes on your newest sidekick. Once you’ve
removed the packaging, make sure you have your
trusty toolkit to hand, as shown in the illustration on
the next page.
01. Unpacking your bike
and experience box

1312 Amsterdam+Assembly & Maintenance Guide
02. Fitting
the handlebars
Tip: Should you wish to adjust the angles of your
grips, brakes and shifter, you can do so with a simple
turn of allen key 3 or 4. However, this should be
correctly set already.
Step 1: Loosen the two stem bolts using the 4mm
allen key. Next, align the handlebars so that they are
perpendicular to the front wheel. Then, tighten the
two bolts.
Step 2: To adjust the angle of the handlebar, use the
same tool to loosen the faceplate at the front of the
handlebar stem and reposition the handebars. Then,
tighten the handlebar to the stem with the four bolts.
Step 3: To adjust the height of the handlebars use the
4mm allen key to adjust the angle of the stem.

1514 Amsterdam+Assembly & Maintenance Guide
03. Fitting
the pedals
To assemble the pedals, you will need a 15mm open-
ended spanner. Insert the pedal into the crank and
ensure the pedal is properly tightened. Please see
below which pedal should go on each side of the
bike.
LEFT pedal: this is the pedal that has indented
horizontal lines on the small part between the pedal
and thread.
RIGHT pedal: this pedal has no indented lines and is
smooth in between the pedal and thread.
ATTENTION: please make sure you check the thread
direction before inserting the pedals. Fitting the
pedal to the wrong side can damage the crank arm
which is not covered under warranty.

1716 Amsterdam+Assembly & Maintenance Guide
04. Battery
setup
Make sure that the battery is properly inserted into
the frame. When you feel a click, you’ll know it’s been
locked into place. Your battery can be charged whilst
the battery is inside the frame, or you can simply take
it out and charge it separately.
Step 1: Insert the battery key into the keyhole in the
frame to unlock your battery. Make sure to insert it in
the keyhole, and not the charging port as this could
cause a short circuit.
Step 2: After turning the key, the battery will partially
pop out so you can easily remove the battery.
Remember to remove the key from the battery lock
whilst riding.
All batteries will come partially charged. However, to
get the most out of your battery, we strongly recom-
mend that you check out chapter 2 “Battery health”
of the Maintenance section of this manual.
Once you’ve nished inserting the battery, it’s time to
turn the bike on!
Note: All batteries and frames are water-resistant,
but if you are storing the bike outside overnight, or
for long periods of time, we recommend that the
battery is removed and kept inside and the bike is
covered and stored. Removing the battery overnight
will not only help to maximize its overall lifespan, but
also lower the risk of theft.

1918 Amsterdam+Assembly & Maintenance Guide
05. Getting ready
to ride
We recommend that you sit on your bike before turn-
ing it on. That way, you’ll be in full control.
To turn on your Amsterdam+, press and hold the
power button at the back of your display (on the left
hand side of your handlebar) for 2 seconds. This will
turn on the screen.
Once on, you can scroll through the 5 levels of motor
assist using the + and - buttons on the front of the
control module / display. For more in-depth instructi-
ons for your screen, please refer to the Bafang manu-
al, found in PDF format on our website.
Finally, to turn on your front and rear light, press and
hold the + button for 2 seconds.

2120 Amsterdam+Assembly & Maintenance Guide
06. Finishing
touches
Tyres
Pump the tyres to 3.1 - 4.5 Bar (45-65 PSI)
Saddle
Using a 5mm allen key, loosen the seatpost clamp
bolt and adjust the seatpost height. Ensure it’s at the
correct height for you, and tighten the bolt.
Tip: Your knee should slightly bend when the pedal is
at its lowest position while sitting on the saddle.
Safety
Install the bell on your handlebars, in your preferred
position. Generally, this is on the left hand side, next
to the brake lever. Don’t forget to install the reectors
for optimal visibility during your ride.
If you’ve ordered any accessories such as racks, locks
or lights, don’t forget to t these too.
Now, you’re good to go. Enjoy your ride, the Amster-
dam way!

2322 Amsterdam+Assembly & Maintenance Guide
Maintenance

2524 Amsterdam+Assembly & Maintenance Guide
01. Aligning
the brakes
Lift the wheel o the ground and give it a spin. It
should spin freely and not make any noise. If you hear
a metallic rubbing sound, then the brakes will need
adjusting.
To do this, you’ll need to use the 5mm allen key. With
the bike upside down, adjust the caliper. You will
need to slightly loosen the two 5mm allen key bolts
(found on the top of the caliper), so that you can
gently move the caliper horizontally, allowing the disc
rotor to move freely between the brake pads.

2726 Amsterdam+Assembly & Maintenance Guide
02. Battery
health
Below, you’ll see a few tips and tricks to help optimise
your new eBike battery’s performance and lifespan:
1. Never leave your battery at. Doing so causes irre-
parable damage and drastically shortens its lifespan.
2. Store your battery with 50 - 80% charge. Charging
up to 100% is ne, but avoid storing it at 100% for an
extended period (i.e. longer than a month). If possi-
ble, also remove your battery from your bike during
storage.
3. Store your battery in a dry, cool place, out of direct
sunlight and at a temperature between 5 - 20°C (41
- 68°F). If you’re using your bike during warmer sum-
mer days, remove your battery when possible. Simi-
larly, if you keep your bike outside during the winter,
remove your battery if it’s freezing or snowing.
4. Our smart charger automatically detects when
your battery is fully charged and will then stop char-
ging. However, we recommend that you disconnect
the charger when the battery is fully charged and the
indicator light on the charger switches from red to
green. For safety reasons, we also advise that you do
not leave your battery charging whilst unattended.
5. Your LEKKER bike comes with the Bafang C11 dis-
play, which gives you an indication of your battery’s
remaining range. However, this number does not
factor in your weight, terrain, temperature and riding
style. For these reasons, it should only be used as a
rough indication, not an absolute number.

2928 Amsterdam+Assembly & Maintenance Guide
- Battery capacity; the larger the capacity, the more
range the bike will have.
- Battery age; over time your battery will lose the abi-
lity to store charge. The above points will help slow
down this process.
7. Using your eBike battery is better than not. So hop
on your bike and (regularly) take it for a spin!
6. What factors will aect my battery’s range?
- Rider weight & load (Racks, pannier bags, Child
seat).
- Environmental factors such as terrain, gradient, am-
bient temperature & wind. Lower outside temperatu-
res will negatively impact your bike’s range.
- Assistance level that’s selected on the Bafang E-sys-
tem.
- Cadence Eciency: Drive-train systems will aect
how eciently your bike will consume energy. For
example single speed on the Amsterdam+ vs Amster-
dam GT with Enviolo Stepless gearing. A variable ra-
tio drive-train allows for more ecient use of energy
than a xed ratio.
- Torque rating of your motor; a 80Nm torque
mid-motor will help you accelerate faster than a
32Nm hub motor, but will also consume more energy
in the process.

3130 Amsterdam+Assembly & Maintenance Guide
03. Safety
and warranty
We oer a 2-year warranty on our LEKKER frames.
Additionally, we supply you with 2 years warranty
on the components of our dierent models starting
on the day of purchase. This warranty is only for re-
placeable components. Unfortunately, our warranty
is not transferable (including when sold to another
consumer) and can only be used by the original buyer
of a LEKKER product. If you want to use the warran-
ty, please ensure you have your receipt and go to the
original shop where you made your purchase.
There are cases when our warranty isn’t valid. Our
warranty doesn’t cover wear and tear, incorrect as-
sembly or maintenance. There’s no warranty in the
case of; damage caused by accidents, improper use
or negligence. Our warranty is also void if changes
are made to the original design of the LEKKER bike.
All pedelec eBikes must be limited to 250w power
output and motor assist cannot exceed 25km/h.
LEKKER Bikes will not be held liable for any aftermar-
ket modications to the motor or system that may
have an eect on its performance.
Do not make any changes to your electric system or
t any other products to it, aimed at increasing the
power output from your eBike. As a rule, you will
shorten the service life of the system, risk damaging
the Drive Unit (motor) and also the eBike itself. The-
re’s also the danger that you’ll void the warranty of
your eBike. Furthermore, as a result of inexpert work
on the system you will jeopardise your own safety,
as well as that of other road users. Risking accidents
caused by customisations can lead to high personal
liability costs and potentially even the danger of cri-
minal prosecution.
Please note: your frame number is located on the
bottom of the bike frame, near the bottom bracket.
This might be needed for insurance purposes.

3332 Amsterdam+Assembly & Maintenance Guide
Amsterdam+Assembly &
Maintenance Guide
lekkerbikes.com
Other manuals for Amsterdam+
2
Table of contents
Other Lekker Bicycle manuals

Lekker
Lekker Amsterdam Series Quick guide

Lekker
Lekker X User manual

Lekker
Lekker Jordaan+ Quick guide

Lekker
Lekker Jordaan+ Quick guide

Lekker
Lekker Jordaan Step Through Quick guide

Lekker
Lekker Pedal User manual

Lekker
Lekker jordaan 2016 series User manual

Lekker
Lekker AmsterdamGT Quick guide

Lekker
Lekker Jordaan+ Quick guide

Lekker
Lekker Jordaan Quick guide