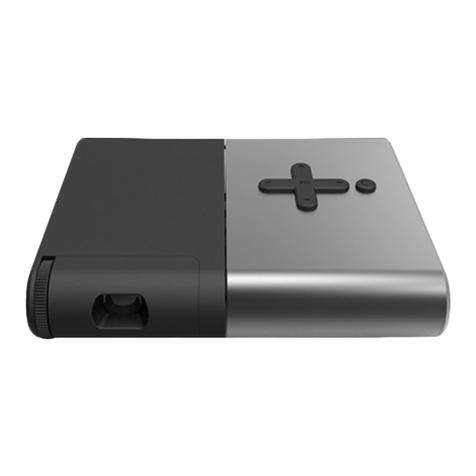
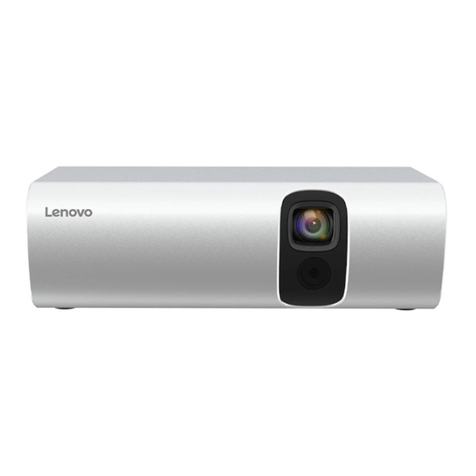
Lenovo moto mods Insta-Share Projector User manual

INSTA-SHARE PROJECTOR
en-GB, zh-CN, ja

Moto Mods_GSG_APAC China_68018244004B.book Page 0 Thursda
y

1Attach your Moto Mod™
Attach your Moto Mod™
Align the camera lens on the back of your phone
with the projector and then align the sides and
bottom of the phone with the projector until they
snap together.
Note:
make sure that the connectors are clean
and dry. Also, remove your phone case if you use
one.
Caution:
before using your device, please read
the safety, regulatory and legal information at
the back of this guide.
Moto Mod
Connectors
Moto Mods_GSG_APAC China_68018244004B.book Page 1 Thursda
y

2Quicksetup
Quick setup
When you attach the projector, your phone
automatically guides you through setup. Follow
the on-screen instructions to get started.
Start projecting
Aim the projector away from your eyes at a
light-coloured wall or ceiling in a darkened room.
Press and hold the projector's Power button until
the projector turns on to begin projecting.
Tip:
while projecting, press the Power button to
adjust settings, such as brightness. See more
settings on
page 3
.
Warning:
avoid looking directly at the projector
lamp. The bright light may damage your eyes.
Power button
Press & hold to
start/stop projecting
Focus wheel
Air vent
Air vent
(on back)
Moto Mods_GSG_APAC China_68018244004B.book Page 2 Thursda
y

3Adjust settings
Adjust settings
To
focus
the image, use the focus wheel next to
the projector's lamp.
Or, with the projector on, press the Power button
to adjust these settings on your phone screen:
• Keystone image correction
: change the angle
of the projection to make the image
rectangular.
•Brightness
: adjust the projection brightness
(not your phone's brightness).
Remove it
To detach the projector
from your phone, place
your finger in the notch
at the bottom of the
projector and pull it
away from your phone.
Note:
be careful not to
put your finger in the
phone's USB charging
port.
Moto Mods_GSG_APAC China_68018244004B.book Page 3 Thursda
y

4 Charge it
Charge it
Charge up fully before starting your projector.
Tip:
if your phone is still attached to the projector,
charging the phone is the best way to charge
both at the same time.
Charging status lights
Charging slow blinking green
Full charge rapid blinking green, or
steady green when
charging
Partially charged:
51-99%
16-50%
6-15%
steady green, then off
steady amber, then off
steady red, then off
Very low power rapid blinking red
Press the button
to check the
battery level
Moto Mods_GSG_APAC China_68018244004B.book Page 4 Thursda
y

5Use the kickstand
Use the kickstand
Pull out the kickstand and adjust the angle.
Project on a wall: Or project on a ceiling:
Moto Mods_GSG_APAC China_68018244004B.book Page 5 Thursda
y

6 Tips & tricks
Tips & tricks
Looking for more?
•Airvent
: keep the air vents on the projector
side and back unblocked. (See
page 2
)
• Cleaning
: to keep your projector lens clean
and free of dust, use a soft, dry cloth.
• Connection vibration
: when you successfully
attach your Moto Mod to your phone, you feel
a slight vibration.
• Reset
: Press and hold the battery check
button (see
page 4
) for seven seconds until
the light blinks green.
Help & more
Everything Moto
:
for tutorials and helpful tips,
visit
www.motorola.com/mymotomods
.
Get more Mods
: Moto Mods™ are sold separately.
View the complete collection at
www.motomods.com
. Or, visit us at
www.moto.com/motomodsmobileapp
Help
:
for help and more on your phone, tap
Apps >
Settings
>
Moto Mods
>
Help
.
News
:
get the latest news, apps, tips, and much
more—join us on:
www.youtube.com/motorola
www.facebook.com/motorola
www.twitter.com/moto
Moto Mods_GSG_APAC China_68018244004B.book Page 6 Thursda
y

7Safety, regulatory & legal
Safety, regulatory & legal
Important:
this product contains magnets. Always keep products with
magnets more than 20cm (8in) from medical devices, such as
pacemakers, internal cardio defibrillators or other devices that can be
affected by a magnetic field. Also, keep products with magnets away
from credit cards, IDcards and other media that use magnetically
encoded information. Also, don't slide your Moto Mod and phone
together – doing so may scratch your phone.
Note
: Charge your Moto Mod using the charger that came with your
phone. Using other chargers with a USB-C connector is not
recommended and can slow charge speed. Avoid incompatible USB-B
(micro USB) chargers and uncertified adapters and cables, as they may
damage your device.
Where is my legal, safety and regulatory
information?
In order to provide you with better access to this important information,
we've made the materials accessible from the phone's settings menu and
on the web. Review these materials prior to using your device. To access
the materials from a connected phone, go to
Settings
>
Legal
information
and select a topic. To access the materials on the web,
visit
www.motorola.com/device-legal
.
Battery safety
For yo ur sa fety
Before assembling, charging or using your mobile device for the first time,
please read the important product safety and legal information provided
with your product.
If your mobile device becomes unresponsive, try a reboot – press and
hold the Power button until the screen goes dark and your device
restarts.
For your safety, the battery in your mobile device should only be removed
by a Motorola approved service centre or independent qualified
professional. Don't try to remove or replace the battery yourself – doing
so may damage the battery and could cause burning and injury. Don't
crush, bend or expose your mobile device to heat or liquid. This may
damage the battery and may cause burning and injury.
Moto Mods_GSG_APAC China_68018244004B.book Page 7 Thursda
y

8 Safety, regulatory & legal
European Union directives conformance
statement
EU conformanc e
This product complies with the applicable EU requirements and carries
the CE mark.
The Technical Construction File (TCF) is available from the
Certifying Organisation at Motorola Mobility UK Ltd.,
Redwood, Crockford Lane, Chineham Business Park,
Basingstoke, RG24 8WQ, UNITED KINGDOM.
FCC and IC compliance
This device complies with part 15 of the FCC rules. Operation is subject to
the following two conditions: (1) this device may not cause harmful
interference and (2) this device must accept any interference received,
including interference that may cause undesired operation. This device
complies with Industry Canada licence-exempt RSS standard(s).
Operation is subject to the following two conditions: (1) this device may
not cause interference and (2) this device must accept any interference
received, including interference that may cause undesired operation.
Disposal & recycling
Hearing aid compatibility
Help do your part! Please don't dispose of mobile devices or
electrical accessories (such as chargers, headsets or batteries)
with your household waste. Product packaging and product
guides should only be disposed of in accordance with national
collection and recycling requirements. For details on approved
national recycling schemes and Motorola recycling activities, go to:
www.motorola.com/recycling
.
Moto Mods_GSG_APAC China_68018244004B.book Page 8 Thursda
y

9Safety, regulatory & legal
Open source information
OSS information
This Moto Mod accessory is intended to be interfaced with a Motorola
mobile device and may include Open Source Software (the "Software")
Copyrighted and distributed under an MIT licence and BSD-style licences,
including a Modified BSD licence, a BSD-like licence and a
BSD-compatible licence.
The open source software is distributed WITHOUT ANY WARRANTY;
without even the implied warranty of MERCHANTABILITY or FITNESS
FOR A PARTICULAR PURPOSE. See, for example, the disclaimer
provisions in BSD Licences identified above.
To view the text of the licences, acknowledgments and required copyright
notices for the open source software used on this Moto Mod, tap
Apps>
Settings
>
Moto Mods
>
Legal Information
>
Open
source licences
on the Motorola mobile device after it is connected
to this Moto Mod.
Warranty
This product is covered by Motorola's limited warranty. To review the
warranty on your phone, go to
Settings
>
Legal information
>
Warranty
, or visit
motorola.com/device-legal
. You may also obtain
a copy of the warranty by contacting Motorola at: Motorola Mobility LLC,
Attention Customer Service – Warranty Request, 222 West Merchandise
Mart Plaza, Suite 1800, Chicago, IL 60654.
Arbitration & opt-out
Any controversy or claim arising out of or relating to any Motorola
product will be resolved by binding arbitration, instead of in court, unless
you opt out. To opt out, send a written rejection notice within 30 days of
purchase that includes your name, address, phone number, device and
device serial number, and tells Motorola that you are rejecting this
Arbitration provision to: Motorola Mobility LLC, 222 West Merchandise
Mart Plaza, Suite 1800, Attn: Arbitration Provision Opt-Out, Chicago, IL
arbitration provision, on your phone, go to
Settings
>
Legal
information
>
Arbitration and Opt-out
, or visit
www.motorola.com/device-legal.
Moto Mods_GSG_APAC China_68018244004B.book Page 9 Thursda
y

10 Safety, regulatory & legal
Copyright & trademarks
Motorola Mobility LLC
222 W. Merchandise Mart Plaza
Chicago, IL 60654
www.motorola.com
Certain features, services and applications are network-dependent and
may not be available in all areas; additional terms, conditions and/or
charges may apply. Contact your service provider for details.
All features, functionality and other product specifications, as well as the
information contained in this guide, are based upon the latest available
information and believed to be accurate at the time of printing. Motorola
reserves the right to change or modify any information or specifications
without notice or obligation.
Note:
the images in this guide are examples only.
MOTOROLA, the stylised M logo, MOTO and the MOTO family of marks
are trademarks or registered trademarks of Motorola Trademark Holdings,
LLC. All other product or service names are the property of their
respective owners.
© 2016 Motorola Mobility LLC. All rights reserved.
Product ID: Moto Insta-Share Projector (Model MD100P)
Manual number: 68018244004-B
Moto Mods_GSG_APAC China_68018244004B.book Page 10 Thursd

INSTA-SHARE PROJECTOR
zh-CN

Moto Mods_GSG_APAC China_68018244004B.book Page 0 Thursda
y

1安装您的 Moto Mod™
安装您的
Moto Mod™
将手机背面的相机镜头与投影仪对齐,然后将手机侧面
及底部与投影仪对齐,直到两者卡合。
注:
确保连接器清洁干燥。如使用了手机壳,请拆下。
注意:
使用设备前,请先阅读本指南背面的安全、
法规和法律信息。
Moto Mod
䖲఼
䖲఼
Moto Mods_GSG_APAC China_68018244004B.book Page 1 Thursda
y

2快速设置
快速设置
当安装投影仪时,手机会自动引导您进行设置。按照屏
幕说明开始操作。
开始投影
将投影仪偏离您的双眼,对准暗室的浅色墙壁或天花板。
按住投影仪的电源按钮,直到投影仪打开并开始投影。
提示:
投影期间,按下电源按钮可调整亮度等设置。
在
第
3
页
上查看更多设置信息。
警告:
避免直视投影灯。强光可能会伤害您的眼睛。
⭫Ⓠ䭤⭫Ⓠ䭤
օᔶခڒ↘ᣋᖧȾ
䈹❜䖤
䈹❜䖤
䙐伄ᆊ䙐伄ᆊ
䙐伄ᆊ䙐伄ᆊ
δ㜂䶘ε
Moto Mods_GSG_APAC China_68018244004B.book Page 2 Thursda
y

3调整设置
调整设置
要
聚焦
图像,请使用投影灯旁边的调焦轮。
或打开投影仪,按下电源键,在手机屏幕上调整这些
设置:
•
图像梯形校正
:改变投影角度,将图像变成矩形。
•
亮度
:调整投影亮度 (而非手机亮度)。
拆卸
要从手机上拆下投影仪,
请将手指放在投影仪底部
的槽口,然后从手机上
拔下。
注:
小心请勿将手指放在
手机的
USB
充电端口。
Moto Mods_GSG_APAC China_68018244004B.book Page 3 Thursda
y

4充电
充电
未充满电前,请勿开启投影仪。
提示:
如手机仍然安装在投影仪上,同时给手机和
投影仪充电的最优方式就是给手机充电。
充电状态灯
正在充电 缓慢闪烁绿色
电量已满 充电时将快速闪烁绿色,
或呈长亮绿色
电量未满:
51-99%
16-50%
6-15%
长亮绿色,然后灭掉
长亮琥珀色,然后灭掉
长亮红色,然后灭掉
需要充电 长亮红色,然后灭掉
с䫤θ
ḛⵁ⭫䠅Ⱦ
Moto Mods_GSG_APAC China_68018244004B.book Page 4 Thursda
y

5请使用支架
请使用支架
请抽出支架然后调整角度。
ᣋᖧࡦрφ
ᣋᖧࡦрφ
ᡌᣋᖧࡦཟ㣧ᶵрφ
ᡌᣋᖧࡦཟ㣧ᶵрφ
Moto Mods_GSG_APAC China_68018244004B.book Page 5 Thursda
y

6提示和技巧
提示和技巧
了解更多?
•
通风孔
:请勿堵塞投影仪侧面和背面的通风孔。
(请参阅
第
2
页
)
•
清洁
:要保持投影仪镜头干净无尘,请使用柔软的
干布清洁。
•
连接时的振动
:当您成功将
Moto Mod
连接到
手机上时,您会感觉到轻微振动。
•
重置
:按住电池检测按钮 (参见
第
4
页
)七秒,
直到指示灯闪烁绿色。
帮助及更多
有关
Moto
的一切
:
想要获取有关教程和有用提示,
请访问
www.motorola.com/mymotomods
。
了解更多
Mods
:
Moto Mods™
均单独出售。访问
www.motomods.com
查看全部产品。或登录
www.moto.com/motomodsmobileapp
访问我们
帮助
:
获取帮助和与您的手机有关的更多信息,请点击
应用程序
>
设置
>
Moto Mods
>
帮助
。
新闻
:
要获取最新新闻、应用程序、提示等更多内容,
赶快通过以下网址加入我们吧:
www.youtube.com/motorola
www.facebook.com/motorola
www.twitter.com/moto
Moto Mods_GSG_APAC China_68018244004B.book Page 6 Thursda
y
This manual suits for next models
1
Table of contents
Languages:
Other Lenovo Projector manuals

Lenovo
Lenovo ThinkPad Stack User manual

Lenovo
Lenovo P0510 User manual

Lenovo
Lenovo LXP200 User manual

Lenovo
Lenovo P0510 User manual

Lenovo
Lenovo L1210E Parts list manual

Lenovo
Lenovo ThinkPad Stack Assembly instructions

Lenovo
Lenovo M500 User manual

Lenovo
Lenovo ThinkVision E500 Original instructions

Lenovo
Lenovo C500 User manual

Lenovo
Lenovo ThinkPad Stack User manual