manuals.online logo
Brands
  1. Home
  2. •
  3. Brands
  4. •
  5. Leviton
  6. •
  7. Relay
  8. •
  9. Leviton 40A00-1 Mounting instructions

Leviton 40A00-1 Mounting instructions

INSTALLATION AND OPERATING INSTRUCTIONS ENGLISH
WARNINGS AND CAUTIONS
• TO AVOID FIRE, SHOCK, OR DEATH; TURN OFF POWERatcircuitbreakerorfuseand
testthatpowerisoffbeforewiring!
•  To beinstalledand/orusedinaccordancewithappropriateelectricalcodesandregulations.
• Ifyouareunsureaboutanypartoftheseinstructions,consultanelectrician.
WARNINGS AND CAUTIONS
• Thisproductmustbeinstalledinasuitablejunctionboxorequivalentenclosure.
• Usethisdevicewithcopper or copper-clad wire only.
• Forindooruseonly.
• SAVETHESEINSTRUCTIONS.
LEVITON UPB™ 15A RELAY SWITCH AND AUXILIARY SWITCH
Cat.No.40A00-1
Installation Instructions and User’s Guide DI-022-HL401-05AAR2253
(40I00-1)
For the following Models:
40A00-1Leviton15ARelaySwitch(referredtoasLevitonUPB™WallSwitch,inthisdocument),
and37A00-1LevitonAuxiliarySwitch.
NOTE:AllLevitonUPB™WallSwitchesrequireaneutral(white)connectionwire.
Leviton UPB™ Wall Switch Overview
TheLevitonUPB™WallSwitch(Figure 1)allowsforlocalcontrolofloadsbyusingtherockerswitch.Italso
incorporatestheUPB™two-waypowerlinecommunicationtechnologythatgivesittheabilitytoberemotely
controlledbyUPB™compatiblecontrollers.TheLevitonUPB™WallSwitchisalsocapableoftransmitting
UPB™messageswhentherockerswitchisturnedonorturnedoff.
TheLeviton15ARelaySwitchisusedtocontrolloadssuchasreceptacles,motor-operatedappliances(i.e.
fans),anduorescentlightingxtures.
Figure 1 - Leviton UPB™ Wall Switch
(ON/BRIGHT)
(OFF/DIM)
BOTTOM
LED
INDICATOR
TOP
GROUND
GREEN
RED
YELLOW
WHITE
LOAD
CONTROL
NEUTRAL
BLACK LINE
Leviton Auxiliary Switch Overview
The37A00-1LevitonAuxiliarySwitch(Figure 2)isanoptionalcompaniondeviceusedwiththeLevitonUPB™
WallSwitchformulti-waycircuits.TheLevitonAuxiliarySwitchhasarockerswitchthatcontrolstheloadinthe
exactsamemannerastherockerswitchontheLevitonUPB™WallSwitch.
Figure 2 – Leviton Auxiliary Switch
YELLOW
BLUE
GRAY
CONTROL
*NEUTRAL
*NEUTRAL
BLACK LINE
BOTTOM
(OFF/DIM)
(ON/BRIGHT)
TOP
(FOR RED INDICATOR)
(FOR BLUE INDICATOR)
INDICATOR
LED
Changing Switch Color
ThecoloroftheLevitonUPB™WallSwitchandAuxiliarySwitchmaybechangedtocomplementtheinterior
décor.TheLevitonUPB™WallSwitchandAuxiliarySwitchissuppliedwithawhiteswitchplate.Additional
colorsareavailable;contactyourLevitondistributorformoreinformation.Whenchangingtheswitchplate,
makesurethattheswitchisdisconnectedfromallpower,andproceedasfollows:
Figure 3 – Changing Switch Color
1. TheswitchplateattachestotheLevitonUPB™WallSwitchandAuxiliarySwitchwithtwo
latchesontherightandtwoontheleft.Usingasmall-bladedscrewdriver,gentlydepressthe
upperandlowerlatchononesidewhileliftingupontheplate.Oncethelatchesarereleased
ononeside,removetheswitchplatefromtheotherside.
2. Alignthelatchesofthenewswitchplatetotheopeningsonthemountingplateandgently
snapintoplace.
INSTALLATION INSTRUCTIONS
TheLevitonUPB™WallSwitchiswireddirectlytotheloadandcanbecontrolledbyaddingone
ormoreoptionalLevitonAuxiliarySwitchesproducingmulti-waycircuits.Multi-waycircuitsmake
itpossibleforagroupofswitchestocontrolthesameload.Thissectionwillillustratehowto
maketheconnections.
NOTES:
1. RefertoFigures 1 and 2todeterminethewirecolorsforeachconnection.
2. AllLevitonUPB™WallSwitchesrequireaneutral(white)connection.
3. TheLine(black)wiremustbeaccessiblefortheinstallationofallLevitonAuxiliarySwitches.
Thiswiremaybeconnectedtoeitherphaseofthe120/240Vsupply.Theblueand/orgray
wireontheLevitonAuxiliarySwitchcanbeconnectedtoeitherearthgroundorneutral.The
blueand/orgraywireisonlyusedtolighttheLEDontheswitch.ThisLEDonlyindicatesthat
powerisappliedandservesasanight-light.ConnectthebluewireonlytolighttheLEDblue.
ConnectthegraywireonlytolighttheLEDred.Connectboththebluewireandthegraywire
tolighttheLEDmagenta.
Installation Procedure
1. Besurethatallpowertotheloadhasbeendisconnectedbyturningoffthecircuitbreaker.
2.
Ifapplicable,removethefaceplatefromtheexistingwallswitch,removetheexistingwallswitchfromthewallbox,and
disconnectthewiresfromtheexistingwallswitch.Identifythe"Line","Neutral","Load"and"Traveler"(ifapplicable)wires.
3. Remove3/4"ofinsulationfromeachofthewiresontheLevitonUPB™WallSwitch.InstalltheLevitonUPB™WallSwitch
byconnectingwiresperwiringcongurationshowninFigure 5.
4. InstallanyoptionalLevitonAuxiliarySwitchperwiringcongurationshowninFigure 5.
6. Afterallconnectionshavebeenmade,becertainthatallwireconnectorsarermlyattachedandthereisnoexposedcopper.
5. GentlyplacethewiresandLevitonUPB™WallSwitchintothewallboxwiththeLEDatthetopofdevice.Usingthesupplied
screws,attachtheLevitonUPB™WallSwitchtothewallbox.
6. Beforeinstallingthefaceplate,restorepowertothecircuit,andthenfullyclosetheair-gapswitchlever.
7. AftertestingtheLevitonUPB™WallSwitchandAuxiliarySwitchforproperlocaloperation(see Table 1),
installaDecora®faceplateovereachswitch.
Leviton 15A RELAY SWITCH OPERATION
TheLeviton15ARelaySwitchhascongurableitemsthatcanbesetusingtheUPB™UPStartcongurationsoftware.The
followingdescribestheoperationoftheLeviton15ARelaySwitchinitsfactorydefaultconguration.
Local Rocker Switch Operation
TheLeviton15ARelaySwitchhasarockerswitchthatcanbeusedtocontroltheloadasfollows.
WEB VERSION
For Technical Assistance Call: 800-824-3005 - www.leviton.com
© 2013 Leviton Mfg. Co., Inc.
FOR CANADA ONLY
Forwarrantyinformationand/orproductreturns,
residentsofCanadashouldcontactLevitoninwriting
atLeviton Manufacturing of Canada Ltd to the
attention of the Quality Assurance Department, 165
Hymus Blvd, Pointe-Claire (Quebec), Canada H9R
1E9orbytelephoneat1 800 405-5320.
Table 1 - Leviton UPB™ 15A Relay Switch Local Operation
Rocker Event Top Rocker Bottom Rocker
Single-Tap Loadturnson. Loadturnsoff.
Leviton AUXILIARY SWITCH OPERATION
TheLevitonUPB™WallSwitchcanbeconnectedto
oneormoreLevitonAuxiliarySwitchesproducingmulti-
waycircuits.EachLevitonAuxiliarySwitchhasarocker
switchthatcontrolstheloadintheexactsamemanner
astherockerswitchontheconnectedLevitonUPB™
WallSwitch,aspreviouslydescribed.Whenconnected,
theLEDremainscontinuallyonatalltimeswhilepower
isapplied.
LED Indicator
TheLevitonUPB™WallSwitchcomesequippedwith
amulti-colorLEDindicatorthatisnormallylittoblue
whentheloadisoff.TheLEDisoffwhentheloadis
on.
Ifused,theLEDintheLevitonAuxiliarySwitchis
alwayslit.
Setup Mode
To conguretheLevitonUPB™WallSwitchusingan
LevitoncontrolleroraPCrunningtheUPB™UPStart
congurationsoftware,itmustbeputintoSetupMode
asfollows:
Step Operation
1Ta p therockerswitchquickly5times.
2 TheLevitonUPB™WallSwitchwillcycletheloadonetimeandblinkitsLEDbluetoindicatethatitisin
SetupMode.NOTE:theswitchwillautomaticallyexitSetupmodeafter5minutes.
Figure 4 - Wiring Diagram
LINE
NEUTRAL
37A00 (OPTIONAL)
AUXILIARY SWITCH
AUXILIARY SWITCH
37A00 (OPTIONAL) 40A00
HAI Relay Switch
BLACK BLACK BLACK
REDWHITE
YELLOWYELLOW
*BLUE AND/OR GRAY*BLUE AND/OR GRAY
YELLOW
*CONNECTING THE BLUE AND/OR GRAY WIRE TO NEUTRAL SETS THE COLOR OF THE LED INDICATOR.
CONNECT BLUE FOR BLUE INDICATOR, GRAY FOR RED INDICATOR, OR BOTH FOR MAGENTA INDICATOR.
BLUE AND/OR GRAY WIRE MAY BE CONNECTED TO NEUTRAL OR EARTH GROUND. NEUTRAL IS RECOMMENDED.
GREEN
Line 120VAC, 60Hz
NOTE:Itisnormalforthisswitchtomakeaslight
buzzingsoundduringoperation.Itisalsonormalfor
theswitchandwallplatetofeelwarmtothetouch.
SPECIFICATIONS
Reset to Factory Default Settings
To resettheLevitonUPB™WallSwitchtofactorydefaultsettings:
Model Number 40A00-1
IncandescentLoads,InductiveLoads,andFlorescentLoads Ye s
Motor-OperatedAppliances Ye s
CurrentMaximum 15A
Connections 18GA
LEDIndicator Ye s
Dimensions 4.1x1.75x1.45
Weight 0.25lb.
Mounting StandardJBox
InputPower 120±12VAC
InputFrequency 60±3Hz
OperatingTemperature -40°Fto104°F
Step Operation
1 OntheLevitonUPB™WallSwitchthatyouwanttoresettofactorydefault,taptherockerswitch
quickly5times.
2 TheLevitonUPB™WallSwitchwillcycletheloadonetimeandblinkitsLEDbluetoindicatethatit
isreadytobereset.
3Ta p therockerswitchquickly10timestoresettofactorydefaultsetting.
4 TheLevitonUPB™WallSwitchwillcycletheloadonetimeandblinkitsLEDredtoindicatethatit
hasbeenreset.
5Ta p therockerswitchoncemoretostoptheLEDfromblinking.
DI-022-HL401-05AAR2253
FCC Compliance

Thisequipmenthasbeentestedandfoundtocomply
withthelimitsforaClassBdigitaldevice,pursuantto
part15oftheFCCRules.Theselimitsaredesigned
toprovidereasonableprotectionagainstharmful
interferenceinaresidentialinstallation.Thisequipment
generates,usesandcanradiateradiofrequency
energyand,ifnotinstalledandusedinaccordance
withtheinstructions,maycauseharmfulinterference
toradiocommunications.However,thereisno
guaranteethatinterferencewillnotoccurinaparticular
installation.Ifthisequipmentdoescauseharmful
interferencetoradioortelevisionreception,whichcan
bedeterminedbyturningtheequipmentoffandon,the
userisencouragedtotrytocorrecttheinterferenceby
oneormoreofthefollowingmeasures:
-Reorientorrelocatethereceivingantenna.
-Increasetheseparationbetweentheequipmentand
receiver.
-Connecttheequipmentintoanoutletonacircuit
differentfromthattowhichthereceiverisconnected.
-Consultthedealeroranexperiencedradio/TV
technicianforhelp.
LEVITON LIMITED WARRANTY
Leviton warrants to the original consumer purchaser and not for the benet of anyone else that products manufactured by Leviton under the Leviton brand name (“Product”) will be free from defects
in material and workmanship for the time periods indicated below, whichever is shorter: • OmniPro II and Lumina Pro: three (3) years from installation or 42 months from manufacture date.
• OmniLT, Omni IIe, and Lumina: two(2)yearsfrom installation or 30 monthsfrommanufacturedate. • Thermostats, Accessories: two(2)yearsfrominstallationor30monthsfrommanufacture date.
• Batteries: Rechargeable batteries in products are warranted for ninety (90) days from date of purchase. Note: Primary (non-rechargeable) batteries shipped in products are not warranted.
Products with Windows®Operating Systems: Duringthe warranty period,Levitonwillrestore corrupted operating systems tofactory default atno charge,provided that theproducthas been usedas
originally intended. Installation of non-Leviton software or modication of the operating system voids this warranty. Leviton’s obligation under this LimitedWarranty is limited to the repair or replacement,
at Leviton’s option, of Product that fails due to defect in material or workmanship. Leviton reserves the right to replace product under this Limited Warranty with new or remanufactured product.
Leviton will not be responsible for labor costs of removal or reinstallation of Product.TherepairedorreplacedproductisthenwarrantedunderthetermsofthisLimitedWarrantyfortheremainderof
theLimitedWarrantytimeperiod or ninety (90) days,whicheveris longer.ThisLimitedWarrantydoesnotcoverPC-based softwareproducts.Leviton is not responsible for conditions or applications
beyond Leviton’s control. Leviton is not responsible for issues related to improper installation, including failure to follow written Installation and operation instructions, normal wear and
tear, catastrophe, fault or negligence of the user or other problems external to the Product. To  view complete warranty and instructions for returning product, please visit us at www.leviton.com.
Usehereinofthirdpartytrademarks,servicemarks,
tradenames,brandnamesand/orproductnames
areforinformationalpurposesonly,are/maybethe
trademarksoftheirrespectiveowners;suchuseisnot
meanttoimplyafliation,sponsorship,orendorsement.
WEB VERSION

Other Leviton Relay manuals

Leviton GreenMAX Series User manual

Leviton

Leviton GreenMAX Series User manual

Leviton Z-MAX r24sd User manual

Leviton

Leviton Z-MAX r24sd User manual

Leviton WSP05-010 User manual

Leviton

Leviton WSP05-010 User manual

Leviton GreenMAX R16TC-100 User manual

Leviton

Leviton GreenMAX R16TC-100 User manual

Leviton GreenMAX R16TC-100 User manual

Leviton

Leviton GreenMAX R16TC-100 User manual

Leviton EZ-Max Plus Operating instructions

Leviton

Leviton EZ-Max Plus Operating instructions

Leviton Z-Max Remote Installation and operating instructions

Leviton

Leviton Z-Max Remote Installation and operating instructions

Leviton EZ-MAX User manual

Leviton

Leviton EZ-MAX User manual

Leviton EZ-MAX H Series User manual

Leviton

Leviton EZ-MAX H Series User manual

Leviton EZ-MAX Plus 8 User manual

Leviton

Leviton EZ-MAX Plus 8 User manual

Leviton GreenMAX R1616-1CB User manual

Leviton

Leviton GreenMAX R1616-1CB User manual

Leviton GreenMAX RELAY-1TB User manual

Leviton

Leviton GreenMAX RELAY-1TB User manual

Leviton EZ-MAX Plus 16 User manual

Leviton

Leviton EZ-MAX Plus 16 User manual

Leviton GreenMAX Relay System Cabinet User manual

Leviton

Leviton GreenMAX Relay System Cabinet User manual

Leviton EZ-Max Plus Operating instructions

Leviton

Leviton EZ-Max Plus Operating instructions

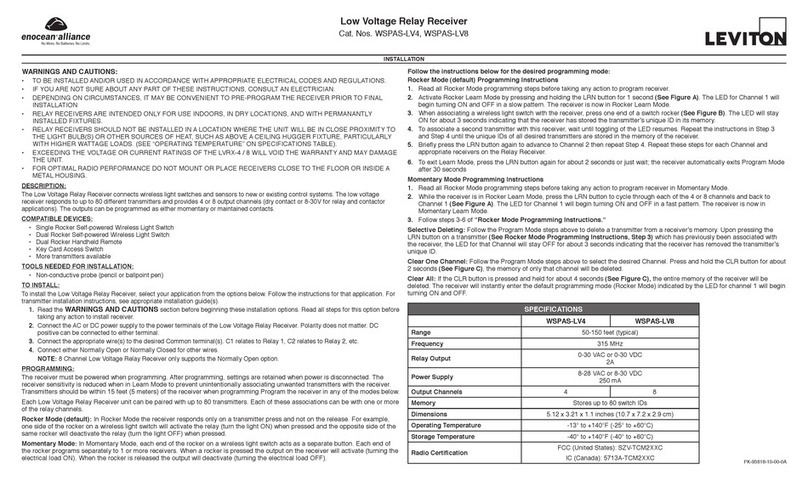
Leviton EnOcean WSPAS-LV4 User manual

Leviton

Leviton EnOcean WSPAS-LV4 User manual

Popular Relay manuals by other brands

Schweitzer Engineering Laboratories SEL-387-0 instruction manual

Schweitzer Engineering Laboratories

Schweitzer Engineering Laboratories SEL-387-0 instruction manual

WEBTEC RMS Mors Smitt 2V75 user guide

WEBTEC

WEBTEC RMS Mors Smitt 2V75 user guide

DOLD VARIMETER PRO Monitoring Technique

DOLD

DOLD VARIMETER PRO Monitoring Technique

Bayrol PM5-REL-4 user manual

Bayrol

Bayrol PM5-REL-4 user manual

Metz Connect C Logline MARK-E08 Mounting Note

Metz Connect

Metz Connect C Logline MARK-E08 Mounting Note

CD Automation REVEX 2PH RX2 280 Series user manual

CD Automation

CD Automation REVEX 2PH RX2 280 Series user manual

MULTISPAN CPR 126 manual

MULTISPAN

MULTISPAN CPR 126 manual

Sel SEL-487E-5 manual

Sel

Sel SEL-487E-5 manual

Novatek-electro RNPP-301 user manual

Novatek-electro

Novatek-electro RNPP-301 user manual

CALEFFI Z-one ZSR101 Series Wiring guide

CALEFFI

CALEFFI Z-one ZSR101 Series Wiring guide

Videx VX8900 manual

Videx

Videx VX8900 manual

FANOX SIA C Series Installation & commissioning guide

FANOX

FANOX SIA C Series Installation & commissioning guide

Areva MVAJ05 Service manual

Areva

Areva MVAJ05 Service manual

Pilz PNOZ s3 Series operating manual

Pilz

Pilz PNOZ s3 Series operating manual

Siemens SIRIUS SRF2 Series operating instructions

Siemens

Siemens SIRIUS SRF2 Series operating instructions

Siemens 7SR46 Argus Quick reference guide

Siemens

Siemens 7SR46 Argus Quick reference guide

Keithley ERB-24 user guide

Keithley

Keithley ERB-24 user guide

Steren K-415 user manual

Steren

Steren K-415 user manual

manuals.online logo
manuals.online logoBrands
  • About & Mission
  • Contact us
  • Privacy Policy
  • Terms and Conditions

Copyright 2025 Manuals.Online. All Rights Reserved.