leziter MIR1008 Quick setup guide

Telepítési és kezelési kézikönyv
Assembly and use instructions
HU EN

FIGYELEM! Kérjük, hogy összeszerelés előtt figyelmesen olvassa el a használati utasítást. Kérjük, szigorúan
kövesse azt. Kérjük, alaposan ellenőrizze, hogy a csomag tartalma minden része sértetlen -e.
A sérülések elkerülése érdekében a szerelés során védőkesztyű használata ajánlott.
WARNING! Read the instructions manual carefully before assembly. Ensure you are assembling the house
according to this instruction manual. Ensure all parts are included in the contents of this packaging. To
avoid injury, protective gloves are recommended during assembly.
A telepítés megkezdése előtt ellenőrizze a helyi előírásokat
építkezés az alapozás, a helyszín és egyéb követelmények
tekintetében.Tanulmányozza és értse meg ezt az összeszerelési
útmutatót. Fontos információ és hasznos tippek megkönnyítik a
Dolgát és szórakoztatóbb.
A kézikönyvben található utasítások minden utasítást tartalmaznak
releváns információkat az Ön modelljéhez. Az összeszerelés előtt olvassa
el a teljes kézikönyvet gondosan kövesse a lépések sorrendjét, hogy
megtalálja a megfelelőt eredmények.
Győződjön meg arról, hogy megvan az összes szükséges alkatrész
az építéshez. Különítse el a doboz tartalmát cikkszámokkal
az alkatrészlista megtekintésével. Az első néhány lépés bemutatja a
kapcsolódó alkatrészek csatlakoztatását,hogy nagyobb részegységeket
hozzon létre későbbi használatra. Ismerje meg a berendezéseket és
szerelvényeket a könnyű használat érdekében összeszerelés közben.
Kartondobozba vannak csomagolva. Jegyzet,további elemekkel az
Ön kényelme érdekében.
Before starting the installation, check local building codes
regarding foundations, location and other requirements. Study
and understand this assembly manual. Important information and
helpful tips will make your work easier and more enjoyable.
Assembly instructions:
The instructions in this manual contain all the relevant information
for your model.
Read the entire manual before you start, and follow the sequence
of steps carefully during assembly to get the right results.
Make sure you have all the necessary parts for assembly.
Separate the contents of the carton by part number while viewing
the parts list.
The first few steps show you how to connect related parts to
create larger subassemblies for use later.
Familiarize yourself with the equipment and fittings for easier use
during assembly. They are packed in a cardboard box. Please note
that additional items are provided for your
convenience.
Győződjön meg arról, hogy azon a napon, amikor telepíteni szeretné
házát,alkalmas e az időjárás. Ne próbálja meg összeszerelni a bungalót
egy szeles napon.
Amikor csak lehetséges, két vagy több embernek kell
együtt dolgozni a ház összeállításán. Egy személy elhelyezheti az
alkatrészeket vagy paneleket közben a másik képes kezelni azt
kapcsokkal és szerszámokkal.
Az építéshez csak alapvető eszközökre és anyagokra van szükség.
Válassza ki a rögzítési módszert és a használni kívánt hordozó típusát
hogy elkészítse a szükséges anyagok teljes listáját.
Make sure it is dry on the day you install your shed.
Do not try to assemble the shed on a windy day.
Whenever possible, two or more people should work together to
assemble the shed.
One person can position the parts or panels while the other is able
to handle it with clasps and tools.
Only basic tools and materials are needed to build your shed.
Select the anchoring method and the type of ground you want to
use to create the complete list materials needed.
1
2
3L
3R
4L
4R
5
6
7
8
9
10L
10R
11
13
14
15
16
17
2
2
1
1
1
1
1
1
1
1
2
1
1
2
4
4
2
2
2
18
19
20
21L
21R
22
23
24L
24R
25L
25R
27
P1
P1B
P2
P2A
P3
P5
P6
2
2
4
2
2
2
2
1
1
1
1
2
2
2
2
2
16
6
4
P7
P8
D1
D2
B1
B2
B3
G2
GB
GC
GD
GE
GF
F1
F2
F3
S1
S2
4
2
1
1
2
2
4
4
2
4
4
2
4
469
70
8
188
471


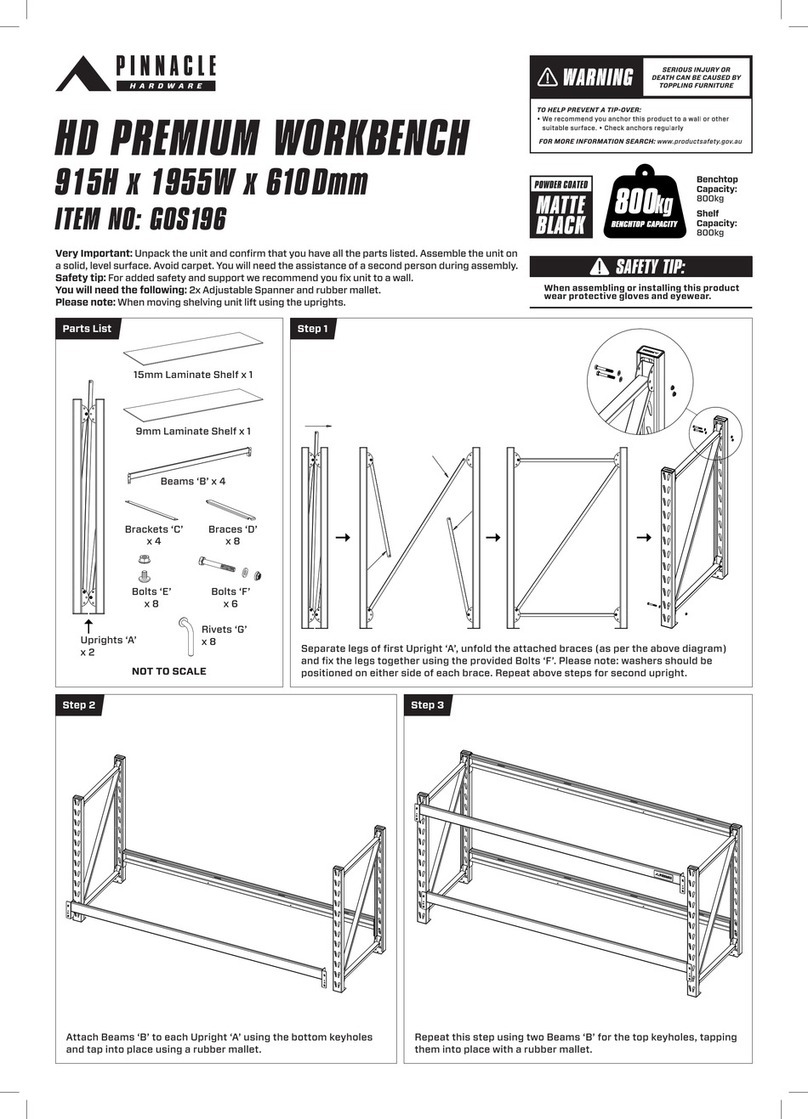
Szerelje össze az alaprúdakat (1) - (4R) a csavarokkal (F1).
Ezután helyezze felül a bemenetcsökkentő csatornát (5)
rúd (3L) és (3R). Csavarokkal (F1) rögzítse az alaphoz. Látás
az alábbi adatok az alábbi ábrákon. Győződjön meg róla, hogy
megvan a készlet
rögzítő alaprudak négyzet alakúak.
Assemble the base bars (1) to (4R) with the screws (F1). Then place
the reducing channel input (5) at the top of the rod (3L) and (3R).
Secure with screws (F1) to the base, looking at the following data
in the figures below. Make sure the base bar mounting kit is square
in shape.
Warning: note the sharp edges
Figyelmeztetés: vegye figyelembe az
éles széleket

Helyezze a falpaneleket (P1), (P2), (P2A) az alaprúdra
(3L), (3R), (4L) és (4R) a képen látható módon. Furatok az oldalon
igazítsa a ház falait az alaprudakhoz. Biztonságos
csavarok (F1) alátétekkel a külső oldalon.
A
A
A
Place the wall panels (P1), (P2), (P2A) on the base bars (3L), (3R),
(4L) and (4R) as shown in drawing. Align the holes in the side walls
of the shed with the base bars. Secure with screws (F1) and washers
from the outside.

Szerelje be a megerősítő rudakat (22), (23), (24 L) és (24R)
belülről falpanelek az alábbiak szerint. Biztosítsa őket
csavarok (F1) alátétekkel.
Install the reinforcement bars (22), (23), (24L) and (24R) on the
inside of the wall panels as shown below in the picture. Secure them
with screws (F1) and washers.

Helyezze a felső csúszka 2 darabját (G2) a csúszócsatornába
(8). Lásd a nagyított nézetet. Szerelje be az ajtórudat (6) közé
elülső falpanelt (P1) és (P2), majd helyezze el
a csúszócsatorna (7) és (8) az elülső falpanelek tetején
belülről. Igazítsa a lyukakat a falpanelekhez. Használjon csavarokat
(F1) alátétekkel a panelek összecsavarásához. Lásd a helyét
az alábbi képeket. Megjegyzés: A csúszócsatornák (7) és (8) nem
rendelkeznek lyukak, elég puhák ahhoz, hogy a csavar kialakítsa őket
csavarozás.
Warning: Ensure that the element of part
G2 which is sticking out is facing the inside
direction.
Place the 2 pieces (G2) of the upper slide into the sliding channel
(8). See enlargement. Install the door bar (6) between the front wall
panel (P1) and (P2), and then place the sliding channel (7) and (8)
on top of the front wall panels from the inside. Align the holes in
the wall panels. Use the bolts (F1) with washers to fix the panels.
See the arrangement in the pictures below. Attention: The sliding
channels (7) and (8) have no holes, they are soft enough for the
screw to create them when screwdriving.
Figyelmeztetés: Győződjön meg arról, hogy az
alkatrész eleme a kilógó G2 a belseje felé néz

Helyezze fel a felső szögeket (9), (10L), (10R) és (11)
a falpanel tetején. Igazítsa a lyukakat
a falpanelekbe, és csavarokkal (F1) rögzítse.
Make sure that the parts overlap
Place the upper angles (9), (10L), (10R) and (11) on the top of the
wall panel. Align the holes in the wall panels and fasten them with
screws (F1).
Győződjön meg arról, hogy az alkatrészek átfedésben vannak

Helyezze a bal oldali ajtóoszlopot (25L) az alaprúdra (3L)
és illessze be a fali panelbe. Ezután rögzítse az ajtóoszlopot
(25L) csavarokkal (F1). Ismételje meg a jobb oldali oszlopnál
ajtó (25R).
Place the Left Door Column (25L) on top of the Base Bar (3L) and
insert into the wall panel. Then fasten the door column (25L) with
the screws (F1). Repeat for the right door pillar (25R).

Helyezze fel a 4 db felső panelt (21L) és (21R). Azután
szereljen össze két oromfalat (21L) és (21R) a kötéssel (B1)
és szerelje össze a csatlakozót (B1) a képen látható módon. Biztosítsa
őket csavarok (F2) és anyák, lásd az alábbi képeket. Csatlakoztassa a
két tartót tetőt (13) és (14), majd rögzítsen 4 készlet szerkezetet
tető az oromfalakhoz (21L) és (21R). Igazítsa a lyukakat
és rögzítse őket csavarral (F2) és anyával.
13
14
B1
B2
B3
21L
21R
GF
F2
4
4
2
2
4
2
2
4
44
Place the 4 pieces of the top panels (21L) and (21R). Then assemble
the two gable panels (21L) and (21R) together with the joint (B1)
and assemble the joint (B1) as shown in the picture. Secure them
with the bolt (F2) and nut, see the pictures below. Connect the two
roof supports (13) and (14), then attach 4 sets of roof structures to
the gable panels (21L) and (21R). Align the holes and secure them
with bolt (F2) and nut.

Helyezze rá a felső panelek (21L), (21R), (13) és (14) 4 darabját
a csúszócsatornák (7) (8) és a hátsó rudak (10L) (10R). Igazítsa a
lyukakat, és rögzítse őket csavarokkal (F1) belülről az ábrán látható
módon.
Place the 4 pieces of the top panels (21L), (21R), (13) and (14) on
top of the slide channels (7) (8) and rear rods (10L) (10R). Align the
holes and secure them with screws (F1) from the inside as shown in
the picture.

Helyezze a tetőpaneleket (P5), (P6), (P7) és (P8) a panel tetejének
csúcsára. Igazítsa a lyukakat és rögzítse csavarokkal (F1)
és alátétekkel.
Place the roof panels (P5), (P6), (P7) and (P8) on top of the gable
panel. Align the holes and secure them with bolts (F1) and nuts with
washers.
Warning: Ensure that the overlaying
panels are placed in the position shown
in the larger image
Figyelmeztetés: Győződjön meg arról,
hogy az átfedés a paneleket a bemutatott
helyzetben kell elhelyezni a nagyobb kép
alapján

Helyezze a megmaradt tetőpaneleket (P5), (P6), (P7) és (P8)
az oromfal panel tetejére. Igazítsa a lyukakat
és rögzítse őket csavarokkal (F1) és alátéttel.
Warning: Ensure that the roof panels are placed in
the position shown in the larger image.
Place the rest of the roof panels (P5), (P6), (P7) and (P8) on top of
the gable panel. Align the holes and secure them with bolts (F1) and
nuts with washers.
Figyelmeztetés: Győződjön meg arról, hogy a
tetőpanelek el vannak helyezve a nagyobb képen
látható pozícióba.

Csatlakoztassa a tetőléceket (15) (16) és (17), (18) a tetőpanelekkel,
rögzítse őket csavarokkal (F1) és alátétekkel. Ezután helyezze el a 4
darabot a tetőkarima illesztései felső sarkának (GC) és rögzítse
azokat csavarokkal (F1) és alátétekkel.
Connect the roof slats (15) (16) and (17), (18) with the roof panels,
secure them with screws (F1) and washers. Then place the 4 pieces
of the top corner (GC) on the roof flange joints and secure them
with bolts (F1) and washers.

Helyezze a két középső tetőburkolatot (19) a tetőpanelek tetejére.
Igazítsa a lyukakat és rögzítse csavarokkal (F1) és alátétekkel.
Ezután csúsztassa a zárófedelet (GE) a tető elülső és hátsó részén, és
rögzítse a csavarokkal (F1) és az alátétekkel az ábrán látható módon.
Place the two central roof trim pieces (19) on top of the roof panels.
Align the holes and secure them with screws (F1) and washers.
Then slide the end cover (GE) over the front and rear of the roof and
secure it with the bolts (F1) and washers as shown in the picture.

Csatlakoztassa az ajtókárpitot (20) az ajtólapokhoz (D1) és (D2) és
rögzítse a rúddal (27). Ezután telepítse az alsó csúszkát (GD) a
ajtószalag (20) mindkét alsó szélén. Rögzítse őket csavarral (F2)
és az anyát alátéttel.
Connect the door trim (20) to the door panels (D1) and (D2) and
fasten with the rod (27). Next install the lower slide (GD) on the
door strip (20) at both lower edges. Secure them with the bolt (F2)
and the nut with washer.

Rögzítse a 2 fogantyút (GB) belülről az ajtólapokhoz (D2)
a csavart (F2) és az anyát.
Fix the 2 handles (GB) to the door panels (D2) from the inside with
the bolt (F2) and the nut.

Csúsztassa az ajtólapot az alapsávba (3L). Ügyeljen arra, hogy az alsó
a csúszda (GD) be kell csúsznia az alapsávba (3L). Ezután csatolja
az ajtólap tetejét a felső csúszkához (G2) a csavarokkal (F3).
Lásd az alábbi képeket.
Warning: ensure the alignment of the
door will realign the holes with
door panel.
Slide the door panel into the base strip (3L). Make sure the lower
slide (GD) should slide into inside the base strip (3L). Then attach
the top of the door panel to the top slide (G2) with the screws (F3).
See the pictures below.
Figyelmeztetés: ügyeljen a
az ajtó igazítására és a lyukakakra
az ajtó panelen.

A kerti szerszámházak olyan embereknek ajánlottak, akik
olcsón, gyorsan és sikeresen akarnak fedett tárolót építeni
tároljon bennük mindenféle kerti felszerelést
szerszámokat és gépeket. A szerszámosház kizárólag tárolási
használatra alkalmas kültéren.
A használathoz és az összeszereléshez száraz és kemény vízszintes talaj
Alkalmas. Ehhez a modell összerakásához, 2 felnőtt részvétele ajánlott.
Kezdés előtt használatakor győződjön meg arról, hogy az egész szerkezet
stabil és megfelelően összeszerelték és meghúzták a csavarokat. Ennek
elmulasztása vezethet a szerkezeti elemek károsodásához és ennek
Következtében baleset és a felhasználók sérülése is fennáll. Ne másszon
fel a tetőre mivel az esés ebből a magasságból súlyos sérüléseket
okozhat és szélsőséges esetekben akár halált is. Soha ne gyújtson grillezőt
a tárolóba.
Befejezés: Hosszantartó befejezéshez, rendszeresen
tisztítsa meg és viaszolja a külső felületet.
Vigyázzon a karcolásokra, amint észreveszi azokat a modelljén.
Azonnal tisztítsa meg a területet drótkefével; mosás
és vigye fel a javító festéket a gyártó ajánlása szerint.
Tartsa távol a tetőt a levelektől és a hótól hosszú,
puha kefével. Nagy mennyiségű hó a tetőn károsíthatja
a házat, veszélyessé téve a belépést. Országokban
erős havazás esetén tetőerősítő készletek állnak rendelkezésre
a legtöbb "Arrow" épülethez, ami további
védelmet nyújt a nagy hó felhalmozódása ellen.
Az ajtóvezetőket mindig tartsa távol a szennyeződésektől és
egyéb törmelékektől. Minden évben kezelje az ajtókat egy
speciális pasztával vagy szilikon spray-vel. Próbálja zárva tartani az ajtókat
hogy elkerülje a sérüléseket.
: Használja az összes mellékelt alátétet
az időjárás behatolásának megakadályozása és a fém biztonságának
megőrzése érdekében és csavarokkal való karcolás ellen. Rendszeresen
ellenőrizze házát laza csavarok, anyák stb. esetén, és szükség esetén
húzza meg őket igény szerint.
Műanyag lap (párazáró) van elhelyezve
a teljes padlófelület alatt, mely jó szellőzéssel csökkenti a
Páralecsapódást.
Törölje le a tintával írt cikkszámokat
a paneleken szappannal és vízzel. Ne tárolja a medence vegyszereit
szerszámos fészerében. Gyúlékony és maró anyagokat légmentesen
lezárt tartályokban tároljuk.
Metal sheds are a great option for people who want to efficiently
and successfully store their garden equipment, tools or machines,
whilst still on a budget. The shed is intended for outdoor use only.
Use and assembly should take place on a dry, hard and even ground.
Both assembly and maintenance should be performed by adults
only.
2 adults are recommended for this model to be assembled. Before
use, make sure that the entire structure is firm and properly
assembled and that the screws are tightened. Failure to do so may
result in damage to structural elements and, consequently, in an
accident and injury to users. You should not climb onto the roof of
the house, as a fall from this height may result in serious injuries and
in extreme cases even death. Never light the grill inside the house,
do not let go of fireworks or other accessories with an open flame.
For a long lasting finish, periodically clean and wax the
exterior surface. Take care of scratches as soon as you spot them
on your model. Clean the area immediately with a wire brush; wash
and apply repair paint as recommended by the manufacturer.
Keep the roof clear of leaves and snow with a long, soft
brush. Large amounts of snow on the roof can damage the house,
making it dangerous to enter. In countries with heavy snowfall, roof
reinforcement kits are available for most Arrow buildings, which
provide additional protection against heavy snow build-up.
Always keep the door guides away from dirt and other debris
that prevent them from sliding easily. Every year, lubricate the door
guide with a special paste or silicone spray. Try to keep the door
closed and locked to prevent wind damage.
Use all provided pads to prevent weather
infiltration and to prevent metal from scratching with screws.
Check your house regularly for loose bolts, nuts etc. and tighten
them if necessary.
A sheet of plastic (vapor barrier) placed under the entire
floor surface with good ventilation will reduce condensation and
moisture.
Wash off part numbers written in ink on the panels with
soap and water. Silicone seals can be used for watertight seals
throughout the shed. Do not store pool chemicals in your tool shed.
Flammable and corrosive materials must be stored in hermetically
sealed containers.
Popular Tools Storage manuals by other brands

Emerson
Emerson RIDGID 3060-OS Operator's manual

Wolfcraft
Wolfcraft MASTER 650 ERGO operating instructions

Craftsman
Craftsman 706.657840 Assembly instructions

Draper
Draper Bunker 29779 manual

Rutland County
Rutland County Rutland Workbench Assembly instructions

Meec tools
Meec tools 022532 operating instructions