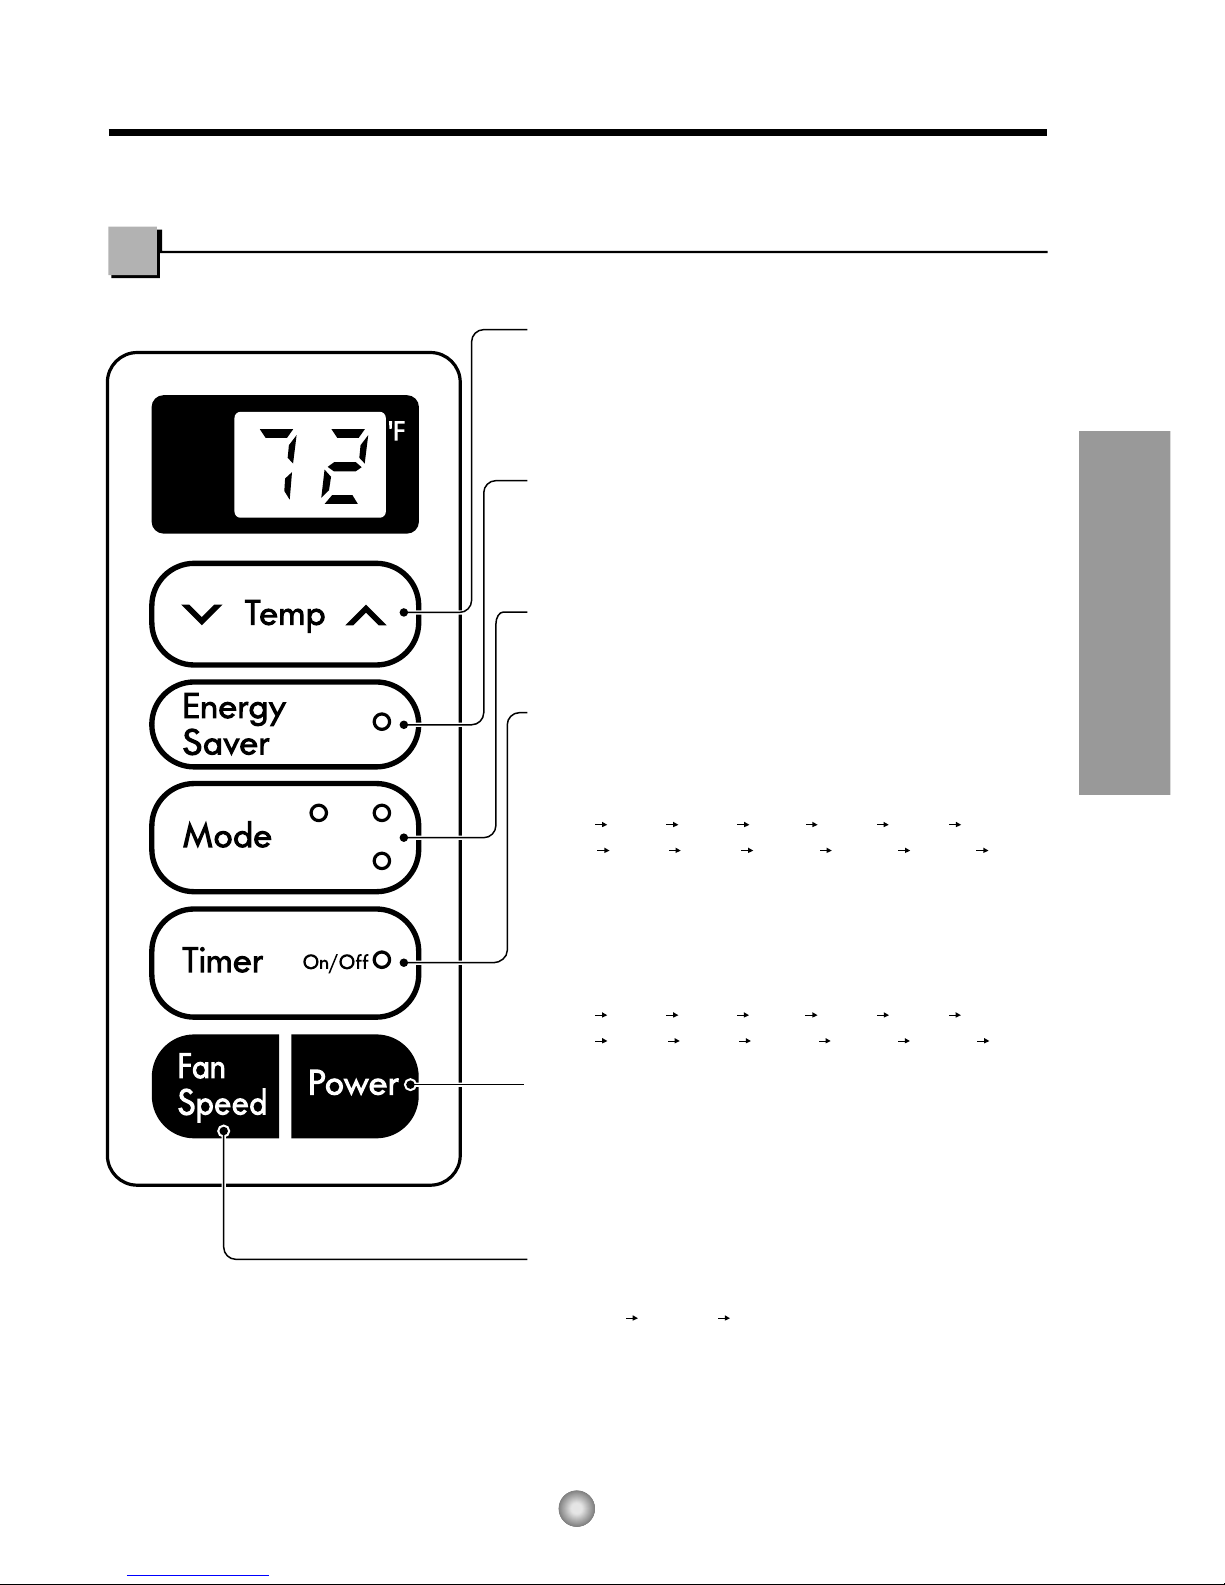
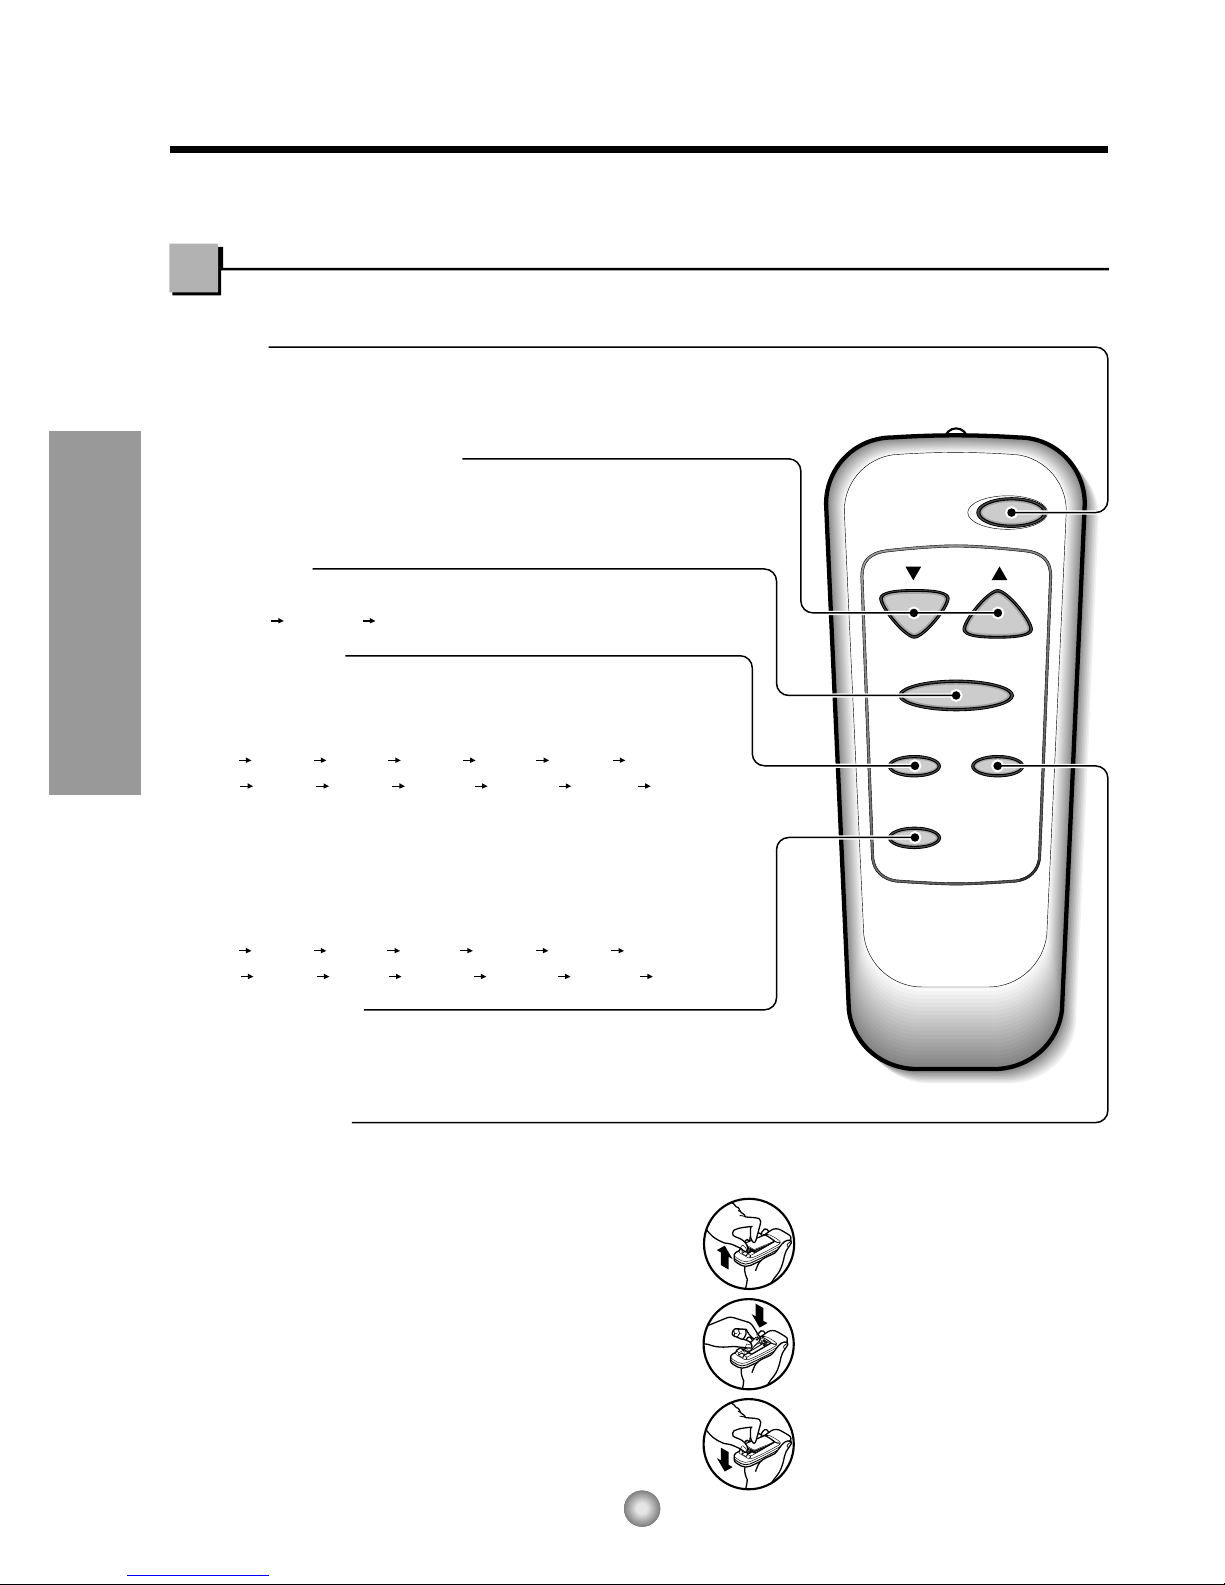
Auto
Swing
Power
Temp
Fan Speed
Timer Mode
Energy
Saver
TEMPERATURE SETTING
•This button can automatically control the temperature of the room.
The temperature can be set within a range of 60°F to 86°F by 1°F.
Select the lower number for lower temperature of the room.
ENERGY SAVER
The fan stops when the compressor stops cooling.
•Approximately every 3 minutes the fan will turn on and
check the room air to determine if cooling is needed.
FAN SPEED
•Everytime you push this button it is set as follows.
(High(F2) Low(F1) High(F2)...)
POWER
•To turn the Set ON, push the button. To turn the Set OFF, push the button again.
•This button takes priority over any other buttons.
•When you first turn it on, the Set is on the High cool mode and the temp. at 72°F
COOL/FAN/DRY
•Everytime you push this button, it will toggle between COOL, FAN and DRY.
ON/OFF TIMER
- STOPPING OPERATION
•Everytime you push this button, when the set is operating,
timer is set as follows.
(1Hour 2Hours 3Hours 4Hours 5Hours 6Hours
7Hours 8Hours 9Hours 10Hours 11Hours 12Hours Cancel)
•The Setting Temperature will be raised by 2°F 30min. later
and by 2°F after another 30 min.
- STARTING OPERATION
•Everytime you push this button, when the set is
not operating, timer is set as follow.
(1Hour 2Hours 3Hours 4Hours 5Hours 6Hours
7Hours 8Hours 9Hours 10Hours 11Hours 12Hours Cancel)
6
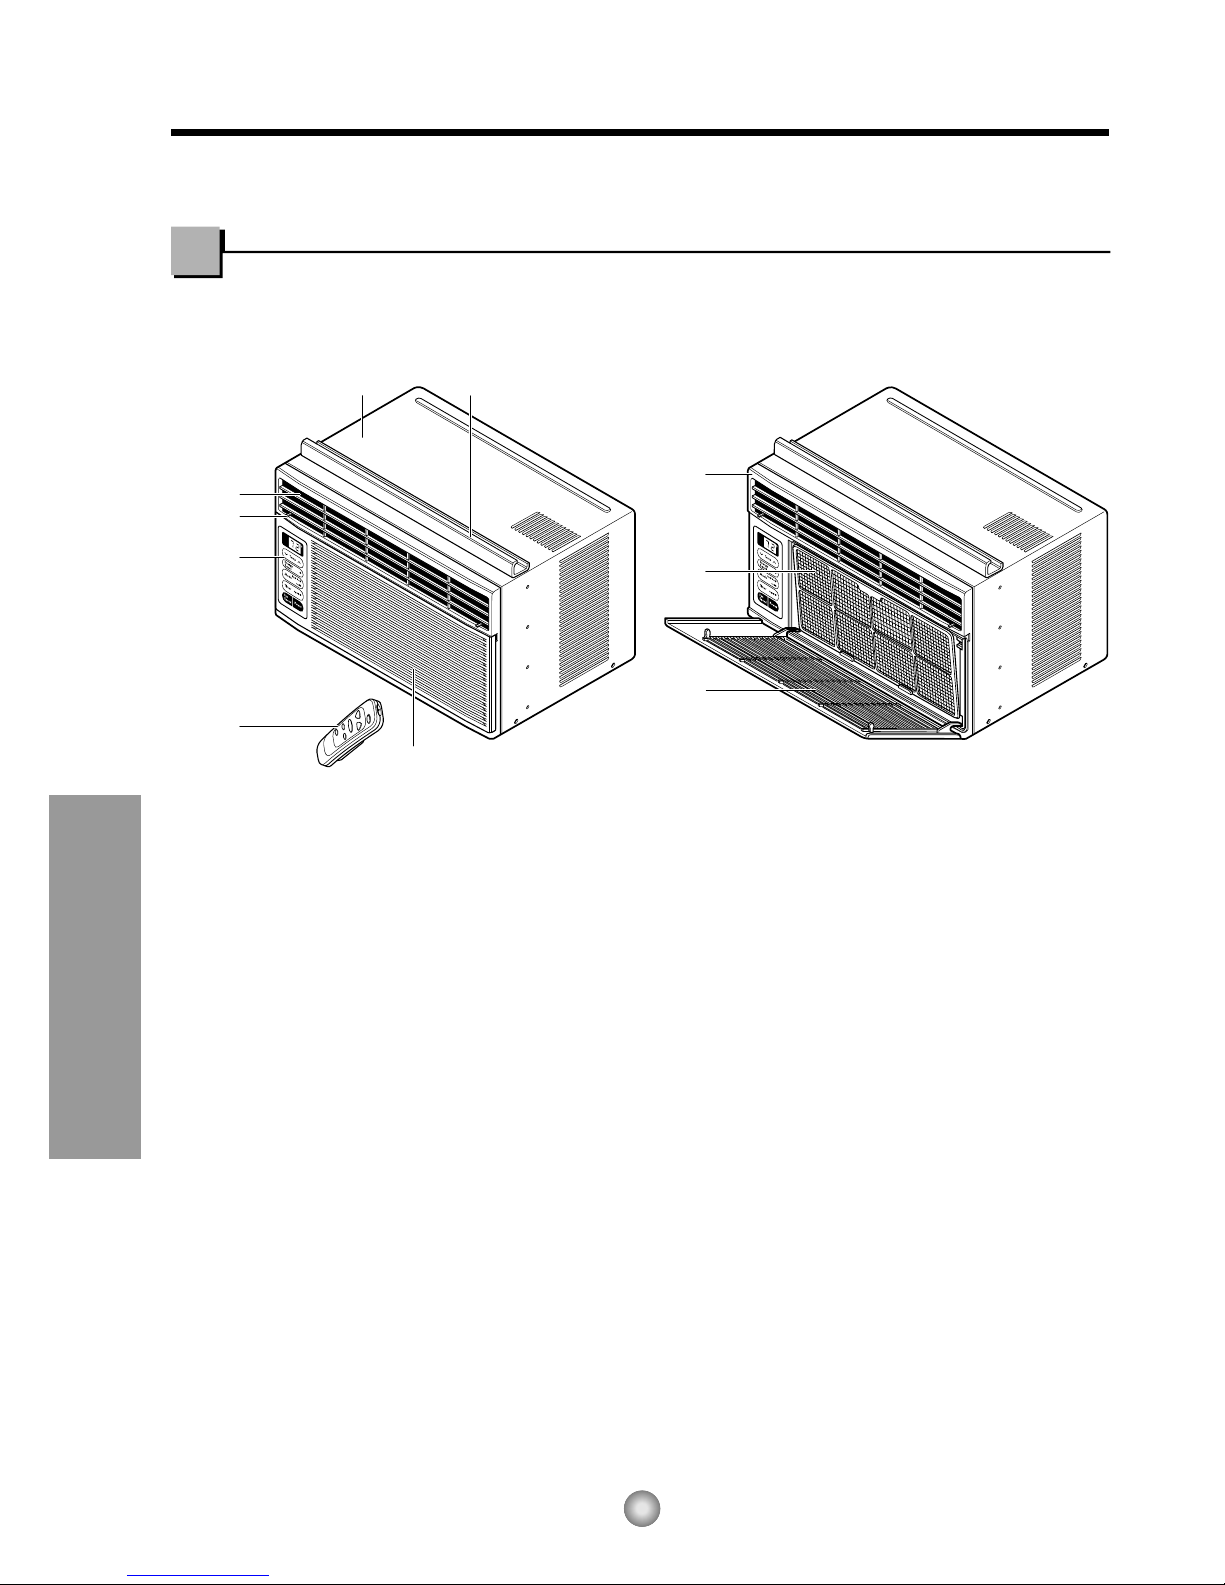
About the Controls on the Air Conditioner
Remote controller
Precaution:
The Remote Controller will not function properly if strong light strikes the sensor window
of the air conditioner or if there are obstacles between the Remote Controller and the air conditioner.
1. Remove the cover from the back of the remote
controller
2. Insert two batteries.
•Be sure that the (+) and (-) directions are correct.
•Be sure that both batteries are new.
3. Re-attach the cover.
•Do not use rechargeable
batteries. Such batteries
differ from standard dry
cells in shape, dimensions,
and performance.
•Remove the batteries from
the remote controller if the
air conditioner is not going
to be used for an extended
length of time.
How to Insert Batteries


 null")