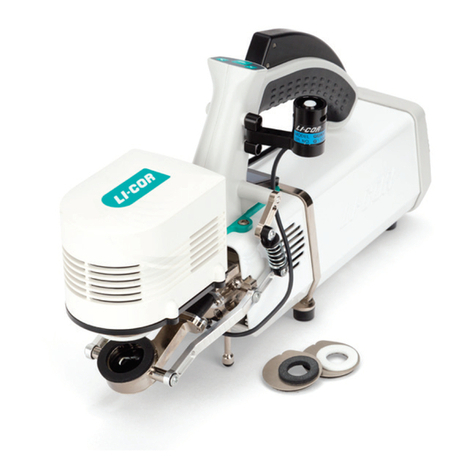
LI-COR LI-600 User manual

Using the
Ll-600 Porometer/Fluorometer
Instruction Manual

i
Using the LI-600
Porometer/Fluorometer
Instruction Manual
LI-COR Biosciences
4647 Superior Street
Lincoln, Nebraska 68504
Phone: +1-402-467-3576
Toll free: 800-447-3576 (U.S. and Canada)
LI-COR Distributor Network:
www.licor.com/envdistributors
Regional Offices
LI-COR Biosciences GmbH
Siemensstraße 25A
61352 Bad Homburg
Germany
Phone: +49 (0) 6172 17 17 771
LI-COR Biosciences UK Ltd.
St. John’s Innovation Centre
Cowley Road
Cambridge
CB4 0WS
United Kingdom
Phone: +44 (0) 1223 422102

Notice
The information in this document is subject to change without
notice.
LI-COR MAKES NO WARRANTY OF ANY KIND WITH
REGARD TO THIS MATERIAL, INCLUDING BUT NOT
LIMITED TO THE IMPLIED WARRANTIES OF
MERCHANTABILITY AND FITNESS FOR A PARTICULAR
PURPOSE. LI-COR shall not be held liable for errors con-
tained herein or for incidental or consequential damages in con-
nection with the furnishing, performance, or use of this
material.
This document contains proprietary information, which is pro-
tected by copyright. All rights are reserved. No part of this doc-
ument may be photocopied, reproduced, or translated to
another language without prior written consent of LI-COR,
Inc.
Windows® is a trademark of Microsoft, Inc. macOS® is a trade-
mark of Apple, Inc., registered in the US and other countries.
Drierite is a registered trademark of the W.A. Hammond Drier-
ite Company. Excelon Bev-a-line is a registered trademark of
Thermoplastic Processes, Inc. All other trademarks and
registered trademarks are property of their respective owners.
This product may be covered by one or more U.S.
pending or issued patents. For more information, visit
www.licor.com/patents.
Printing History
© Copyright 2022, LI-COR, Inc. All rights reserved.
Publication Number: 984-19037
Created on Tuesday, April 19, 2022
ii

iii
Notes on Safety
This LI-COR product has been designed to be safe when oper-
ated in the manner described in this manual. The safety of this
product cannot be assured if the product is used in any other
way than is specified in this manual. The product is intended
to be used by qualified personnel. Read this entire manual
before using the product.
Equipment markings:
The product is marked with this symbol
when it is necessary for you to refer to
the manual or accompanying doc-
uments in order to protect against injury
or damage to the product.
WARNING Warnings must be followed carefully to
avoid bodily injury.
CAUTION Cautions must be observed to avoid
damage to your equipment.
Manual markings:
Warning Warnings must be followed carefully to
avoid bodily injury.
Caution Cautions must be observed to avoid
damage to your equipment.
Note Notes contain important information and
useful tips on the operation of your
equipment.

CE Marking:
This product is a CE-marked product. For conformity inform-
side of the U.S., contact your local sales office or distributor.
California Proposition 65 Warning
WARNING: This product contains chemicals known to the
State of California to cause cancer and birth defects or other
reproductive harm.
Federal Communications Commission
Radio Interference Statement
WARNING: This equipment generates, uses, and can radiate
radio frequency energy and if not installed in accordance with
the instruction manual, may cause interference to radio com-
munications. It has been tested and found to comply with the
limits for a Class A computing device pursuant to Subpart J of
Part 15 of FCC rules, which are designed to provide a reas-
onable protection against such interference when operated in a
commercial environment. Operation of this equipment in a res-
idential area is likely to cause interference in which case the
user, at his own expense, will be required to take whatever
measures may be required to correct the interference.
Waste Electronic and Electrical Equip-
ment (WEEE) Notice
This symbol indicates that the product is to be col-
lected separately from unsorted municipal waste. The
following applies to users in European countries: This
product is designated for separate collection at an
appropriate collection point. Do not dispose of as
household waste. For more information, contact your local dis-
tributor or the local authorities in charge of waste man-
agement.
iv

v
Contents
Section 1. The LI-600
Components 1-2
Accessories kit 1-3
Support 1-4
Power and battery 1-4
Section 2. Using the LI-600 interface
Select Configuration 2-1
Measurement 2-2
Data labels and remarks 2-3
Matching 2-5
Scan Barcode 2-5
Instrument Settings 2-5
Info 2-6
Section 3. Taking Measurements
Measurement precautions and techniques 3-1
Precautions 3-1
Techniques 3-2
Taking a measurement 3-3
Taking a measurement in Auto Mode 3-3
Taking a measurement in Manual Mode 3-4
Using the barcode scanner 3-5
Viewing measurement data on-screen 3-6
Section 4. Using the computer software
Download the software and connect the LI-600 4-1
Connection Overview 4-1
Home screen 4-3

Toolbar 4-3
Drop-down menu 4-3
Buttons 4-4
Configuration Management 4-5
Data Management 4-7
Live View 4-9
Offline Mode 4-10
Barcode generator 4-11
Section 5. Configurations
Configuration settings 5-1
Creating custom configurations 5-4
General 5-4
Data Labels 5-5
Automode Setup 5-6
Remarks 5-7
Measurement Settings 5-7
Display Layout 5-9
Preview 5-10
Save Configuration 5-10
Section 6. Data files
Downloading data from the LI-600 6-1
Exporting data files from the computer software 6-2
Data file structure 6-2
Variables, units, and equations 6-3
Groups, labels and descriptions 6-3
Section 7. Troubleshooting
Instrument issues 7-1
Instrument will not power on 7-1
Instrument will not seal on a leaf 7-1
Instrument will not automatically log a measurement 7-2
The display layout is blank 7-2
vi

vii
Software warning when connecting the LI-600 7-2
Software warning when updating the firmware 7-3
The new RH sensor serial number has not updated 7-4
The RH values and sample RH are high 7-4
Instrument warnings 7-5
Matching. Do not clamp on leaf. 7-5
Low memory 7-5
Low battery 7-5
Blower off 7-5
Pump 7-6
No GPS map pin 7-6
Data download errors 7-6
Section 8. Maintenance
Storing the LI-600 8-1
Cleaning the LI-600 8-1
Removing the instrument head shells 8-3
Removing and inserting a battery 8-5
Replacing the air intake filter 8-6
Calibrating the sensors 8-8
RH sensors 8-8
Flow sensors 8-16
Fluorescence detector 8-17
Changing the RH sensors serial number 8-17
Section 9. Theory of operation
Leaf porometer 9-1
Derivation of equations 9-2
Boundary layer conductance 9-5
Implementation of equations in the LI-600 9-5
Matching RH sensors 9-7
Flow sensors 9-7
Infrared temperature sensor 9-8
PAR sensor 9-8
Additional calculations for porometry 9-8

Stability criteria in auto mode 9-9
User calibration procedures 9-10
Fluorometer 9-13
Implementation on the LI-600 9-14
Calculating light intensity from LED calibration coef-
ficients 9-14
Dark-adapted vs light-adapted measurements 9-15
Steady-state fluorescence 9-16
Logged Variables 9-17
Porometry group 9-18
Fluorometry group 9-19
Leaf angle and GPS 9-20
Accelerometer/Magnetometer 9-20
GPS 9-21
Leaf angle software calculations 9-22
Clocks 9-24
References 9-25
Section 10. Specifications
General 10-1
Porometer 10-2
Fluorometer 10-3
GPS Receiver 10-3
Appendix A. FlashAnalysis App
Appendix B. Warranty
Appendix C. Index
viii

1-1
Section 1.
The LI-600
The LI-600 Porometer/Fluorometer is a lightweight hand-
held instrument that takes combined stomatal con-
ductance, and Pulse Amplitude Modulation (PAM)
chlorophyll afluorescence measurements of a leaf in
seconds. It delivers precise, high-throughput stress eval-
uations over the same leaf area and can quickly survey
plants under ambient conditions.
The LI-600 has a GPS receiver that records the latitude,
longitude, and altitude for each measurement, allowing
users to track, return to, and map locations. The LI-600
includes a magnetometer/accelerometer that measures the
pitch, roll and heading of a leaf. These measurements,
along with information from the GPSreceiver, enable the
LI-600 software to calculate the angle of incidence of a leaf
for each measurement.1
The LI-600 computer software is available for both Win-
dows®and macOS®. It is used to create and upload con-
figurations to the instrument, download data from the
instrument, record live data, and create barcodes. The soft-
ware is available for download at:
licor.com/600software
1GPS and the accelerometer/magnetometer are included in
models with a serial number higher than PFA-00553.

LI-600 Porometer/Fluorometer Instruction Manual
1-2
Components
The LI-600 components are as shown below.
Figure 1-1. LI-600 Components.
1Aperture. (0.75 cm diameter) Surrounds the leaf gasket, is
the active measurement.
2Aperture clamp. Closes onto the leaf.
3Fluorometer (optional). Takes PAM chlorophyll afluor-
escence measurements.
4Quantum sensor. Measures ambient light level.
5Accelerometer / Magnetometer (internal). Measures
pitch, roll, and heading.
6Display. Shows measurement workflow, instrument set-
tings, and variables data.
7Navigation arrows. Moves up, down, right, and left
through options and screens.
8Enter button. Powers on the instrument and selects
options.
9Handle. Encloses the rechargeable battery.
10 Micro-USB port. Connects the instrument to the com-
puter or universal charging adapter via micro-USB cable.

Section 1. The LI-600
1-3
11 Barcode scanner. Scans barcodes.
12 Tripod mount. (1/4-20 UNC) Attaches to a tripod.
13 Porometer. Takes stomatal conductance measurements.
Accessories kit
The LI-600 includes an accessories kit, which has the fol-
lowing accessories and replacement parts for your instru-
ment. Additional accessories can be purchased separately
(see Support on the next page).
Description Quantity Part Number
Aperture clamp 2 6360-350
Face seal O-rings 2 192-17935
Filters12 301-19838
Foam swabs 6 610-16093
Leaf gasket 2 6360-356
Microfiber cloth 1 229-16069
Radial seal O-rings 4 192-18368
Scrub tube zero kit 1 9968-258
Spare screws 20 150-14386
Charging adapter 1 591-19074
Charger prong kit 1 591-19075
USBcable 1 392-19077
Wrist strap 1 610-19076
Zero adapter assembly 1 9960-327
Table 1-1. LI-600 Accessories.
600-01F Fluorometer upgrade kit (optional)
The 600-01F Fluorometer Upgrade Kit adds the fluoro-
meter module to the porometer model.
1Replacing 301-16918

LI-600 Porometer/Fluorometer Instruction Manual
1-4
The LI-600 porometer-only includes a fluorometer
blank. If the instrument is upgraded and the fluoro-
meter needs to be removed, reinsert the fluorometer
blank. The gray ribbon cable does not attach to the
fluorometer blank. Store the fluorometer in the carrying
case with the instrument.
Support
The user manual, instructional videos, technical doc-
uments, webinars, FAQs, and other resources are avail-
able online at licor.com/600support. The user manual
can be downloaded as a PDF.
To contact LI-COR environmental support, go to
https://www.licor.com/env/contact/ .
Power and battery
The LI-600 is powered by a rechargeable lithium ion bat-
tery. The LI-600 is shipped partially charged. Before
using it the first time, charge the battery to 100% fol-
lowing the instructions below.
Charging considerations
A power supply—either the universal charging adapter
or an external battery pack—can be connected to the LI-
600. If using an alternate USB wall charger, ensure that
it has at least 1 Amp at 5 VDC.
The LI-600 can be charged when powered on or off.
Before using the LI-600 for the first time, charge the bat-
tery to 100%. Charging with the instrument powered
off and using the universal charging adapter takes
approximately 3.5 hours. Charging with the instrument
powered off and from a computer USB port takes 8 to

Section 1. The LI-600
1-5
10 hours and is not recommended. To charge in less
than two hours, use a USB wall adapter that supports
Qualcomm® Quick Charge™ (QC) 2.0 or 3.0. When
fully charged, the instrument will operate for approx-
imately 8 hours of active use; however, battery life can
vary due to age and amount of use. External battery
packs are suggested for expected use longer than 8 con-
secutive hours.
Charging temperature: the battery will only charge
when the pack temperature is within 0 to 45 °C. If the
pack reaches a temperature outside this range, it will
automatically stop charging.
Powering the LI-600 on and off
To power on the LI-600, press and hold the round enter
button on top of the instrument.
To power off the LI-600, navigate to Settings by press-
ing the left arrow at the Select Configuration screen,
then select Shut Down and press the Enter button. If
the LI-600 is not responding and the settings cannot be
accessed, power off the instrument by pressing and hold-
ing the Enter button for seven seconds; avoid this, as the
last data record could be lost. Power off the instrument
when not in use.
Using the universal charging adapter
The included universal charging adapter is compatible
with main power in most localities globally (input: 90
to 264 VAC, 50 to 60 Hz; output: 5 VDC, 1 Amp). You
may need to install different blades from the outlet
adapter kit to fit your outlets.

LI-600 Porometer/Fluorometer Instruction Manual
1-6
Battery warnings and disposal
The LI-600 includes a rechargeable lithium ion battery
(3.7 V, 5.2 AH) that must be disposed of safely. Contact
LI-COR for a replacement battery. The exclamation
point label on the exterior and a warning label on the
interior indicate the location of the lithium ion battery
compartment.
Caution: Lithium ion batteries may cause
environmental damage or damage to human
health if they are disposed of improperly. Do
not dispose of the batteries in unsorted muni-
cipal waste or an incinerator. Many localities
have battery recycling facilities that accept lith-
ium ion batteries. Contact your local dis-
tributor or the local authorities in charge of
waste management to determine how to safely
dispose of the battery.

2-1
Section 2.
Using the LI-600 interface
The LI-600 user interface includes four arrow buttons, an
enter button, and the display. The up and down arrows
navigate through options in the display, and the left and
right arrows navigate through the screens. The Enter but-
ton powers the LI-600 on, selects highlighted options, and
initiates or logs a measurement.
The LI-600 instrument display has four parts: GPS map
pin, time, and battery percentage on the top, headings and
prompts, options or information in the main portion of
the screen, and navigation icons and text at the bottom.
Select Configuration
Select Configuration appears when the LI-600 is
powered on, and lists the configurations loaded onto the
instrument (see Configurations on page5-1).

LI-600 Porometer/Fluorometer Instruction Manual
2-2
Figure 2-1. The Select Configuration screen.
Select Configuration is Home in the navigation, and
from it you access Settings and Info.
Measurement
After a configuration has been selected, the Meas-
urement screen appears. The screen headings include a
prompt, measurement status, and how many meas-
urements have been logged. The main part of the dis-
play includes the variables and layout set in the
configuration (see Display Layout on page5-9). The bot-
tom includes navigation to labels and remarks, and
indicates whether to log or initiate a new measurement
with the Enter button.

Section 2. Using the LI-600 interface
2-3
Figure 2-2. The Measurement screen.
Clamp to leaf and Stability search appear when the
instrument is in Auto mode; they do not appear in
Manual mode. When taking a measurement with the LI-
600 Porometer/Fluorometer, the heading cycles through
Logging,Flashing,Complete, and Logged. When
taking a measurement with the LI-600 Porometer, the
heading cycles through Logging,Complete, and
Logged. At the bottom of the screen, the prompt for
the Enter button in Auto mode is New; in manual
mode it is Log then New. The right arrow is either
Mark or Prompt. The left arrow navigates back to
Select Configuration.
Data labels and remarks
Data labels and remarks are configured in the LI-600
computer software (see Data Labels on page5-5 and
Remarks on page5-7) and correspond to Prompt and
Mark on the instrument. The data labels heading is

LI-600 Porometer/Fluorometer Instruction Manual
2-4
Press enter to edit highlighted values, and the
remarks heading is Mark reason.
Figure 2-3. Data labels and remarks are selected in the
"Press enter to edit highlighted values" and "Mark reason"
screens.
The data label options appear (Press enter to edit
highlighted values)after each measurement if
Prompt on log is enabled in the configuration. If
Prompt on log is not enabled, the options are accessed
with the right arrow before taking a measurement. When
accessed and selected manually, data labels and barcodes
apply to subsequent measurements until a new label or
barcode is selected. Done takes you back to Meas-
urements. See Data Labels on page5-5.
Remarks are accessed with the right arrow after logging
a measurement (Mark reason). You can select one of
up to three remarks in a configuration. Cancel takes
you back to Measurements. See Remarks on page5-7.

Section 2. Using the LI-600 interface
2-5
Matching
This screen appears when the RHsensors are matching,
and goes to Measurements with a beep when match-
ing is complete. Matching can only be done when the
cuvette is empty. If the instrument is clamped onto a
leaf when the instrument is matching, the instrument
will beep and prompt the user to unclamp the leaf.
Scan Barcode
Scan Barcode prompts you to scan a barcode when a
barcode data label is selected and the onboard barcode
scanner on the bottom of the instrument is activated.
See Using the barcode scanner on page3-5 and Data Labels
on page5-5.
Instrument Settings
Settings options include Shut Down, Match, Instru-
ment Settings, and Warning(s). Navigate to Settings
with the left arrow from Select Configuration.
lShut Down powers off the LI-600.
lMatch manually match the RH sensors to the envir-
onment; it will beep when complete.
lInstrument Settings to set the time or clear all
data. The percentage of memory used and the firm-
ware version also appear at the top of the screen.
lGPS:turn on or off. Indicates number of satel-
lites, latitude, longitude, altitude, pitch, roll, and
heading.
lSet Time : sync with GPS, or set manually. For
instruments with GPS, we recommend always
syncing the time with GPS. See Clocks on
page9-24.
Other manuals for LI-600
3
Table of contents
Other LI-COR Measuring Instrument manuals

LI-COR
LI-COR LI-800 User manual

LI-COR
LI-COR LI-3100C User manual

LI-COR
LI-COR LAI-2200 User manual

LI-COR
LI-COR LI-830 User manual

LI-COR
LI-COR LI-800 User manual

LI-COR
LI-COR LI-7810 User manual

LI-COR
LI-COR LI-840 Guide

LI-COR
LI-COR LI-820 User manual

LI-COR
LI-COR LI-6800 User manual

LI-COR
LI-COR LI-820 User manual

LI-COR
LI-COR LI-180 User manual

LI-COR
LI-COR li-7200 User manual

LI-COR
LI-COR LAI-2200 User manual

LI-COR
LI-COR LI-8100A User manual
LI-COR
LI-COR LI-250A User manual

LI-COR
LI-COR Eddy Covariance User manual

LI-COR
LI-COR LI-3000C User manual

LI-COR
LI-COR LI-200R User manual

LI-COR
LI-COR LI-8100A User manual

LI-COR
LI-COR LI7200RS User manual