manuals.online logo
Brands
  1. Home
  2. •
  3. Brands
  4. •
  5. Lindy
  6. •
  7. Enclosure
  8. •
  9. Lindy 43288 User manual

Lindy 43288 User manual

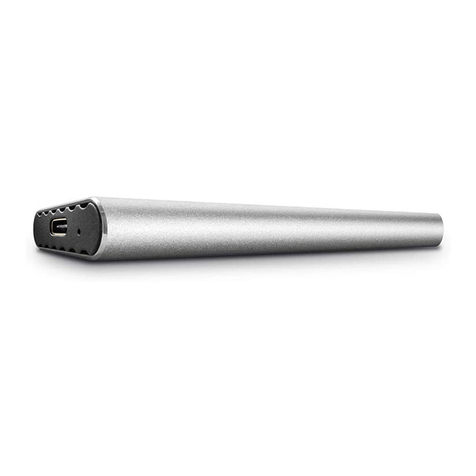
USB 3.0 SATA
Enclosure 2.5“
User Manual English
Benutzerhandbuch Deutsch
Manuel Utilisateur Français
Manuale Italiano
No. 43288
Hersteller / Manufacturer (EU): Manufacturer (UK):
LINDY-Elektronik GmbH LINDY Electronics Ltd.
Markircher Str. 20 Sadler Forster Way
68229 Mannheim Stockton-on-Tees, TS17 9JY
Germany England
Email: [email protected] [email protected]
T: +49 (0)621 470050 T: +44 (0) 1642 754000
lindy.com
© LINDY Group - SECOND EDITION (January 2021)
User Manual English
Benutzerhandbuch Deutsch
Introduction
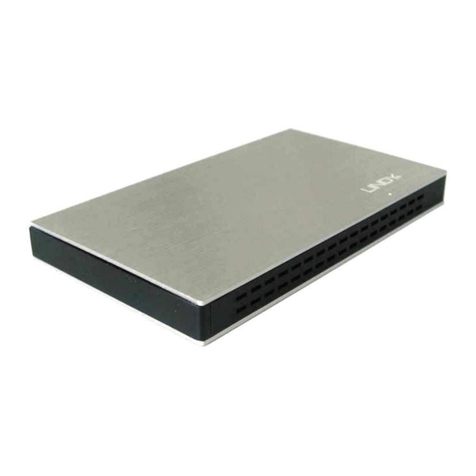
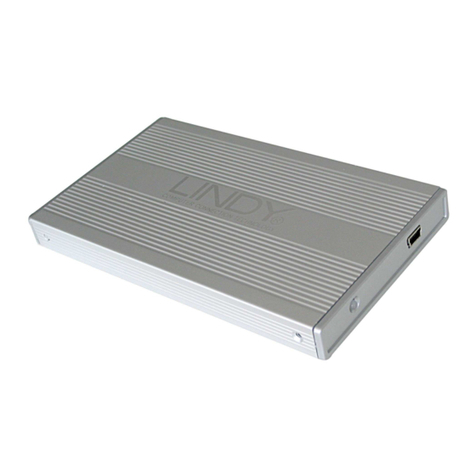
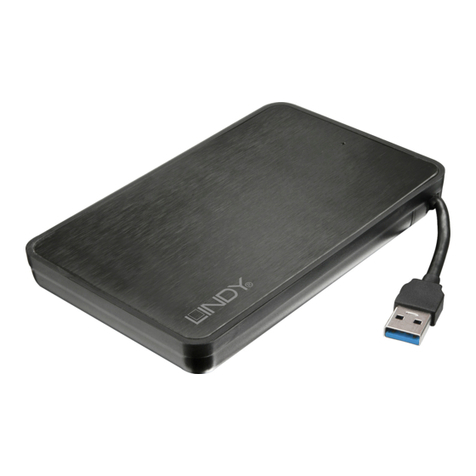
Thank you for purchasing the USB 3.0 SATA Enclosure 2.5”.
This product has been designed to provide trouble free, reliable
operation. It benefits from both a Lindy 2 year warranty and free
lifetime technical support. To ensure correct use, please read
this manual carefully and retain it for future reference.
Package content
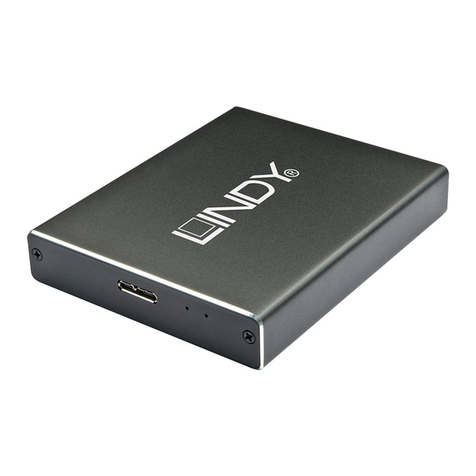
•USB 3.0 SATA Enclosure 2.5"
•0.30m USB 3.0 A Male to Micro B cable
•Lindy Manual
Features
•2.5” Enclosure for SATA hard disks/SSDs up to 9.5mm
height and 2TB capacity
•USB 3.2 / 3.1 Gen 1 / USB 3.0 standard (max. 5Gbps),
USB 2.0 / 1.1 compliant
•Supports SATA 6 / 3 / 1.5Gbps
•Screwless design
•Chipset: JMS567
•UASP support
•USB bus-powered
•LED indicator
Installation & Operation
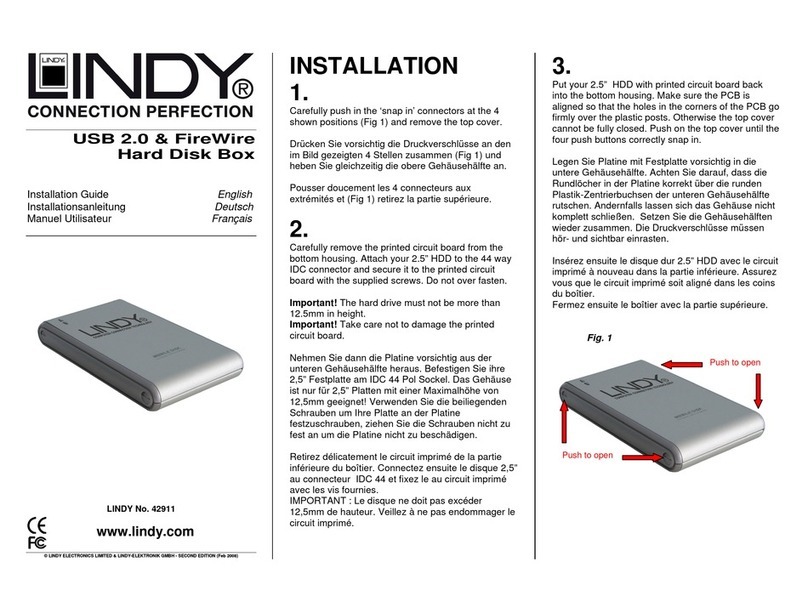
Slide open the housing and place the HDD in the disk tray so
the SATA connector fits into the backplane. Then close the
housing by pushing the top and bottom parts back to the
original position again.
Driver installation is not necessary. Modern operating systems
already include the necessary drivers.
The LED indicator illuminates solid blue when the hard drive is
connected and powered. The LED flashes during data transfer.
Do not disconnect the enclosure whilst the LED is flashing!
Please note: Drives should be safely ejected from the PC rather
than just unplugging them.
Einführung
Wir freuen uns, dass Ihre Wahl auf ein Lindy-Produkt gefallen
ist und danken Ihnen für Ihr Vertrauen. Sie können sich
jederzeit auf unsere Produkte und einen guten Service
verlassen. Diese USB 3.0 SATA Gehäuse 2.5“unterliegt einer
2-Jahres LINDY Herstellergarantie und lebenslangem
kostenlosen, technischen Support. Bitte lesen Sie diese
Anleitung sorgfältig und bewahren Sie sie auf.
Lieferumfang
•USB 3.0 SATA Gehäuse 2.5"
•0.30m USB 3.0 Kabel Typ A / Micro-B
•Lindy Handbuch
Eigenschaften
•2.5” Gehäuse für SATA-Festplatten/SSDs bis 9.5mm
Höhe und einer Kapazität von 2TB
•USB 3.2 / 3.1 Gen 1 / USB 3.0 Standard (max. 5Gbit/s),
USB 2.0 / 1.1 kompatibel
•Unterstützt SATA 6 / 3 / 1.5Gbit/s
•Werkzeugloser Einbau
•Chipset: JMS567
•UASP-Unterstützung
•USB bus-powered
•LED-Anzeige
Installation
Ziehen Sie den Einschub des Gehäuses heraus und legen Sie
die Festplatte so in den Festplattenträger, so dass sie sicher
mit dem SATA-Anschluss verbunden ist. Schieben Sie nun den
Einschub zurück ins Gehäuse.
Es müssen keine Treiber installiert werden. Moderne
Betriebssysteme haben bereits alle notwendigen Treiber an
Board.
Die Anzeige-LED leuchtet blau, sobald das Gehäuse
angeschlossen und mit Strom versorgt ist. Sie blinkt während
eines Datentransfers.
Ziehen Sie nie die Stecker während die LED noch blinkt!
Beachten Sie bitte, dass Sie das Gehäuse mit der Funktion
„Hardware sicher entfernen“ vom Betriebssystem abmelden.
Radio Frequency Energy, Certifications
CE Certification
LINDY declares that this equipment complies with relevant European CE requirements.
CE Konformitätserklärung
LINDY erklärt, dass dieses Equipment den europäischen CE-Anforderungen entspricht
UKCA Certification
LINDY declares that this equipment complies with relevant UKCA requirements.
FCC Warning
This equipment has been tested and found to comply with the limits for a Class B digital
device, pursuant to part 15 of the FCC Rules. Operation is subject to the following two
conditions:
1. This device may not cause harmful interference, and
2. This device must accept any interference received, including interference that may
cause undesired
WEEE (Waste of Electrical and Electronic Equipment),
Recycling of Electronic Products
Europe, United Kingdom
In 2006 the European Union introduced regulations (WEEE) for the collection and
recycling of all waste electrical and electronic equipment. It is no longer allowable to simply
throw away electrical and electronic equipment. Instead, these products must enter the
recycling process.
Each individual EU member state, as well as the UK, has implemented the WEEE regulations
into national law in slightly different ways. Please follow your national law when you want to
dispose of any electrical or electronic products. More details can be obtained from your
national WEEE recycling agency.
Germany / Deutschland Rücknahme Elektroschrott und Batterie-Entsorgung
Die EU WEEE Direktive wurde im ElektroG in deutsches Recht umgesetzt. Das Entsorgen
von Elektro- und Elektronikgeräten über die Hausmülltonne ist verboten! Diese Geräte
müssen den Sammel- und Rückgabesystemen zugeführt werden! Dort werden sie kostenlos
entgegen genommen. Die Kosten für den weiteren Recyclingprozess übernehmen die
Gerätehersteller. LINDY bietet deutschen Endverbrauchern ein kostenloses
Rücknahmesystem an, beachten Sie bitte, dass Batterien und Akkus vor der Rückgabe an
das Rücknahmesystem entnommen werden müssen und über die Sammel- und
Rückgabesysteme für Batterien separat entsorgt werden müssen. Ausführliche
Informationen finden Sie stets aktuell auf der LINDY Webseite.
France
En 2006, l'union Européenne a introduit la nouvelle réglementation (DEEE) pour le
recyclage de tout équipement électrique et électronique.
Chaque Etat membre de l’ Union Européenne a mis en application la nouvelle réglementation
DEEE de manières légèrement différentes. Veuillez suivre le décret d’application
correspondant à l’élimination des déchets électriques ou électroniques de votre pays.
Italy
Nel 2006 l’unione europea ha introdotto regolamentazioni (WEEE) per la raccolta e il riciclo
di apparecchi elettrici ed elettronici. Non è più consentito semplicemente gettare queste
apparecchiature, devono essere riciclate. Ogni stato membro dell’ EU ha tramutato le
direttive WEEE in leggi statali in varie misure. Fare riferimento alle leggi del proprio Stato
quando si dispone di un apparecchio elettrico o elettronico.
Per ulteriori dettagli fare riferimento alla direttiva WEEE sul riciclaggio del proprio Stato.
LINDY Herstellergarantie –Hinweis für Kunden in Deutschland
LINDY gewährt für dieses Produkt über die gesetzliche Regelung in Deutschland hinaus
eine zweijährige Herstellergarantie ab Kaufdatum. Die detaillierten Bedingungen dieser
Garantie finden Sie auf der LINDY Website aufgelistet bei den AGBs.
© LINDY Group - SECOND EDITION (January 2021)
Manuel Utilisateur Français
Manuale Italiano
Introduction
Nous sommes heureux que votre choix se soit porté sur un
produit Lindy et vous remercions de votre confiance. Vous
pouvez compter à tout moment sur la qualité de nos produits
et de notre service. Ce boitier USB 3.0 SATA 2.5“est soumis
à une durée de garantie Lindy de 2 années et d’une
assistance technique gratuite à vie. Merci de lire attentivement
ces instructions et de les conserver pour future référence.
Contenu de l'emballage
•Boitier USB 3.0 SATA 2.5"
•Câble USB 3.0 A mâle vers micro-B, 0.30m
•Manuel LINDY
Caractéristiques
•Boîtier 2.5” pour disque dur/SSD SATA de jusqu’à
9.5mm de haut et 2To de capacité
•Norme USB 3.2 / 3.1 Gen 1 / USB 3.0 (max. 5Gbit/s),
compatible USB 2.0 / 1.1
•Prise en charge SATA 6 / 3 / 1.5Gbit/s
•Montage sans vis
•Chipset: JMS567
•Prise en charge UASP
•Alimenté par le bus USB
•Indicateur LED
Installation & Utilisation
Ouvrez le boîtier en glissant le couvercle et placez le HDD
dans son emplacement en vous assurant que le connecteur
SATA se connecte bien. Refermez le boîtier en replaçant le
couvercle dans sa position initiale.
L’installation de pilote n’est pas nécessaire. Les systèmes
d’exploitation actuels possèdent les pilotes requis.
L’indicateur LED s’allume en bleu lorsque le disque dur est
connecté et alimenté. La LED clignote lorsque des données
sont transférées.
Ne pas déconnecter le boîtier tant que la LED clignote !
Merci de noter : vous devez déconnecter le boîtier du système
d'exploitation à l'aide de la fonction "Retirer le matériel en toute
sécurité".
Introduzione
Vi ringraziamo per aver acquistato il box USB 3.0 SATA da
2.5”. Questo prodotto è stato progettato per garantirvi la
massima affidabilità e semplicità di utilizzo ed è coperto da
da 2 anni di garanzia Lindy oltre che da un servizio di
supporto tecnico a vita. Per assicurarvi di farne un uso
corretto vi invitiamo a leggere attentamente questo manuale
e a conservarlo per future consultazioni.
Contenuto della confezione
•Box USB 3.0 SATA da 2.5"
•Cavo USB 3.0 A Maschio a Micro B da 0,30m
•Manuale
Caratteristiche
•Alloggiamento per Hard Disk/SSD da 2.5” SATA alti
fino a 9.5mm e della capacità massima di 2TB
•Standard USB 3.2 / 3.1 Gen 1 / USB 3.0 (max. 5Gbps),
USB 2.0 / 1.1 compatibile
•Supporto SATA 6 / 3 / 1.5Gbps
•Design a incastro, senza viti
•Chipset: JMS567
•Supporto UASP
•USB bus-powered
•LED di stato
Installazione & Utilizzo
Fate scorrere l’alloggiamento e inserite l’HDD in modo che il
connettore SATA si inserisca nel backplane. Richiudete
l’alloggiamento reinserendolo nella posizione originale.
Non occorre installare alcun driver, utilizza driver inclusi nei
moderni sistemi operativi.
Il LED si illumina di blu quando il drive è connesso ed
alimentato, lampeggia durante il trasferimento dati.
Non scollegate il box se il led sta lampeggiando!
Nota bene: le unità devono essere espulse in modo sicuro
dal PC anziché essere semplicemente scollegate.
Tested to comply with FCC
standards.
For home and office use.

Other Lindy Enclosure manuals

Lindy 20775 How to use

Lindy

Lindy 20775 How to use

Lindy 43097 User manual

Lindy

Lindy 43097 User manual

Lindy 42672 User manual

Lindy

Lindy 42672 User manual

Lindy 20694 User manual

Lindy

Lindy 20694 User manual

Lindy 43095 User manual

Lindy

Lindy 43095 User manual

Lindy 43184 User manual

Lindy

Lindy 43184 User manual

Lindy 42714 User manual

Lindy

Lindy 42714 User manual

Lindy 43103 User manual

Lindy

Lindy 43103 User manual

Lindy 43095 User manual

Lindy

Lindy 43095 User manual

Lindy 43332 User manual

Lindy

Lindy 43332 User manual

Lindy 43125 User manual

Lindy

Lindy 43125 User manual

Lindy 20939 User manual

Lindy

Lindy 20939 User manual

Lindy 43138 User manual

Lindy

Lindy 43138 User manual

Lindy 43115 User manual

Lindy

Lindy 43115 User manual

Lindy 42901 User manual

Lindy

Lindy 42901 User manual

Lindy 42910 User manual

Lindy

Lindy 42910 User manual

Lindy 42671 User manual

Lindy

Lindy 42671 User manual

Lindy 43186 User manual

Lindy

Lindy 43186 User manual

Lindy 43285 User manual

Lindy

Lindy 43285 User manual

Lindy 42840 User manual

Lindy

Lindy 42840 User manual

Lindy 42706 User manual

Lindy

Lindy 42706 User manual

Lindy 42831 User manual

Lindy

Lindy 42831 User manual

Lindy Network Device 42807v0 User manual

Lindy

Lindy Network Device 42807v0 User manual

Lindy Mini NAS Enclosure SATA & IDE 42808 User manual

Lindy

Lindy Mini NAS Enclosure SATA & IDE 42808 User manual

Popular Enclosure manuals by other brands

Pulsar AWO 359 Assembly instructions

Pulsar

Pulsar AWO 359 Assembly instructions

SFF time P-ATX manual

SFF time

SFF time P-ATX manual

Antec Plus800 Series user manual

Antec

Antec Plus800 Series user manual

Maico ER-SE UP Additional instructions

Maico

Maico ER-SE UP Additional instructions

Altronix Trove1V1R installation guide

Altronix

Altronix Trove1V1R installation guide

Extron electronics PowerCage 1600 user guide

Extron electronics

Extron electronics PowerCage 1600 user guide

Akasa Pi-4Pro installation manual

Akasa

Akasa Pi-4Pro installation manual

Bartec GWR Series Instructions for use

Bartec

Bartec GWR Series Instructions for use

welland SunBright ME-340J Quick install guide

welland

welland SunBright ME-340J Quick install guide

Graco 24C222 Instructions-parts list

Graco

Graco 24C222 Instructions-parts list

Altelix NF14VFA1C-STK1 installation guide

Altelix

Altelix NF14VFA1C-STK1 installation guide

Rorke Data Galaxy A16F-R2422 Installation and hardware guide

Rorke Data

Rorke Data Galaxy A16F-R2422 Installation and hardware guide

StorCase Technology Data Express DE300i-SWC user guide

StorCase Technology

StorCase Technology Data Express DE300i-SWC user guide

Icy Box IB-1824ML-C31 manual

Icy Box

Icy Box IB-1824ML-C31 manual

Rinnai INFINITY R1385 installation guide

Rinnai

Rinnai INFINITY R1385 installation guide

ASTEK D60-6A user manual

ASTEK

ASTEK D60-6A user manual

Tripp Lite SmartRack SRWF5U owner's manual

Tripp Lite

Tripp Lite SmartRack SRWF5U owner's manual

StarTech.com SAT3520U3R instruction manual

StarTech.com

StarTech.com SAT3520U3R instruction manual

manuals.online logo
manuals.online logoBrands
  • About & Mission
  • Contact us
  • Privacy Policy
  • Terms and Conditions

Copyright 2025 Manuals.Online. All Rights Reserved.