LinkPoint 3000 User manual

LFRST23
V 1.0
LINKPOINT 3000
REFERENCE MANUAL
RESTAURANT VERSION
APPLICATION ID LFRST23

LINKPOINT 3000 Reference Manual—Restaurant Version/LFRST23
FDRMS-Omaha
Manual Version Number 1.1
Published May 1999
LinkPoint International, Inc.
5310 Derry Avenue Suites V&W
Agoura Hills, CA 91301
www.linkpt.com
Printed in the United States of America.
© Copyright 1999 LinkPoint International, Inc. All rights reserved.
Under the copyright laws, no part of this publication may be copied, distributed, stored in a retrieval
system, translated into any language, transmitted in any form or by any means, without the prior written
agreement of LinkPoint International, Inc. LinkPoint International reserves the right to make changes to this
document and the products it describes without prior notice. LinkPoint International shall not be liable for
inadvertent technical errors or omissions made herein, nor for incidental or consequential damages
resulting from the performance or use of this product.
LinkPoint 3000, PrintPoint 1000, PrintPoint 3000, and LoadPoint are service marks (SM) of LinkPoint
International, Inc. Printer 250, Printer 900, PrintPak 350, PINpads 101, 1000, 201, 2000, and Zontalk 2000 are
trademarks of VeriFone, Inc. VeriFone is a registered trademark of VeriFone, Inc. Citizen iDP Printers 562
and 3530 are trademarks of CBM, Inc.
Note: This equipment has been tested and found to comply with the limits for a Class A digital device, pursuant to part
15 of the FCC Rules. These limits are designed to provide a reasonable protection against harmful interference when the
equipment is operated in a commercial environment. This equipment generates, uses, and can radiate radio frequency
energy and, if not installed and used in accordance with the instruction manual, may cause harmful interference to radio
communications. Operation of this equipment in a residential area is likely to cause harmful interference in which case
the user will be required to correct the interference at his own expense.
Caution: Danger of explosion if lithium battery is incorrectly replaced. Replace battery only with the same of equivalent
type recommended by the manufacturer. Dispose of used batteries according to the manufacturer's instructions.

TABLE OF CONTENTS
1999 LinkPoint International, Inc. i LFRST23 Reference Manual
INTRODUCTION....................................................................................................................................... 1
Printers...................................................................................................................................................1
PINpad Devices.....................................................................................................................................1
GETTING STARTED.................................................................................................................................2
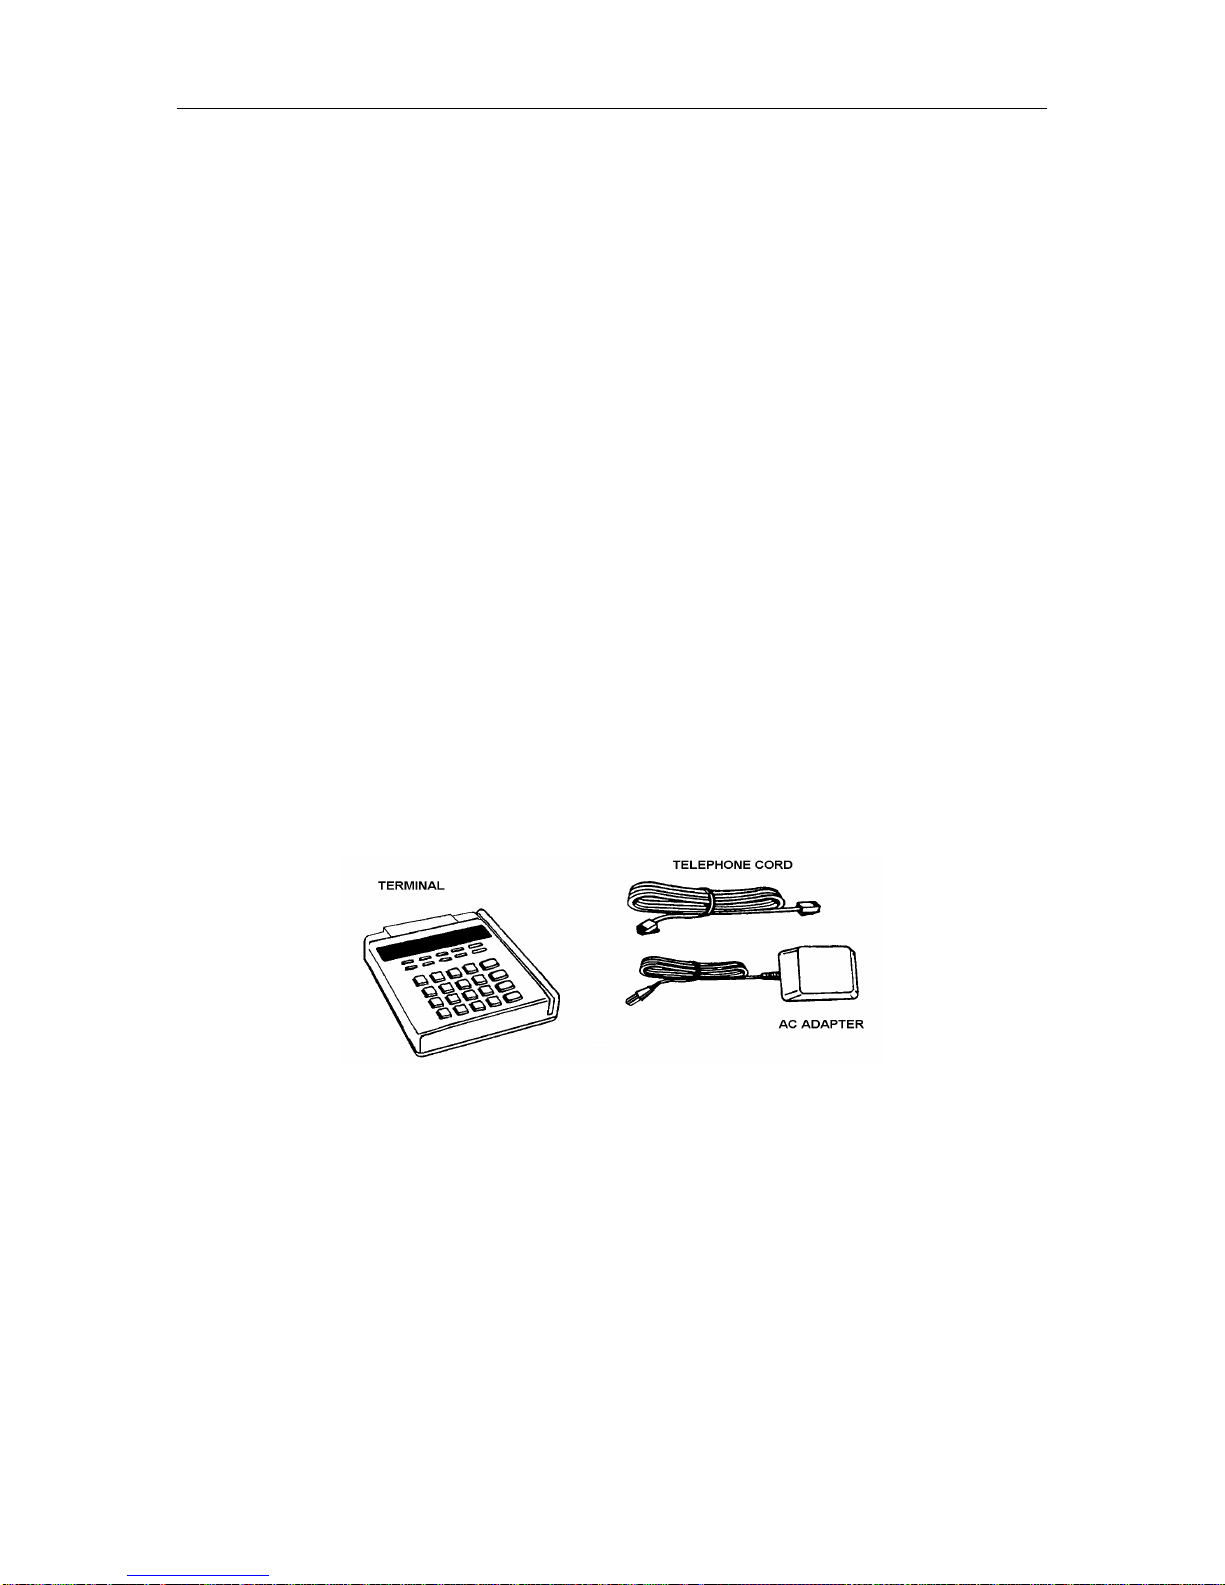
Unpacking..............................................................................................................................................2
Installation.............................................................................................................................................3
Maintenance ..........................................................................................................................................4
Returning the Terminal for Service....................................................................................................4
TERMINAL FEATURES............................................................................................................................5
Software Features..................................................................................................................................5
Hardware Features...............................................................................................................................7
LinkPoint 3000 Specifications............................................................................................................11
BOOT MODE FUNCTIONS................................................................................................................... 12
Boot Mode Passwords........................................................................................................................12
Cold Boot..............................................................................................................................................12
Date and Time Setup..........................................................................................................................13
Printer Port Setup ...............................................................................................................................14
RS232 Port Setup.................................................................................................................................15
PINpad Port Setup..............................................................................................................................16
Model Number....................................................................................................................................17
Clear Memory......................................................................................................................................18
TERMINAL DIAGNOSTICS .................................................................................................................19
Display Test —Press [1] ..................................................................................................................... 19
Keyboard Test — Press [2].................................................................................................................20
Clock Test — Press [3]........................................................................................................................20
Dialer Test — Press [4].......................................................................................................................20
Line Voltage Test — Press [5]............................................................................................................21
Modem Originate Test — Press [6]...................................................................................................21
Modem Answer Test — Press [7].....................................................................................................22
Cardreader Test — Press [8].............................................................................................................23
Serial Port Test — Press [9]................................................................................................................24
Memory Analysis — Press [0]........................................................................................................... 24
DOWNLOAD PROCEDURES ...............................................................................................................26
Telephone Download (No application loaded) ..............................................................................26
Telephone Download (Shortcut with Application already loaded).............................................27
Direct PC-to-POS Download.............................................................................................................28
Direct PC-to-POS Download (Shortcut)...........................................................................................30
POS-to-POS (Master/Slave) Download...........................................................................................31
DOWNLOAD PARAMETERS............................................................................................................... 33
Field Type Codes................................................................................................................................33
Memory Locations..............................................................................................................................33
Password Protect Settings.................................................................................................................36
Telecheck Check Service Information..............................................................................................37
Telecheck Check Service Prompt Options.......................................................................................37
Equifax Check Service Information..................................................................................................38
BASIC OPERATION................................................................................................................................ 40
Transaction Keys.................................................................................................................................40
Using the Cardreader......................................................................................................................... 40
Backspace Key.....................................................................................................................................40

TABLE OF CONTENTS
1999 LinkPoint International, Inc. ii LFRST23 Reference Manual
The Calculator.....................................................................................................................................41
LOCAL FUNCTIONS...............................................................................................................................42
Printer Enable/Disable ......................................................................................................................42
Dial Prefix (PABX)..............................................................................................................................42
Dial Suffix ............................................................................................................................................43
Demo Mode Enable/Disable.............................................................................................................43
Technical Specification Printout .......................................................................................................44
Batch Number Setting........................................................................................................................44
View Merchant ID, Device ID, Primary Phone/Change Phone Numbers and Device ID .......45
Clear Batch...........................................................................................................................................46
View Last Response From Host........................................................................................................47
STANDARD KEY OPERATIONS.........................................................................................................48
DINE IN / BAR TAB & TAKE OUT................................................................................................49
ADDING TIPS (REQUIRED TO CLOSE BATCH).........................................................................55
CLOSING BAR TAB (REQUIRED TO CLOSE BATCH)...............................................................58
ADJUST AMOUNT (FOR NEW TOTAL) .......................................................................................60
ATM / DEBIT CARD SALE..............................................................................................................62
RETURN...............................................................................................................................................65
ATM / DEBIT CARD RETURN........................................................................................................ 68
AUTHORIZATION ONLY................................................................................................................71
TICKET ONLY (OFFLINE)................................................................................................................74
VOID.....................................................................................................................................................78
REVIEW ...............................................................................................................................................80
REPRINT..............................................................................................................................................93
CLOSE BATCH...................................................................................................................................95
APPENDIX A—PROMPTS.....................................................................................................................97
APPENDIX B—TROUBLESHOOTING GUIDELINES................................................................... 102
GLOSSARY..............................................................................................................................................103
INDEX.......................................................................................................................................................106

INTRODUCTION
1999 LinkPoint International, Inc. 1 LFRST23 Reference Manual
INTRODUCTION
Congratulations on your choice of the LinkPoint 3000 point-of-sale (POS) terminal. The LinkPoint
3000 is ideal for processing restaurant transactions. Scientifically engineered to exceed the quality
found in current terminal technology, the LinkPoint 3000 combines user-friendly operation with
soft programmable functions. The screen-addressable keys and an innovative, backlit display
make terminal operation quick and easy. With expanded serial ports, the LinkPoint 3000 is
compatible with all major printers. The terminal also contains additional serial ports for PINpads,
check readers, and other peripherals.
Figure 1
This manual includes step-by-step guides through specific transactions and operations, and
shows how to keep the terminal in peak operating condition. Words that appear in capital letters
and brackets, [LIKE THIS], stand for keys on the terminal keypad. Words that appear in capital
letters without brackets, LIKE THIS, stand for display messages.
Printers
The LinkPoint 3000 terminal supports all major terminal printers. The terminal is compatible
with: LinkPoint’s PrintPoint 1000, PrintPoint 3000, VeriFone’s P250, PrintPak 350, P900 and
Citizen’s iDP3530 and iDP562 printers. Printers attach easily to the LinkPoint 3000 terminal with
a connecting cable. If a merchant does not use an electronic printer, a manual imprinter is
normally provided to produce transaction records for both the merchant and the customer.
PINpad Devices
The LFRST23 Restaurant application programmed in the LinkPoint 3000 terminal supports VFI
PINpads 101, 1000, 201, 2000 for Debit transactions. The PINpads attach easily to the PINpad
connector on the back of the terminal (please refer to the PINpad manual for installation and
operating instructions). The Master/Session encryption method is supported.

GETTING STARTED
1999 LinkPoint International, Inc. 2 LFRST23 Reference Manual
GETTING STARTED
Unpacking
Carefully inspect the shipping carton and its contents for any damage that may have occurred
during shipping. If the terminal is damaged, file a claim immediately with the shipping company
or carrier and notify LinkPoint International.
Do not try to use a damaged terminal!
To unpack the LinkPoint 3000:
1. With the shipping carton right side up, open the carton’s lid.
2. Lift the terminal, its AC adapter and line cord with modular plugs up and out of the box.
3. Remove the terminal from its protective bubble wrap and place the bubble wrap back in the
shipping carton. Remove the AC adapter from its protective box and return the box to the
shipping carton. Close the shipping carton and save the shipping materials so that the unit
can be repacked for shipping or moving in the future.
4. Place the terminal on a desk or tabletop. When choosing a place for the LinkPoint 3000
terminal, avoid areas with:
♦Direct sunlight or objects that radiate heat
♦Excessive dust
♦Electrical devices that cause excessive voltage variations such as air conditioners, space
heaters, fans, or high-frequency security devices
Shipping Carton Contents
Figure 2

GETTING STARTED
LinkPoint International, Inc.
1999 3 LFRST23 Reference Manual
Installation
Installing the LinkPoint 3000 terminal is simple and requires no tools.
1. Connect the AC adapter’s triangular end to the power input at the rear of the LinkPoint 3000
terminal (Figure 3).
Figure 3
2. Plug the adapter into a 120V electrical outlet (Figure 4) or into a quality surge suppressor.
Figure 4
3. Insert one end of the telephone line cord into one of the modular jacks at the rear of the
terminal. Insert the other end of the line cord into a modular telephone wall jack, just as one
would connect a telephone (See Figure 5). The modular plug may be inserted directly into the
wall jack, or use a 4-prong adapter (not included) for older 4-prong jacks.
Note: A standard telephone may be connected to the other modular jack at the rear of the
terminal.
Figure 5
4. If the PrintPoint 1000, PrintPoint 3000, VeriFone P250, P900, PrintPak350, Citizen iDP3530
iDP562 or other compatible printer is used with the LinkPoint 3000 terminal, please refer to
the manual packaged with the printer for installation and operating instructions.

GETTING STARTED
1999 LinkPoint International, Inc. 4 LFRST23 Reference Manual
5. When the terminal is plugged in, it will display the message APP. NOT AVAILABLE (unless
an application is pre-downloaded).
Maintenance
The LinkPoint 3000 system does not need preventive maintenance. However, LinkPoint
International does recommend periodic cleaning of the keypad, using a soft brush to remove any
dust. Because the terminal can be damaged by liquids, do not spray liquid cleaners directly on the
terminal. Always apply the cleaner to the cloth before cleaning the terminal. To avoid costly
downtime, LinkPoint International also recommends protecting the terminal with a surge
protector.
Returning the Terminal for Service
LinkPoint International has both warranty and non-warranty LinkPoint 3000 services. Refer to
your sales agreement for specific details on coverage. To repair or replace the LinkPoint 3000
terminal, contact LinkPoint International.

TERMINAL FEATURES
LinkPoint International, Inc.
1999 5 LFRST23 Reference Manual
TERMINAL FEATURES
Software Features
The LinkPoint 3000 LFRST23 Restaurant application includes:
♦A Sale key used for Dine-In, Bar Tab and Take-Out transactions (Bar Tab feature will be
available with the LFRST23 application).
♦A special adjust key ([+] key) to add tips and close out Bar Tabs.
♦An option to add tips by Server ID or by item number.
♦An item review feature for viewing all transaction details, including each transaction’s actual
date and time.
♦The ability to view the terminal’s totals by card type, or individual transaction details by item
number.
♦The numbering of all captured transactions for easy review.
♦A READY message on line 1 of the display that tracks the number of transactions available in
the current batch.
♦Six custom header lines for receipts and reports, as well as three flexible customer agreement
lines and two trailer message lines.
♦Easy-to-read descriptions of the transaction details, displayed through item review, detail, or
summary reports.
♦A missing tip report and the ability to correct a tip amount before closing the batch.
♦An Open Bar Tab report.
♦A pre-print function to begin printing after the user slides the card or manually enters the
card number information.
♦Server Identification (up to four digits).
♦Individual Server and Server totals reports.
♦Option to adjust tip using Server ID or Item #.

TERMINAL FEATURES
1999 LinkPoint International, Inc. 6 LFRST23 Reference Manual
♦The capability of reading both track 1 and track 2 card data to allow printing of the
cardholder’s name under the signature line on credit card receipts. This feature also enables
the terminal to accept ATM/Debit cards.
♦CASH BACK and tiered TRANSACTION FEE options available with ATM/Debit processing.
♦The ability to add tip via the PINpad for ATM/Debit sales.
♦Special instructional reminders on the display and on the receipts.
♦Compatibility with the new PrintPoint 1000 printer, VeriFone’s P250, P900, PrintPak350, and
Citizen’s iDP3530, and iDP562.
♦A summary report that prints separate bank card, credit card, ATM/Debit, and check
processing transactions.
♦A special optional report to separate Dine-In, Bar Tab and Take Out sales.
♦Fraud control features (i.e.,entry of the last four digits).
♦Calculator functions.
♦Can now choose whether or not to obtain new authorization when closing Bar Tab.
♦Ability to add incidentals like dessert or coffee to the original ticket transaction amount
(requires password for access).
♦Improved Summary Report for credit and debit transactions.
♦Enhanced Item Detail Report to include all Debit Card transaction details (food/beverage,
tip, cashback, surcharge and total).
♦PINpad 101/1000 and 201/2000 capability.
♦Option added to permit tip entry on PINpad or on terminal keypad for Debit Card sales.
♦Available terminal functions include: dial prefix and suffix entry, ability to both view and
change the merchant number, phone number and device ID.
♦On non-approvals, the message from the host and the remainder of the receipt will print
above the tear off edge.
♦Telecheck and Equifax check warranty services.

TERMINAL FEATURES
LinkPoint International, Inc.
1999 7 LFRST23 Reference Manual
♦Preprint modified to eliminate printing of cardholder’s account number until transaction is
approved.
♦Ability to retrieve the most recent message from the host.
♦Double entry requirement to confirm amounts entered for $1,000.00 or greater.
♦The ability to process up to 500 transactions in one batch.
♦Special Dial String Codes to enable the terminal to dial out under special circumstances such
as many terminals on one phone line or multiple phone line systems.
Hardware Features
The most important hardware components of the LinkPoint 3000 terminal are the display panel,
the cardreader and the keypad. Their features are detailed below in the description of each
component.
The Display Panel
Each LinkPoint 3000 terminal has a built-in display panel capable of displaying up to 20 letters or
numbers (See Figure 8). The backlit characters and plastic screen enhance readability while
reducing glare. The 20-character, two-line display easily accommodates most display messages.
The LinkPoint 3000 terminal also supports a scrolling feature that allows users to read messages
longer than 20 characters.
Figure 8
The Cardreader
The LinkPoint 3000 terminal comes with a Dual Track magnetic cardreader, so the terminal can
read both track 1 and track 2. The cardreader reads the cardholder’s account number, expiration
date, name (track 1 only) and security data from the magnetic stripe on the back of all major
credit cards and bank cards.

TERMINAL FEATURES
1999 LinkPoint International, Inc. 8 LFRST23 Reference Manual
Figure 9
Note: When sliding the card (bidirectional), face the magnetic stripe down and away from the
keypad.

TERMINAL FEATURES
LinkPoint International, Inc.
1999 9 LFRST23 Reference Manual
The Keypad and Key Functions
Transactions are performed via the terminal’s keypad (See Figure 10). The keypad allows users to
select transaction types and enter information. The three green arrow keys are an updated
feature on the LinkPoint 3000. This change assists both the merchant and the Help Desk when
processing transactions, printing reports, and troubleshooting.
LinkPoint 3000 Terminal Keypad
Figure 10
As Figure 10 illustrates, the LinkPoint 3000 terminal keypad has 30 keys that can be used to select
numbers or letters, choose functions, or enter data. During transactions, the number keys and the
“soft” [▲] keys are used to respond to prompts or to enter alphanumeric data.
Entering Alphanumeric Data from the Keypad
The LinkPoint 3000 keypad has 30 keys that can be used to enter as many as 47 different
alphanumeric characters (please see chart on next page). To enter numbers and special characters
(i.e., +) simply press the appropriate key. Alpha characters can be entered in one of two modes:
single or locked. The “single” mode is selected by pressing the [ALPHA] key once followed by
the corresponding character key. For example, to enter the letter “A” press [ALPHA] [A]. The
“locked” mode is selected by pressing the [ALPHA] key twice followed by the corresponding
character keys. For example, to enter the word “LINKPOINT” press [ALPHA] [ALPHA] [L] [I]
[N] [K] [P] [O] [I] [N] [T]. To release the “locked” upper case mode, press the [ALPHA] key once.

TERMINAL FEATURES
1999 LinkPoint International, Inc. 10 LFRST23 Reference Manual
LINKPOINT 3000 ALPHA/SYMBOL ASSIGNMENTS
Key Assignment ALPHA MODE
[ALPHA] is
depressed once or
twice prior to
pressing the
corresponding key
Symbol displayed when
pressing the
corresponding key
directly
(NO ALPHA KEY)
Void A . (period)
Left ▲B - (hyphen)
Center ▲CSpace
Right ▲D+
Return E , (comma)
Sale F ‘ (apostrophe)
ATM/Debit G “ (quote)
Check H : (colon)
Review I ; (semi-colon)
Close J @ (“at”)
1K 1
2L 2
3M 3
÷N(
4O 4
5P 5
6Q 6
✕R)
7S 7
8T 8
9U 9
−V!
*W*(asterisk)
0X 0
#Y#(pound)
+Z&(ampersand)

TERMINAL FEATURES
LinkPoint International, Inc.
1999 11 LFRST23 Reference Manual
LinkPoint 3000 Specifications
Microprocessor Z180 CPU operating at 12.288 MHz
Memory 128k EPROM and 256k battery-backed RAM (standard);
up to 1 megabyte (optional)
Display Two-line
20 character
LCD back-lit display
Keypad 30 key alphanumeric keypad
Audio feedback tone (short tone for legal key entry, longer
tone for illegal key entry)
Cardreader Track 1 and track 2, bidirectional magnetic stripe cardreader
Communications Internal modem with modular jack
Standard Bell 103/212A series, V.21 and V.22 high-speed dial-
up modem, 300 and 1200 baud
Peripheral Ports 3x RS232 serial ports for PINpad, roll printers, slip printers,
bar code wands, etc.
Power Connector Three-pin male-DIN power connector
Telco Connector Six-position modular jack
Operating Environment 32º to 104º F, 0º to 40º C
Humidity: 5% to 90% relative humidity; no condensation
Power Requirements Voltage: 120 volts AC, 60 HZ
Power: 10W
Dimensions Height: 1.98 in (50.4 mm)
Width: 5.60 in (143.1 mm)
Depth: 6.50 in (165.4 mm)
Weight Shipping Weight: 2.74 lb. (1.24 kg)

BOOT MODE FUNCTIONS
1999 LinkPoint International, Inc. 12 LFRST23 Reference Manual
BOOT MODE FUNCTIONS
The LinkPoint 3000 boot mode allows access to certain Operating System, Hardware, and
Diagnostic functions, including: date and time setup, terminal diagnostics, clear memory
(application and data), port setup, and application download. Application download procedures
are covered in detail beginning on page 26. This section explains how to:
1. Set the correct date and time
2. Use terminal diagnostics
3. Setup ports
4. Erase the RAM
!If the LP2000 displays APP. NOT AVAILABLE on line 1 of the display and TIME LOAD
SETUP on line 2, it is already in boot mode. When in boot mode with an application
already loaded, line 1 displays CLEAR TO RESUME, while the display on line 2 is also
TIME LOAD SETUP.
Boot Mode Passwords
•If an application is already downloaded into the LinkPoint 3000 terminal (i.e. display reads
READY XXX), the procedure to gain access to the boot mode is: hold down [ALPHA], press
[7] [1] [3] [9] and release [ALPHA].
•While in the boot mode, if the LP2000 terminal prompts for password entry, key in the
password [4] [6] [5] [1] [0] [7] [0] and press [ENTER].
Cold Boot
The cold boot feature can be used to clear the terminal’s memory (RAM). This feature should
always be used under the guidance of a qualified service representative, and should only be done
to clear a corrupted application or to perform download tests. To access this feature, with the
terminal’s power off, hold down the [CLEAR] key and plug in the power cord:
Display Message Operator Action
Enter password: Key in the default password of [4] [6] [5] [1] [0] [7] [0] or the
password assigned by the bank/ISO or FDMS Help Desk and
[▲] [▲] [▲] press [ENTER].
CLEAR to cold start Press the [CLEAR] key to erase the memory (RAM) or any
Any other to resume other key to reboot the terminal.
[▲] [▲] [▲]
LP-3000,3.X,MMDDYY Press the [*] key to reset the terminal to the
Select Test Number “App Not Available” display.
[▲] [▲] [▲]

BOOT MODE FUNCTIONS
LinkPoint International, Inc.
1999 13 LFRST23 Reference Manual
Date and Time Setup
To set the correct date and time follow the procedures outlined below.
Display Message Operator Action
READY XXX Hold down the [ALPHA] key and press [7] [1] [3] [9]. Release
JAN-02-00 SUN 10:30P the [ALPHA] key to enter the boot mode.
[▲] [▲] [▲]
CLEAR_to_resume Press the left [▲] key to select TIME.
_ Time Load Setup
[▲] [▲] [▲]
01/02/00 10:30:41 Press the left [▲] key to select DATE.
Date Time
[▲] [▲] [▲]
Enter password: Key in the default password of [4] [6] [5] [1] [0] [7] [0] or the
password assigned by the bank/ISO or FDMS Help Desk and
[▲] [▲] [▲] press [ENTER].
Enter_new_date Key in the correct date and press [ENTER].
MM/DD/YY
[▲] [▲] [▲]
01/03/00 10:30:41 Press the right [▲] key to select TIME.
Date Time
[▲] [▲] [▲]
Enter new time Key in the correct time using 24-hour format
HH:MM (3:30p.m.=15:30) and press [ENTER].
[▲] [▲] [▲]
01/03/00 12:00:01 Press [CLEAR] twice to reboot terminal and return to the
Date Time Ready prompt.
[▲] [▲] [▲]

BOOT MODE FUNCTIONS
1999 LinkPoint International, Inc. 14 LFRST23 Reference Manual
Printer Port Setup
To change the printer port factory defaults follow the steps outlined below. The default settings
are compatible for use with most LinkPoint, VeriFone, and Citizen printers. There is usually no
need to change these settings. Standard Default: Baud= 9600, Parity= Even.
Display Message Operator Action
READY XXX Hold down the [ALPHA] key and press [7] [1] [3] [9]. Release
JAN-03-00 MON 12:00P the [ALPHA] key to enter the boot mode.
[▲] [▲] [▲]
CLEAR_to_resume Press the right [▲] key to select SETUP.
_ Time Load Setup
[▲] [▲] [▲]
Setup Press the left [▲] key to select PORTS.
Ports Model Test
[▲] [▲] [▲]
Port_setup Press the left [▲] key to select PRINTER.
Printer RS232 Pinpad
[▲] [▲] [▲]
Printer_setup Press the left [▲] key to select BAUD to change the
Baud Parity baud rate of the printer port.
[▲] [▲] [▲]
Current baud: 9600 Select the correct baud rate. Press the [▲] key below your
1200 2400 9600 choice to select it and press [CLEAR].
[▲] [▲] [▲]
Printer_setup Press the right [▲] key to select PARITY.
Baud Parity
[▲] [▲] [▲]
Current parity: Even Select the correct parity. Press the [▲] key below your
Even None Odd choice to select it and press [CLEAR] five times to reboot the
[▲] [▲] [▲]terminal.

BOOT MODE FUNCTIONS
LinkPoint International, Inc.
1999 15 LFRST23 Reference Manual
RS232 Port Setup
To change the RS232 port factory defaults follow the steps outlined below. The default settings
are designed to be used for direct RS232 and Master-Slave (POS-to-POS) downloads. Standard
Default: Baud= 19200, Parity= None. There is usually no need to change these settings.
Display Message Operator Action
READY XXX Hold down the [ALPHA] key and press [7] [1] [3] [9]. Release
JAN-03-00 _MON _12:00P the [ALPHA] key to enter the boot mode.
[▲] [▲] [▲]
CLEAR_to_resume Press the right [▲] key to select SETUP.
_ Time Load Setup
[▲] [▲] [▲]
Setup Press the left [▲] key to select PORTS.
Ports Model Test
[▲] [▲] [▲]
Port setup Press the middle [▲] key to select RS232.
Printer RS232 Pinpad
[▲] [▲] [▲]
RS232 setup Press the left [▲] key to select BAUD.
Baud Parity
[▲] [▲] [▲]
Current baud: 19200 Select the correct baud rate (default is 19200). Press the [#]
1200 2400 9600 key to see other options. Press the [▲] key below your choice
[▲] [▲] [▲] to select it and press [CLEAR].
RS232 setup Press the right [▲] key to select PARITY.
Baud Parity
[▲] [▲] [▲]
Current parity: None Select the correct parity (default is None). Press the [▲] key
Even None Odd below your choice to select it and press [CLEAR] five times
[▲] [▲] [▲] to reboot the terminal.

BOOT MODE FUNCTIONS
1999 LinkPoint International, Inc. 16 LFRST23 Reference Manual
PINpad Port Setup
To change the PINpad port factory defaults follow the steps outlined below. The standard default
settings are: Baud= 1200, Parity= Even.
Display Message Operator Action
READY XXX Hold down the [ALPHA] key and press [7] [1] [3] [9]. Release
JAN-03-00 MON 12:00P the [ALPHA] key to enter the boot mode.
[▲] [▲] [▲]
CLEAR_to_resume Press the right [▲] key to select SETUP.
_ Time Load Setup
[▲] [▲] [▲]
Setup Press the left [▲] key to select PORTS.
Ports Model Test
[▲] [▲] [▲]
Port setup Press the right [▲] key to select PINPAD.
Printer RS232 Pinpad
[▲] [▲] [▲]
Pinpad_setup Press the left [▲] key to select BAUD.
Baud Parity
[▲] [▲] [▲]
Current baud: 1200 Select the correct baud rate (default is 1200). Press the [▲]
1200 2400 key below your choice to select it and press [CLEAR].
[▲] [▲] [▲]
Pinpad setup Press the right [▲] key to select PARITY.
Baud Parity
[▲] [▲] [▲]
Current parity: Even Select the correct parity (default is Even). Press the [▲] key
Even None Odd below your choice to select it and press [CLEAR] five times
[▲] [▲] [▲] to reboot the terminal.
Other manuals for 3000
5
Table of contents