LION MISTY User manual

Version 1.2
19/04/19
[USER’S MANUAL
|||||||||||||||||||||||||||||||||||||||||||||||||||||||||||||||||||||||||||||||||||||||||||
MISTY
ELECTRONIC
BLINDMASK
ORIGINAL
USER’S MANUAL

Misty Electronic Blindmask
User’s Manual
Version 1.2 | 19/04/19
Page 1
Contents
General description 2
Technical specifications 3
Use 4
Misty Mask and Misty Student Unit 4
Misty Instructor Unit 8
More than two Misty Student Units 11
Inspection and maintenance 12
Precautions and safety instructions 13
Frequently asked questions 14

Misty Electronic Blindmask
User’s Manual
Version 1.2 | 19/04/19
Page 2
General description
Misty is an electronic vision-restricting mask, especially developed for situations in which smoke must be
simulated but in spaces where it is not possible to set up a LION smoke generator. The instructor
operates Misty via a wireless remote with which he can control the “vision” of the students.
An instructor can work with two students at the same time. The system has six different channels
available, so that a maximum of six groups can train in the same space.
The electronic vision-restricting mask has been developed to be worn as a primary face mask, but it can
also be used in combination with other face masks. The adjustable elastic band can be used to adjust
the mask for use with most other face masks commonly used.
To ensure maximum safety, these student units are equipped with a panic button, which allows the
student to immediately restore 100% vision with one push of the button.
The set consists of:
-1 Instructor Unit
-2 Student Units
-2 Masks
-1 Battery Charger
-2 carrying straps for Student Unit
-1 user's manual
-1 storage case

Misty Electronic Blindmask
User’s Manual
Version 1.2 | 19/04/19
Page 3
Technical specifications
Misty Instructor Unit
Casing material: ABS
Battery: 7.2 V / 700 mAh NiMH
Range: approx. 25 metres, depending on buildings
Radiofrequency: 433.92 MHz
Transmitting power: 10 mW
Battery life: approx. 8 hours with fully-charged battery*
Dimensions: 168 x 74 x 35 mm
Weight: 250 grams
Misty Student Unit
Casing material: ABS
Battery: 7.2 V / 1500 mAh NiMH
Range: approx. 25 metres, depending on buildings
Radiofrequency: 433.92 MHz
Transmitting power: 10 mW
Battery life: approx. 10 hours with fully-charged battery*
Dimensions: 150 x 100 x 54 mm
Weight: 430 grams
Misty Mask
Material: Frame: Polyurethane (hard)
Polyurethane (soft)
Visor: Polycarbonate
Transparency: max. 75%
Viewing angle: 120 degrees
Dimensions: approx. 190 x 110 x 70 mm
Cable length: 130 cm
Weight: 180 grams
Misty Battery Charger
Casing material: ABS
Supply voltage: 230 V~ 50 Hz 115 mA
Number of channels: 3
Charge current per channel: max. 240 mA
Charge time Student Unit: max. 4 hours
Charge time Instructor Unit: max. 4 hours
Dimensions: 87 x 60 x 84 mm
Weight: 620 grams
*The battery will reach its full capacity only after being recharged several times. The battery time
will be much shorter on the first few occasions.

Misty Electronic Blindmask
User’s Manual
Version 1.2 | 19/04/19
Page 4
Use
Misty Mask and Misty Student Unit
Figures 3.1 and 3.2 show the control elements and connections for the Misty Student Unit.
Figure 3.1: View from above of Misty Student Unit Figure 3.2: Front and bottom view of Misty Student Unit
The Misty Student Unit comes with:
1) Connector for the Misty Mask
2) On/Off switch
3) Status indicator
4) Panic button
5) Charging indicator
6) Charging connector

Misty Electronic Blindmask
User’s Manual
Version 1.2 | 19/04/19
Page 5
Group settings
The MISTY system works with six different groups, making it possible to carry out training exercises in
the same space with several MISTY units at the same time.
A MISTY Student Unit will respond to a MISTY Instructor Unit only if both units are set to the same
group. Each Misty Student Unit must also be identified as unit A or unit B. Always make sure that one
Misty Student Unit is set as unit A and the other as unit B.
You can change the settings of the Student Unit via a set of micro switches in the battery compartment.
Switch off the unit using the switch on the top, and then open the
battery compartment on the back of the unit. The micro switches
are located to the left of the battery (see figure 3.2). The easiest
way to set the switches is by using a ballpoint pen or a similar
pointed object.
Important! The Misty Student Unit must be SWITCHED OFF
when adjusting group settings!
Figure 3.2: micro switches
Using switches 1, 2 and 3, you can set the unit to the correct
group (1 through 6). Using switch 4, you can identify the Misty
Student Unit as unit A or B (switch to the right selects for unit A;
switch to the left selects for unit B).
Figure 3.3 displays all the possible combinations for selecting the
different groups. The squares marked with an x indicate the
position of the micro switches.
figure 3.3: All possible group settings
Group 1
Group 4
o
×
1
o
×
1
p
×
2
p
×
2
e
×
3
e
×
3
n
B
A
4
n
B
A
4
Group 2
Group 5
o
×
1
o
×
1
p
×
2
p
×
2
e
×
3
e
×
3
n
B
A
4
n
B
A
4
Group 3
Group 6
o
×
1
o
×
1
p
×
2
p
×
2
e
×
3
e
×
3
n
B
A
4
n
B
A
4
Example
To set the Misty Student Unit to group 1 and
unit A, the switches are adjusted as follows:
1: Left
2: Right
3: Right
4: Right

Misty Electronic Blindmask
User’s Manual
Version 1.2 | 19/04/19
Page 6
To adjust the settings, proceed as follows:
-Make sure the unit is switched off using the on/off switch (2)
-Open the battery compartment (figure 3.1)
-Using a ballpoint or other pointed object, move the switches to the appropriate position (figure
3.3).
-Close the battery compartment
-Switch on the Student Unit using the on/off switch (2)
When you switch the unit on, the settings selected are indicated by two series of beeps and the
simultaneous blinking of the indicator. The first series of beeps indicates the group selected (the number
of beeps indicates the number of the group). The second series of beeps indicates whether unit A or B
has been selected (1 beep for unit A and 2 beeps for unit B).
If a Misty Mask is connected to the unit, the indicator will blink slowly after initialisation. If a Misty Mask is
not connected or if the panic button is accidentally activated, then a long beep will be heard and the
indicator will light up continuously after initialisation.
If the settings are incorrectly adjusted, then after it is switched on, the Misty Student Unit will continue to
produce rapid beeps and the indicator will also continue blinking. In that case, switch the unit off and
adjust the settings again for the correct group.
Using the unit
Once you have correctly adjusted the settings, the unit is ready for use.
-Attach the Misty Student Unit around your waist using the belt supplied with the unit.
-Connect the Misty Mask to the Misty Student Unit.
-Switch on the Misty Student Unit using the on/off switch (2)
-Put the mask over your face or over your face mask. If necessary, adjust the elastic band.
Important! If the Misty Student Unit is switched off or if the cable to the Misty Mask is not
connected, then the Misty Mask will completely block your vision. Be sure to always switch on
the Misty Student Unit before putting on the Misty Mask.
An Instructor Unit set to the same group can now be used to control the Misty Student Unit.
Panic button
If a student panics, then the student only needs to push the red button on the front of the Misty Student
Unit to immediately regain vision.
-Push the panic button (4) on the Student Unit.
Vision will also be restored on the second Misty Student Unit. An alarm signal is also sent to the
Instructor Unit with an indication as to which student has activated the alarm. The panic setting can only
be switched off via the Instructor Unit.
Example
The Misty Student Unit beeps four times, followed by an interval of silence and then beeps one
more time. The indicator then blinks slowly and no more beeps are heard.
This means that the unit is set to Group 4, unit A.

Misty Electronic Blindmask
User’s Manual
Version 1.2 | 19/04/19
Page 7
Low battery warning
When the battery is almost empty, the Misty Student Unit will produce short pulsating beeps. The status
indicator (3) on top of the Misty Student Unit will then light up continually. The low battery warning signal
is also sent to the Instructor Unit. Finish the training exercise, and then recharge the unit.
Charging
-Make sure the unit is switched off using the on/off switch (2).
-Connect the power plug of the Misty Battery Charger to the wall outlet.
-Then connect one of the three charge cables on the Battery Charger to the battery charging
connector (6) of the Misty Student Unit.
The Charging indicator (5) will blink quickly, indicating that the charging process has started. The
Charging indicator will light up continuously once the charging process has been completed.
Use in combination with a face mask
As there are many different types of face masks on the market, the Misty Mask may not block the
student's entire field of vision when used in combination with a face mask. LION supplies blocking foil to
deal with such situations. The foil can be attached to the face mask to ensure that the student cannot
see around the Misty Mask.

Misty Electronic Blindmask
User’s Manual
Version 1.2 | 19/04/19
Page 8
Misty Instructor Unit
Figures 3.4 and 3.5 display the controls and
indicators on the Misty Instructor Unit.
The Misty Instructor Unit comes with:
1) Student Unit indicator
2) Battery indicator
3) On/Off indicator
4) On/Off switch
5) Charging indicator
6) Group switch
7) Group indicators
8) Automated indicator
9) Automated switch
10) Unobstructed vision indicator
11) Unobstructed vision switch
12) More vision switch
13) Less vision switch
14) Vision indicators
15) Charging connector
Figure 3.4: Controls and indicators on Misty Instructor Unit
Figure 3.5: Charging connector on Misty Instructor Unit

Misty Electronic Blindmask
User’s Manual
Version 1.2 | 19/04/19
Page 9
Switching on the Misty Instructor Unit
-Push the on/off button (1) for at least 2 seconds in order to switch the unit on.
A beep will be produced and the green on/off indicator will light up in confirmation.
All the indicators will light up briefly one after the other (as a check), after which the Instructor Unit will
automatically switch to the group last used. Immediately after starting up, the vision on the Student Units
will always be unobstructed, and the unobstructed vision indicator (10) will light up in red.
Setting the group
-Push down on the “group” switch (6) until the group indicator for the desired group (7) lights up.
The group indicator (7) indicates which group the Misty Instructor Unit is working with. Student Units set
to a group setting that does not correspond with the setting on a Misty Instructor Unit will automatically
have unobstructed vision. When the Misty Instructor Unit is switched on, the group last worked with is
automatically chosen as the active group.
Return to unobstructed vision
-Push the “unobstructed vision” switch (11) to return to completely unobstructed vision or to again
limit the vision available.
When the “unobstructed vision” option is switched on, the unobstructed vision indicator (10) lights up.
When the “unobstructed vision” option is switched off, the unobstructed vision indicator (10) light will go
out.
In order to be able to adjust the degree of vision available on the Misty Student Units, this option must be
switched off.
Manually adjusting degree of vision
-Push the “more vision” switch (12) in order to provide more vision on the Misty Student Units or
push the “less vision” switch (13) to decrease the vision available on the Misty Student Units.
The degree of vision can be adjusted in nine steps.
The vision indicators indicate the degree of vision obstruction on the Student Units.
If the indicator lights up on the extreme left, vision is completely obstructed. If it lights up on the extreme
right, vision is completely unobstructed.
Automatically adjusting degree of vision (Automated option)
-Push the “automated” switch (9) in order to switch the automated vision obstruction option on or
off.
This option controls the degree of vision obstruction fully automatically. The degree of vision is
continuously increased or decreased in a random fashion without the instructor having to do anything.
When the automated option is switched on, the automated indicator (8) lights up.
When the automated option is switched off, the automated indicator (8) is dimmed.
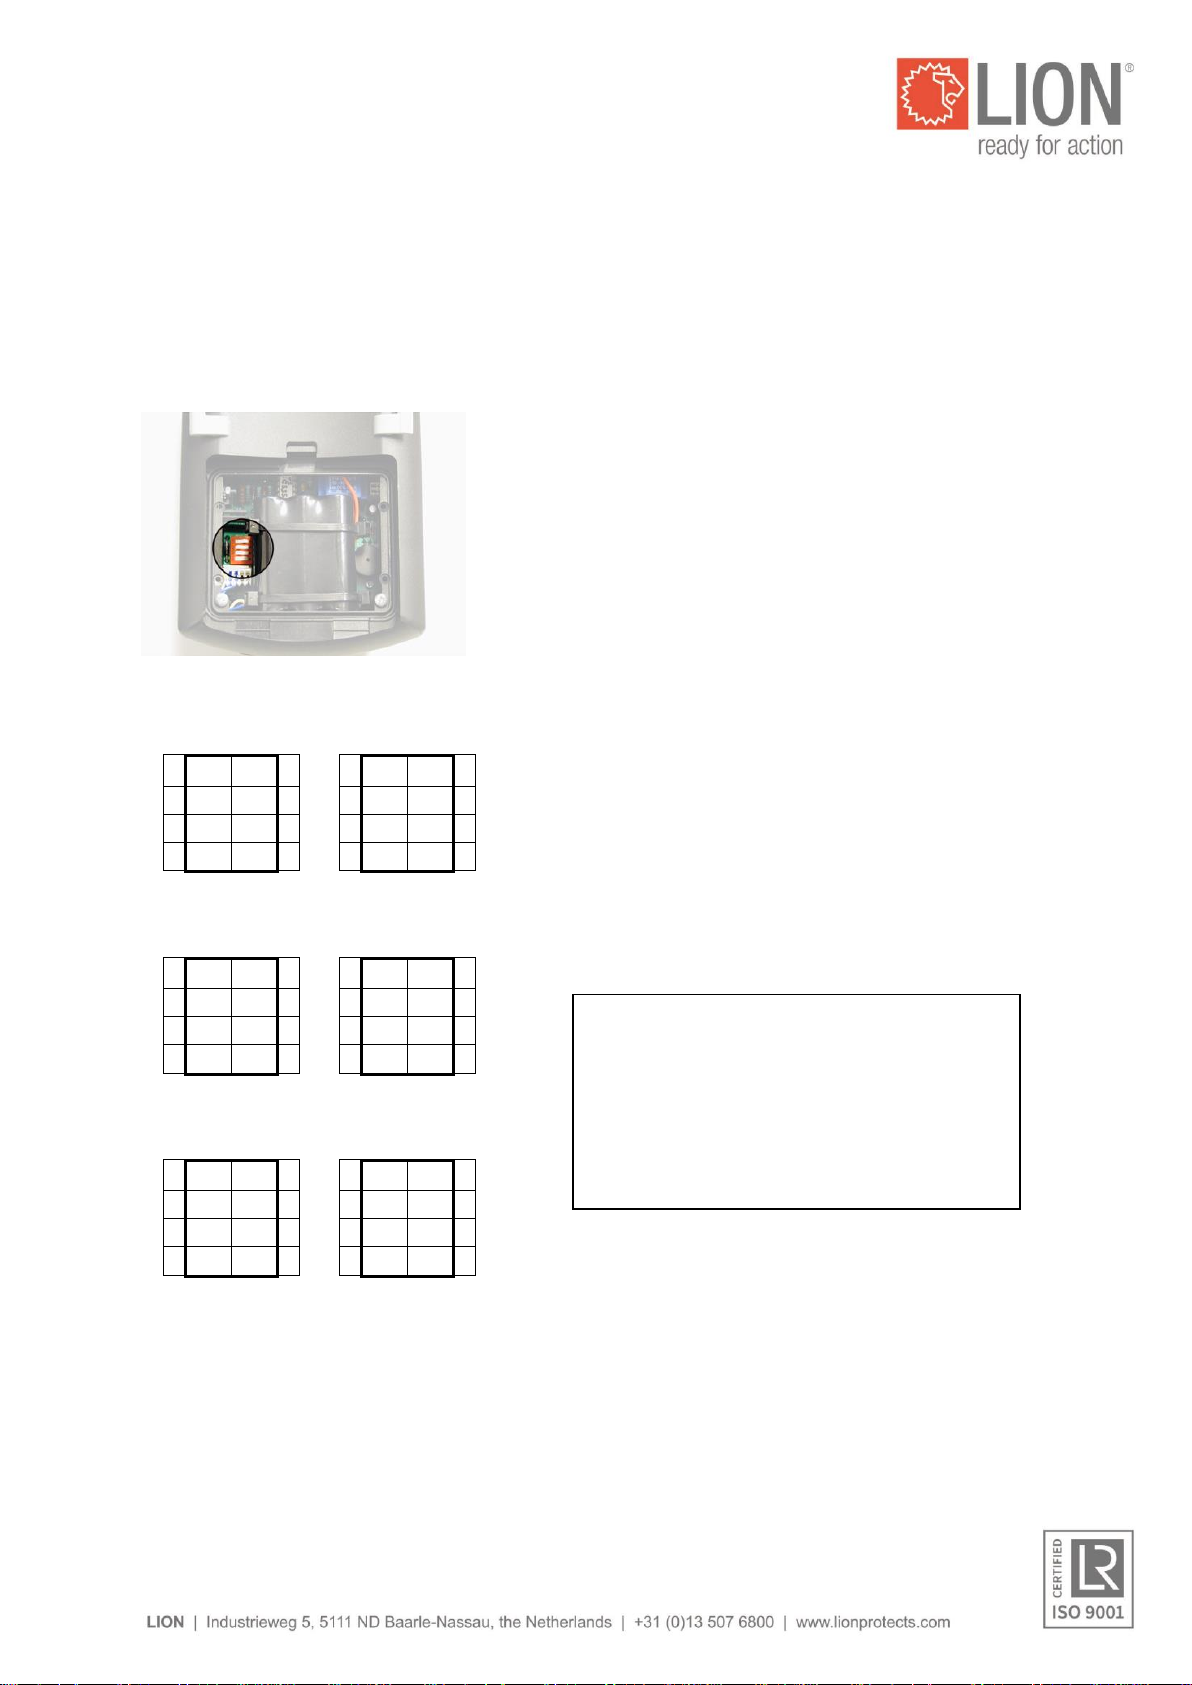
Low battery indicator Misty Instructor Unit
When the battery of the Misty Instructor Unit is almost empty, the low battery indicator (2) lights up, and
two short beeps will be heard every five seconds. Finish your training exercise and recharge the battery.

Misty Electronic Blindmask
User’s Manual
Version 1.2 | 19/04/19
Page 10
Low battery indicator Misty Student Unit
When the battery of one of the Misty Student Units is almost empty, the unit sends a signal to the Misty
Instructor Unit. The Student Unit indicator (1) for the unit concerned then begins to blink. Finish your
training exercise and recharge the battery.
Panic alarm
If the panic button on one of the Misty Student Units is activated, then the Misty Instructor Unit will report
this: the relevant Student Unit indicator (1) will light up and an intermittent beep will be heard.
-On the Misty Instructor Unit, push the “unobstructed vision” switch (11).
The alarm will be switched off, but vision on both Student Units will remain unobstructed.
-Again, push the “unobstructed vision” switch (11).
The system will return to the settings last selected before the alarm was activated.
This alarm is also triggered if one of the cables of the Misty Masks is disconnected. If this happens, the
alarm can be turned off (via the procedure described above) only after the cable has again been
connected to the Misty Student Unit.
Switching off the Misty Instructor Unit
-Push down on the on/off switch (1) for at least 4 seconds to switch the unit off.
The on/off indicator (3) will blink, and after four seconds, a beep will be heard to confirm that the unit is
switched off. All Student Units whose settings are set to the group selected by this Instructor Unit will
return to unobstructed vision.
Charging Misty Instructor Unit
-Make sure the unit is turned off by using the on/off switch (4).
-Connect the power plug on the Misty Battery Charger to the wall outlet.
-Then connect one of the three charge cables on the Battery Charger to the battery charging
connector (15) of the Misty Instructor Unit.
The charging indicator (5) will blink rapidly to indicate that charging has begun. The charging indicator
will light up continually to indicate that the charging process has been completed.

Misty Electronic Blindmask
User’s Manual
Version 1.2 | 19/04/19
Page 11
More than two Misty Student Units
It is possible to train students in the same space and to work with more than one Misty set at the same
time. To do so, each set is adjusted to a different group. It is also possible to work with more than two
Student Units in combination with a single Instructor Unit. The example given below illustrates the
various options available.
Simultaneous training with several Misty sets
The instructor can divide the group in two, work with two Misty sets adjusted to two different groups, and
use two Instructor Units to train the students.
However, in this case, the instructor must operate two Instructor Units at the same time.
Simultaneous training with a single Instructor Unit
The Misty set also provides the option of working with more than two Student Units in combination with a
single Instructor Unit. To do so, simply set all the Student Units to the desired group channel, and divide
them proportionately between the setting Student A and Student B.
The above example would then result in the following configuration:
Instructor Unit: Set to group 1
Student Unit 1: Set to group 1, unit A
Student Unit 2: Set to group 1, unit A
Student Unit 3: Set to group 1, unit B
Student Unit 4: Set to group 1, unit B
All four Student Units will now work on group setting 1 with the same Instructor Unit. However, as more
than one unit is set to the A and/or B setting at the same time, it will be more difficult to determine which
Student Unit is generating an alarm or which Student Unit has a low battery. The Instructor Unit was
initially developed to work with two Student Units and therefore offers only two options, A or B, to identify
the source of an alarm.
Training separately with a single Instructor Unit
It is also possible to divide the 4 students into groups of 2. The first group can start training with the
Instructor Unit set to group 1. Meanwhile, the second group can get ready for the training. After the first
group completes the training exercise, the Instructor Unit only needs to be set to group 2 and the training
exercise for the second group can begin.
The configuration is then as follows:
Instructor Unit: Set to whichever group is training
Student Unit 1: Set to group 1, unit A
Student Unit 2: Set to group 1, unit B
Student Unit 3: Set to group 2, unit A
Student Unit 4: Set to group 2, unit B
Example
A group consists of four students, but there is only one
instructor and there are two Misty sets available.

Misty Electronic Blindmask
User’s Manual
Version 1.2 | 19/04/19
Page 12
Inspection and maintenance
To ensure trouble-free training sessions, we recommended that you regularly carry out the following
checks, preferably before every training session:
•Inspect the system for damage to the casing or cables. Do not use the system if the cables are
damaged or if the casing is damaged to such an extent that one can suspect that the system will
not function properly or that it will pose a safety risk to the student or instructor. In that case,
contact LION Protects B.V., and have the system repaired.
•Check the proper functioning of the system. Switch on both Student Units, and check to make
sure that they work properly together with the Instructor Unit. Check the panic buttons on both
Student Units to make sure they function properly, as this option can be very important!
•If necessary, clean the equipment with a moist cloth (using a mild all-purpose household
cleaning agent if necessary). The casing is not resistant to chemicals such as alcohol, thinner or
acetone.
•NEVER clean the system using a washing machine / drier (for example of the type used for face
masks). This will permanently damage the system, and such damage is not covered by the
product guarantee!
•Make sure that the system is adequately charged when starting a training exercise. An empty
battery can cause unwelcome training interruptions.
•The usable lifetime of the batteries is limited. On average, a NiMH battery will last for several
years. If the length of time that one can work with the unit on a fully charged battery diminishes
noticeably, then we recommend that you replace the batteries. In order to get maximum benefit
from the system, we recommend that you replace all the batteries together at the same time. The
batteries will also last longer if you use the system regularly and regularly recharge the batteries.
If the system is not used for a period of one month or longer, you should completely charge the
set before using it.

Misty Electronic Blindmask
User’s Manual
Version 1.2 | 19/04/19
Page 13
Precautions and safety instructions
•The system is not waterproof. Never use it in the rain or in places where fire-extinguishing
materials are used. Contact with water can permanently damage the system, in which case any
resulting damage will not be covered by the product guarantee.
•Never use the system if the casing or cables are damaged, possibly resulting in increased risk
for the instructor or student. In such cases, contact LION and have the set repaired.
•If no units are being charged, disconnect the battery charger from the mains power.
•After every training session, put the set back in the case it came with to ensure that it is properly
protected and stored.

Misty Electronic Blindmask
User’s Manual
Version 1.2 | 19/04/19
Page 14
Frequently asked questions
This section deals with the most common malfunctions and/or errors and possible solutions. If you have
any doubts, please feel free to contact LION.
Problem
Possible solution
The Student Units do not respond to the
Instructor Unit
Check whether all the units are switched on and
set to the same group setting.
The Student Unit provides a view that is
completely or partially obstructed, even after the
panic button has been activated or the Instructor
Unit has been switched off.
Check to make sure that the Student Unit is
switched on and that the battery is sufficiently
charged. Charge the unit and try again. If the
problem persists, contact LION.
The Instructor Unit no longer responds to the
controls.
This may happen if the Instructor Unit was
previously outside the range of the Student Unit.
Bring the two units within range of each other,
and briefly activate the on/off switch. If this does
not help, switch the unit off completely and
switch it on again.
If you are not able to switch the unit off, connect
it to the battery charger for 30 seconds,
disconnect it, and then switch the Instructor Unit
on again.
Walkie-talkies are also used during the training.
The Instructor Unit reports a panic alarm, but
none of the students has activated the panic
button.
The Misty system works on the same frequency
range as many walkie-talkies (430 –440 MHz,
70cm wavelength band).
If a walkie-talkie is used near the Instructor or
Student Unit, the system may act unpredictably
and false alarms may result.
If a student is using a walkie-talkie that is
causing the malfunction, make sure that the
walkie-talkie is kept as far away as possible from
the Student Unit. If the walkie-talkie and the
Student Unit are both attached to the carrying
belt, make sure that the walkie-talkie is on the
other side of the waist from the Student Unit.
Is the instructor is using a walkie-talkie that is
causing the malfunction, make sure that the
Instructor Unit is kept as far away as possible
from the walkie-talkie when the latter is in use.
A distance of circa 60 cm is generally enough to
resolve the interference. However, this depends
very much on the transmitting power of the
walkie-talkie.

Misty Electronic Blindmask
User’s Manual
Version 1.2 | 19/04/19
Page 15
||||||||||||||||||||||||||||||||||||||||||||||||||||||||||||||||||||||||||||||||||||||||||||||||||||||||||||||||||||||||||||||||||||||||||||||||||||||||||||||||||||||||||||||||||||||||||||||||||||||||||||||||||||||||||||||||||||||||||||||||||||||||||||||||||||||||||||||
Version 1.2
19/04/19
LION Protects B.V.
Industrieweg 5
5111 ND Baarle-Nassau
the Netherlands
T: +31 (0)13 507 6800
F: +31 (0)13 507 6808
E: infoEMEA@lionprotects.com
WWW.LIONPROTECTS.COM
© LION Group, Inc. All rights reserved.
voorbehouden.
This manual suits for next models
1
Table of contents
Other LION Safety Equipment manuals