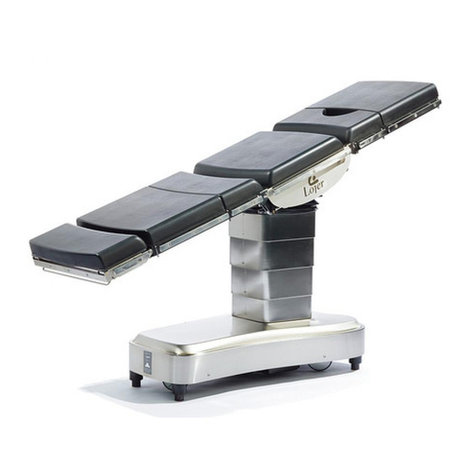
Lojer Afia 4040 User manual

Afia 4040, 4050 and 4140
Examination tables
Operating instructions


Operating instructions 4040, 4050 and 4140 examination tables/Version 1.15
Copyright © Lojer Oy, 2007
Contents
1Lojer Afia 4040, 4140 and 4050 examination tables ..................................................................1
2Parts of the examination tables.......................................................................................................1
2.1 Afia 4040............................................................................................................................................1
2.2 Afia 4050........................................................................................................................................... 2
2.3 Afia 4140............................................................................................................................................ 3
2.4 Hand control....................................................................................................................................4
2.5 Options and accessories for examination tables..................................................................4
2.6 Symbols used on the examination tables...............................................................................5
3Inspection of delivery ....................................................................................................................... 5
4Commissioning .................................................................................................................................. 6
4.1 Mounting of side rails ...................................................................................................................6
5Using the examination table........................................................................................................... 7
5.1 Movements of table top sections.............................................................................................. 7
5.2 Locking the wheels ........................................................................................................................ 8
5.3 Height adjustment .........................................................................................................................8
5.3.1 Height adjustment with hand control.............................................................................8
5.3.2 Height adjustment with foot control............................................................................... 9
5.4 Adjusting the backrest ................................................................................................................ 10
5.5 Adjusting the gynaecological backrest (4050) .................................................................... 10
5.6 Adjusting the seat (4050)............................................................................................................ 11
5.7 Adjusting the heel supports (4140 and 4050) ......................................................................11
5.8 Swiveling in/out and removing the bowl (4140 and 4050) ............................................. 12
5.9 Paper roll holder........................................................................................................................... 12
5.10 Trendelenburg function ............................................................................................................. 13
5.11 Mounting of mounting adapter............................................................................................... 13
5.12 Using the arm support plate..................................................................................................... 14
5.12.1 Mounting of arm support................................................................................................. 14
5.12.2 Removing of arm support plate ..................................................................................... 14
5.12.3 Adjusting of arm support plate....................................................................................... 14
5.13 Raising and lowering the hand rail ......................................................................................... 15

Operating instructions 4040, 4050 and 4140 examination tables/Version 1.15
Copyright © Lojer Oy, 2007
5.14 Attachment of the neck cushion ............................................................................................. 15
5.15 Leg supports (4050 and 4140)) ................................................................................................ 15
5.15.1 Height and width adjustment of the leg supports ................................................... 16
5.15.2 Inclination adjustment of the leg support cushion................................................... 16
5.16 Mounting of infusion pole......................................................................................................... 16
5.17 Mounting of anaesthesia screen ............................................................................................. 18
6Care and maintenance ....................................................................................................................18
6.1 Cleaning and care of Upholstery............................................................................................. 18
6.2 Disinfection..................................................................................................................................... 19
7Service.................................................................................................................................................19
7.1 Half-yearly maintenance ............................................................................................................ 19
7.2 Yearly maintenance ..................................................................................................................... 19
7.3 Adjusting the brakes.................................................................................................................... 19
8Technical data ..................................................................................................................................20
8.1 Applied standards ........................................................................................................................ 21
9Troubleshooting ...............................................................................................................................21
10 Spare parts....................................................................................................................................22
11 Lojer Warranty .............................................................................................................................23
11.1 International warranty conditions ...........................................................................................24
11.2 Proceeding in a warranty case .................................................................................................24
12 Contact information ...................................................................................................................25

Operating instructions 4040, 4050 and 4140 examination tables/Version 1.15
Copyright © Lojer Oy, 2007 1
1Lojer Afia 4040, 4140 and 4050 examination tables
Lojer Afia 4040 examination and treatment table, 4050 gynaecological general
examination table and 4140 general examination table are intended for use in
examinations and treatments by medical staff in hospitals and clinics.
The models 4040 and 4140 have a two-piece table top; the 4050 has a three-piece table
top. The models 4140 and 4050 have a gynaecological seat at the rear end of the table.
Read these instructions carefully before the use of the examination table.
NOTE! Follow the instructions with this label to avoid damage.
2Parts of the examination tables
The numbered parts of the examination tables are listed below the picture of each
model.
2.1 Afia 4040
1
Hand control
2
Paper roll holder
3
Backrest
4
Foot control
5
Central locking pedal

Operating instructions 4040, 4050 and 4140 examination tables/Version 1.15
Copyright © Lojer Oy, 2007 2
Figure 1.
Afia 4040 examination and treatment table
2.2 Afia 4050
1
Hand control
2
Paper roll holder
3
Mounting adapter
4
Infusion pole (accessory)
5
Arm support plate (accessory)
6
Anaesthesia screen (accessory)
7
Backrest
8
Gynaecolocical backrest
9
Adjusting lever for gynaecological backrest
10
Trendelenburg lever (option)
11
Side rail (accessory)
12
Seat
13
Leg support (accessory)
14
Heel support

Operating instructions 4040, 4050 and 4140 examination tables/Version 1.15
Copyright © Lojer Oy, 2007 3
15
Bowl
16
Foot control
17
Central locking pedal
Figure 2.
Afia 4050 gynaecological general examination table
2.3 Afia 4140
1
Hand control
2
Paper roll holder
3
Backrest
4
Heel support
5
Bowl
6
Foot control
7
Central locking pedal
Figure 3.
Afia 4140 general examination table

Operating instructions 4040, 4050 and 4140 examination tables/Version 1.15
Copyright © Lojer Oy, 2007 4
2.4 Hand control
All examination tables have a hand control device for backrest and height adjustment
functions.
1
Backrest up
2
Backrest down
3
Table top up
4
Table top down
Figure 4.
Hand control functions
2.5 Options and accessories for examination tables
Examination tables are available with following options:
Separately lockable wheels
Trendelenburg function
Special upholstery
Following accessories are available for examination tables:
Side rails
Mounting adapter D20 for accessories
Adjustable D20 fastener
Infusion pole
Arm support plate
Handrails
Leg supports
Neck cushion

Operating instructions 4040, 4050 and 4140 examination tables/Version 1.15
Copyright © Lojer Oy, 2007 5
Many accessories for operation tables with standard attachment to side rails (More
detailed information from Lojer sales, see section
12 Contact information
.)
See the picture of Afia 4050 examination table for more detailed information about
locations of the accessories (Section
2.2 Afia 4050
).
2.6 Symbols used on the examination tables
The following designations and symbols are used on all Afia examination tables and
couches. The symbols are located on the control unit under the table top.
Symbol
Description
This product complies with guideline 93/42/EEC
IPX4
Protection against fluids (electric devices)
Device type B
Transformer with overheating protection
Indoor device
Protective insulation
Protective ground
3Inspection of delivery
Before commissioning the device, make sure that the transport package is intact with no
transport damage.
Report eventual transport damage to the carrier and the supplier within two days from
the delivery.
Check that all the parts listed in the packing list are included in the delivery. If
something is missing, contact the supplier immediately.

Operating instructions 4040, 4050 and 4140 examination tables/Version 1.15
Copyright © Lojer Oy, 2007 6
Permitted transport and storage temperature for this device is from -5 °C to +60 °C and
relative humidity of storage space from 30 % to 75 %.
4Commissioning
This product is intended for use in normal, dry indoor conditions. Make sure that room
temperature is from +10 °C to +40°C and relative humidity from 30 % to 75%
Do the following before the commissioning:
Make sure that all packaging material has been removed.
Make sure that the examination table can move freely up and down.
Set the examination table on its operating site and immobilize the wheels.
Connect the power cord to 230 V grounded plug.
NOTE! Make sure that the power cord is hanging loose between the plug and
the examination table. Do not tie up the cord to the examination table, because
the raising movement can cut it off.
NOTE! Do not place anything (for example a chair) under the examination table,
because the table must be able to move freely up and down.
NOTE! Do not place the examination table too close to a wall or under a ledge
on the wall.
NOTE! Do not alter the construction of the examination table or mount other
parts on it than original parts mentioned in these instructions.
4.1 Mounting of side rails
Following accessories require the mounting of a side rail:
Armrest
Infusion pole
Adjustable and mounting adapters.
Many accessories for operation tables.
NOTE! A 5 mm Allen key and a 13 mm spanner are required for mounting.
Maximum three side rails can be mounted on both sides of the examination table .
1. Remove plastic plugs (3 pcs) from the side of the examination table.
2. Insert bushings (3 st) into the holes.

Operating instructions 4040, 4050 and 4140 examination tables/Version 1.15
Copyright © Lojer Oy, 2007 7
3. Set the rail against the table side so that the holes in the rail meet the bushings.
4. Insert a screw through the hole and the bushing.
5. Turn locking nuts (3 pcs) onto the screws from inside the table frame with the
spanner.
6. Tighten the screws with the Allen key.
Figure 5.
Side rail
5Using the examination table
5.1 Movements of table top sections
Maximum movement and adjustment ranges of the table top sections are illustrated
below.
Table top movements 4040 and 4140 Table top movements 4050
Height adjustment 50 -95 cm
Figure 6.
Maximum movement and adjustment ranges of the examination tables

Operating instructions 4040, 4050 and 4140 examination tables/Version 1.15
Copyright © Lojer Oy, 2007 8
5.2 Locking the wheels
The examination table has central locking on the wheels. On both sides of the
examination table there is a two-sided pedal with a green mark on one end and a red
mark on the other end.
Immobilize the wheels by pressing down the red end of the pedal. You can do this with
either of the pedals.
When the pedal is in horizontal position the wheels can move freely.
To ease the transportation you can lock a front wheel into a direction by pressing down
the green end of the pedal by the wheel to be locked. Make sure that the wheel is
locked by moving the examination table sideways.
1
Wheel immobilized (red end down)
2
Wheel free (pedal in horizontal position)
3
Direction lock (green end down)
Figure 7.
Locking the wheels
5.3 Height adjustment
The examination table has electric height adjustment function. The height is adjustable
between 50 and 95 cm.
CAUTION! Make sure that nobody or nothing is under the examination table
during the raising or lowering movement (risk of squeezing).
5.3.1 Height adjustment with hand control
You can raise or lower the examination table by pressing the hand control buttons.
1
Raising the table
2
Lowering the table
Figure 8.
Height adjustment with hand control

Operating instructions 4040, 4050 and 4140 examination tables/Version 1.15
Copyright © Lojer Oy, 2007 9
5.3.2 Height adjustment with foot control
NOTE! The foot control works only in lengthwise direction. Do not press it or
stand on it!
The table top rises by moving the foot control on rear end of the table upwards (PUSH)
and goes down by moving the foot control down (PULL).
Figure 9.
Foot control on rear end of the table
On the side of the examination table the table top can be raised by moving the foot
control towards the front end of the table and lowered by moving the foot control
towards the rear end of the table.

Operating instructions 4040, 4050 and 4140 examination tables/Version 1.15
Copyright © Lojer Oy, 2007 10
Figure 10.
Foot control on the side of the table
5.4 Adjusting the backrest
You can raise or lower the backrest by pressing the hand control buttons. The backrest
is adjustable between 0 and 78°.
1
Raise
2
Lower
Figure 11.
Adjusting the backrest with hand control
5.5 Adjusting the gynaecological backrest (4050)
Gynaecological backrest (middle section of examination table 4050) can be lifted by
turning the yellow handle under the middle section. The backrest locks into place when
the handle is released. Gynaecological backrest can be raised to 45° angle.
The gynaecological backrest is lowered by turning the handle and pressing the backrest
to desired position.

Operating instructions 4040, 4050 and 4140 examination tables/Version 1.15
Copyright © Lojer Oy, 2007 11
1
Lever for gynaecological backrest
Figure 12.
Gynaecological backrest
5.6 Adjusting the seat (4050)
Seat of examination table 4050 can be lifted by turning the handle under the seat. The
seat can be lifted to two different angles: 10° eller 15°.
1
Handle
Figure 13.
Adjusting the seat, model 4050
5.7 Adjusting the heel supports (4140 and 4050)
Examination tables 4140 and 4050 have longitudinally adjustable heel supports at the
rear end.
1. Lift the heel support and pull it out or push it in.
2. Lower the heel support and pull or push it so that it is locked in a locking hole. There
are five locking holes in the heel support arms.
3. Check always that the heel support is locked into its place.

Operating instructions 4040, 4050 and 4140 examination tables/Version 1.15
Copyright © Lojer Oy, 2007 12
Figure 14.
Heel supports
5.8 Swiveling in/out and removing the bowl (4140 and 4050)
Examination tables 4140 and 4050 are equipped with a bowl. You can swivel the bowl
under the seat or out steplessly. You can remove the bowl by swivelling it first out and
lifting it from the holder.
Figure 15.
Bowl
5.9 Paper roll holder
The paper roll holder is located under the front end of the examination table. The paper
roll holder axle is locked into its place. Suitable paper rolls are available from Lojer sales.
1. Remove the paper roll axle by releasing the locks (2) with fingers.
2. Put the axle with paper roll into its place by pushing the axle into its slot.
1
Paper roll axle
2
Paper roll axle locks, 2 pcs.
Figure 16.
Paper roll holder

Operating instructions 4040, 4050 and 4140 examination tables/Version 1.15
Copyright © Lojer Oy, 2007 13
5.10 Trendelenburg function
On the side of the examination table there is a red handle, which can be used for
adjusting the longitudinal inclination of the table by lifting the handle and tilt the table
top.
The inclination is locked when the handle is released.
1
Trendelenburg handle
Figure 17.
Trendelenburg function
5.11 Mounting of mounting adapter
The mounting adapter is mounted onto the side rail for attaching the accessories. The
mounting adapter can be mounted anywhere on the side rail.
1. Set the mounting adapter on the side rail.
2. Push the accessory shaft/pole through the mounting adapter hole.
3. Fasten the mounting adapter with accessory by tightening the adjuster screw.

Operating instructions 4040, 4050 and 4140 examination tables/Version 1.15
Copyright © Lojer Oy, 2007 14
Figure 18.
Mounting adapter
5.12 Using the arm support plate
An arm support plate can be mounted onto side rail of the examination table. Arm
support with stem can be moved to the other side if required.
1
Mounting adapter screw
2
Cushion locking screw
Figure 19.
Arm support plate
5.12.1 Mounting of arm support
1. Push the arm support stem pin through the mounting adapter hole.
2. Tighten the arm support into its position with the mounting adapter screw.
5.12.2 Removing of arm support plate
1. Loosen the mounting adapter screw a bit.
2. Pull out the arm support with stem.
5.12.3 Adjusting of arm support plate
1. Loosen the arm support by opening the stem mounting adapter screw and
cushion locking screw.
2. Move the arm support plate to the desired position.
3. Tighten the arm support into its position with the mounting adapter screw and
cushion locking screw.

Operating instructions 4040, 4050 and 4140 examination tables/Version 1.15
Copyright © Lojer Oy, 2007 15
5.13 Raising and lowering the hand rail
The hand rails, available as accessories, can be held in up or down position.
The rail can be lowered with locking knob in the middle of the rail.
1. Hold the hand rail from its upper tube with one hand.
2. Lift the locking knob.
3. Lower the hand rail simultaneously.
The rail can be raised by lifting it up. The rail locks in position automatically.
5.14 Attachment of the neck cushion
Attach the neck cushion (accessory) to the armrest with the loop on the back of the
cushion.
Figure 20.
Neck cushion
5.15 Leg supports (4050 and 4140))
Leg supports are attached on the rear end on the examination table.

Operating instructions 4040, 4050 and 4140 examination tables/Version 1.15
Copyright © Lojer Oy, 2007 16
1
Adjustment for leg support inclination
2
Adjustment for height and width
Figure 21.
Leg supports
5.15.1 Height and width adjustment of the leg supports
1. Loosen the height adjustment by turning the handle.
2. Raise or lower the leg support and adjust the width if necessary.
3. Tighten the leg support with the handle.
If the handle will not turn enough you can select a new tightening height and width by
pulling out and turning the handle.
5.15.2 Inclination adjustment of the leg support cushion
1. Loosen the adjuster wheel under the leg support cushion.
2. Tip up the cushion to desired position.
3. Tighten with the adjuster wheel.
5.16 Mounting of infusion pole
The infusion pole is mounted onto the front side rail of the examination table with a
mounting adapter.
1. Fasten the mounting adapter onto the side rail with screw.
2. Push the infusion pole through the mounting adapter hole.
3. Tighten the infusion pole into its position with the mounting adapter screw.
Height of the infusion pole can be adjusted with a screw on the upper part of the pole.
This manual suits for next models
2
Table of contents
Other Lojer Medical Equipment manuals