Shenzhen Longer 3D Technology Co., Ltd
3
support@ longer3d.com
Before using our product, please be sure to read this document
carefully to understand your legal rights, responsibilities and safety
instructions, otherwise it may cause property damage, safety accidents
and personal safety hazards. Once you use this product, you should be
deemed to have understood and accepted all the terms and contents of
this manual.
The user agrees to use the product only for lawful purposes, and agrees
to all the terms and contents of this document and any related policies
or guidelines that longer may establish.
Longer does not assume any responsibility for any loss caused by the
wrong use of our products. Longer has the final right of interpretation
and the right to comply with legal provisions. Longer reserves the right
to update, modify or terminate the terms without notice.
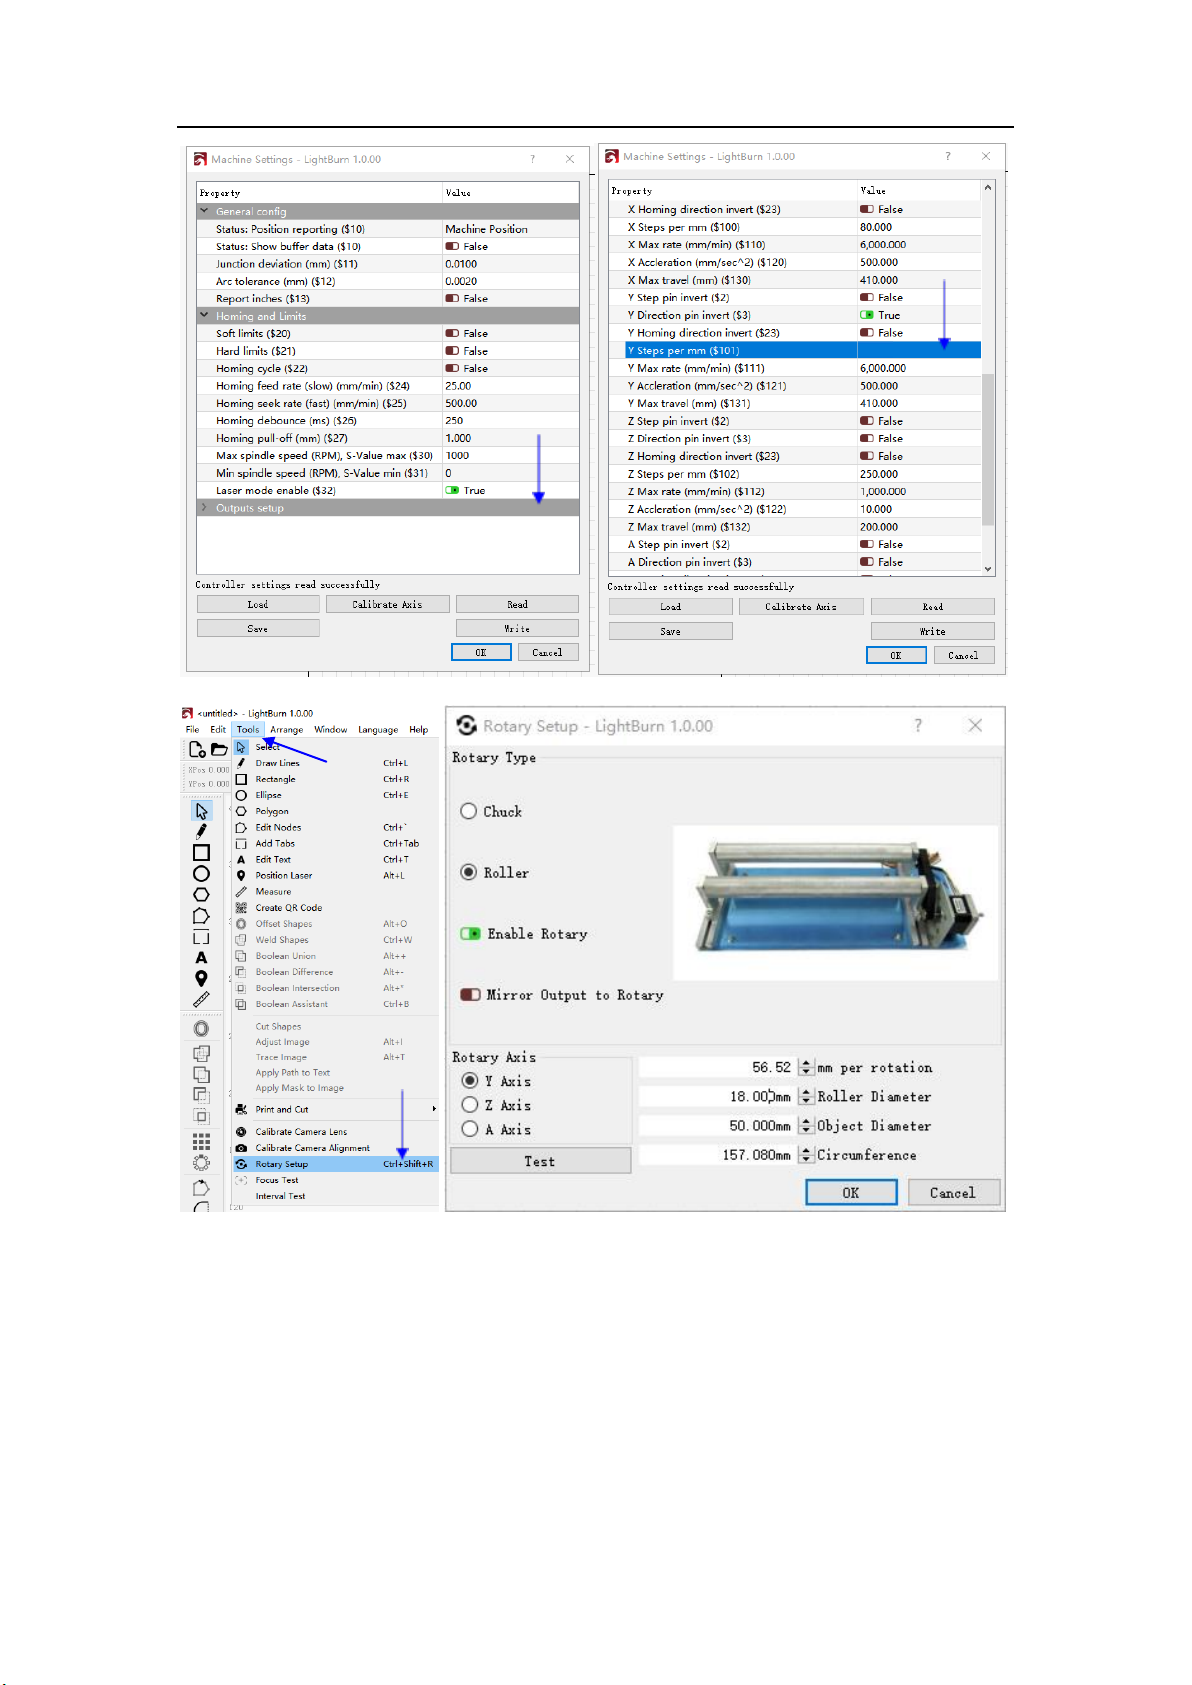
3. Install the Software
The RAY5 Rotary Roller can replace the Y-axis and coordinate with the X-
axis to complete the engraving of rotating objects. The roller adopts a 6-
level adjustable structure design, which can be used for engraving of
rotating objects with a diameter of 16-200mm. At the same time, it is
equipped with two kinds of Y motor extension lines of different line
sequence, which can be adapted to most of the laser engravers, such as
Atomstack, Xtool, Sclupfun, Ortur, Neje, etc.
1) GRBL Software Installation and Use
Download the GRBL software
GRBL is a free laser engraving software that can be downloaded from
http://lasergrbl.com/download.